目录
前言
Swagger 是一个规范和完整的框架,用于生成、描述、调用和可视化 RESTful 风格的 Web 服务。简单来说,swagger是一款可以根据RESTful 风格生成的接口开发文档,并且支持做测试的一款中间软件。在前后端分离的时代,特别是在Swagger诞生之后,程序员门可以直接通过代码生成文档,而不再需要自己手动编写API接口文档了。Swagger在一定程度上也能缓解前端、后端、测试开发人员之间不可调和的矛盾,是一款劝架神器。在正式发布的时候要关闭swagger,以便节省内存,保证安全。

一、配置类配置Swagger
1、导入相关依赖:springfox-boot-starter
<dependency>
			<groupId>io.springfox</groupId>
			<artifactId>springfox-boot-starter</artifactId>
			<version>3.0.0</version>
		</dependency>
2、编写Swagger配置类
(1) 可以自定义编写Swagger的配置信息,覆盖默认的apiInfo,通过localhost:8080/swagger-ui/index.html去访问Swagger后台
//配置swagger信息:通过覆盖默认的apiInfo
    private ApiInfo apiInfo() {
        //配置作者的信息
        Contact contact = new Contact("全村第二帅", "https://blog.csdn.net/qq_53860947?type=blog", "[email protected]");
        return new ApiInfo("自定义api文档",
                "码道万古如长夜",
                "v3.0",
                "https://blog.csdn.net/qq_53860947?type=blog",
                contact,
                "Apache 2.0",
                "http://www.apache.org/licenses/LICENSE-2.0",
                new ArrayList());

    }
(2)配置swagger Docket的bean实例及完整代码
注:要在启动类上加上@EnableWebMvc,否者会报空指针异常
package com.study.config;

import org.springframework.context.annotation.Bean;
import org.springframework.context.annotation.Configuration;

import springfox.documentation.builders.PathSelectors;
import springfox.documentation.builders.RequestHandlerSelectors;
import springfox.documentation.oas.annotations.EnableOpenApi;
import springfox.documentation.service.ApiInfo;
import springfox.documentation.service.Contact;
import springfox.documentation.spi.DocumentationType;
import springfox.documentation.spring.web.plugins.Docket;

import java.util.ArrayList;


@Configuration
@EnableOpenApi
public class SwaggerConfig {
    @Bean //配置了swagger的Docket的bean实例
    public Docket docket() {
        return new Docket(DocumentationType.SWAGGER_2).apiInfo(apiInfo())
                //.enable(false)
                .select()
                //RequestHandlerSelectors,配置要扫描接口的方式
               /* basePackage指定扫描的包;
                  any();扫描全部;
                  none();都不扫描;
                  withClassAnnotation:扫描类上的注解,参数是一个注解的反射对象
                  withMethodAnnotation:扫描方法上的注解
                  .paths()过滤什么路径
                  .enable()是否启用Swagger,默认是true,若为false,则Swagger不能访问,并且会有一个小表情出现
               */
                .apis(RequestHandlerSelectors.basePackage("com.study.controller"))
                .paths(PathSelectors.ant("/study/**"))
                .build();
    }

    //配置swagger信息:通过覆盖默认的apiInfo
    private ApiInfo apiInfo() {
        //配置作者的信息
        Contact contact = new Contact("全村第二帅", "https://blog.csdn.net/qq_53860947?type=blog", "[email protected]");
        return new ApiInfo("自定义api文档",
                "码道万古如长夜",
                "v3.0",
                "https://blog.csdn.net/qq_53860947?type=blog",
                contact,
                "Apache 2.0",
                "http://www.apache.org/licenses/LICENSE-2.0",
                new ArrayList());

    }

}
二、属性文件配置Swagger
1、用属性配置文件配置Swagger的信息
application.properties:
#配置Swagger的信息
swagger:
  title: 自定义api文档
  basePackage: com.study.swagger2.controller
  description: 码道万古如长夜
  version: V3.0
  name: 全村第二帅
  url: https://blog.csdn.net/qq_53860947?type=blog
  email: [email protected]
2、配置类
SwaggerConfig.java :
package com.study.swagger2.config;

import org.springframework.beans.factory.annotation.Value;
import org.springframework.context.annotation.Bean;
import org.springframework.context.annotation.Configuration;

import org.springframework.web.servlet.config.annotation.EnableWebMvc;
import springfox.documentation.builders.ApiInfoBuilder;
import springfox.documentation.builders.PathSelectors;
import springfox.documentation.builders.RequestHandlerSelectors;
import springfox.documentation.oas.annotations.EnableOpenApi;
import springfox.documentation.service.ApiInfo;
import springfox.documentation.service.Contact;
import springfox.documentation.spi.DocumentationType;
import springfox.documentation.spring.web.plugins.Docket;

@Configuration
@EnableOpenApi
@EnableWebMvc
public class SwaggerConfig {
    @Value("${swagger.basePackage}")
    private String basePackage;       // basePackage指定扫描的包

    @Value("${swagger.title}")
    private String title;           // 自定义当前文档的标题

    @Value("${swagger.description}")
    private String description;         // 自定义当前文档的详细描述

    @Value("${swagger.version}")
    private String version;         // 自定义当前文档的版本

    //自定义作者的信息,包括作者名字、个人主页、邮箱等相关信息
    @Value("${swagger.name}")
    private String name;
    @Value("${swagger.url}")
    private String url;
    @Value("${swagger.email}")
    private String email;
    @Bean
    public Docket createRestApi() {
        return new Docket(DocumentationType.SWAGGER_2)
                .apiInfo(apiInfo())
                .select()
                .apis(RequestHandlerSelectors.basePackage(basePackage))
                .paths(PathSelectors.any())
                .build();
    }

    private ApiInfo apiInfo() {
        Contact contact = new Contact(name,url,email);
        return new ApiInfoBuilder()
                .title(title)
                .description(description)
                .version(version)
                .contact(contact)
                .build();
    }
}
3、结果

三、配置多个分组
1、配置API文档默认组
.groupName("全村第二帅")
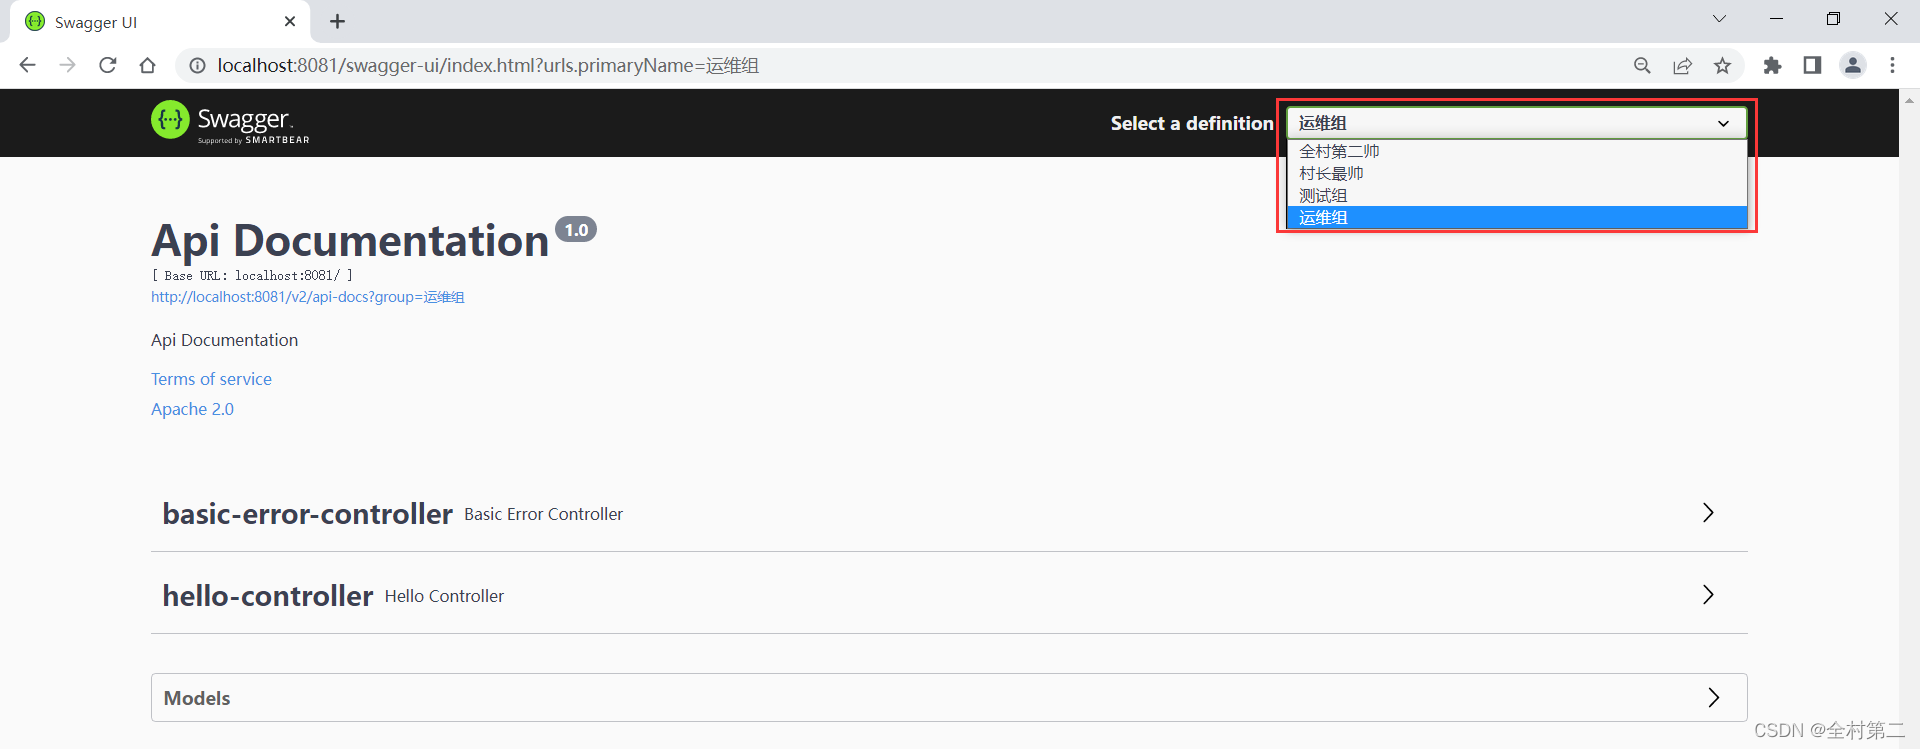
2、如何配置多个分组协同开发
创建多个Docket实例即可,且分组不允许重名,在swagger界面下拉框中可以看见
@Bean
    public Docket docket1() {
        return new Docket(DocumentationType.SWAGGER_2).groupName("村长最帅");
    }
    @Bean
    public Docket docket2() {
        return new Docket(DocumentationType.SWAGGER_2).groupName("测试组");
    }
    @Bean
    public Docket docket3() {
        return new Docket(DocumentationType.SWAGGER_2).groupName("运维组");
    }
四、配置扫描接口
1、配置扫描接口的好处在于:
1)可以通过Swagger给一些比较难理解的属性或者接口,增加注释信息
2)接口文档实时更新
3)可以在线进行测试
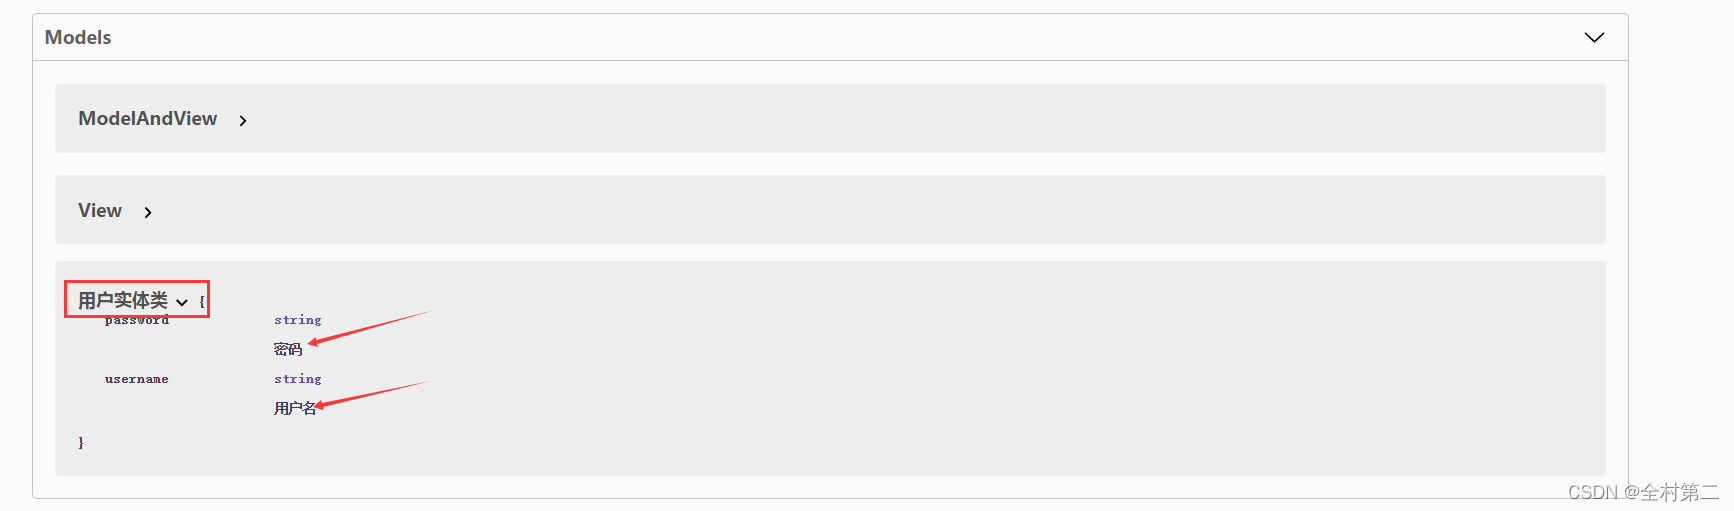
2、给实体类接口添加注释信息
@ApiModel("用户实体类")
public class User  {
    @ApiModelProperty("用户名")
    public String username; //如果设置私有属性private,在swagger端Models中将不再显示
    @ApiModelProperty("密码")
    public String password;
只要我们的接口中,返回值存在实体类,它就会被扫描到swagger中去
 如果设置私有属性private,在swagger端Models中将不再显示。但如果设置属性为public,后面又接收不到参数值,也许你会说设置setter,getter方法不就行了,会产生空指针异常。改进如下:
@ApiModel("用户实体类")
public class User {
@ApiModelProperty("用户名")
private String username;
@ApiModelProperty("密码")
private String password;
public String getUsername() {
return username;
}
public void setUsername(String username) {
this.username = username;
}
public String getPassword() {
return password;
}
public void setPassword(String password) {
this.password = password;
}
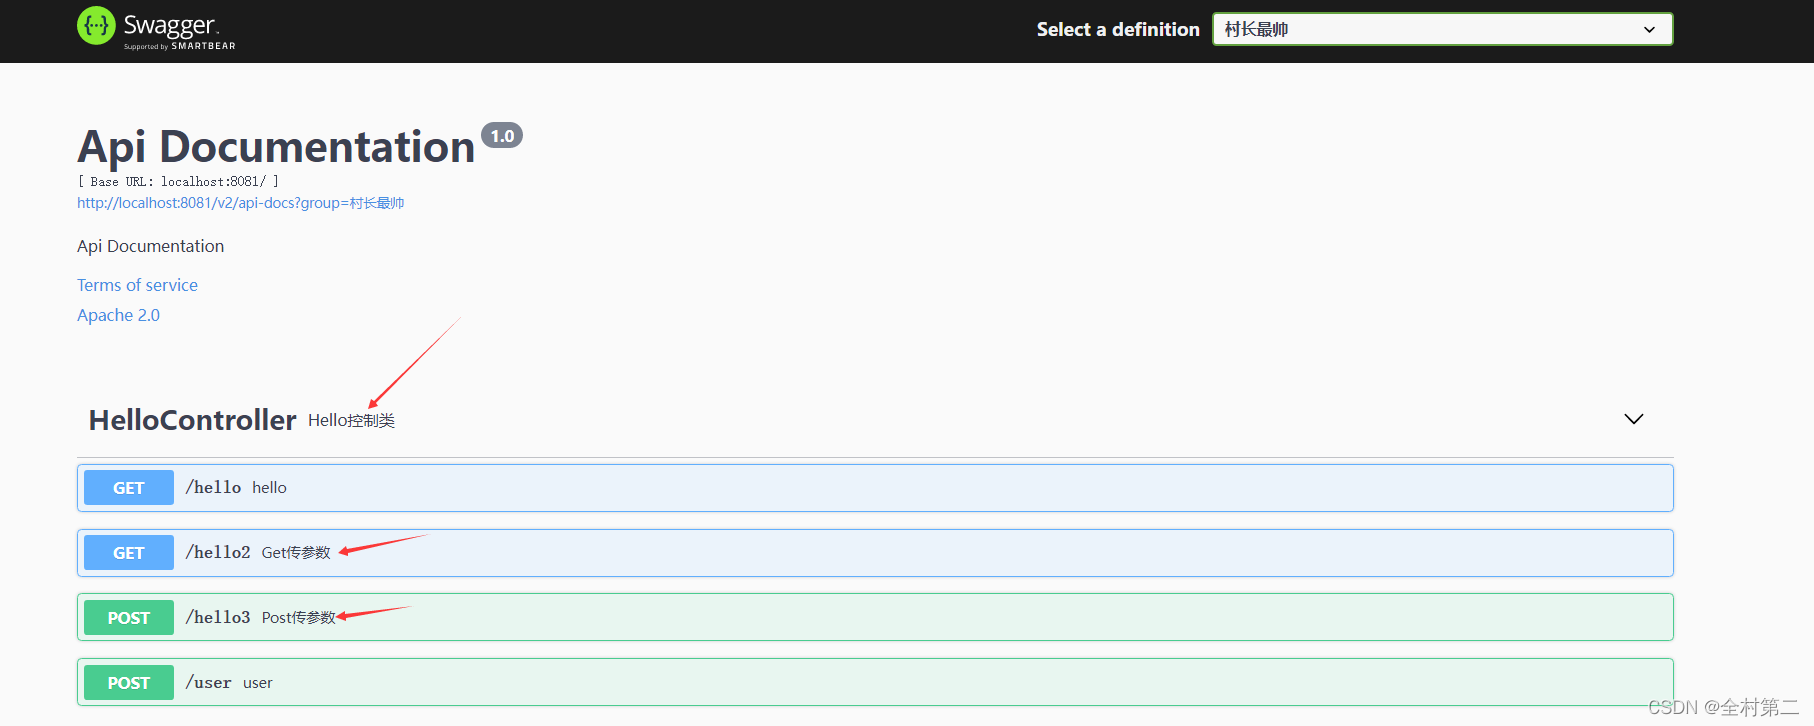
}3、给控制类接口添加注释信息
@Api作用在类上,@ApiOperation作用在方法上
package com.study.controller;
import com.study.pojo.User;
import io.swagger.annotations.Api;
import io.swagger.annotations.ApiOperation;
import io.swagger.annotations.ApiParam;
import org.springframework.web.bind.annotation.GetMapping;
import org.springframework.web.bind.annotation.PostMapping;
import org.springframework.web.bind.annotation.RestController;
@Api(tags ="HelloController",description ="Hello控制类") //作用在类上,ApiOperation作用在方法上
@RestController
public class HelloController {
@GetMapping("/hello")
public String hello(){
return "你好呀!";
}
//只要我们的接口中,返回值存在实体类,它就会被扫描到swagger中去
@PostMapping(value="/user")
public User user(){
return new User();
}
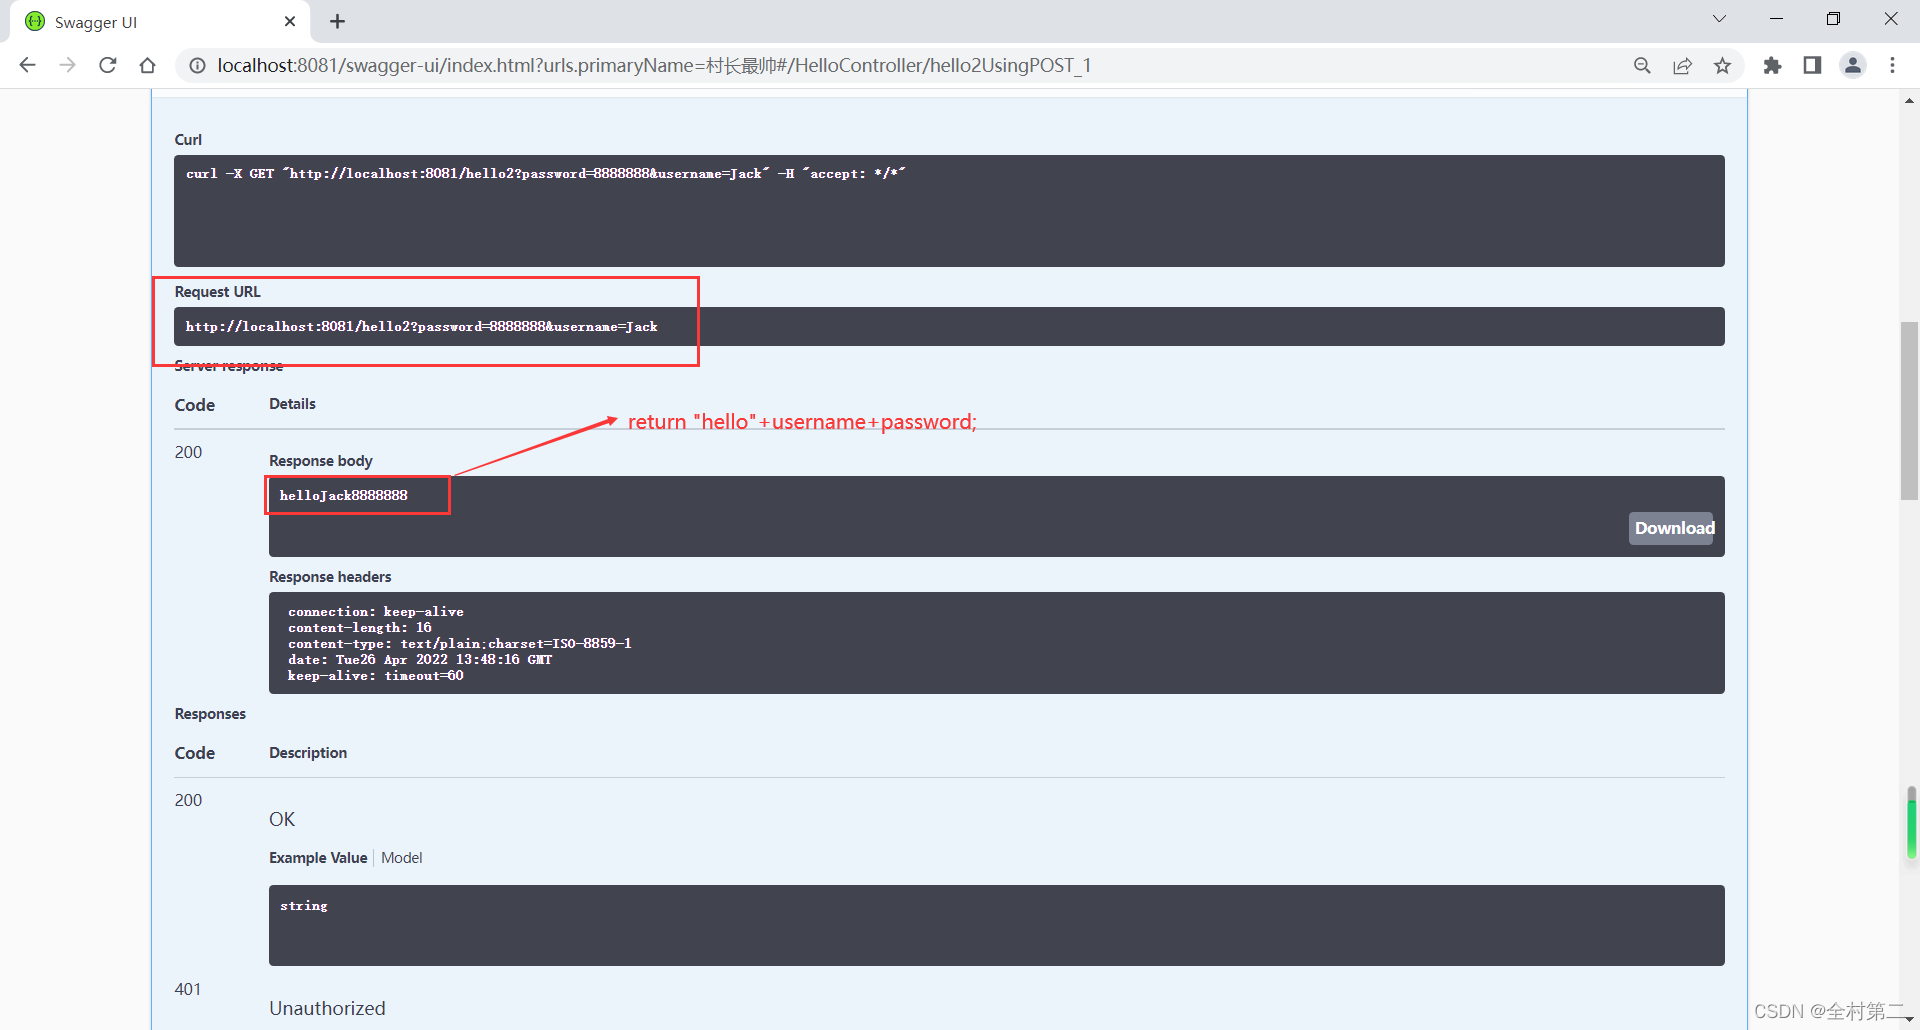
@ApiOperation("Get传参数")
@GetMapping(value = "/hello2")
public String hello2(@ApiParam("用户名") String username,@ApiParam("密码") String password){
return "hello"+username+password;
}
@ApiOperation("Post传参数")
@PostMapping(value = "/hello3")
public User hello2(@ApiParam(value = "用户名",required = true) User user ){
return user;
}
}
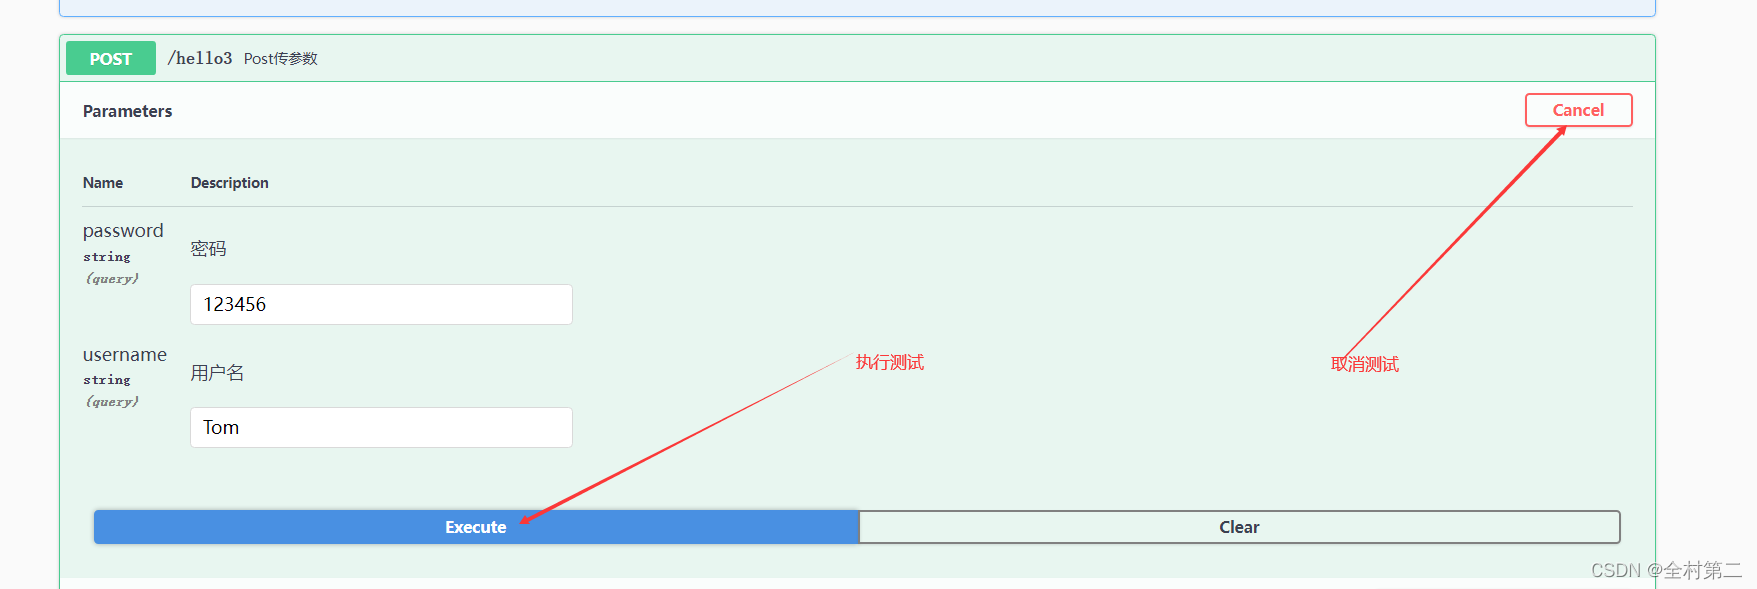
4、测试传参
1)这里传递参数的形式默认是JSON格式的,为什么呢?第一,使用了@RestController注解;第二,在执行测试后,方法体中数据格式是JSON格式的。

2) post方法测试
在输入用户名和密码后,点击执行 ,我们能看到请求的URL和Post方法的响应体

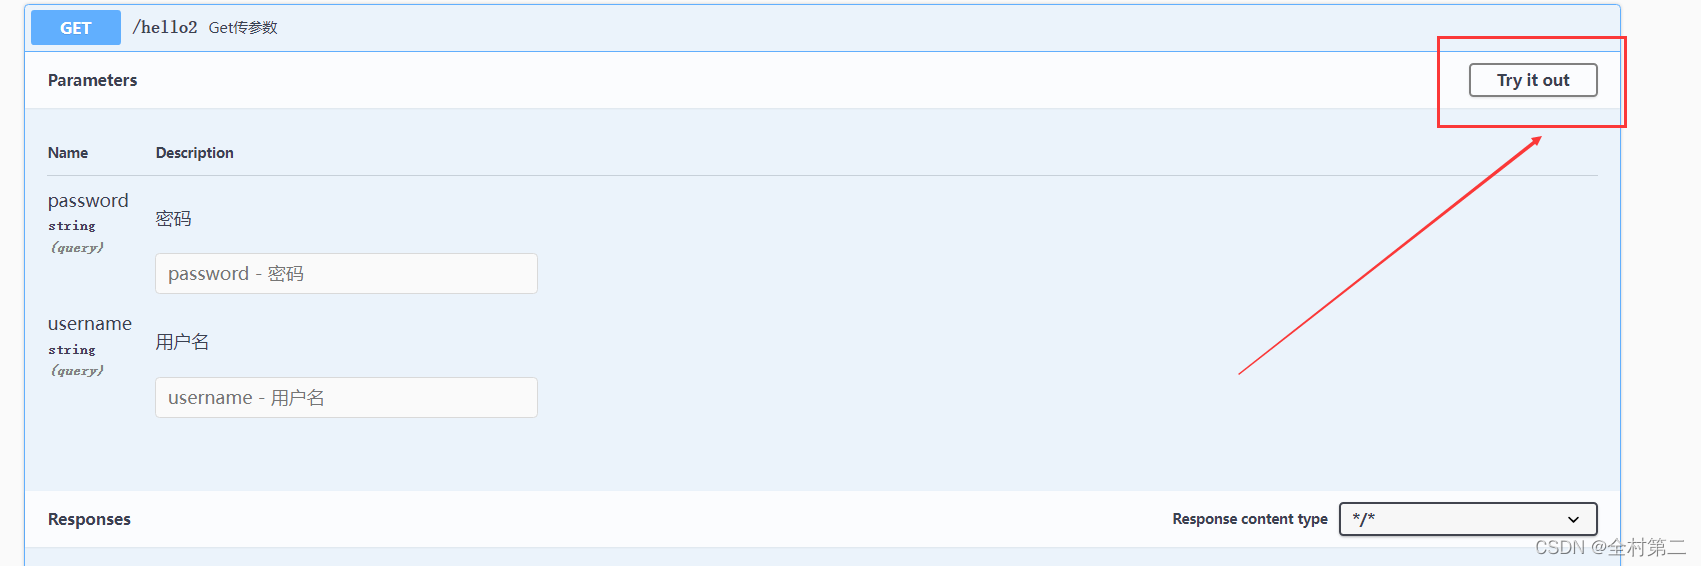
3)get方法测试
点击“Try it out”才能输入参数的值,这里的响应体与Get传参数方法的返回值一致
五、空指针异常
1、第一种情况:Swagger3.0空指针异常,可能由于Springboot版本过高,导致不兼容

有两种可行的解决方案:
1)降低版本,将版本降为2.5.7及以下,在配置类中加上@EnableSwagger2或@EnableOpenApi均可

高版本的Swagger在URL栏中输入:localhost:8080/swagger-ui/index.html;低版本的Swagger在URL栏中输入:localhost:8080/swagger-ui.html
2)添加springfox-boot-starter依赖,在配置类中加上@EnableOpenApi,在启动类上加上@EnableWebMvc注解
<dependency>
			<groupId>io.springfox</groupId>
			<artifactId>springfox-boot-starter</artifactId>
			<version>3.0.0</version>
		</dependency>
在URL栏中输入:localhost:8080/swagger-ui/index.html
2、第二种情况的空指针异常

原因:swagger在生成接口参数记录对象时,会保留参数对象中getter方法的属性,如果又使用public修饰了属性,则会造成冲突
解决方法:将实体类中的public改为private即可或者去掉getter方法