前提
已经注册过GitHub账号
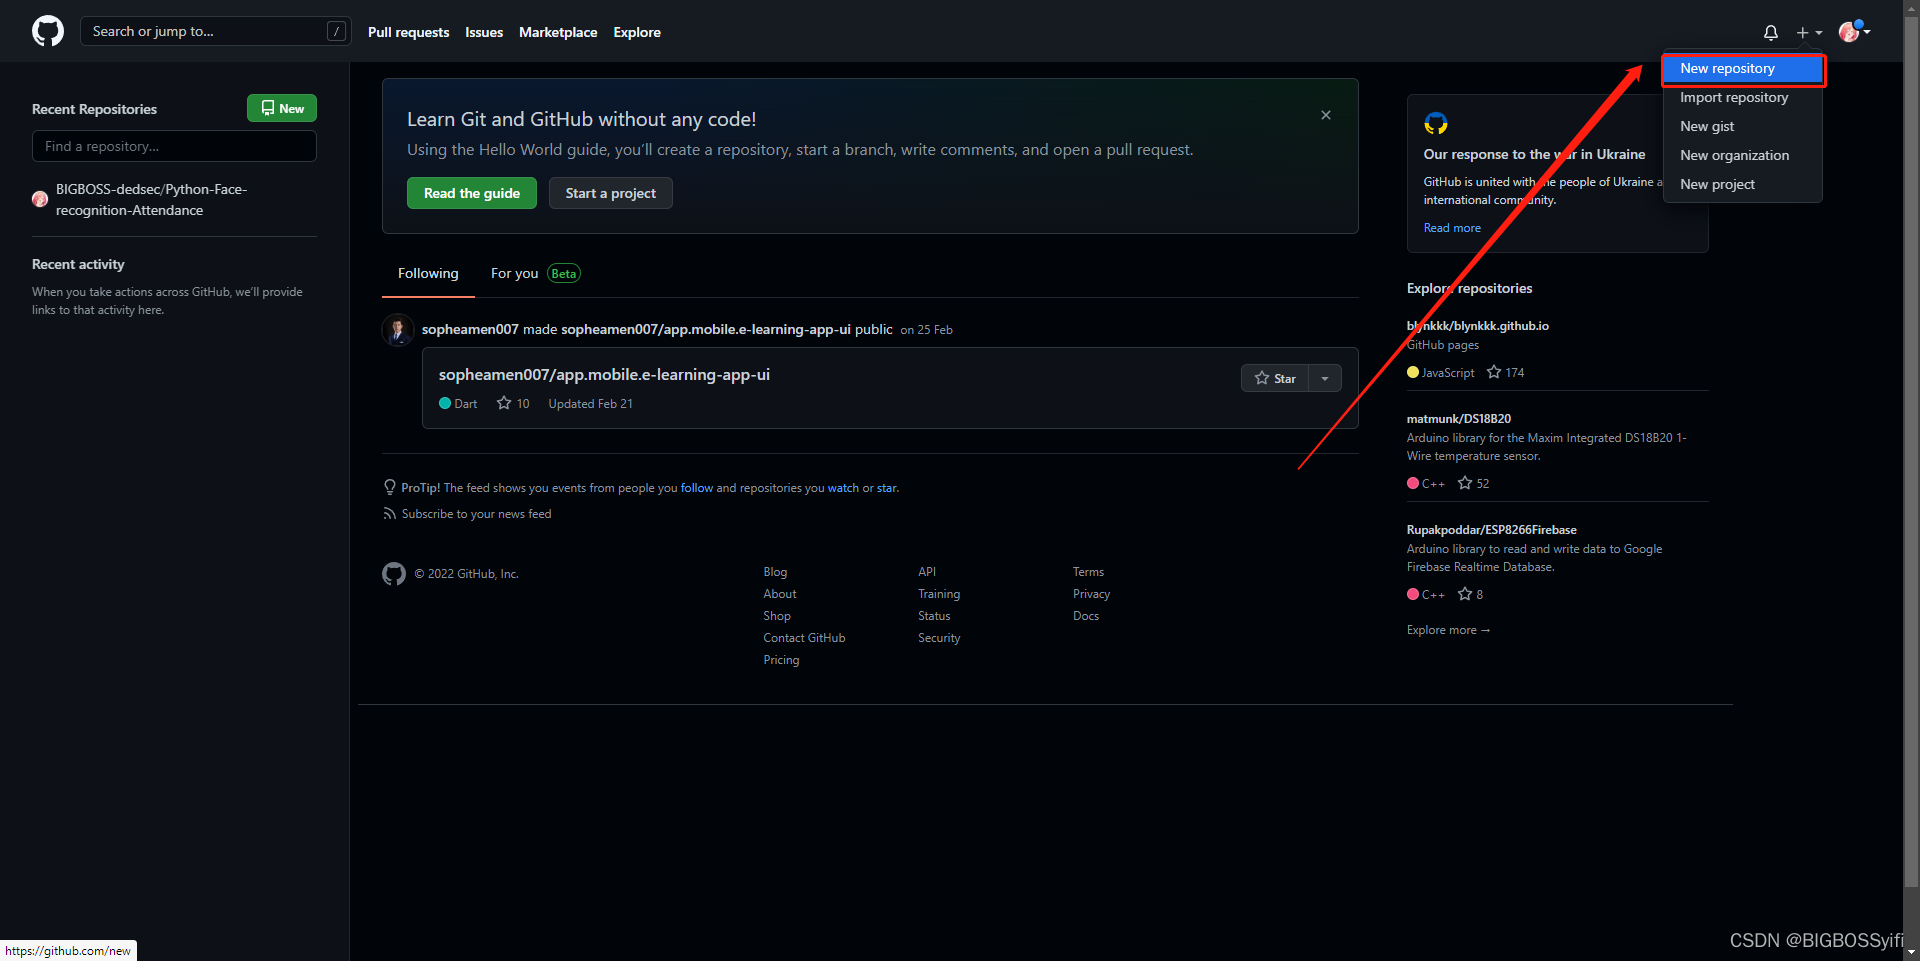
创建仓库
进入GitHub官网
右上角的+,选择new repository
接着按照图中进行配置
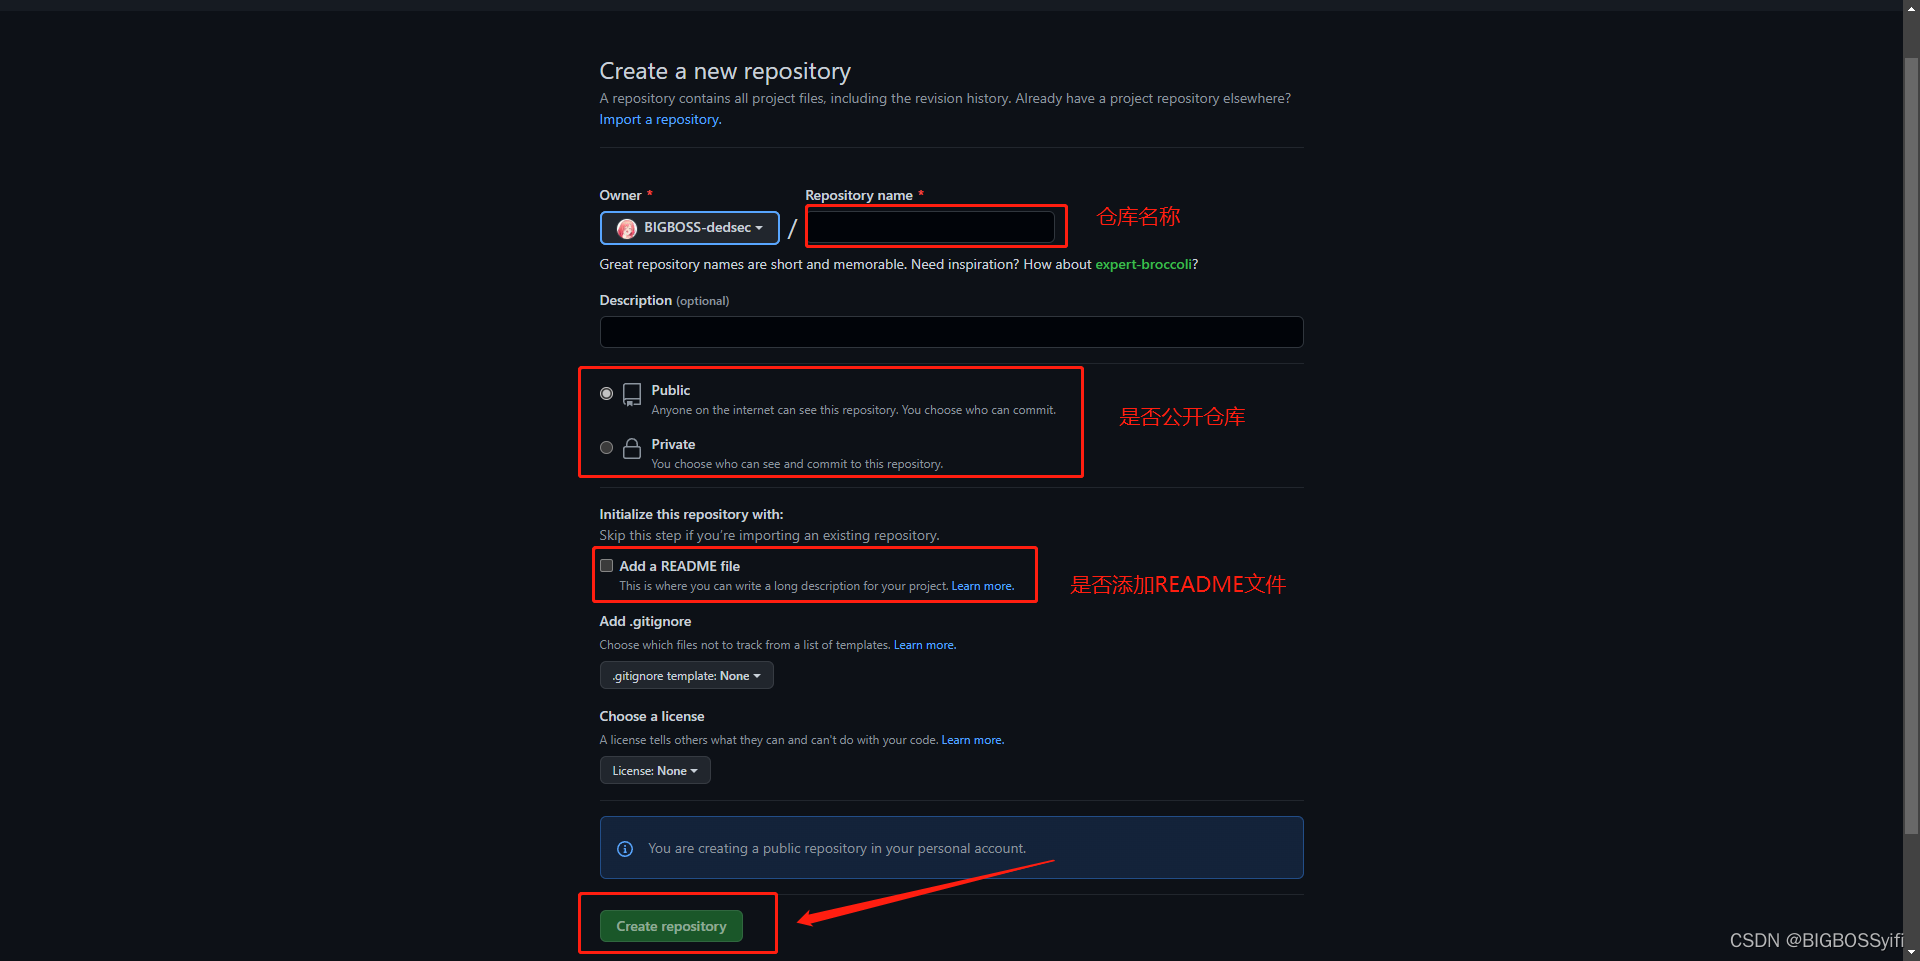
最后完成创建
Git工具
下载地址:https://git-for-windows.github.io/
配置Git
安装完成后,打开Git bash
输入:
中间填写你GitHub的邮箱
ssh-keygen -t rsa -C “[email protected]”
一路回车,不设置密码,完成创建后进入C盘下目录:
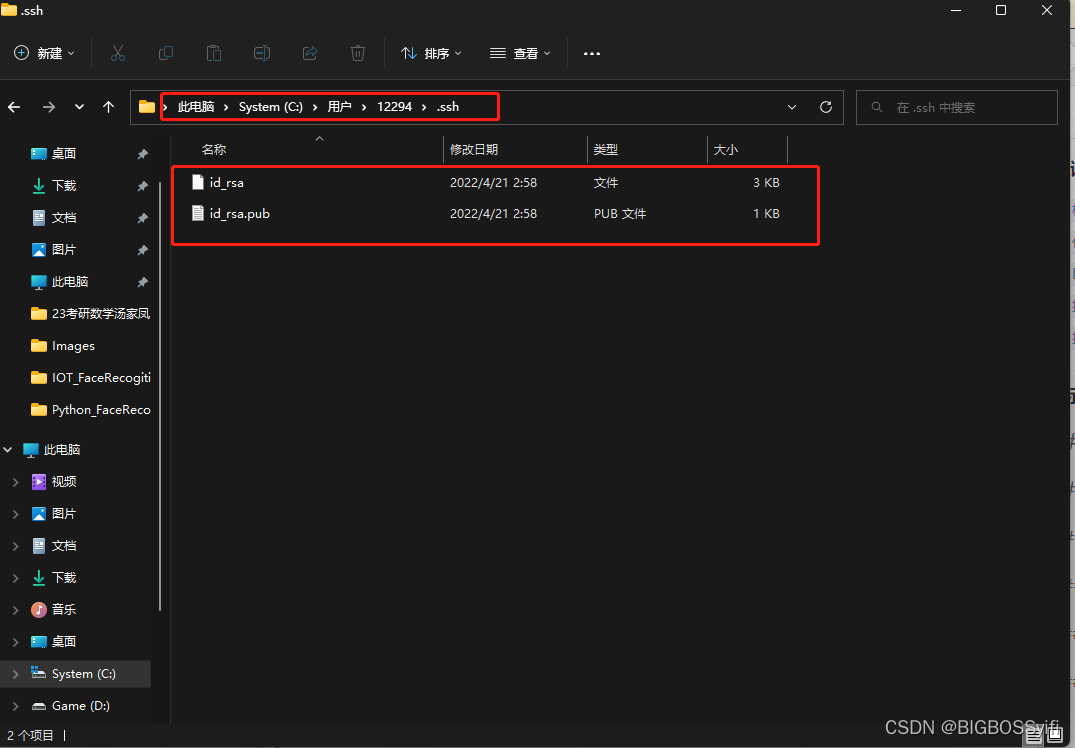
id_rsa.pub文件中有我们需要的密钥,复制下来
打开Github
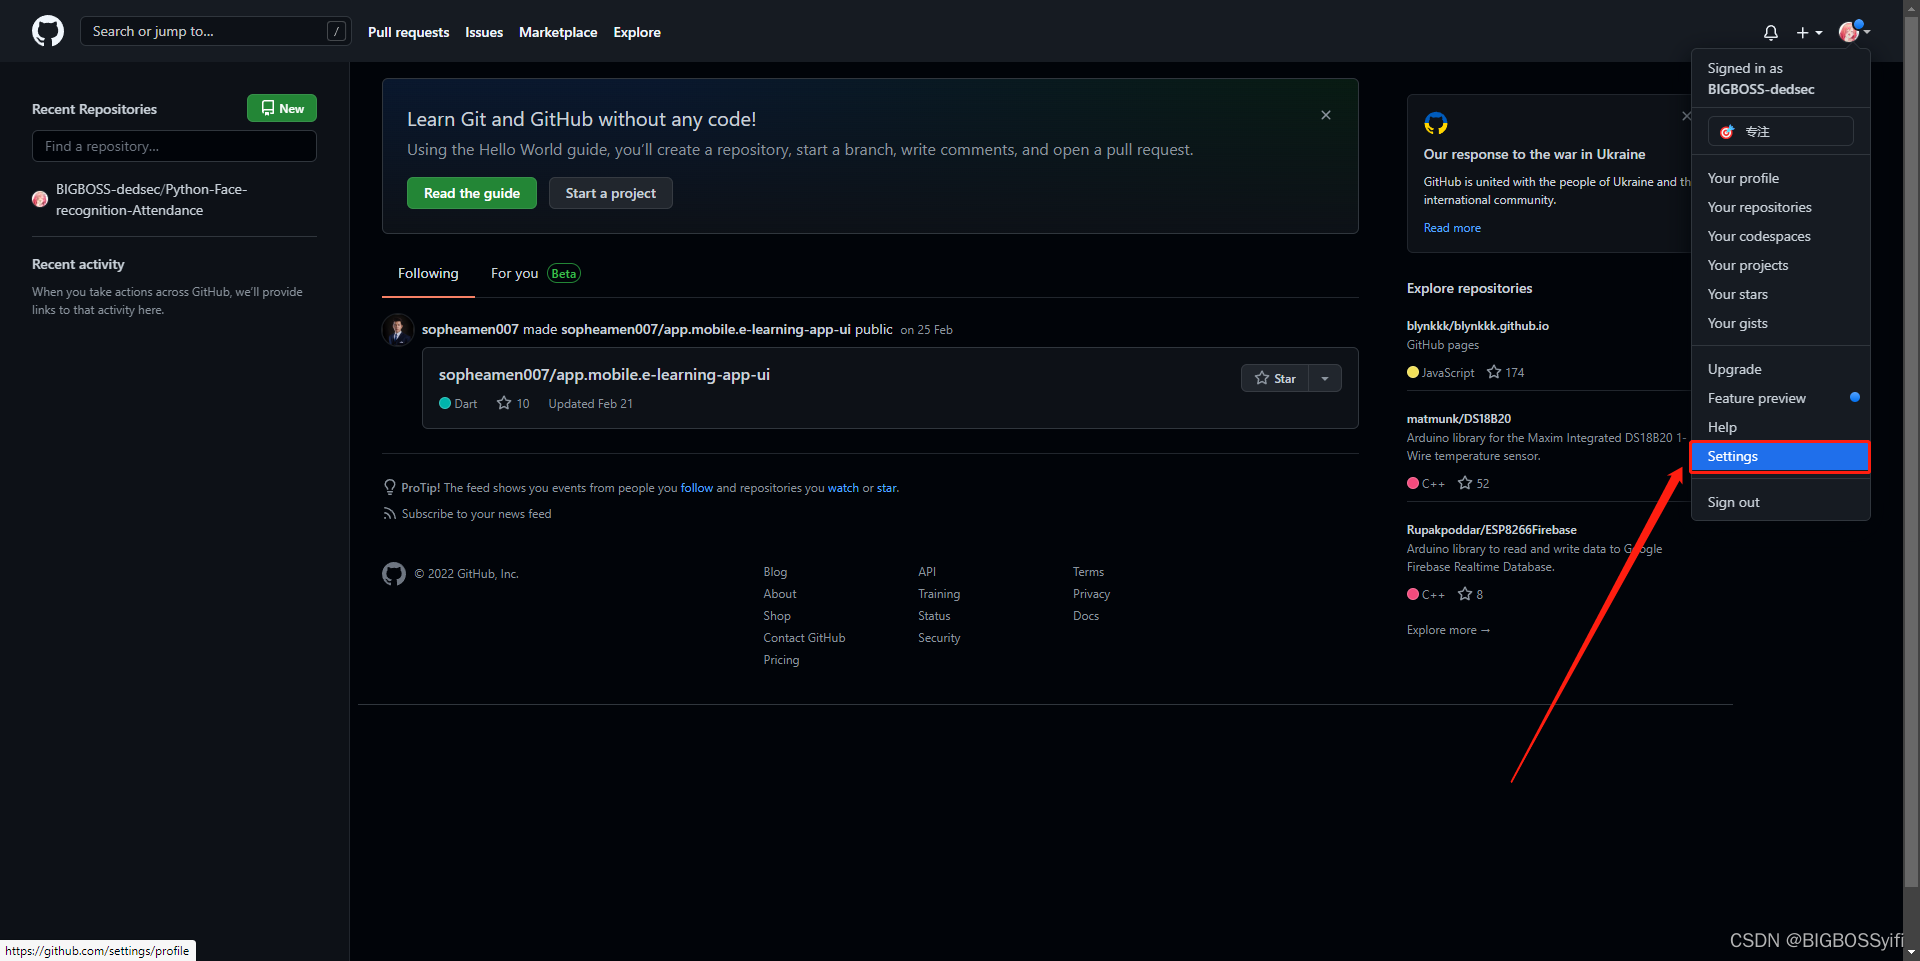

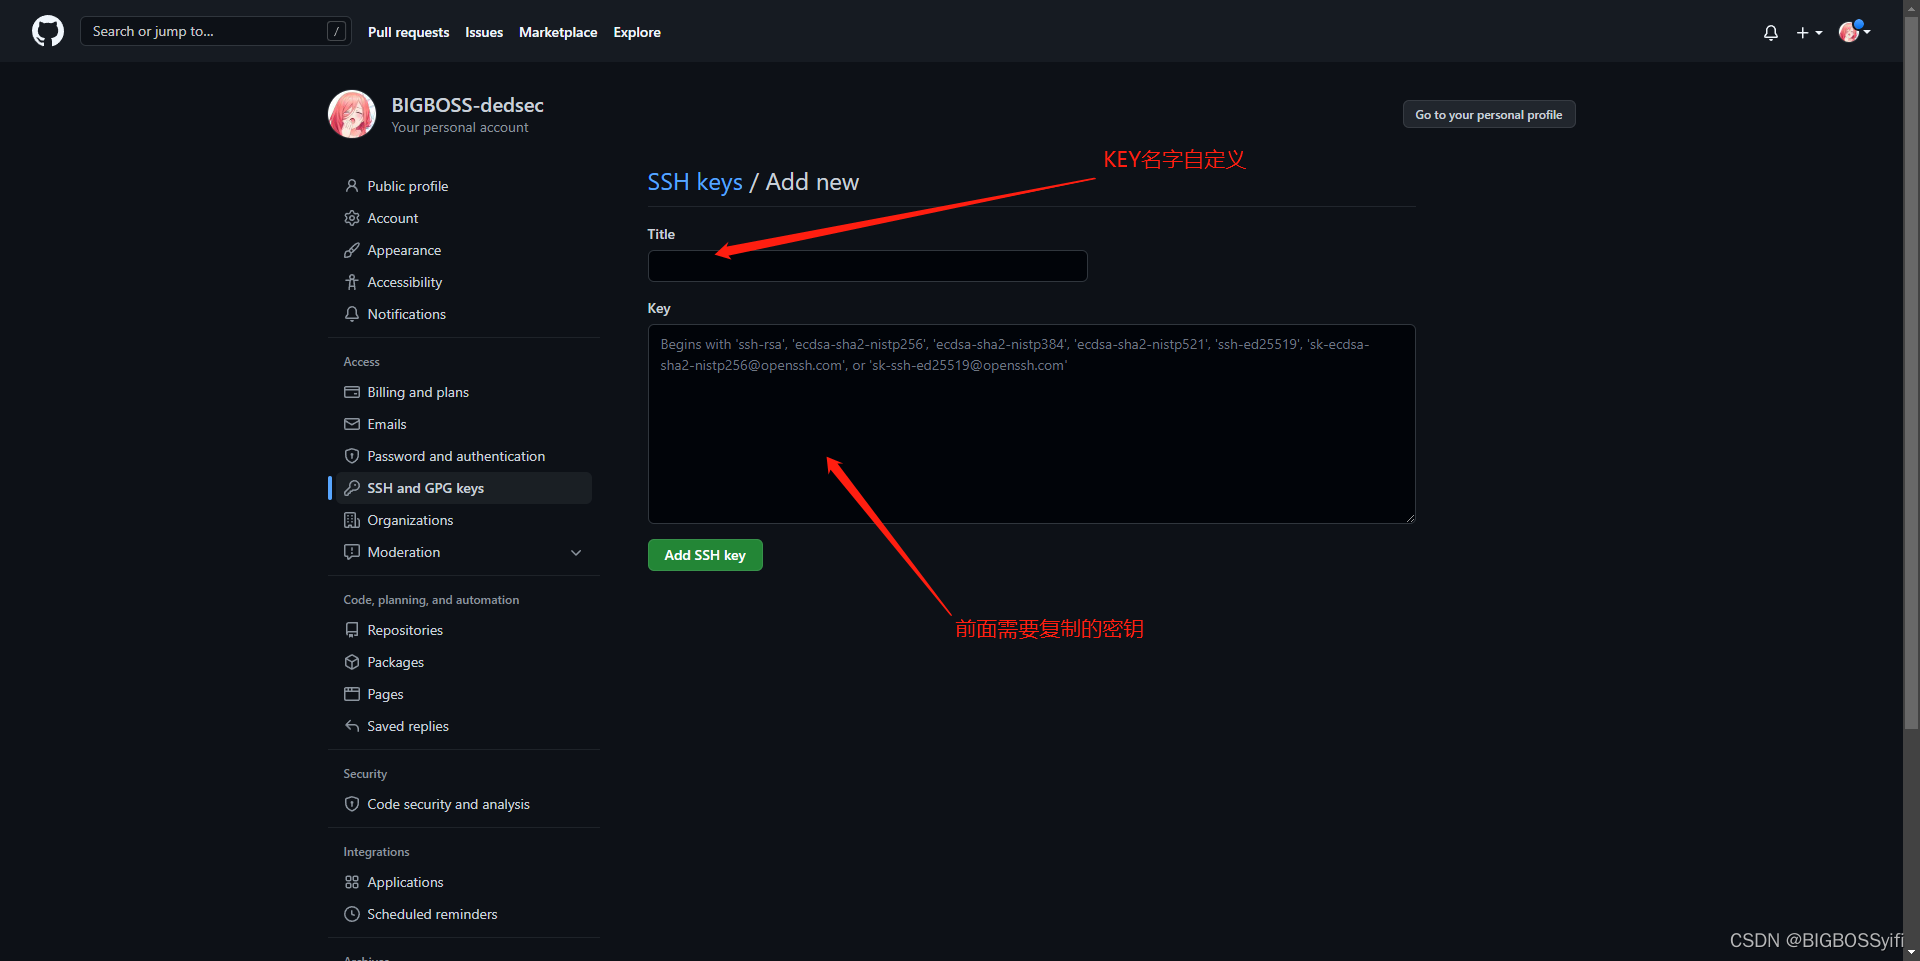
新建一个SSH密钥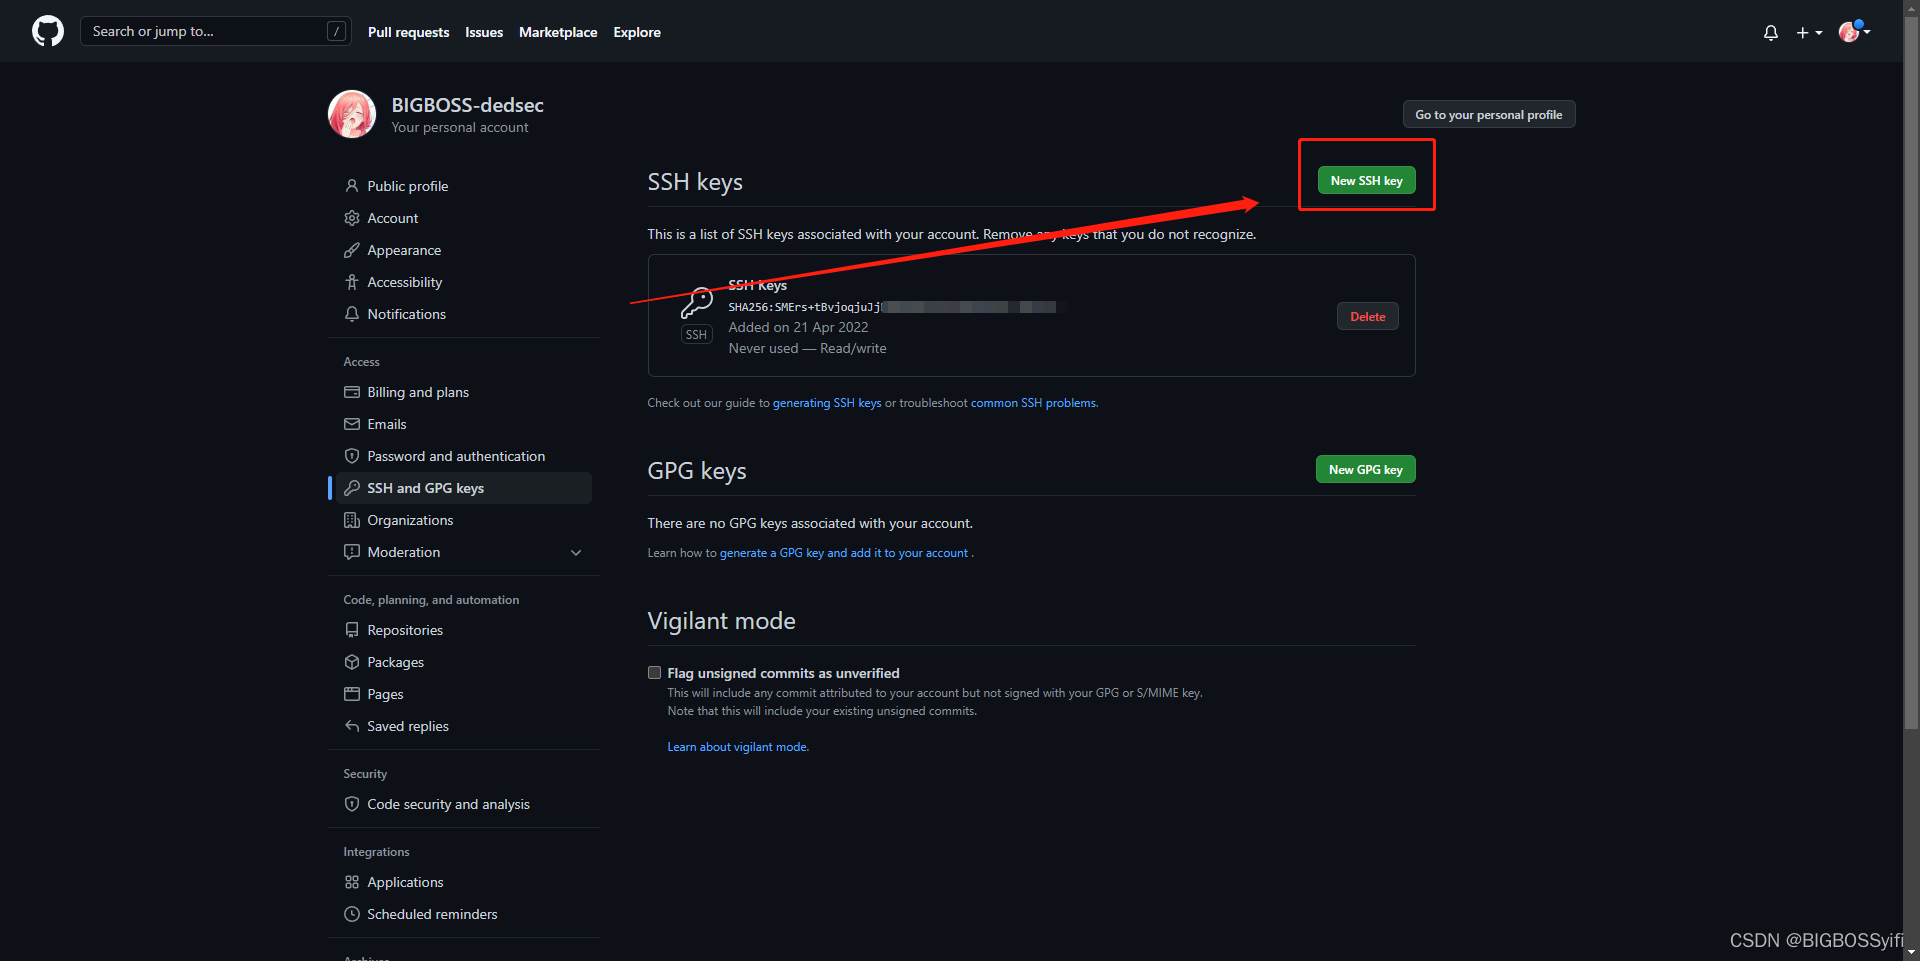
本地仓库搭建
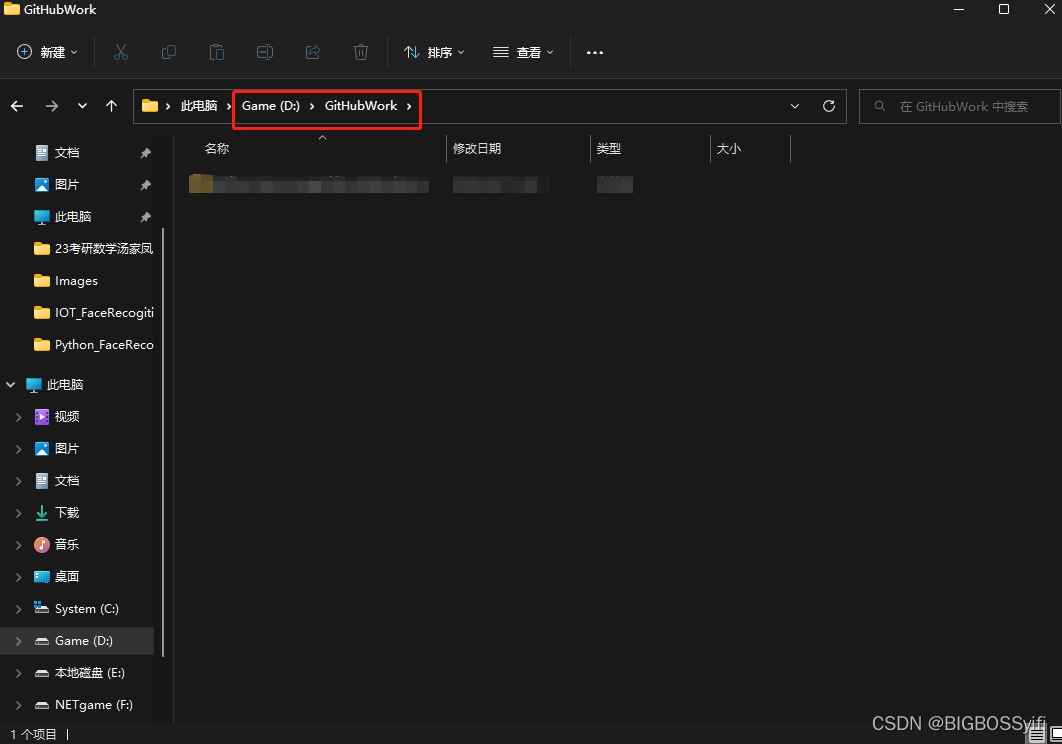
接着需要在本地磁盘中创建仓库:
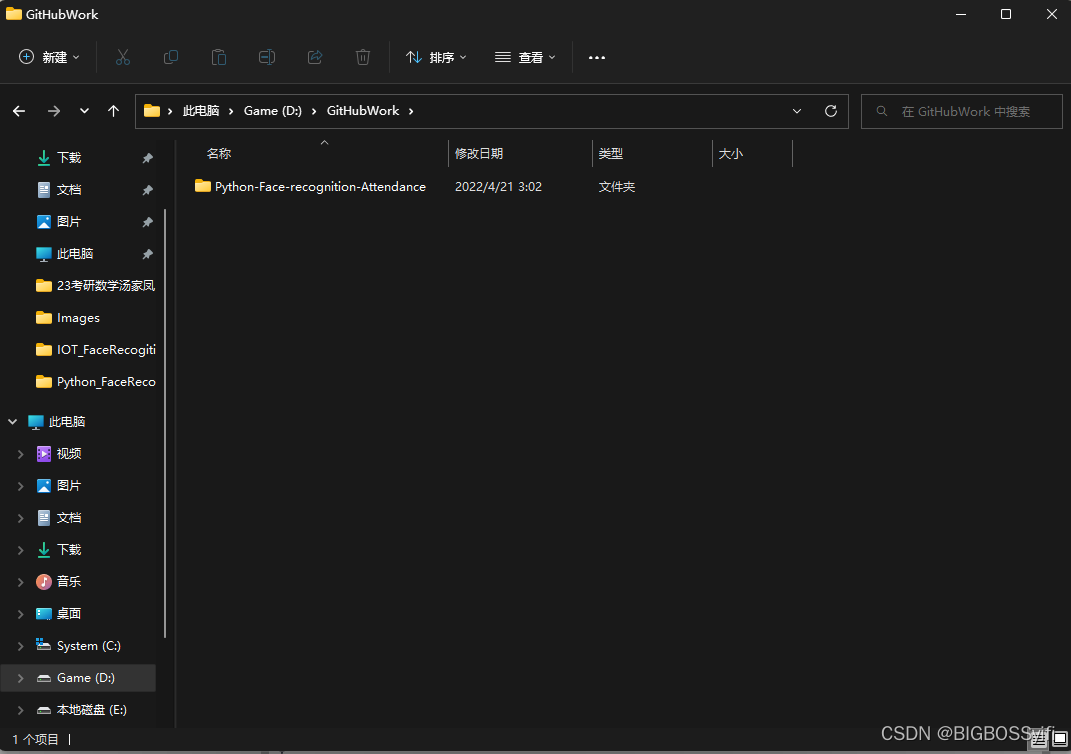
然后右键,再此处打开Git Bash
git clone https://github.com/xxxxxxxx
后面是之前创建的GitHub仓库网址
运行结束后,文件夹会clone已经有的文件夹
部署到Git仓库
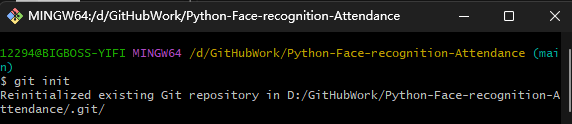
接着进入clone好的文件夹,右键再此处打开Git bash
git init
git init后会创建一个.git的文件夹
接着执行:
git add “项目名”
git commit -m “xxx”  //这里是项目注释
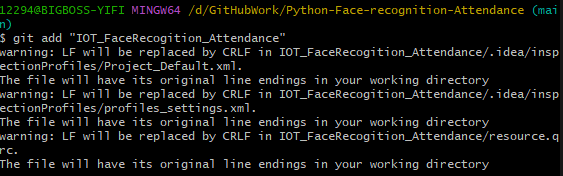
(这里我的git add .中,有部分文件出现警告,暂且忽略)

可能遇到的问题 1
在执行中会提示你绑定GitHub的邮箱或者名字,按照提示绑定即可
接着添加github上的仓库地址
git remote add origin 你GitHub仓库网址

(我的开了加速器会有很多的源,选择第一个即可)
可能遇到的问题 2

error: remote origin already exists
remote origin已经存在
执行删除语句:
git remote rm origin

继续执行
git remote add origin 你GitHub仓库网址

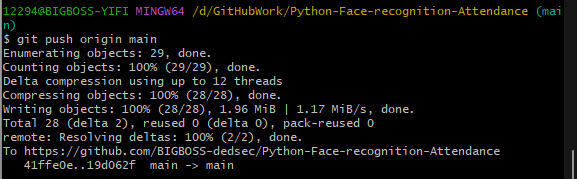
最后将本仓库和github仓库进行关联,推送本地仓库:
git pull origin main

git push origin main
查看GitHub仓库

项目部署成功!!!