tftp服务端环境配置
1、安装tftp服务端程序
sudo apt-get install tftp-hpa tftpd-hpa
2、配置tftp服务
zh@zh-lpc:~$ sudo vi /etc/default/tftpd-hpa
3、修改如下:
# /etc/default/tftpd-hpa

TFTP_USERNAME="tftp"
TFTP_DIRECTORY="/home/zh/tftpboot"
TFTP_ADDRESS=":69"
TFTP_OPTIONS="-l -c -s"
4、启动tftp服务
zh@zh-lpc:~$ sudo /etc/init.d/tftpd-hpa start
Starting tftpd-hpa (via systemctl): tftpd-hpa.service.
zh@zh-lpc:~$
5、创建测试文件
zh@zh-lpc:~$ mkdir /home/zh/tftpboot
zh@zh-lpc:~$ touch /home/zh/tftpboot/test.txt
zh@zh-lpc:~$
6、进入Uboot命令行界面

7、配置ip地址和服务器的ip地址
设置自己的板子在Uboot的时候的ip地址;
所以这个ip是在自己局域网内必须是唯一的。
setenv ipaddr 192.168.1.99
设置服务器的ip,后期tftp需要从这个ip去下载文件;
所以这个ip是tftp服务器的ip。
setenv serverip 192.168.1.100
设置完之后,记得进行保存,不然重启后就没了
saveenv
技巧:
如果你回车就继续执行上一步的命令的花,你就按Ctrl+C即可。
8、测试是否可以把文件下载下来
出现下面这个状态的时候,说明成功了
=>
=> tftp test.txt
Using ethernet@020b4000 device
TFTP from server 192.168.1.100; our IP address is 192.168.1.99
Filename 'test.txt'.
Load address: 0x80800000
Loading: #
         0 Bytes/s
done
通过网络启动内核
在imx6ull中直接执行run netboot:
可以看到并未成功,显示没有这些文件,所以我们先去准备这些文件。一共需要两个:
- 1、
zImage- 2、
100ask_imx6ull-14x14.dtb
=> run netboot
Booting from net ...
Using ethernet@020b4000 device
TFTP from server 192.168.1.100; our IP address is 192.168.1.99
Filename 'zImage'.
Load address: 0x80800000
Loading: *
TFTP error: 'File not found' (1)
Not retrying...
Using ethernet@020b4000 device
TFTP from server 192.168.1.100; our IP address is 192.168.1.99
Filename '100ask_imx6ull-14x14.dtb'.
Load address: 0x83000000
Loading: *
TFTP error: 'File not found' (1)
Not retrying...
Bad Linux ARM zImage magic!
=>
准备好两个文件
zh@zh-lpc:~$ ls ~/tftpboot/ -lah
总用量 8.6M
drwxrwxr-x  2 zh zh 4.0K 9月  25 16:58 .
drwxr-xr-x 22 zh zh 4.0K 9月  25 16:55 ..
-rw-r--r--  1 zh zh  38K 9月  25 16:58 100ask_imx6ull-14x14.dtb
-rw-rw-r--  1 zh zh   11 9月  25 16:34 test.txt
-rwxrwxr-x  1 zh zh 8.5M 9月  25 16:55 zImage
zh@zh-lpc:~$
再次执行成功了!
=>
=> run netboot
Booting from net ...
Using ethernet@020b4000 device
TFTP from server 192.168.1.100; our IP address is 192.168.1.99
Filename 'zImage'.
Load address: 0x80800000
Loading: #############T ########T ############################################
         #################################################################
         #################################################################
         ######################################################T ######T #####
         #####T ##T ###########################################################
         #################################################################
         #################################################################
         #################################################################
         ###################################T ##############################
         ####################
         112.3 KiB/s
done
Bytes transferred = 8873336 (876578 hex)
Using ethernet@020b4000 device
TFTP from server 192.168.1.100; our IP address is 192.168.1.99
Filename '100ask_imx6ull-14x14.dtb'.
Load address: 0x83000000
Loading: ###
         385.7 KiB/s
done
Bytes transferred = 38370 (95e2 hex)
Kernel image @ 0x80800000 [ 0x000000 - 0x876578 ]
## Flattened Device Tree blob at 83000000
   Booting using the fdt blob at 0x83000000
   Using Device Tree in place at 83000000, end 8300c5e1
Modify /soc/aips-bus@02200000/epdc@0228c000:status disabled
ft_system_setup for mx6

Starting kernel ...


.....


....


...

省略


[   64.533635] Bluetooth: hci0: Failed to load rtl_bt/rtl8723b_config.bin
[   64.540244] Bluetooth: hci0: rtl: loading rtl_bt/rtl8723b_fw.bin
[   64.546857] bluetooth hci0: Falling back to user helper
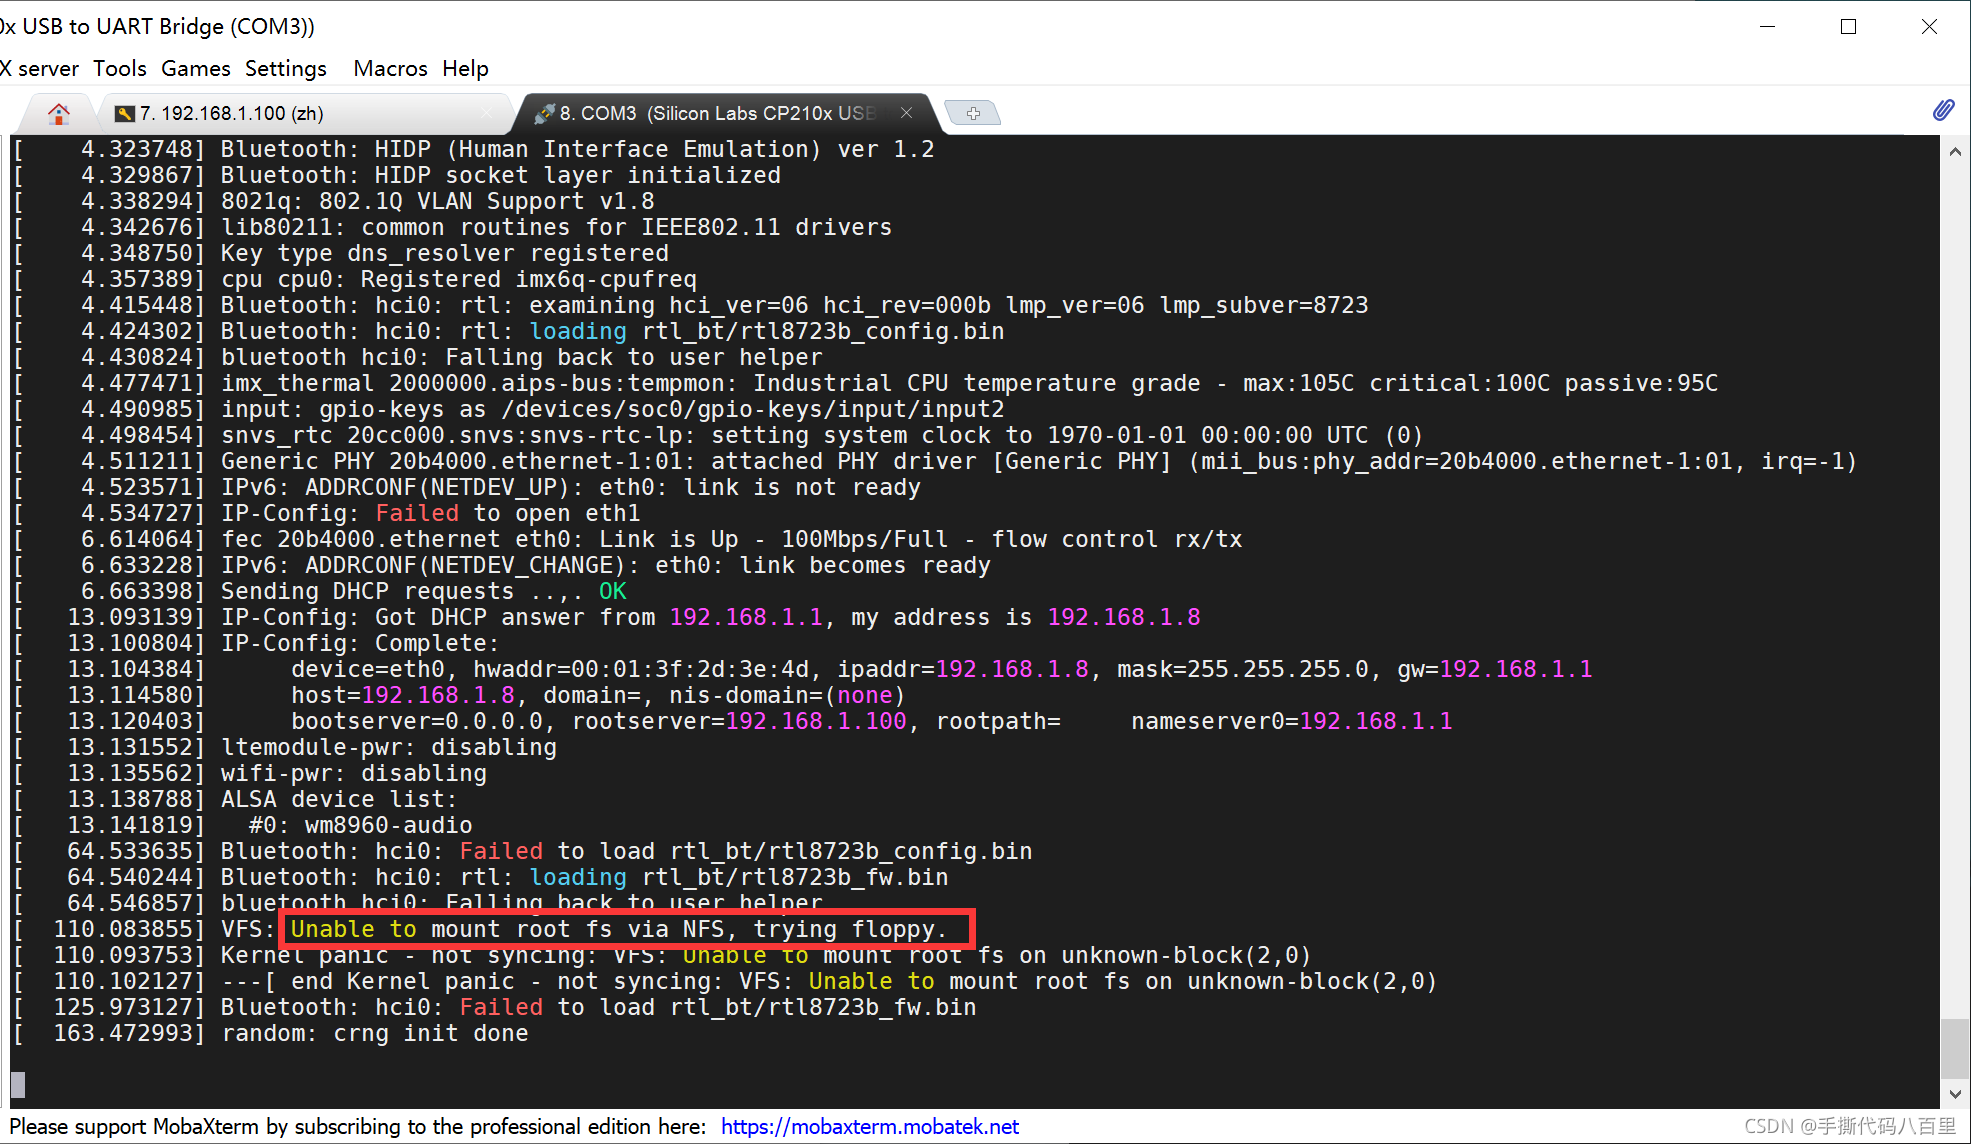
[  110.083855] VFS: Unable to mount root fs via NFS, trying floppy.
[  110.093753] Kernel panic - not syncing: VFS: Unable to mount root fs on unknown-block(2,0)
[  110.102127] ---[ end Kernel panic - not syncing: VFS: Unable to mount root fs on unknown-block(2,0)
[  125.973127] Bluetooth: hci0: Failed to load rtl_bt/rtl8723b_fw.bin
[  163.472993] random: crng init done
可以看到走到这里,就不往下走了
错误原因是,我们并没有制作rootfs,也就是文件系统。

我的根文件系统:
这里就不在这里啰嗦了,如果不会制作,可以参考我的本系列的下一篇文章。制作根文件系统,将会在下一篇文章中写。
zh@zh-lpc:~/100ask_imx6ull-sdk/Buildroot_2019.02/output/target$ pwd
/home/zh/100ask_imx6ull-sdk/Buildroot_2019.02/output/target
zh@zh-lpc:~/100ask_imx6ull-sdk/Buildroot_2019.02/output/target$ ls
bin   dev  home  lib32    linuxrc  mnt  proc  run   sys       THIS_IS_NOT_YOUR_ROOT_FILESYSTEM  usr
boot  etc  lib   libexec  media    opt  root  sbin  test.txt  tmp                               var
zh@zh-lpc:~/100ask_imx6ull-sdk/Buildroot_2019.02/output/target$
我的根文件系统的路径:
/home/zh/100ask_imx6ull-sdk/Buildroot_2019.02/output/target
还需要开启nfs服务:
zh@zh-lpc:~$ cat /etc/exports
/home/zh *(rw,sync)
zh@zh-lpc:~$
启动:
/etc/init.d/nfs-kernel-server restart
启动nfs之后,可以用showmount命令查看本机,或者其他主机共享的文件:
zh@zh-lpc:~$ showmount -e
Export list for zh-lpc:
/home/zh *
zh@zh-lpc:~$
zh@zh-lpc:~$
zh@zh-lpc:~$
zh@zh-lpc:~$ showmount -e 192.168.1.100
Export list for 192.168.1.100:
/home/zh *
zh@zh-lpc:~$
在开发板中配置nfsroot的地址:
1、可以使用pri命令查看已有的环境变量。
2、关键的一条如下:
nfsroot=${serverip}:${nfsroot}
我们配置了serverip=192.168.1.100
没有配置nfsroot的环境变量。
所以需要配置一下。
netargs=setenv bootargs console=${console},${baudrate} root=/dev/nfs ip=dhcp nfsroot=${serverip}:${nfsroot},v3,tcp
3、配置nfsroot环境变量
记得保存哈
setenv nfsroot /home/zh/100ask_imx6ull-sdk/Buildroot_2019.02/output/target
saveenv
4、然后输入run netboot命令进行重新从网络启动
run netboot
5、验证是否成功
成功后出现如图所示界面

输入df命令可以看到根目录是挂载上去的:

方便之处&测试
好处1:文件内容实时同步。
我们在pc机或自己的Linux虚拟机中在制作的根目录中创建一个简单的文件
zh@zh-lpc:~$
zh@zh-lpc:~$ echo "zhenghui haha" > /home/zh/100ask_imx6ull-sdk/Buildroot_2019.02/output/target/root/zhenghui.txt
zh@zh-lpc:~$
可以看到在开发板中就会立马同步了。

好处2:
修改了系统中的代码文件,只需要重启即可自动挂载执行新的代码程序。