目录
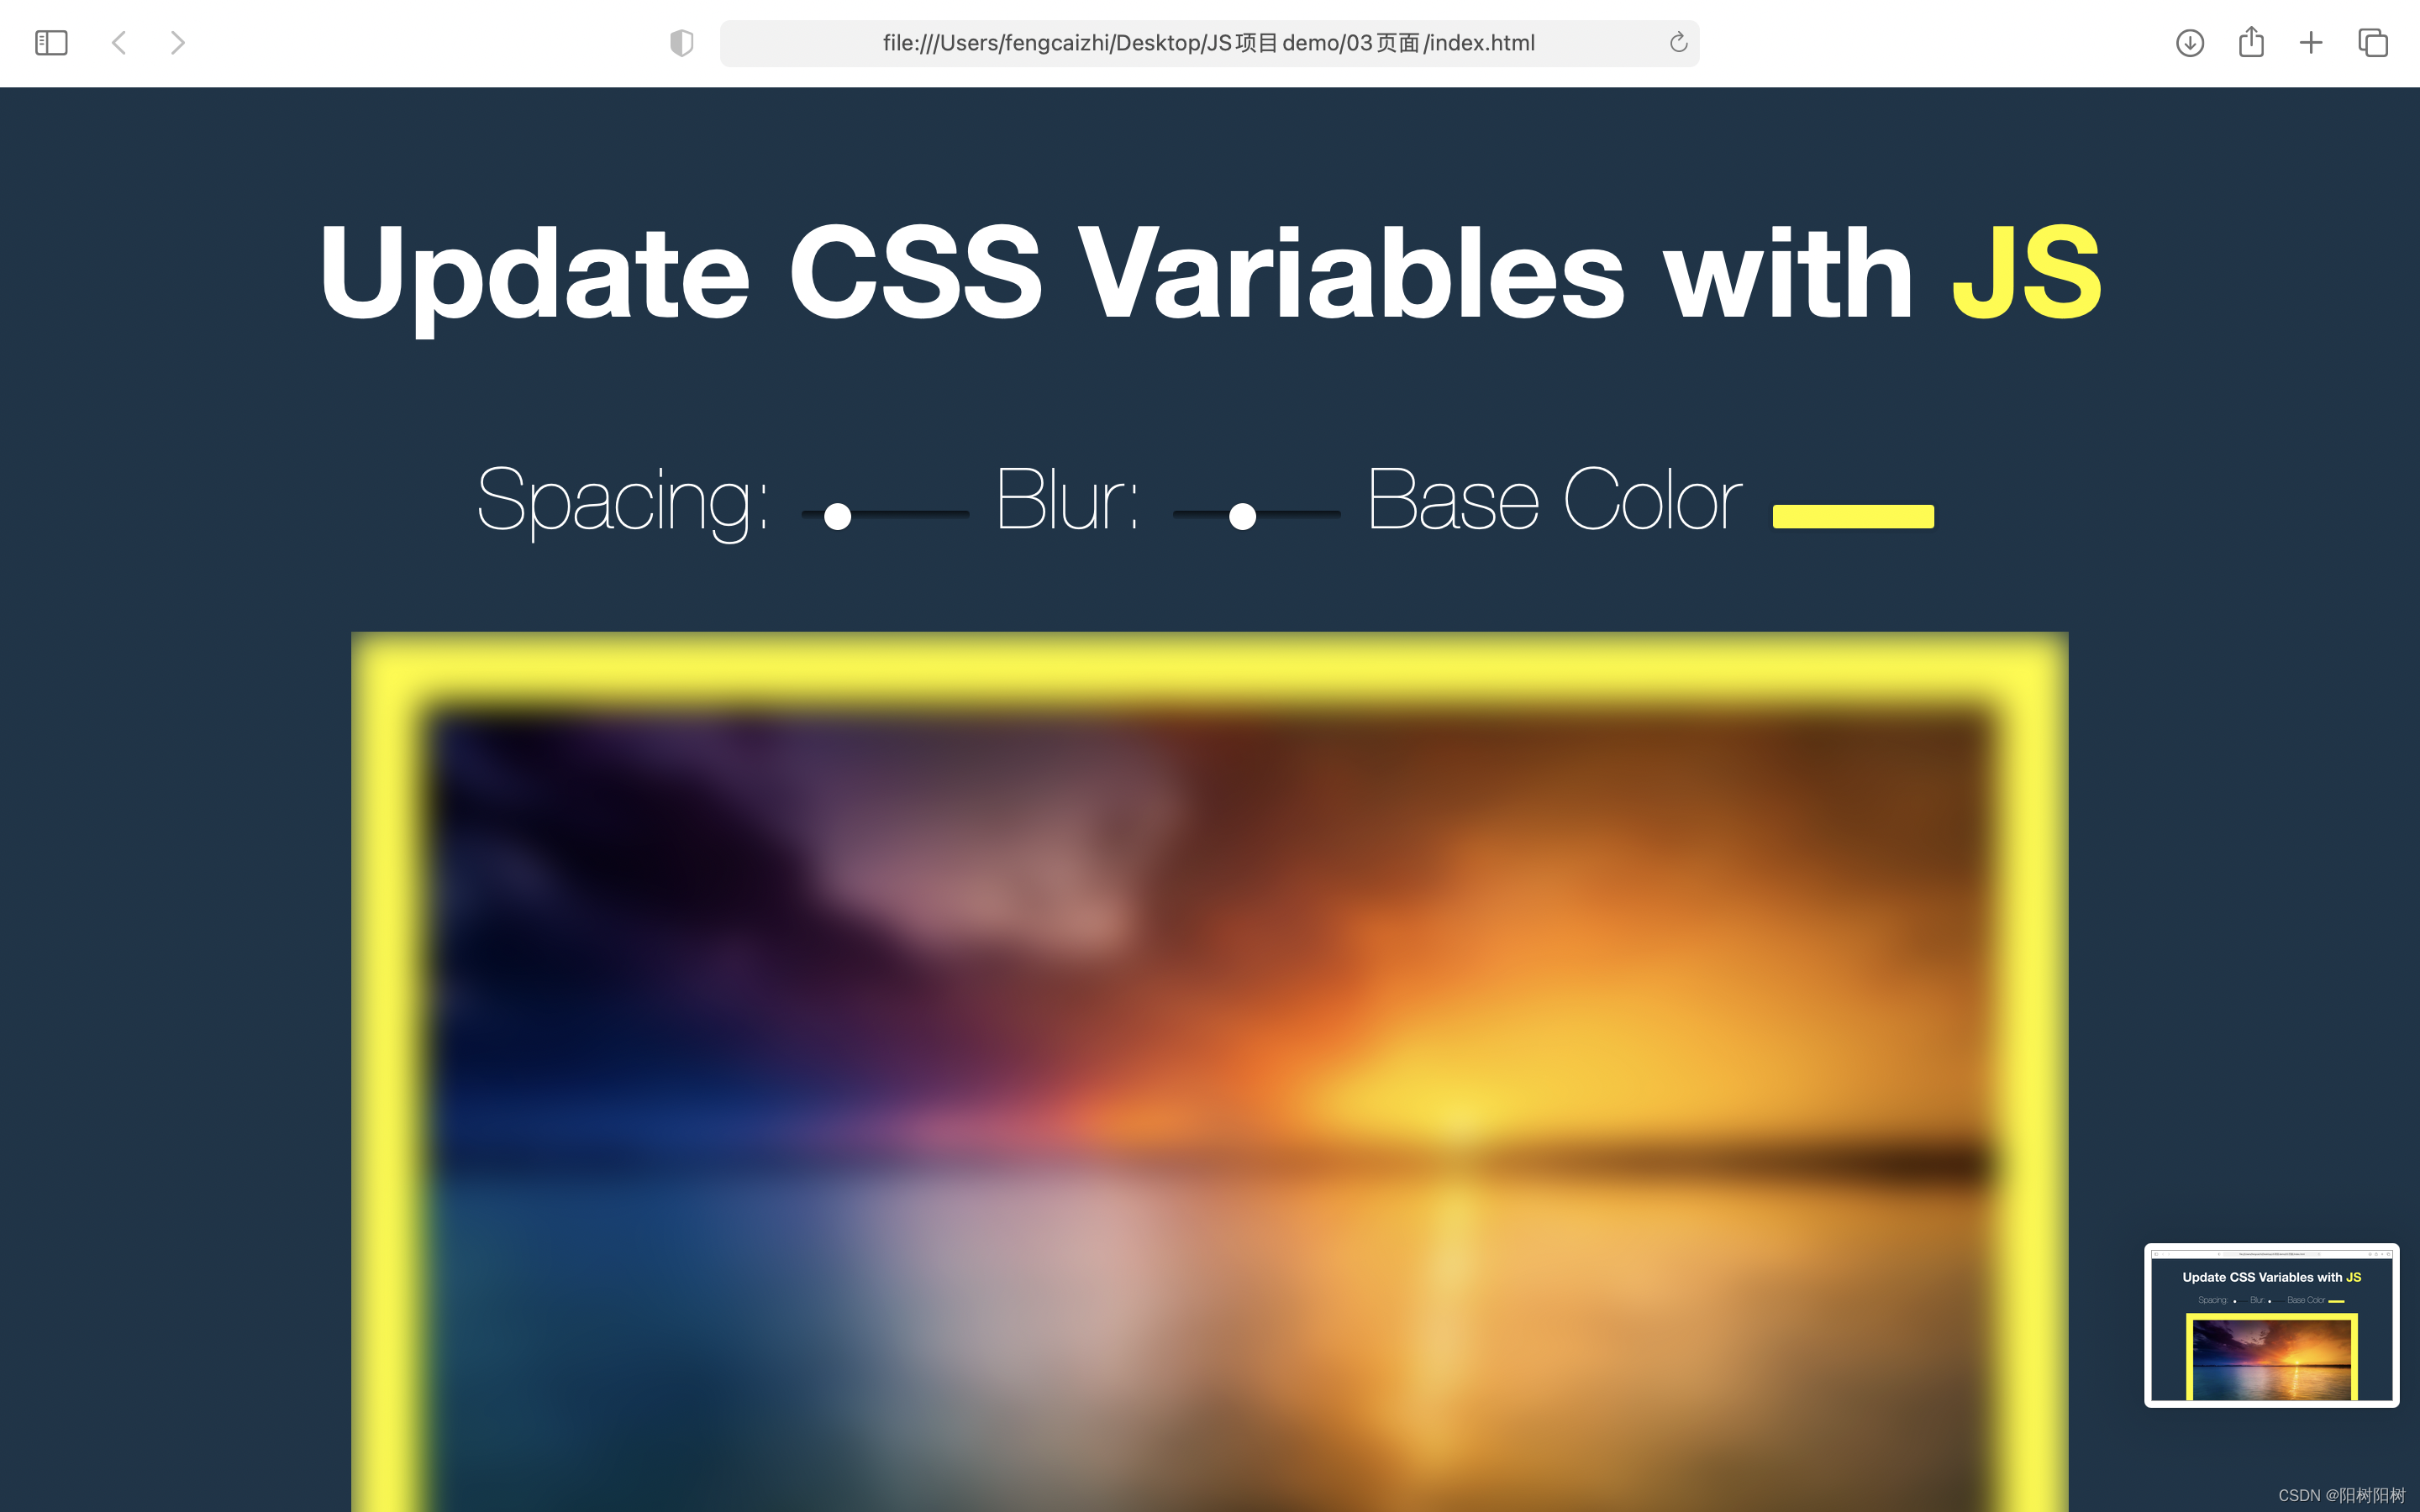
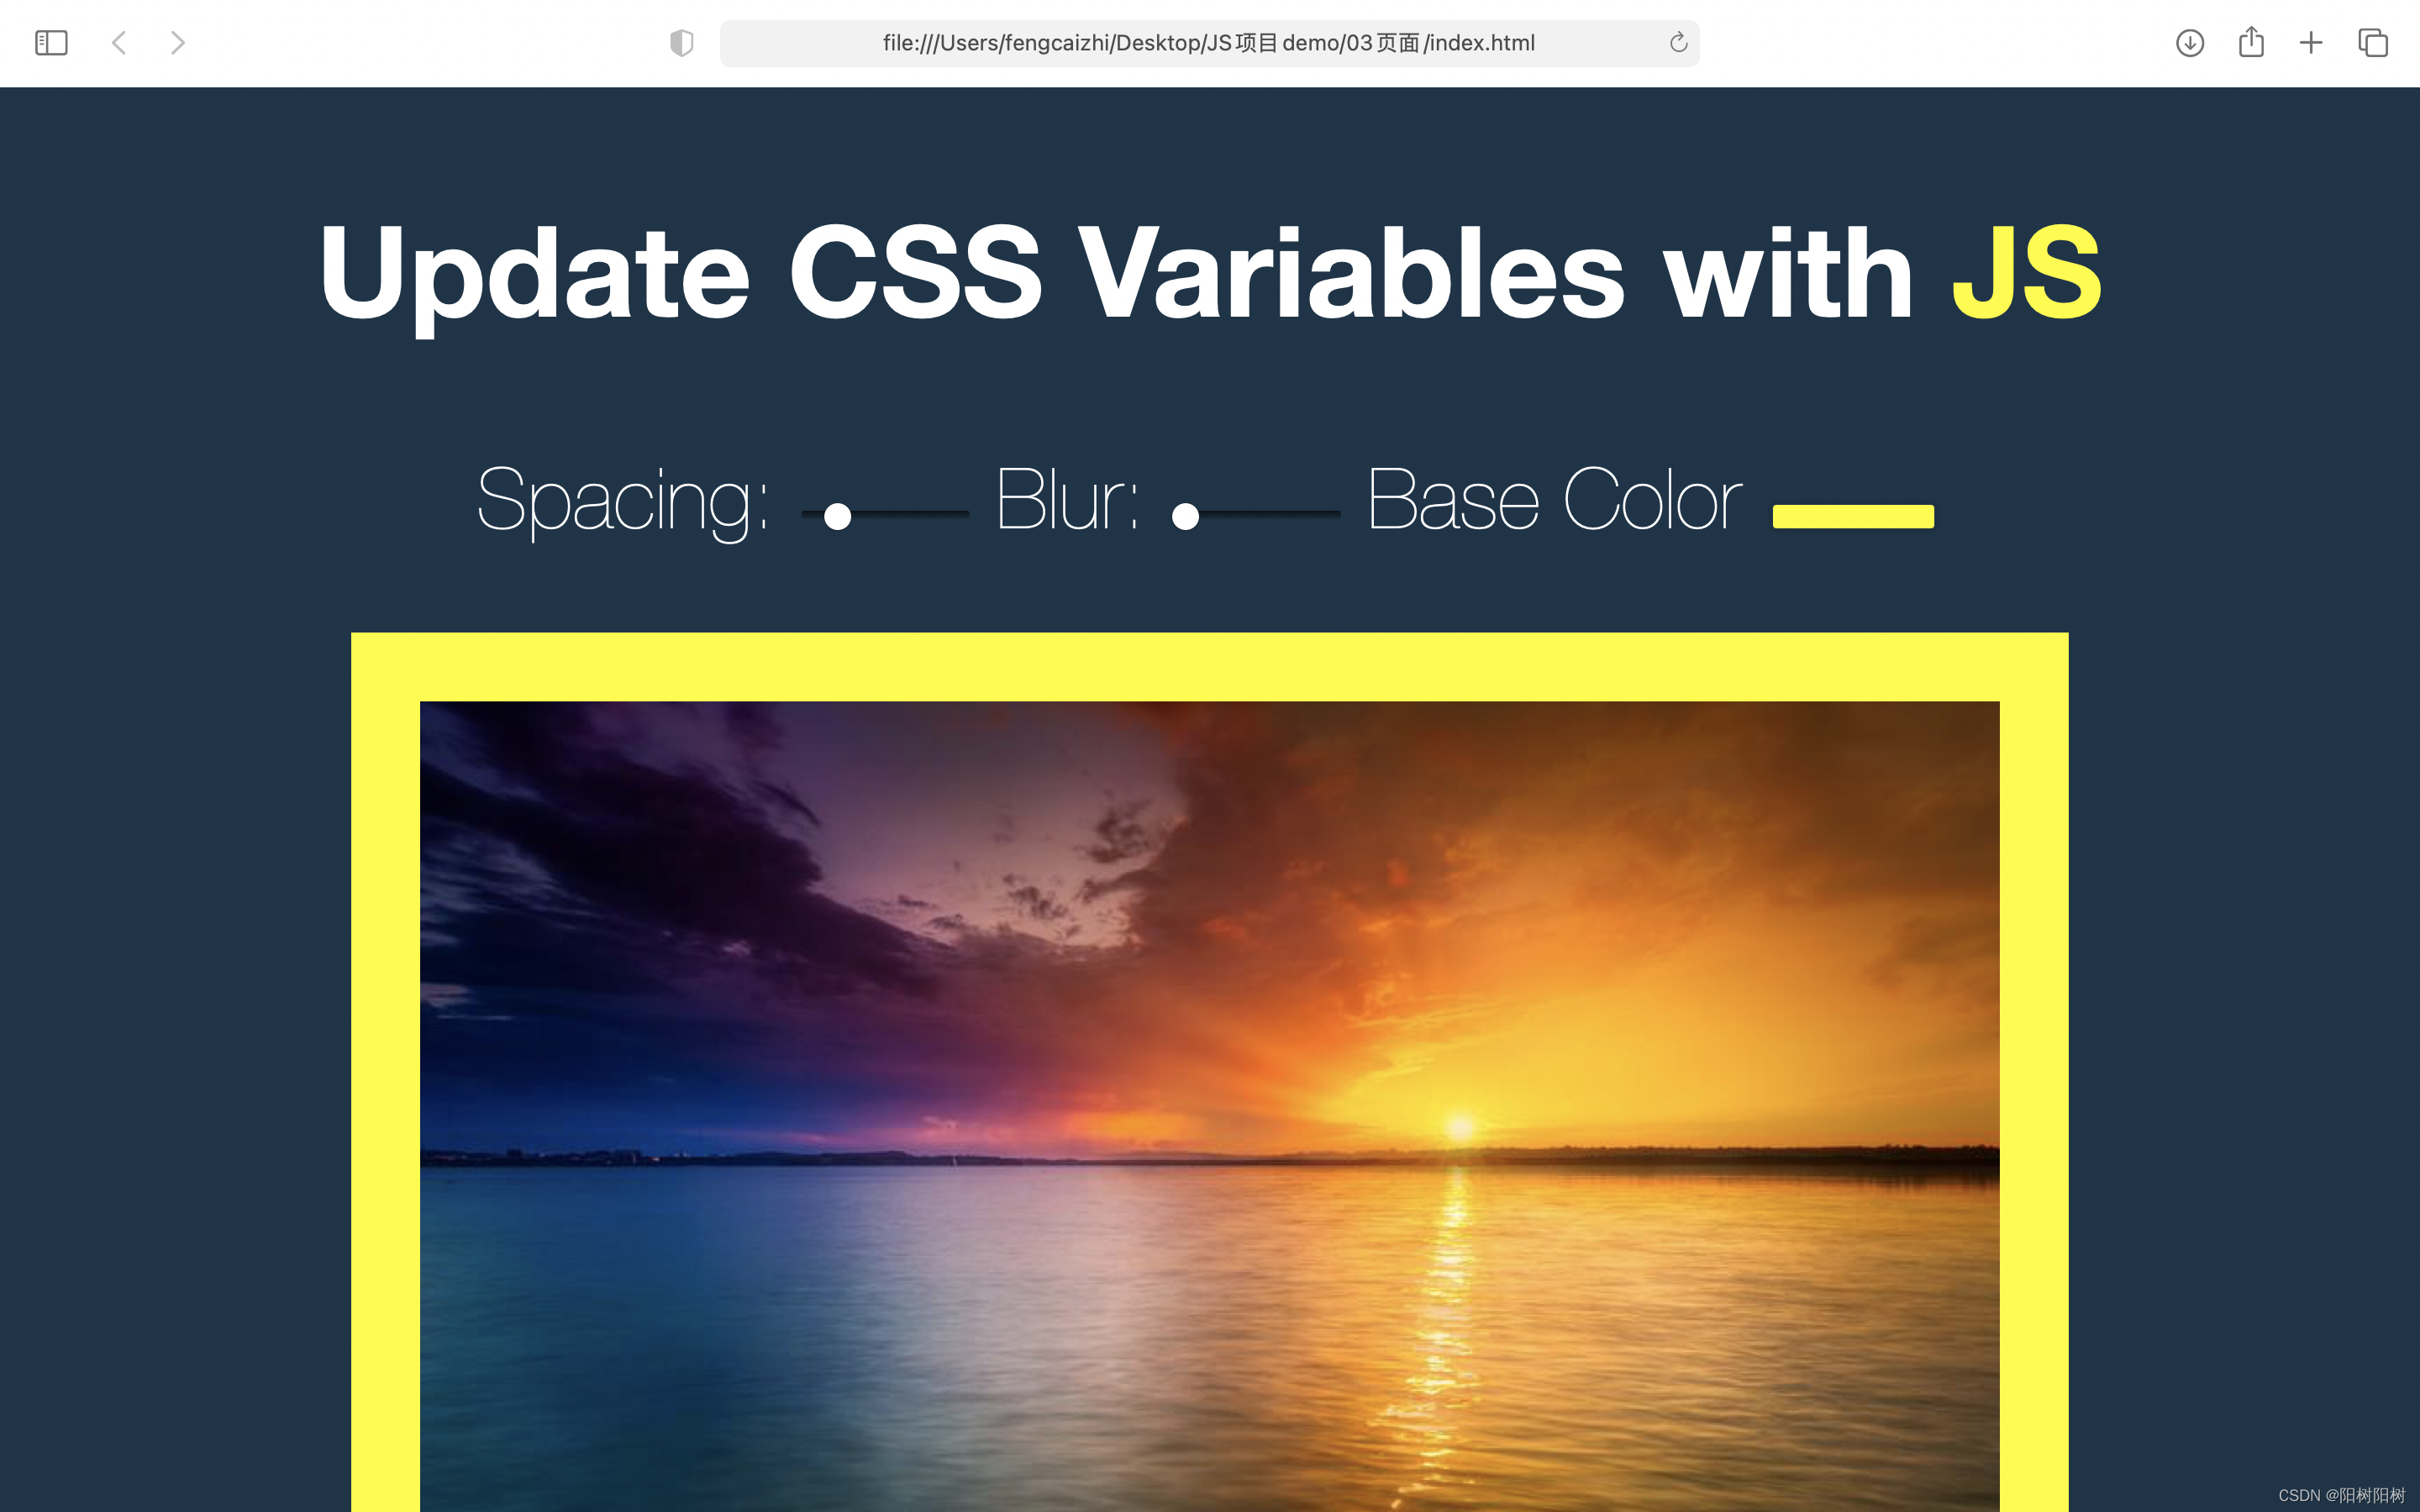
效果图
实现了调色,调整清晰度,改变颜色的功能
遇到的盲点
1.<label>一般与<input>共用
优点:
- 标签文本不仅与其相应的文本输入元素在视觉上相关联,程序中也是如此。 这意味着,当用户聚焦到这个表单输入元素时,屏幕阅读器可以读出标签,让使用辅助技术的用户更容易理解应输入什么数据。
- 你可以点击关联的标签来聚焦或者激活这个输入元素,就像直接点击输入元素一样。这扩大了元素的可点击区域,让包括使用触屏设备在内的用户更容易激活这个元素。
将一个 <label> 和一个 <input> 元素匹配在一起,你需要给 <input> 一个 id 属性。而 <label> 需要一个 for 属性,其值和 <input> 的 id 一样。
for
即和 <label> 元素在同一文档中的 可关联标签的元素 的 id。 文档中第一个 id 值与 <label> 元素 for 属性值相同的元素,如果可关联标签(labelable),则为已关联标签的控件,其标签就是这个 <label> 元素。如果这个元素不可关联标签,则 for 属性没有效果。如果文档中还有其他元素的 id 值也和 for 属性相同,for 属性对这些元素也没有影响。
注意:<label> 元素可同时有一个 for 属性和一个子代控件元素,只是 for 属性需要指向这个控件元素。
示例:
简单的label
<label>Click me <input type=“text”></label>
使用for属性
<label for=“username”>Click me</label>
<input type=“text” id=“username”>
可访问性问题:
交互内容:
不要在 label 元素内部放置可交互的元素,比如 anchors 或 buttons。这样做会让用户更难激活/触发与 label 相关联的表单输入元素。
var()
概述
var()函数可以代替元素中任何属性中的值的任何部分。var()函数不能作为属性名、选择器或者其他除了属性值之外的值。(这样做通常会产生无效的语法或者一个没有关联到变量的值。)
语法
方法的第一个参数是要替换的自定义属性的名称。函数的可选第二个参数用作回退值。如果第一个参数引用的自定义属性无效,则该函数将使用第二个值。
var( <custom-property-name> , <declaration-value>? )
注意:自定义属性的回退值允许使用逗号。例如, var(--foo, red, blue) 将red, blue同时指定为回退值;即是说任何在第一个逗号之后到函数结尾前的值都会被考虑为回退值。
在 :root 上定义,然后使用它
:root {
--main-bg-color: pink;
}
body {
background-color: var(--main-bg-color);
}
Copy to Clipboard
当第一个值未定义,回退值生效
/* 后备值 */
/* 在父元素样式中定义一个值 */
.component {
--text-color: #080; /* header-color 并没有被设定 */
}
/* 在 component 的样式中使用它: */
.component .text {
color: var(--text-color, black); /* 此处 color 正常取值 --text-color */
}
.component .header {
color: var(--header-color, blue); /* 此处 color 被回退到 blue */
}
filter
filter CSS属性将模糊或颜色偏移等图形效果应用于元素。滤镜通常用于调整图像,背景和边框的渲染。
opacity()
opacity() 转化图像的透明程度。amount 的值定义转换的比例。值为 0% 则是完全透明,值为 100% 则图像无变化。值在 0% 和 100% 之间,则是效果的线性乘数。也相当于图像样本乘以数量。 若值未设置,值默认是1。该函数与已有的 opacity 属性很相似,不同之处在于通过 filter,一些浏览器为了提升性能会提供硬件加速。
grayscale()
grayscale() 函数将改变输入图像灰度。amount 的值定义了转换的比例。值为 100% 则完全转为灰度图像,值为 0% 图像无变化。值在 0% 到 100% 之间,则是效果的线性乘数。若未设置值,默认是 0。
blur()
表示这个图片的模糊度
源码
<!DOCTYPE html>
<html lang="en">
<head>
<meta charset="UTF-8">
<meta http-equiv="X-UA-Compatible" content="IE=edge">
<meta name="viewport" content="width=device-width, initial-scale=1.0">
<title>在线图片修饰器 使用JS修饰CSS变量</title>
</head>
<body>
<h2>Update CSS Variables with <span class='h1'>JS</span></h2>
<div class="controls">
<!-- label与input一般同时使用//还有range的特殊操作,左边界与右边界进行设置 value就是位置啊-->
<label for="spacing">Spacing:</label>
<input id="spacing" type="range" name="spacing" min="10" max="200" value="10" data-sizing="px">
<label for="blur">Blur:</label>
<input id="blur" type="range" name="blur" min="0" max="25" value="10" data-sizing="px">
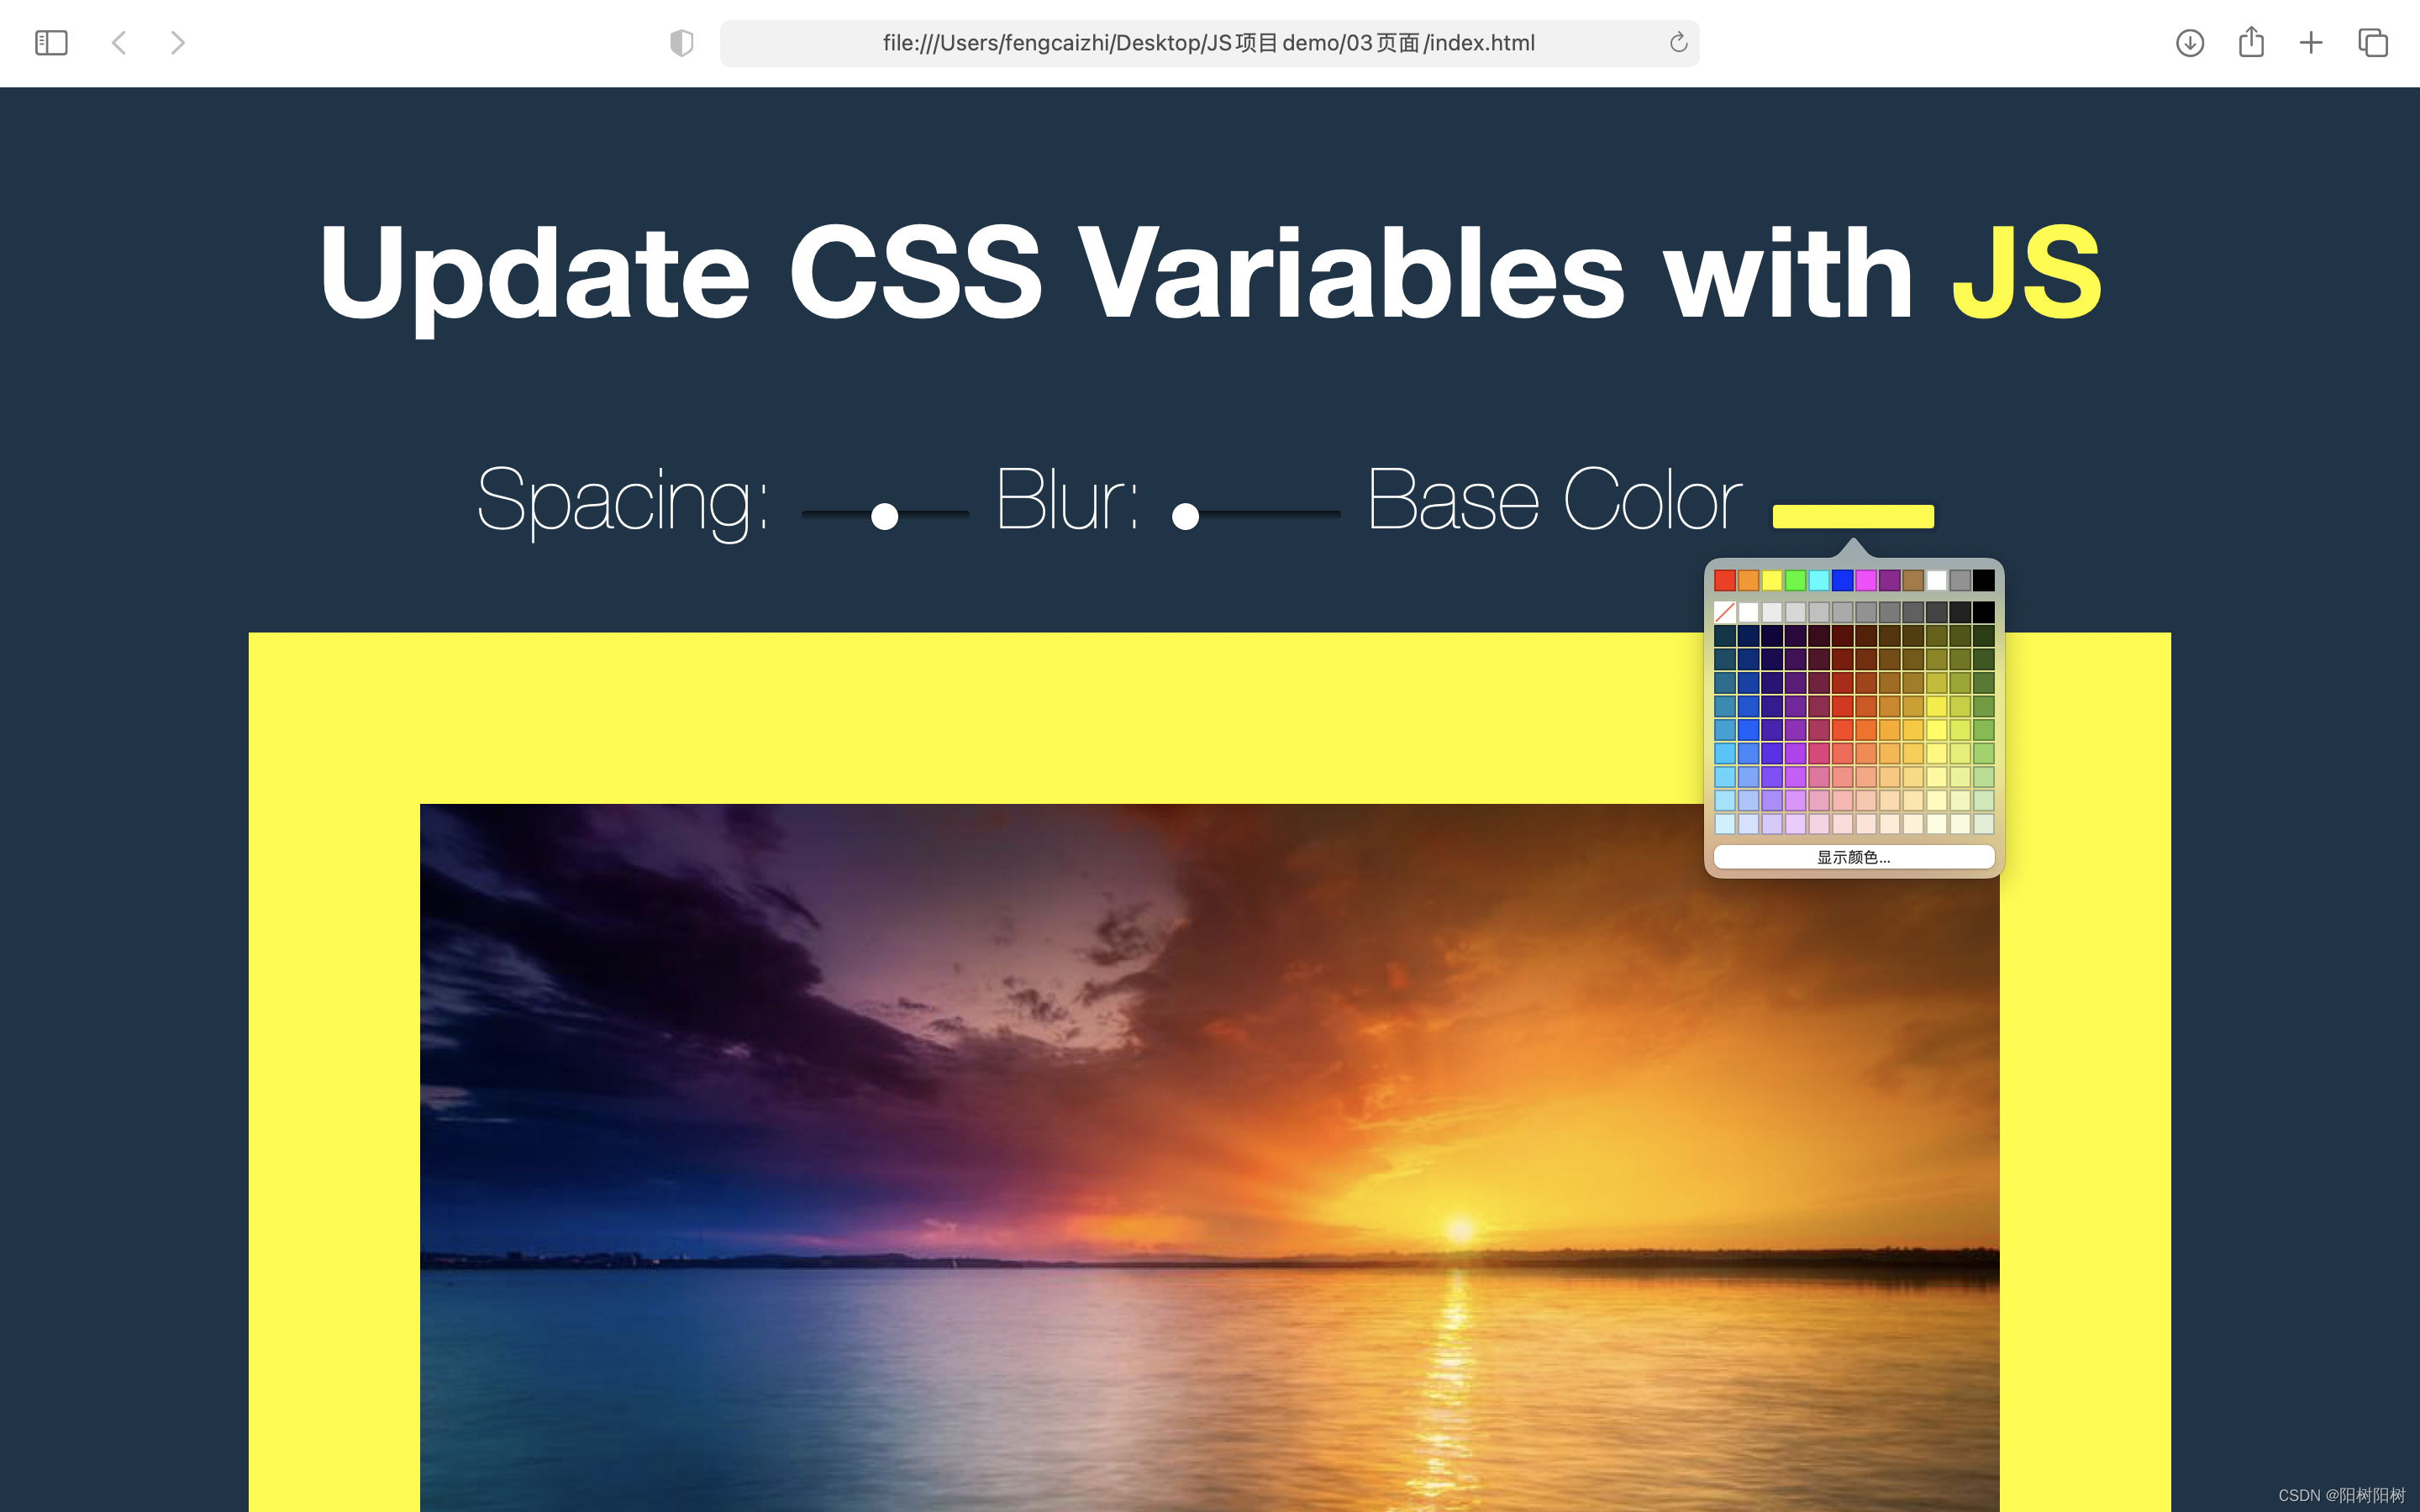
<label for="base">Base Color</label>
<input id="base" type="color" name="base" value="#ffc600">
</div>
<img src="./留言板.jpg" alt="">
<style>
:root{
--base: #ffc600;
--spacing: 10px;
--blur: 10px;
--grayscale: 0%;
}
img {
padding: var(--spacing);
background: var(--base);
filter: blur(var(--blur)) grayscale(var(--grayscale));
width: 66%;
}
.h1{
color: var(--base);
}
body {
text-align: center;
background: #193549;
color:white;
font-family: 'helvetica neue', sans-serif;
/* 表示了字体的粗细程度 */
font-weight: 100;
font-size: 50px;
}
.controls {
margin-bottom: 50px;
}
input {
width: 100px;
}
</style>
<script>
const inputs = document.querySelectorAll('.controls input');
function handleUpdate() {
const suffix = this.dataset.sizing || '';
// 用于改变CSS样式
document.documentElement.style.setProperty(`--${this.name}`, this.value + suffix);
}
inputs.forEach(input => input.addEventListener('change',handleUpdate));
inputs.forEach(input => input.addEventListener('mousemove',handleUpdate));
</script>
</body>
</html>