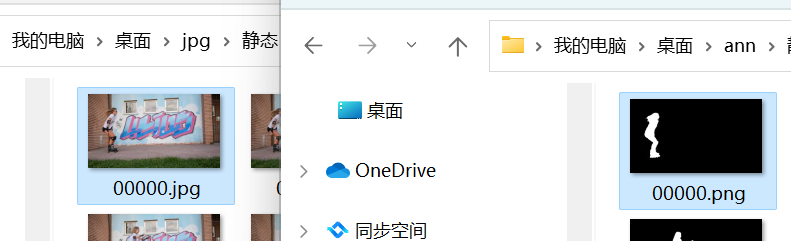
今天在做视频修复的时候遇到了一个问题:我应该如何将左边的照片转为右边这种形式的呢(也可以自定义mask,做静态mask...)?
第一步:
我先用PS将图像抠出来(这里推荐使用套索工具,感觉很好用)

然后我右键这个区域,选择填充为白色,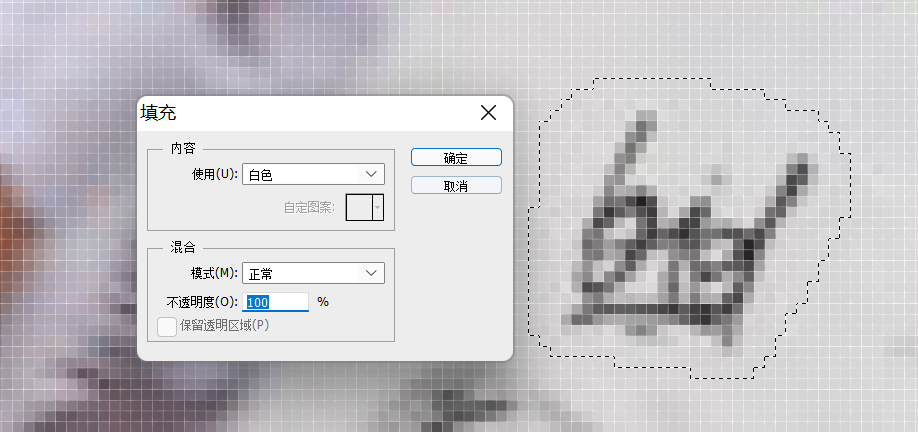
然后再右键该区域,选择反向,填充为黑色:
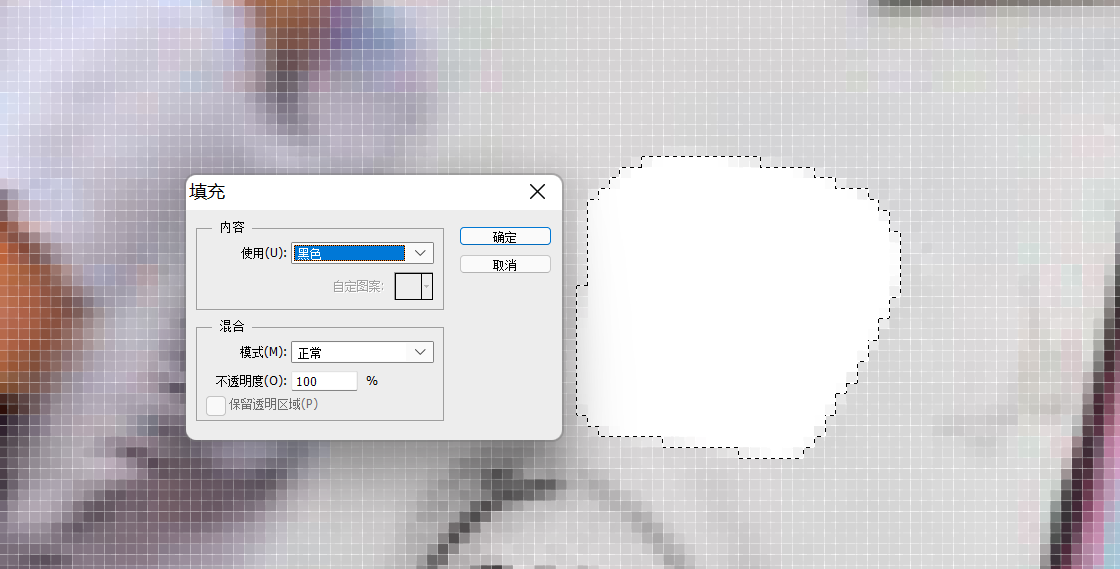
这样你选择的地方就变成白色,其他地方就变成黑色了

保存为PNG格式到桌面
第2步:
但是这样不够,因为你会发现这个照片是24位深,并且黑白交互地方有羽化的痕迹
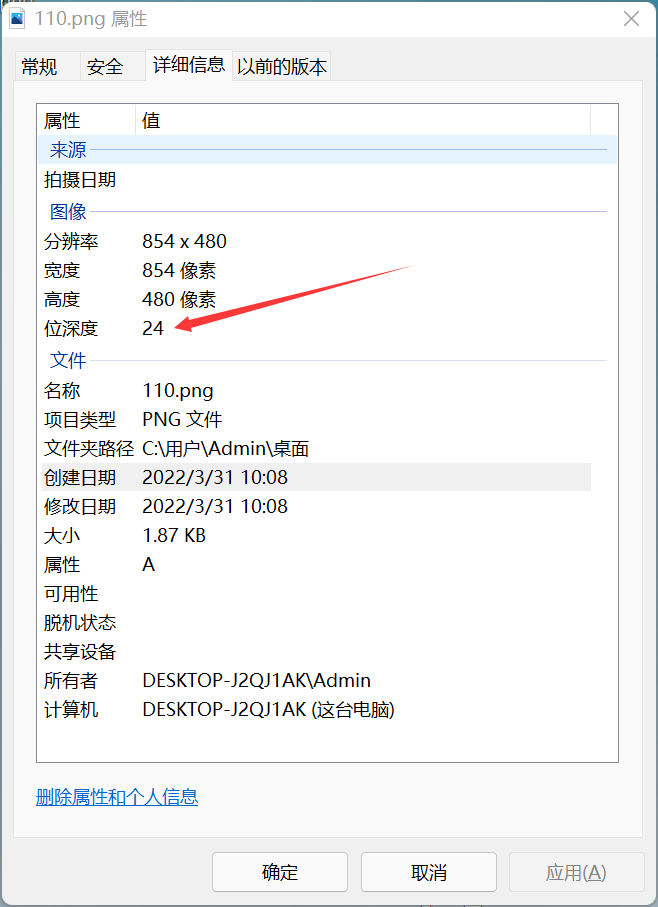
通过以下代码生成8位深的纯黑白照片
import glob
import os

import cv2
import numpy as np

# Get all png files under the input folder
input_img_path = glob.glob("images/*.png")
save_path = "blur13x13/"


def mkdir(path):
    folder = os.path.exists(path)
    if not folder:  # 判断是否存在文件夹如果不存在则创建为文件夹
        os.makedirs(path)  # makedirs 创建文件时如果路径不存在会创建这个路径
        print("--- create new folder...  ---")
    else:
        print("---  There is this folder!  ---")

def erode_demo(gray):
    ret, binary = cv2.threshold(gray, 0, 255, cv2.THRESH_BINARY_INV)
    kernel = cv2.getStructuringElement(cv2.MORPH_RECT, (5, 5))
    dst = cv2.erode(binary, kernel)
    return dst


def dilate_demo(gray):
    ret, binary = cv2.threshold(gray, 0, 255, cv2.THRESH_BINARY_INV)
    kernel = cv2.getStructuringElement(cv2.MORPH_RECT, (5, 5))
    dst = cv2.dilate(binary, kernel)
    return dst


mkdir(save_path)  # 调用函数

i = 0
for file in input_img_path:
    # get the file_name of image
    file_name = file.split('\\')[-1]

    print(file_name)

    img1 = cv2.imread(file, cv2.IMREAD_GRAYSCALE)


    ### 下面为处理图片的过程

    binary_path, th = cv2.threshold(img1, 180, 255, cv2.THRESH_BINARY)
    binary_inv_path, th1 = cv2.threshold(img1, 180, 255, cv2.THRESH_BINARY_INV)
    trunc_path, th2 = cv2.threshold(img1, 180, 255, cv2.THRESH_TRUNC)
    tozero_path, th3 = cv2.threshold(img1, 180, 255, cv2.THRESH_TOZERO)
    tozero_inv_path, th4 = cv2.threshold(img1, 180, 255, cv2.THRESH_TOZERO_INV)

    result = erode_demo(th3)
    result3 = dilate_demo(result)

    cv2.waitKey(0)
    cv2.destroyAllWindows()

    img_color = cv2.applyColorMap(th3, cv2.COLORMAP_HOT)
    img_color1 = cv2.applyColorMap(th4, cv2.COLORMAP_DEEPGREEN)

    Image = cv2.addWeighted(img_color, 0.3, img_color1, 0.7, 0)

    out_img1 = np.hstack((img1, th, th1))
    out_img2 = np.hstack((th2, th3, th4))
    out_img = np.vstack((out_img1, out_img2))

    ###

    # cv2.imwrite(save_path + file_name, out_img)
    # cv2.imwrite(save_path + file_name, img_color)
    # cv2.imwrite(save_path + file_name, img_color1)
    # cv2.imwrite(save_path + file_name, Image)
    #
    # cv2.imwrite(save_path + file_name, img1)
    # cv2.imwrite(save_path + file_name, th)
    cv2.imwrite(save_path + file_name, th1)
    # cv2.imwrite(save_path + file_name, th2)
    # cv2.imwrite(save_path + file_name, th3)
    # cv2.imwrite(save_path + file_name, th4)

    i = i + 1
    print("The", i, "picture is currently being processed")
在文件夹下:C:\Users\PycharmProjects\color_flower这个就是你想要的照片了
