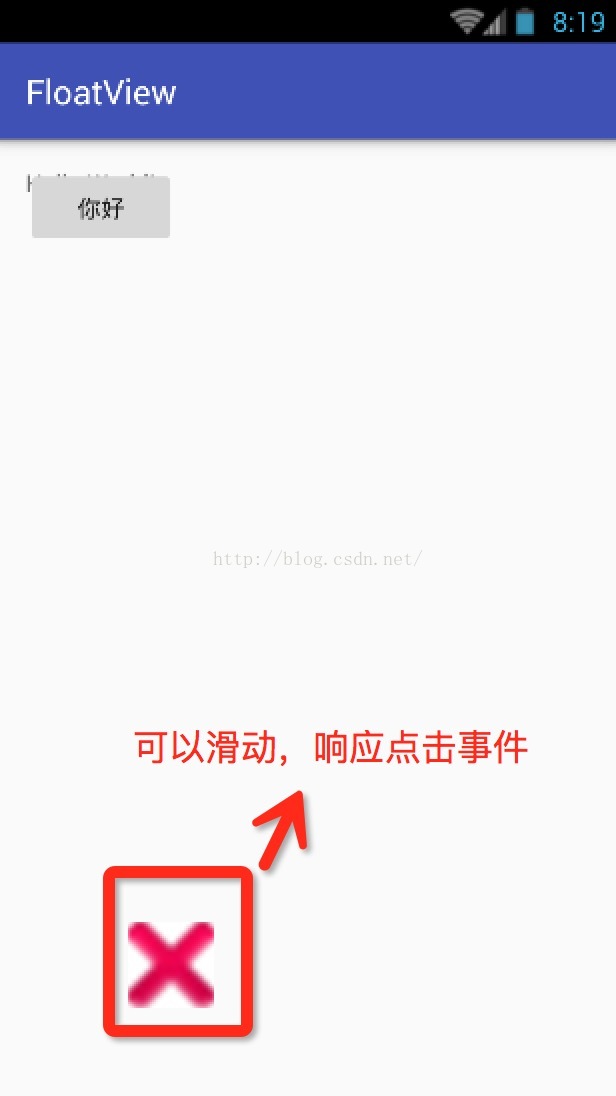
基于公司项目要求,要彷照iPhone Assistivetouch 做一个浮动在窗口的按钮,且按钮有点击响应。
网上搜罗一遍,照葫芦画瓢的做了一个简单的demo。下面介绍一下我的思路:
1.要实现的功能:浮动在窗口最上层,支持手势滑动,点击响应。
2.实现过程:
a.首先罗列出自定义view的属性
public class FloatViewAttr {
/**
* 初始x坐标(以屏幕中心为基准)
*/
public float iniX;
/**
* 初始Y坐标(以屏幕中心为基准)
*/
public float iniY;
/**
* touchView 布局
*/
public int viewLayoutID;
/**
* touchView 对应imgview控件ID
*/
public int viewID;
}
b.做出浮动按钮的背景和对应的控件
<?xml version="1.0" encoding="utf-8"?>
<LinearLayout xmlns:android="http://schemas.android.com/apk/res/android"
android:layout_width="wrap_content"
android:layout_height="wrap_content"
android:gravity="center"
android:background="#ffffffff"
>
<ImageView
android:id="@+id/myImg"
android:layout_width="100dp"
android:layout_height="100dp"
android:src="@android:drawable/ic_delete"/>
</LinearLayout>
c.创建自定义View MyFloatView
package com.cjx.myfloatview;
import android.app.Activity;
import android.content.Context;
import android.graphics.Color;
import android.view.LayoutInflater;
import android.view.MotionEvent;
import android.view.View;
import android.view.WindowManager;
import android.widget.ImageView;
import android.widget.Toast;
/**
* Created by on 16/3/3.
*/
public class MyFloatView extends View {
/**
* 上下文
*/
private Activity con;
/**
* 浮动view的属性类
*/
private FloatViewAttrattr = new FloatViewAttr();
private WindowManager mWindowManager;
/**
* touchView布局
*/
private View mView;
/**
* 浮动view
*/
private ImageView mImageView;
WindowManager.LayoutParams wmParams;
public MyFloatView(Activity context,FloatViewAttr Attr) {
super(context);
this.con = context;
this.attr = Attr;
iniFloatView();
}
public void iniFloatView() {
mWindowManager = (WindowManager) con.getSystemService(Context.WINDOW_SERVICE);
mView = LayoutInflater.from(con).inflate(attr.viewLayoutID, null);
mImageView = (ImageView)mView.findViewById(attr.viewID);
mImageView.setBackgroundColor(Color.TRANSPARENT);
mImageView.setOnTouchListener(mTouchListener);
wmParams = new WindowManager.LayoutParams(0,40);
wmParams.width = 100;
wmParams.height = 100;
wmParams.x=(int)attr.iniX;//实际对应的坐标x=屏幕宽/2+attr.iniX
wmParams.y=(int)attr.iniY;//实际对应的坐标y=屏幕高/2+attr.iniY
mWindowManager.addView(mView,wmParams);
}
private OnTouchListener mTouchListener= new OnTouchListener() {
float lastX,lastY;
int paramsX, paramsY;
@Override
public boolean onTouch(View v,MotionEvent event) {
final int action = event.getAction();
float x = event.getRawX();
float y = event.getRawY();
System.out.println("x="+x+",y="+y);
switch (action) {
case MotionEvent.ACTION_DOWN:
motionActionDownEvent(x, y);
break;
case MotionEvent.ACTION_MOVE:
motionActionMoveEvent(x, y);
break;
case MotionEvent.ACTION_UP:
motionActionUpEvent(x, y);
break;
default:
break;
}
return true;
}
private void motionActionDownEvent(floatx, float y) {
lastX = x;
lastY = y;
paramsX = wmParams.x;
paramsY = wmParams.y;
}
private void motionActionMoveEvent(floatx, float y) {
int dx = (int) (x -lastX);
int dy = (int) (y - lastY);
wmParams.x = paramsX + dx;
wmParams.y = paramsY + dy;
// 更新悬浮窗位置
mWindowManager.updateViewLayout(mView,wmParams);
}
private void motionActionUpEvent(floatx, float y) {
int dx = (int) (x -lastX);
int dy = (int) (y - lastY);
if(dx==0&&dy==0){
//点击事件
Toast.makeText(con,"你点击了我",Toast.LENGTH_SHORT).show();
}
}
};
}
c.activity中调用
WindowManager mWindowManager = (WindowManager) getSystemService(Context.WINDOW_SERVICE);
attr=new FloatViewAttr();
attr.iniX = mWindowManager.getDefaultDisplay().getWidth()/2-50;
attr.iniY = mWindowManager.getDefaultDisplay().getHeight()/2-50;
System.out.println("x="+attr.iniX+",y="+attr.iniY);
attr.viewLayoutID=R.layout.floatview;
attr.viewID=R.id.myImg;
myFloatView=new MyFloatView(this,attr);
3.需要注意
a.经过测试,window manager.layoutParams 的x,y属性与实际touchView在手机窗口中的坐标关系如下:
x坐标=屏幕宽/2+x;y坐标=屏幕高/2+y;
项目地址:https://github.com/MissMyDearBear/FloatButton.git