一、前言
当我们在Horizon DAAS环境中,完成租户环境的创建,而后计划部署虚拟桌面而非物理桌面时,则在创建 Windows 系统映像时有些注意事项是必须应该考虑的。

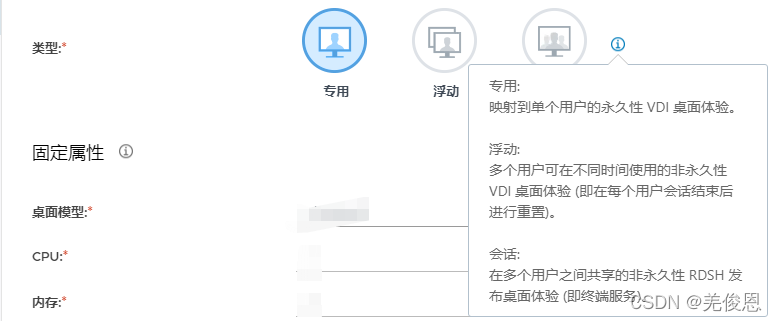
物理桌面: 它使用物理机器上的资源,仅影响使用该机器的用户。物理机上的操作系统决定了资源是否可用。某些单次性操作仅在第一次执行时影响用户,因为之后机器永远不会刷新。例如,用户第一次登录时通常会获得一个新的用户配置文件,并且他们在所有后续登录中将继续使用相同的配置文件。
虚拟桌面: 相比之下,在虚拟环境中,GOS表现得好像它拥有对 CPU 内核的独占访问权限,但实际上这些内核在 2 到 8 个虚拟机之间共享。使用非持久性 VMware Horizon ®虚拟机或用户配置文件时,那些只运行一次的操作可能会在用户每次登录时运行。对于虚拟桌面,必须在基础映像中配置一次性系统操作,并且必须在默认用户配置文件中配置一次性用户操作。此外,为了达到更高的整合率,增加单个VMware vSphere ®主机上托管的虚拟机数量,VMware 建议关闭不需要的功能。

当前我们也可以使用 Microsoft 部署工具包 (MDT) 提供的自动化或借助使用 VMware OS Optimization Tool MDT 插件来完成桌面映像的优化制作。
二、手动桌面黄金映像制作
2.1 优化GOLD image后
1)初始部署时间节省: 通过裁剪映像,可以将桌面模板所需的磁盘空间量最多减少 80%,这意味着创建桌面池所需的时间显着减少(最多快 3 倍)。默认情况下,Windows 会在空闲 10 分钟后生成本机映像并执行磁盘清理操作,这可以使用完整内核长达一个小时。部署大型池时,这意味着集群可能在部署后长达一小时内无法使用。然而,通过图像优化,这个过程可以减少到 30 秒。
2)用户登录时间节省:当用户登录时,用于创建标准用户配置文件的登录时间部分最多可能需要 30 秒,但经过优化后,这部分登录时间可以减少到 3.5-10.5 秒。
3)主机内存节省:默认部署最多可以使用 2 GB 的活动内存,但通过优化,内存需求可以显着降低(最多 50%)。
4)主机 CPU 节省:优化的部署可以将 CPU 使用率降低多达 40%,从而使物理 vSphere 主机上的 VM 密度增加多达 40%。
5)存储和 IOPS 节省:由于前面提到的磁盘空间节省,同步也实现了缓存使用的改进。停用不需要的功能并压缩操作系统文件意味着更大的部分可以放入缓存中,这可以将所需的 IOPS 量减少多达 250%。
2.2 使用已测试成熟的OS
截至 2021 年 6 月中旬,所有下图操作系统均已使用所有可用更新进行了测试。更多参见:受支持的 Windows 10 操作系统的完整列表。
| 操作系统 | 版本 | 内建版本 | 发行版 | 系统架构 | 占用空间 | 新配置文件创建持续时间 |
|---|---|---|---|---|---|---|
| Windows 10 | 1607 | 14393.4467 (2021-06-08) | LTSB* | x64 | 4.84 GB | 2.5 S |
| Windows 10 | 1809** | 17763.1999(2021-06-08) | LTSC* | x64 | 5.32 GB | 2.5 S |
| Windows 10 | 1909** | 18362.1621(2021-06-08) | Education | x64 | 6.22 GB | 4 S |
| Windows 10 | 1909** | 18363.1621(2021-06-08) | Enterprise | x64 | 6.31 GB | 4 S |
| Windows 10 | 2004** | 19041.1052(2021-06-08) | Education | x64 | 5.94 GB | 4.5 S |
| Windows 10 | 2004** | 19041.1052(2021-06-08) | Enterprise | x64 | 6.00 GB | 4.5 S |
| Windows 10 | 2004** | 19041.1052(2021-06-08) | Professional | x64 | 6.10 GB | 4.5 S |
| Windows 10 | 20H2** | 19042.1052 (2021-06-08) | Education | x64 | 6.22 GB | 4.5 S |
| Windows 10 | 20H2** | 19042.1052(2021-06-08) | Enterprise | x64 | 6.00 GB | 4.5 S |
| Windows 10 | 20H2** | 19042.1052(2021-06-08) | Professional | x64 | 6.22 GB | 4.5 S |
| Windows 10 | 21H1** | 19043.1052(2021-06-08) | Education | x64 | 6.08GB | 4 S |
| Windows 10 | 21H1** | 19043.1052(2021-06-08) | Enterprise | x64 | 5.97 GB | 4 S |
| Windows 10 | 21H1** | 19043.1052 (2021-06-08) | Professional | x64 | 6.06 GB | 4 S |
| Windows Server 2016 | 1607 | 14393.4467(2021-06-08) | Datacenter | x64 | 6.50 GB | 2.5 S |
| Windows Server 2016 | 1607 | 14393.4467 (2021-06-08) | Standard | x64 | 6.51 GB | 2.5 S |
| Windows Server 2019 | 1809** | 17763.1999 (2021-06-08) | Datacenter | x64 | 6.41 GB | 3.5 S |
| Windows Server 2019 | 1809** | 17763.1999(2021-06-08) | Standard | x64 | 6.85GB | 3 S |
2.3 环境配置
1)基础环境软件版本:vSphere 7.0 U2b 和 Horizon 2103;
2)如果计划使用VMware App Volumes ™,必须拥有安装了 App Volumes Manager 的服务器的主机名或 IP 地址,或者安装了 App Volumes Manager 的服务器前面的负载均衡器的主机名或 IP 地址。这些信息在主 VM 映像上安装 App Volumes Agent 时,将会要求输入此信息。
3)
三、自动化制作桌面黄金映像
手动创建和更新 Windows 映像容易出错、繁琐,并且可能导致结果不一致。而自动化仅需要花费一些额外的时间来预先配置,以后变更时就会大大方便,这也是官方所强烈推荐的。下面我们来看下如何使用 Microsoft 部署工具包 (MDT) 自动创建映像,该工具包可以选择与 System Center Configuration Manager (SCCM) 一起使用。这些过程包括创建 vSphere VM、安装和配置 Windows 操作系统、优化操作系统以及安装在 VMware Horizon® 环境中部署所需的各种 VMware 代理。Windows 评估和部署工具包 (Windows ADK) 具有用于自定义 Windows 映像以进行大规模部署的工具。MDT 使用 ADK 修改 Windows 预安装环境可启动映像。
3.1 安装前准备
下表描述了 ESXi 主机上除了系统内存之外,视频开销所需的最少RAM。而VGPU的 VRAM 大小要求取决于为最终用户配置的显示分辨率和监视器数量。
| 显示分辨率标准 | 宽度,以像素为单位 | 高度,以像素为单位 | -显示器开销 | 2 显示器开销 | 3 显示器开销 | 4 显示器开销 |
|---|---|---|---|---|---|---|
| VGA | 640 | 480 | 1.20 MB | 3.20 MB | 4.80 MB | 5.60 MB |
| WXGA | 1280 | 800 | 4.00 MB | 12.50 MB | 18.75 MB | 25.00 MB |
| 1080p | 1920 | 1080 | 8.00 MB | 25.40 MB | 38.00 MB | 50.60 MB |
| WQXGA | 2560 | 1600 | 16.00 MB | 60.00 MB | 84.80 MB | 109.60 MB |
| UHD (4K) | 3840 | 2160 | 32.00 MB | 78.00 MB | 124.00 MB | Not supported |
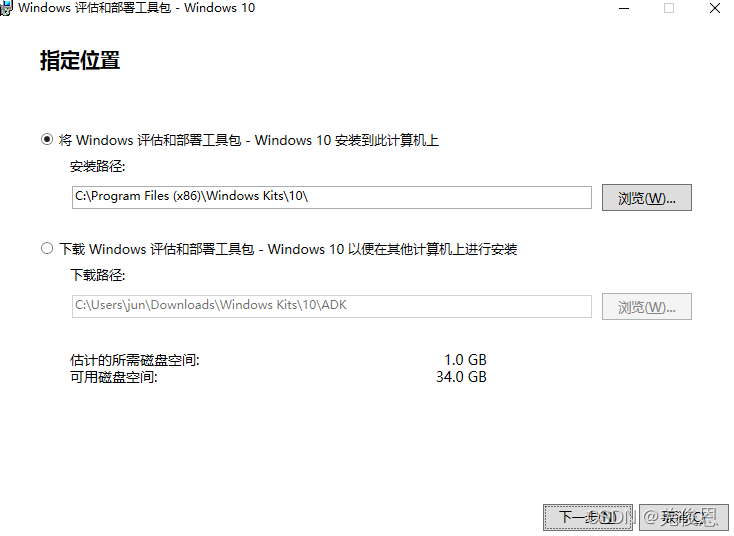
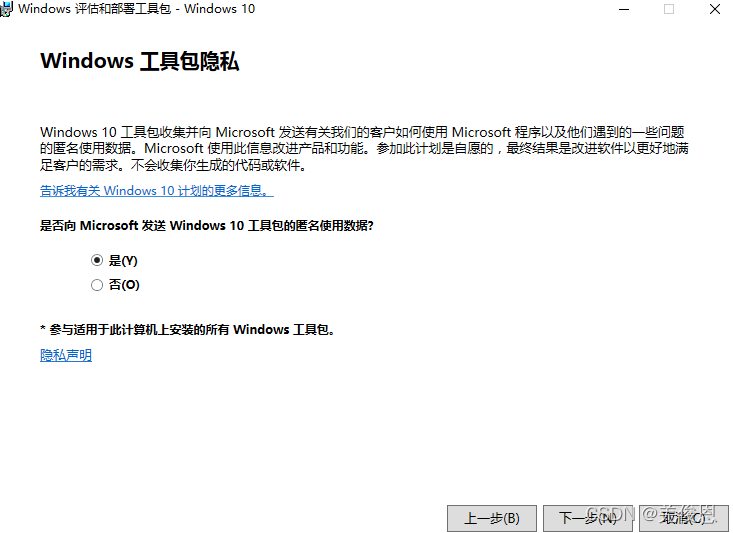
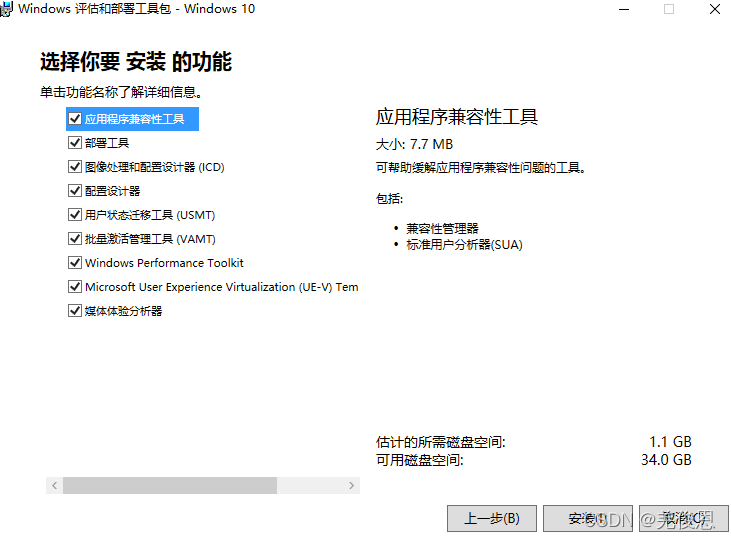
3.2 安装 Windows 评估和部署工具包 (ADK)
下面那我们作为演示,会把Windows 部署服务、MDT 部署共享、SQL 服务器和 MDT 控制台都部署在一台vm上。
1)下载 Windows 评估和部署工具包 (ADK)
2)软件安装
3)安装 Windows 预安装环境 (PE) ADK 加载项
Windows PE 是用于安装、部署和修复 Windows 的小型操作系统。MDT 使用它来创建可启动映像以设置 Windows。
软件下载:ADKWINPESETUP;
4)安装 Microsoft SQL Server
SQL 数据库用于选择哪台机器应该获取哪些任务序列和应用程序。
软件下载:SQL Express
选择基本安装类型下一步安装即可。
5)安装 Microsoft 部署工具包 (MDT)
MDT 有助于自动部署 Windows 操作系统和应用程序。使用 MDT 为 Windows 配置无人参与的安装文件,并将必要的文件打包到一个合并的映像文件中,然后将其部署到引用和目标计算机。
1>下载 Microsoft 部署工具包 (MDT)
软件下载:MicrosoftDeploymentToolkit_x64;
2>默认安装即可。
参考:MDT使用。
6)安装 Windows 部署服务
Windows 部署服务 (WDS) 是一种服务器角色,它使管理员能够通过网络部署 Windows 操作系统。Microsoft WDS 用于加载 MDT 创建的 Windows PE 启动映像以执行 Windows 的安装。
7)配置:
1>启用 SQL Server 协议和浏览器
本过程,我们将启用命名管道协议和 TCP/IP 协议,为 SQL Server 数据库配置 TCP 端口。
1》启动 SQL Server 配置管理器
开始---->Microsoft SQL Server 2019---->QL Server 配置管理器
2》选择命名管道协议
SQL Server 网络配置—>选择SQLEXPRESS 的协议---->双击命名管道—>勾选已启用—启用命名管道
3》配置 TCP 端口
启用 TCP/IP 协议后,选择IP 地址选项卡,在页面底部的IPAll下,将TCP Dynamic Ports设为空白。
输入1433作为TCP 端口,完成后重启 SQL Server 服务。
4》SQL Server 浏览器配置为自启动。
5》启动 SQL Server 浏览器
注意:如开启防火墙,请允许来自 SQL Server 的 TCP 端口 1433 和 UDP 端口 1434 上的入站连接。
2>创建部署共享
此过程创建一个部署共享,该共享将存储用于自动创建 Windows 映像的启动映像、应用程序和驱动程序。
1》新建部署共享
开始----Microsoft 部署工具包—部署工作台----单击部署共享----新建部署共享–指向第二个驱动器–下一步直到完成。
2》添加开箱即用的驱动程序
可将各种显示、网络和鼠标驱动程序导入新的部署共享。MDT 会将这些注入到我们的可引导映像中,并在操作系统安装期间将它们添加到目标中。
将驱动程序复制到新文件夹:从c:\Windows\System32\DriverStore\FileRepository中,将以下列名称开头的文件夹复制到新文件夹:
display.inf
pvscsi.inf
vmmouse.inf
vmusbmouse.inf
vmxnet3.inf
vm3d.inf
从部署共享启动导入驱动程序向导:
在 Deployment Workbench 中,选择之前创建的部署共享,然后右键单击Out-of-Box Drivers。
选择导入驱动程序。过程中输入上述新创建的文件夹的位置,直到完成。只要警告没有说不支持平台 amd64,就可以忽略这些警告。
3》设置部署共享属性
指定计划使用的架构平台,添加规则以在创建映像期间跳过各种提示,提供凭据,并包括您在之前的练习中导入的驱动程序。
在部署工作台中,单击新部署共享的名称,单击属性。单击Edit Bootstrap.ini之前,使用所需的值添加以下规则。
SkipDomainMembership=YES
SkipUserData=YES
SkipFinalSummary=YES
SkipLocaleSelection=YES
SkipBDDWelcome=YES
SkipComputerName=YES
SkipDeploymentType=YES
SkipRoles=YES
SkipSummary=YES
JoinWorkgroup=WORKGROUP
SkipTimeZone=Yes
TimeZoneName=[your timezone]
_SMSTSOrgName=[your company]
可以通过在 Windows 系统上运行以下命令来获取当前时区:
tzutil /g
tzutil /l //获取完整列表
单击编辑 Bootstrap.in,添加规则以跳过欢迎屏幕并提供域凭据:
SkipBDDWelcome=YES
KeyboardLocale=[your locale]
UserID=[your MDT user]
UserPassword=[your password]
UserDomain=[your domain]
4》完成 Windows PE 选项卡
单击Windows PE,选择x64,点击驱动程序和补丁,从选择配置文件中选择包括所有驱动程序,单击确定。
打开更新部署共享向导,右键单击部署共享,选择更新部署共享,完成更新。
5》创建数据库表并配置数据库规则
SQL Server 上创建一个数据库,并配置该数据库以实现基本功能:
1>新建数据库
在部署工作台中,展开部署共享,选择创建的新部署共享,展开高级配置。右键单击数据库,选择新数据库。提供SQL Server 名称,提供实例名称(不使用默认值时),单击下一步;提供表名,使用部署共享。
单击下一步,开始创建数据库,完成后,将返回到主部署工作台窗口,左侧页面中选择了数据库,中间窗格中将显示我们新建的新数据库信息以及右侧窗格中的数据库操作列表。
单击配置数据库规则,仅选择Query for computer-specific settings和Query for to be installed on this computer,单击下一步;单击取消全选位置选项,取消选择品牌/型号选项,取消选择角色选项,开始数据库配置,单击下一步等待配置完成。
6》配置 Windows 部署服务并将它们添加到 DHCP
将 Windows 部署服务 PXE 服务器配置为使用 MDT 生成的映像,并指定要响应的计算机类型。还可以配置引导属性和普通文件传输协议 (TFTP) 属性。完成此配置后,为 PXE 引导设置 DHCP 选项。
1>打开Windows部署服务
管理工具下,选择Windows 部署服务,单击本地服务器。选择配置服务器。选择集成安装选项
单击下一步。 指定远程安装文件夹的路径,配置 PXE 服务器将响应哪些计算机,取消选择立即将图像添加到服务器,单击完成并关闭部署工作台控制台。
2>添加图像
在 Windows 部署服务窗口的本地服务器下,右键单击启动映像,选择添加启动映像。单击浏览,导航到DeploymentShare下的Boot文件夹,选择LiteTouchPE_x64.wim,选择图像文件并单击打开。单击下一步。
打开本地服务器的属性编辑器,在 Windows 部署服务窗口中,右键单击本地服务器,选择属性。单击引导选项卡。为Known clients和Unknown clients选择Always continue the PXE boot。单击TFTP选项卡。
输入1456作为最大块大小,取消选择启用可变窗口扩展,单击确定。完成后,右键单击本地服务器。
选择所有任务。选择重新启动并关闭 Windows 部署服务控制台。
7》将部署服务添加到 DHCP
1>添加 VMware 操作系统优化工具 MDT 插件
下载OS优化工具MDT插件:OSOT Fling 网站,选择VMwareHorizonOSOptimizationToolMDTPlugin zip 文件,点击下载。将Templates和VMware文件夹放在部署共享的根目录中。将Bin文件夹的内容复制到C:\Program Files\Microsoft Deployment Toolkit\Bin。
8)部署
下载应用程序源文件,然后使用 MDT 部署工作台中的新建应用程序向导将这些应用程序源文件导入部署共享上的目录。例如,我们使用 Microsoft Office 2019,但同样的原则适用于任何进入黄金映像的应用程序。
在 Deployment Workbench 中启动 New Application Wizard,在正确的部署共享下,右键单击Applications,选择新应用程序。下一步,将应用程序文件目录导入到部署共享中的目录中,指定应用程序名称、发布者、版本和语言,浏览到带有提取的 Office 文件的文件夹,为将在部署共享上创建的目录提供一个名称,以存储此导入的应用程序,指定运行安装程序的命令行命令,开始导入过程。
1》在 MDT 中添加操作系统
使用 MDT 部署工作台中的导入操作系统向导并将 Windows 操作系统源文件从 ISO 文件导入到部署共享上的目录。
1>导入OS
打开部署工作台,在正确的部署共享下,右键单击操作系统,选择导入操作系统。对于操作系统类型,选择全套源文件;单击浏览。浏览到已安装的 ISO。为将在部署共享上创建以存储操作系统文件的目录提供名称,开始导入,完成后,新导入的操作系统版本会列在部署工作台中,位于指定部署共享的操作系统下。
2》添加 VMware 代理和工具
将下载各种 VMware 代理和工具以及一些第三方工具,并将这些安装程序复制到部署共享上VMware文件夹的正确子文件夹中。
VMware 文件夹:下载操作系统优化工具 MDT 插件、提取其文件和文件夹,以及将VMware文件夹复制到部署共享。
App Volumes 安装程序:VMware App Volumes™ 包含在 Horizon Enterprise Edition 中,可从下载 VMware Horizon页面获得。App Volumes 安装程序作为 ISO 文件分发。将 ISO 内容提取到一个文件夹,以便您可以复制App Volumes Agent.msi文件。将App Volumes Agent.msi文件复制到AppVolumesAgent文件夹中;
Dynamic Environment Manager 安装程序:VMware Dynamic Environment Manager™ 安装程序可从VMware 下载页面获得。它还包含在 Horizon Enterprise Edition 中。MSI 安装程序文件包含在 ZIP 文件中。将VMware Dynamic Environment*.msi文件复制到DEM文件夹中;
Horizon Agent 安装程序:此可执行 ( .exe) 文件可从下载 VMware Horizon页面获得。将VMware-Horizon-Agent*.exe文件复制到HorizonAgent文件夹中;
1>下载并复制各种工具文件到 OSOT 子文件夹
VMwareOSOptimizationTool;
LGPO.exe(本地组策略对象实用程序)
sdelete64.exe(安全删除)
注意:右键单击每个文件 (sdelete64.exe和lgpo.exe),选择Properties,然后在 Properties 对话框中,选择Unblock并单击OK。
2>下载 VMware Tools 安装程序并将其复制到子文件夹
下载VMware-tools-*.exe文件并将其复制到VMwareTools文件夹中;
3>创建和编辑 MDT 任务序列
任务序列是一组指令,告诉部署工具如何创建或部署映像。在此过程中,将使用 VMware 的任务序列模板来创建用于安装和配置 Windows 操作系统和 VMware 代理和工具以及运行操作系统优化工具的任务序列。然后,还将创建 Windows 系统映像的目录,它会创建一个应答文件以运行无人参与的安装。
在 Deployment Workbench 中,在正确的部署共享下,右键单击Task Sequence,选择新建任务序列, 指定任务序列的 ID 和名称,选择VMware OSOT 任务序列,单击下一步。选择操作系统版本和版本,单击下一步。不要指定产品密钥,指定名称和组织,不要指定管理员密码,开始创建任务序列,完成。
4>为 OS 映像生成目录并编辑 Unattend.xml 文件
为操作系统映像生成目录,并使用 Windows 系统映像管理器 (SIM) 编辑无人参与安装的应答文件。
在部署工作台中,选择部署共享下的任务序列,双击您刚刚创建的任务序列前面的图标。单击操作系统信息选项卡,单击编辑 Unattend.xm。等待生成操作系统映像目录,第一次为每个操作系统版本/版本执行此操作时,生成目录的过程需要一段时间。展开amd64_Microsoft-Windows-Deployment。将Reseal 拖到7 oobeSystem。在中间窗格中选择Reseal后,在右侧窗格中,将审核Mode更改为Audit。单击验证图标。
双击第一条消息 ( ColorDepth )。右键单击amd64_Microsoft -Windows-Shell-Setup_neutral下的显示。
选择删除。注意:对于 Windows 服务器映像,有第二个部分 ( SystemRestore ) 需要删除。
双击NetworkLocation is deprecated警告,右键单击NetworkLocation,选择还原更改,保存更改并关闭 Windows SIM。
3》编辑 VMware 代理和操作系统优化的任务
接下来的任务包括安装 VMware Tools、Horizon Agent 和其他代理,以及运行操作系统优化工具。
单击VMware 工具,单击属性选项卡。此页面打开一次很重要,以便 MDT 插件可以检测到版本。可以在此处选择修改 VMware Tools 选项。在优化下,您可以选择修改 VMware 操作系统优化工具优化。在Generalize下,您可以选择修改 VMware OS Optimization Tools Sysprep 选项。对于 RDS 主机,启用远程桌面服务;
注意:如果您要创建 Windows Server 映像来创建 RDSH 场,请同时启用远程桌面服务下的重新启动计算机。目前,RDSH 构建无法使用 OS 优化工具的 MDT 插件完全自动化。当任务序列到达重新启动计算机步骤时,您必须以管理员身份手动登录以允许序列继续。
单击Horizon Agent,以便 MDT 插件可以检测到版本,可以在此处选择修改 Horizon Agent 选项。同理,修改 Dynamic Environment Manager 选项;在App Volumes Agent下,您可以选择修改 App Volumes Manager 信息
4》创建和部署 VM
这里我们使用两个 PowerShell 脚本来完成。
1>安装VMware PowerCLI
启动 PowerShell 控制台并运行Install-Module VMware.PowerCLI
2>安装 VMware 远程控制台
下载地址:行VMware Remote Console Installer
完成安装。
3>使用 VMware 的 PowerShell 脚本
脚本下载:Create or Reset VMs;
使用此脚本和 Microsoft 部署工具包 (MDT) 自动创建 VM,然后 PXE 启动并遵循上述步骤中创建的 MDT 任务序列。然后,MDT 可以使用 OS 优化工具和 MDT 插件来自动安装代理和优化 Windows。
编辑 CreateResetVM.ps1:
将$vCenterServer更改为vCenter Server 的 FQDN。
将$ClusterName更改为集群的名称。
将$ResourcePoolName更改为资源池的名称。
将$SQLServer更改为SQL Server 的 FQDN,在我们的例子中是 MDT Server。
将$SQLDatabase更改为数据库的名称。
使用当前用户凭据时,将$SQLIntegratedAuth更改为$True 。
编辑 VMList.csv 以根据需要修改 VM 列表,这是一个逗号分隔的文件,每行一个虚拟机。字段是:
名称是虚拟机的名称。
TaskSeq是 MDT 任务序列的名称。
数据存储是 vSphere 数据存储的名称。
Network是 vSphere 网络的名称。
文件夹是 vSphere VM 和模板文件夹的名称。
磁盘是 VM 的磁盘空间量,以 GB 为单位。
Mem是 VM 的内存量,以 GB 为单位。
vCPU是 VM 中虚拟 CPU 的数量。
Displays是 VM 将支持的监视器数量。
VideoMem是 VM 的视频内存量,以 GB 为单位。
HWVersion是虚拟机硬件版本。
GuestId对于 Windows 10是Windows9_64Guest ,对于 Windows Server 2016是Windows9Server64Guest ,对于 Windows Server 2019 是Windows2019srv_64Guest。
注意:HWVersion 15 及更早版本没有Windows2019srv_64Guest。对带有 HWVersion 15 及更早版本的 Windows Server 2019使用windows9Server64Guest (Windows Server 2016)。
如果在运行脚本时未在参数中指定 vCenter Server 的凭据,系统将提示您进行身份验证。运行 CreateResetVM.ps1 脚本:
选择要创建或重置的 VM。vmlist.csv从文件中读取 VM 列表。可以使用 Shift 或 Control 键选择多个 VM。
如果首次创建 VM 并且需要在部署前设置应用程序或角色,请选择暂停以将应用程序添加到 MDT 。您可以在 MDT 控制台中添加这些(如果已经打开,则必须重新启动)。
当具有 VM 的 MAC 地址的机器不存在时,选择添加到 MDT 数据库以将 VM 添加到 MDT 数据库。
创建后选择开机以启动虚拟机。
选择远程控制台以启动 VMware 远程控制台窗口以显示进度。
单击确定。
注意:如果选择了添加到 MDT 数据库,系统可能还会提示您对 SQL Server 实例进行身份验证。这取决于是否正在使用集成身份验证,或者您是否将 SQL 用户名和密码指定为参数。
5》更新图像
借助于 Microsoft 部署工具包 (MDT),更新很简单,只需将新事物复制(导入)到部署共享上的正确位置,然后再次运行 PowerShell 脚本以创建新的更新映像。无需重复上文中的大部分步骤。例如:
要更新应用程序,请下载新版本的源文件,然后使用Microsoft 部署工具中的添加应用程序过程添加新文件并覆盖部署共享上的旧文件。
要更新操作系统(功能更新),请下载新版本并使用过程在 MDT 中添加操作系统来添加新的操作系统版本。
要更新其中一个代理,请下载新版本的安装程序并使用过程添加 VMware 代理和工具来添加新文件并删除部署共享上的旧文件。添加新文件后,打开任务序列中的代理部分,以便更新任务序列中代理的安装命令。
将新版本添加到部署共享后,CreateResetVM.ps1再次运行脚本,如使用 VMware 中的 PowerShell 脚本中所述。要简单地安装 Windows 安全补丁或其他类型的 Windows Update 补丁,只需CreateResetVM.ps1再次运行该脚本即可。作为任务序列的一部分,运行 Windows 更新。
四、附录:脚本
1)如果要导出到 OVA,可以使用Export VMs to OVA脚本:
<#
.SYNOPSIS
Script to Export selected VMs to OVA files.
Requires PowerCLI.
Change variables for vCenter below.
List of VMs in comma separated file.

.USAGE
     .\exportvmtoova.ps1 [vmlist.csv] [vCenterUser] [vCenterPassword]

     WHERE
         vmlist.csv       = Comma delimited file with a VM per row. Fields required are: Name.
         vCenterUser      = Username for vCenter Server.
         vCenterPassword  = Password for vCenter Server user.

.EXAMPLES
     .\exportvmtoova.ps1
     .\exportvmtoova.ps1 mylist.csv
     .\exportvmtoova.ps1 mylist.csv [email protected] VMware1!

.ACTIONS
    *Select VMs
    *Select destination directory
    *Export VMs to OVA

.NOTES
    Version:        1.1
    Author:         Graeme Gordon - [email protected]
    Creation Date:  2021/05/19
    Purpose/Change: Export VMs to OVA

    THE SOFTWARE IS PROVIDED "AS IS", WITHOUT WARRANTY OF ANY KIND, EXPRESS OR
    IMPLIED, INCLUDING BUT NOT LIMITED TO THE WARRANTIES OF MERCHANTABILITY,
    FITNESS FOR A PARTICULAR PURPOSE AND NONINFRINGEMENT. IN NO EVENT SHALL
    VMWARE,INC. BE LIABLE FOR ANY CLAIM, DAMAGES OR OTHER LIABILITY, WHETHER
    IN AN ACTION OF CONTRACT, TORT OR OTHERWISE, ARISING FROM, OUT OF OR IN
    CONNECTION WITH THE SOFTWARE OR THE USE OR OTHER DEALINGS IN THE SOFTWARE.
 #>

param([string]$vmListFile = "vmlist.csv", [string] $vCenterUser, [string] $vCenterPassword)

#region variables
################################################################################
#                                    Variables                                 #
################################################################################
#vSphere settings and credentials
$vCenterServer                    = "vcenter.domain.com"
$global:Export_Directory          = "F:\Images"

$global:Demo                      = $False
#endregion variables

function Initialize_Env
{


################################################################################
#               Function Initialize_Env                                        #
################################################################################
    # --- Initialize PowerCLI Modules ---
    Import-Module VMware.VimAutomation.Core
    Set-PowerCLIConfiguration -Scope User -ParticipateInCeip $false -Confirm:$false
    Set-PowerCLIConfiguration -InvalidCertificateAction ignore -Confirm:$false
    Set-PowerCLIConfiguration -DefaultVIServerMode Multiple -Confirm:$false

    # --- Connect to the vCenter server ---
    Do {


        Write-Output "", "Connecting To vCenter Server:"
        #$vc = Connect-VIServer -Server $vCenterServer -User $vCenterUser -Password $vCenterPassword -Force -WarningAction SilentlyContinue
        If (!$vCenterUser)
        {


            $vc = Connect-VIServer -Server $vCenterServer
        }
        elseif (!$vCenterPassword)
        {


            $vc = Connect-VIServer -Server $vCenterServer -User $vCenterUser
        }
        else
        {


            $vc = Connect-VIServer -Server $vCenterServer -User $vCenterUser -Password $vCenterPassword -Force -WarningAction SilentlyContinue
        }
        If (!$vc.IsConnected) {

     Write-Host ("Failed to connect to vCenter Server. Let's try that again.")  -ForegroundColor Red }
    } Until ($vc.IsConnected)
}

function Get_Folder ($Initial_Directory)
{


################################################################################
#             Function Get_Folder                                              #
################################################################################
    [System.Reflection.Assembly]::LoadWithPartialName("System.windows.forms")|Out-Null

    $foldername = New-Object System.Windows.Forms.FolderBrowserDialog
    $foldername.Description = "Select a folder"
    $foldername.rootfolder = "MyComputer"
    $foldername.SelectedPath = $Initial_Directory

    if($foldername.ShowDialog() -eq "OK")
    {


        $folder = $foldername.SelectedPath
    }
    return $folder
}

function Define_GUI
{


################################################################################
#              Function Define_GUI                                             #
################################################################################
    Add-Type -AssemblyName System.Windows.Forms
    Add-Type -AssemblyName System.Drawing

    $global:form                     = New-Object System.Windows.Forms.Form
    $form.Text                       = 'Export VMs to OVA'
    $form.Size                       = New-Object System.Drawing.Size(500,400)
    #$form.Autosize                   = $true
    $form.StartPosition              = 'CenterScreen'
    $form.Topmost                    = $true

    #OK button
    $OKButton                        = New-Object System.Windows.Forms.Button
    $OKButton.Location               = New-Object System.Drawing.Point(300,320)
    $OKButton.Size                   = New-Object System.Drawing.Size(75,23)
    $OKButton.Text                   = 'OK'
    $OKButton.DialogResult           = [System.Windows.Forms.DialogResult]::OK
    $form.AcceptButton               = $OKButton
    $form.Controls.Add($OKButton)

    #Cancel button
    $CancelButton                    = New-Object System.Windows.Forms.Button
    $CancelButton.Location           = New-Object System.Drawing.Point(400,320)
    $CancelButton.Size               = New-Object System.Drawing.Size(75,23)
    $CancelButton.Text               = 'Cancel'
    $CancelButton.DialogResult       = [System.Windows.Forms.DialogResult]::Cancel
    $form.CancelButton = $CancelButton
    $form.Controls.Add($CancelButton)

    #Browse for Directory button
    $BrowseButton                    = New-Object System.Windows.Forms.Button
    $BrowseButton.Location           = New-Object System.Drawing.Point(300,40)
    $BrowseButton.Size               = New-Object System.Drawing.Size(150,23)
    $BrowseButton.Text               = 'Select Destination'
    $BrowseButton.Add_Click({

     $global:Export_Directory = Get_Folder $Export_Directory })
    $form.Controls.Add($BrowseButton)

    #Checkbox on whether to demo actions
    $global:DemoSelect                = New-Object System.Windows.Forms.CheckBox
    $DemoSelect.Location              = New-Object System.Drawing.Point(300,80)
    $DemoSelect.Size                  = New-Object System.Drawing.Size(200,23)
    $DemoSelect.Text                  = 'Demo'
    $DemoSelect.Checked               = $Demo
    $DemoSelect.Add_CheckStateChanged({

     $global:Demo = $DemoSelect.Checked })
    $form.Controls.Add($DemoSelect)

    #Text above list box of VMs
    $label                          = New-Object System.Windows.Forms.Label
    $label.Location                 = New-Object System.Drawing.Point(10,20)
    $label.Size                     = New-Object System.Drawing.Size(250,20)
    $label.Text                     = 'Select VMs from the list below:'
    $form.Controls.Add($label)

    #List box for selection of VMs
    $global:listBox                 = New-Object System.Windows.Forms.Listbox
    $listBox.Location               = New-Object System.Drawing.Point(10,40)
    $listBox.Size                   = New-Object System.Drawing.Size(260,250)
    $listBox.Height                 = 250
    $listBox.SelectionMode          = 'MultiExtended'
    ForEach ($vm in $vmlist)
    {


        [void] $listBox.Items.Add($vm.Name)
    }
    $form.Controls.Add($listBox)
}

#region logic
################################################################################
#                                    Logic                                     #
################################################################################
$global:vmlist = Import-Csv $vmListFile

Define_GUI
$result = $form.ShowDialog()
if ($result -eq [System.Windows.Forms.DialogResult]::OK)
{


    #Write-Host ("OK Button Pressed") -ForegroundColor Green
    $selection = $listBox.SelectedItems

    If ($selection)
    {


        Write-Host ("Selected VMs:     " + $selection) -ForegroundColor Yellow
        Write-Host ("Export Directory: " + $Export_Directory) -ForegroundColor Yellow
        Write-Host ("Demo:             " + $Demo) -ForegroundColor Green

        Initialize_Env
        Add-Type -AssemblyName 'PresentationFramework'

        ForEach ($vm in $vmlist)
        {


            If ($selection.Contains($vm.Name))
            {


                $vmrecord = Get-VM -Name $vm.Name -ErrorAction SilentlyContinue
                if ($vmrecord)
                {


                    Write-Host ("Export VM: " + $vm.Name) -ForegroundColor Green
                    If (!$Demo) {

     $vmrecord | Export-VApp -Destination $Export_Directory -Format Ova -Force }
                }
                else
                {


                    Write-Host ("VM does not exist: " + $vm.Name) -ForegroundColor Red
                }
            }
        }
    }
    else
    {


        Write-Host ("No VMs Selected") -ForegroundColor Yellow
    }
}
else
{


    #Write-Host ("Cancel Button Pressed") -ForegroundColor Red
}
#endregion logic
2) CreateResetVM.ps1 脚本:
<#
.SYNOPSIS
Script to select VMs to create or reset, and then add them to Microsoft Deployment Toolkit, power on and open console.
Requires PowerCLI.
Change variables for vCenter and the MDT SQL database below.
List of VMs in comma separated file.

.USAGE
     .\createresetvm.ps1 [vmlist.csv] [vCenterUser] [vCenterPassword] [MDTUser] [MDTPassword]

     WHERE
         vmlist.csv       = Comma delimited file with a VM per row. Fields are: Name,TaskSeq,Datastore,Network,Folder,Disk,Mem,vCPU,Displays,VideoMem,HWVersion,GuestId
         vCenterUser      = Username for vCenter Server.
         vCenterPassword  = Password for vCenter Server user.
         MDTUser          = Username with rights to the MDT SQL database.
         MDTPassword      = Password for MDT database user

.EXAMPLES
     .\createresetvm.ps1
     .\createresetvm.ps1 mylist.csv
     .\createresetvm.ps1 mylist.csv [email protected] VMware1!
     .\createresetvm.ps1 mylist.csv [email protected] VMware1! mdtuser sqlpassword

.ACTIONS
    *Select VMS
    *Select actions
    *Create - New VM using spec defined
    *Reset existing VM - Power Off, remove any snapshots, delete hard disk from VMs, add new hard disk
    *Optionally add computer object to Microsoft Deployment Toolkit (MDT) database
    *Optionally power on VM
    *Optionally open remote console

 .NOTES
    Version:        1.7
    Author:         Graeme Gordon - [email protected]
    Creation Date:  2022/02/08
    Purpose/Change: Create or reset virtual machines

    THE SOFTWARE IS PROVIDED "AS IS", WITHOUT WARRANTY OF ANY KIND, EXPRESS OR
    IMPLIED, INCLUDING BUT NOT LIMITED TO THE WARRANTIES OF MERCHANTABILITY,
    FITNESS FOR A PARTICULAR PURPOSE AND NONINFRINGEMENT. IN NO EVENT SHALL
    VMWARE,INC. BE LIABLE FOR ANY CLAIM, DAMAGES OR OTHER LIABILITY, WHETHER
    IN AN ACTION OF CONTRACT, TORT OR OTHERWISE, ARISING FROM, OUT OF OR IN
    CONNECTION WITH THE SOFTWARE OR THE USE OR OTHER DEALINGS IN THE SOFTWARE.
 #>

param([string]$vmListFile = “vmlist.csv”, [string] $vCenterUser, [string] $vCenterPassword, [string] $SQLUser, [string] $SQLPassword )

#region variables
################################################################################
#                                    Variables                                 #
################################################################################
#vSphere settings and credentials
$vCenterServer                     = "vcenter3.eucmobility.com"
$ClusterName                       = "AMD-7002"
$ResourcePoolName                  = ""
$scsiControllerType                = "ParaVirtual" # ParaVirtual or VirtualLsiLogicSAS

#SQL Server settings for MDT database
$SQLServer                         = "sql1"
$SQLPort                           = 1433
$SQLDatabase                       = "mdt"
$SQLIntegratedAuth                 = $True
$global:SQLConnected               = $False

#Control default settings
$global:AddtoMDT                   = $True
$global:PauseforApps               = $True
$global:StartVM                    = $True
$global:OpenConsole                = $True
$global:Demo                       = $False

$MacAddress                        = "00:00:00:00:00:00"
#endregion variables

function Initialize_Env
{


################################################################################
#               Function Initialize_Env                                        #
################################################################################
    # --- Initialize PowerCLI Modules ---
    #Get-Module -ListAvailable VMware* | Import-Module
    Import-Module VMware.VimAutomation.Core
    Set-PowerCLIConfiguration -Scope User -ParticipateInCeip $false -Confirm:$false
    Set-PowerCLIConfiguration -InvalidCertificateAction ignore -Confirm:$false
    Set-PowerCLIConfiguration -DefaultVIServerMode Multiple -Confirm:$false

    # --- Connect to the vCenter server ---
    Do {


        Write-Output "", "Connecting To vCenter Server:"
        #$vc = Connect-VIServer -Server $vCenterServer -User $vCenterUser -Password $vCenterPassword -Force -WarningAction SilentlyContinue
        If (!$vCenterUser)
        {


            $vc = Connect-VIServer -Server $vCenterServer
        }
        elseif (!$vCenterPassword)
        {


            $vc = Connect-VIServer -Server $vCenterServer -User $vCenterUser
        }
        else
        {


             $vc = Connect-VIServer -Server $vCenterServer -User $vCenterUser -Password $vCenterPassword -Force -WarningAction SilentlyContinue
        }
        If (!$vc.IsConnected) {

     Write-Host ("Failed to connect to vCenter Server. Let's try that again.")  -ForegroundColor Red }
    } Until ($vc.IsConnected)
}

function CreateVM ($vm)
{


################################################################################
#               Function CreateVM                                              #
################################################################################
    #Determine if the portgroup is on a distributed or standard switch
    $pg = Get-VirtualPortGroup -Name $vm.Network

	$vCPU = [int]$vm.vCPU
	#Create VM
	If ($pg.ExtensionData.Config) #Portgroup is on Distributed virtual switch
    {


		New-VM -Name $vm.Name -ResourcePool $ResourcePool -HardwareVersion $vm.HWVersion -GuestId $vm.GuestId -DiskGB $vm.Disk -DiskStorageFormat Thin -NumCpu $vCPU -CoresPerSocket $vm.corespersocket -MemoryGB $vm.Mem -Datastore $vm.Datastore -Location $vm.Folder -Portgroup $pg
    }
    else #Portgroup is on Standard virtual switch
    {


		New-VM -Name $vm.Name -ResourcePool $ResourcePool -HardwareVersion $vm.HWVersion -GuestId $vm.GuestId -DiskGB $vm.Disk -DiskStorageFormat Thin -NumCpu $vCPU -CoresPerSocket $vm.corespersocket -MemoryGB $vm.Mem -Datastore $vm.Datastore -Location $vm.Folder -NetworkName $vm.Network
    }
	#Read-Host -Prompt "Press any key to continue"
    $vmobj = Get-VM -Name $vm.Name

    #Reserve Memory
    Write-Host ("Reserving Memory") -ForegroundColor Yellow
    $spec = New-Object VMware.Vim.VirtualMachineConfigSpec
    $spec.memoryReservationLockedToMax = $true
    $vmobj.ExtensionData.ReconfigVM_Task($spec)

    #Change scsi Controller to VMware Para Virtual
    Write-Host ("Setting SCSI Controller to " + $scsiControllerType) -ForegroundColor Yellow
    $scsiController = Get-HardDisk -VM $vm.Name | Select -First 1 | Get-ScsiController
    Set-ScsiController -ScsiController $scsiController -Type $scsiControllerType

    #Change Network Adapter to vmxnet3
    Write-Host ("Set Network Adapter to vmxnet3") -ForegroundColor Yellow
    $vmobj | Get-NetworkAdapter | Set-NetworkAdapter -Type Vmxnet3 -Confirm:$false

    #Set Video Displays and Memory and deselect Secure Boot
    Write-Host ("Configure Video to " + $vm.Displays + " displays and " + $vm.VideoMem + " video RAM") -ForegroundColor Yellow
    $vmobj | %{


        $vid = $_.ExtensionData.Config.Hardware.Device | ?{

    $_.GetType().Name -eq "VirtualMachineVideoCard"}
        $spec = New-Object VMware.Vim.VirtualMachineConfigSpec
        $devChange = New-Object VMware.Vim.VirtualDeviceConfigSpec
        $devChange.Operation = 'edit'
        $vid.NumDisplays = $vm.Displays
        $vid.VideoRamSizeInKB = $vm.VideoMem/1KB
        $devChange.Device += $vid
        $spec.DeviceChange += $devChange

        #Deselect Secure Boot
        $spec.Firmware = [VMware.Vim.GuestOsDescriptorFirmwareType]::efi
        $boot = New-Object VMware.Vim.VirtualMachineBootOptions
        $boot.EfiSecureBootEnabled = $false
        $spec.BootOptions = $boot

        $_.ExtensionData.ReconfigVM($spec)
    }

    #Set Advanced Configuration Parameters
    Write-Host ("Set Advanced Configuration Parameters: devices.hotplug = false") -ForegroundColor Yellow
    $vmobj | New-AdvancedSetting -Name devices.hotplug -Value FALSE -Confirm:$False
}

function ResetVM ($vm)
{


################################################################################
#               Function ResetVM                                               #
################################################################################
    $vmobj = Get-VM -Name $vm.Name
    if ($vmobj.powerstate -eq "PoweredOn") {

    Stop-VM -vm $vmobj -Confirm:$false} #if VM is powered on, power off

    #Delete any snaphots
    $snaps = Get-Snapshot -VM $vmobj
    ForEach ($snap in $snaps)
    {


        Write-Host ("Deleting snapshot") -ForegroundColor Yellow
        Remove-Snapshot -Snapshot $snap -RemoveChildren -Confirm:$false
    }

    #Delete the old hard disk and create a new hard disk
    Write-Host ("Deleting old hard disk") -ForegroundColor Yellow
    Get-HardDisk -vm $vmobj | Remove-HardDisk -DeletePermanently:$true -Confirm:$false #Remove old hard disk

    Write-Host ("Adding new hard disk") -ForegroundColor Yellow
    New-HardDisk -VM $vmobj -CapacityGB $vm.Disk -StorageFormat thin | New-ScsiController -Type $scsiControllerType #Add new hard disk
}

function Connect-MDTDatabase ($server, $port, $db, $user, $password)
{


################################################################################
#               Function Connect-MDTDatabase                                   #
################################################################################
    Do {


        If (!$user -And !$SQLIntegratedAuth) #Need username and password or last  attempt failed.
        {


            if($SQLCred = $host.ui.PromptForCredential("SQL credentials", "Enter credentials for MDT database","", "")){

    }else{

    return}
            $user = $SQLCred.UserName
            $BSTR = [System.Runtime.InteropServices.Marshal]::SecureStringToBSTR($SQLCred.Password) #Convert Password
            $password = [System.Runtime.InteropServices.Marshal]::PtrToStringAuto($BSTR)
        }

        #Form connection string and open a connection
        If ($SQLIntegratedAuth)
        {


            $connString = "Server = $server, $port; Database = $db; Integrated Security = True"
        }
        else
        {


            $connString = "Server = $server, $port; Database = $db; Integrated Security = False; User ID=$user; Password=$password"
        }
        $global:mdtSQLConnection = New-Object System.Data.SqlClient.SqlConnection
        $mdtSQLConnection.ConnectionString = $connString
        $mdtSQLConnection.Open()

        #Check to see if we managed to connect
        If ($mdtSQLConnection.State -eq "Open")
        {


            $global:SQLConnected = $True
        }
        else
        {


            Write-Host ("Failed to connect to MDT SQL Server. Let's try that again.")  -ForegroundColor Red
            $global:SQLConnected = $False
            $user = $null
        }
    } Until ($global:SQLConnected)
    Write-Host ("Connected to MDT SQL Server.")  -ForegroundColor Green
}

function Get-MDTComputer ( $macAddress )
{


################################################################################
#               Function Get-MDTComputer                                       #
################################################################################
    # Specified the initial command
    $sql = "SELECT * FROM ComputerSettings WHERE "

    if ($macAddress -ne "")
    {


        $sql = "$sql MacAddress='$macAddress'"
    }

    $selectAdapter = New-Object System.Data.SqlClient.SqlDataAdapter($sql, $mdtSQLConnection)
    $selectDataset = New-Object System.Data.Dataset
    $null = $selectAdapter.Fill($selectDataset, "ComputerSettings")
    $selectDataset.Tables[0].Rows
}

function New-MDTComputer
{


################################################################################
#               Function New-MDTComputer                                       #
################################################################################
    [CmdletBinding()]
    PARAM
    (
        [Parameter(ValueFromPipelineByPropertyName=$true)] $MacAddress,
        [Parameter(ValueFromPipelineByPropertyName=$true)] $Description,
        [Parameter(ValueFromPipelineByPropertyName=$true, Mandatory=$true)] $Settings
    )

    # Insert a new computer row into the ComputerIdentity table
    $sql = "INSERT INTO ComputerIdentity (Description, MacAddress) VALUES ('$Description', '$MacAddress') SELECT @@IDENTITY"

    Write-Verbose "About to execute command: $sql"
    $identityCmd = New-Object System.Data.SqlClient.SqlCommand($sql, $mdtSQLConnection)
    $identity = $identityCmd.ExecuteScalar()

    Write-Verbose "Added computer identity record"

    # Insert the settings row, adding the values as specified in the hash table
    $settingsColumns = $Settings.Keys -join ","
    $settingsValues = $Settings.Values -join "','"
    $sql = "INSERT INTO Settings (Type, ID, $settingsColumns) VALUES ('C', $identity, '$settingsValues')"

    Write-Verbose "About to execute command: $sql"
    $settingsCmd = New-Object System.Data.SqlClient.SqlCommand($sql, $mdtSQLConnection)
    $null = $settingsCmd.ExecuteScalar()
}

function Define_GUI
{


################################################################################
#              Function Define_GUI                                             #
################################################################################
    Add-Type -AssemblyName System.Windows.Forms
    Add-Type -AssemblyName System.Drawing

    $global:form                     = New-Object System.Windows.Forms.Form
    $form.Text                       = 'Create or Reset Virtual Machines'
    $form.Size                       = New-Object System.Drawing.Size(500,400)
    #$form.Autosize                   = $true
    $form.StartPosition              = 'CenterScreen'
    $form.Topmost                    = $true

    #OK button
    $OKButton                        = New-Object System.Windows.Forms.Button
    $OKButton.Location               = New-Object System.Drawing.Point(300,320)
    $OKButton.Size                   = New-Object System.Drawing.Size(75,23)
    $OKButton.Text                   = 'OK'
    $OKButton.DialogResult           = [System.Windows.Forms.DialogResult]::OK
    $form.AcceptButton               = $OKButton
    $form.Controls.Add($OKButton)

    #Cancel button
    $CancelButton                    = New-Object System.Windows.Forms.Button
    $CancelButton.Location           = New-Object System.Drawing.Point(400,320)
    $CancelButton.Size               = New-Object System.Drawing.Size(75,23)
    $CancelButton.Text               = 'Cancel'
    $CancelButton.DialogResult       = [System.Windows.Forms.DialogResult]::Cancel
    $form.CancelButton = $CancelButton
    $form.Controls.Add($CancelButton)

    #Checkbox to allow pause for adding applicatons to MDT computer
    $global:AppsSelect               = New-Object System.Windows.Forms.CheckBox
    $AppsSelect.Location             = New-Object System.Drawing.Point(300,40)
    $AppsSelect.Size                 = New-Object System.Drawing.Size(200,23)
    $AppsSelect.Text                 = 'Pause to add apps to MDT'
    $AppsSelect.Checked              = $PauseforApps
    $AppsSelect.Add_CheckStateChanged({

     $global:PauseforApps = $AppsSelect.Checked })
    $form.Controls.Add($AppsSelect)

    #Checkbox on whether to try adding to MDT
    $global:MDTSelect                = New-Object System.Windows.Forms.CheckBox
    $MDTSelect.Location              = New-Object System.Drawing.Point(300,80)
    $MDTSelect.Size                  = New-Object System.Drawing.Size(200,23)
    $MDTSelect.Text                  = 'Add to MDT database'
    $MDTSelect.Checked               = $AddtoMDT
    $MDTSelect.Add_CheckStateChanged({

     $global:AddtoMDT = $MDTSelect.Checked })
    $form.Controls.Add($MDTSelect)

    #Checkbox on whether to power on VM
    $global:PowerSelect              = New-Object System.Windows.Forms.CheckBox
    $PowerSelect.Location            = New-Object System.Drawing.Point(300,120)
    $PowerSelect.Size                = New-Object System.Drawing.Size(200,23)
    $PowerSelect.Text                = 'Power on'
    $PowerSelect.Checked             = $StartVM
    $PowerSelect.Add_CheckStateChanged({

     $global:StartVM = $PowerSelect.Checked })
    $form.Controls.Add($PowerSelect)

    #Checkbox on whether to open remote console to VM
    $global:ConsoleSelect            = New-Object System.Windows.Forms.CheckBox
    $ConsoleSelect.Location          = New-Object System.Drawing.Point(300,160)
    $ConsoleSelect.Size              = New-Object System.Drawing.Size(200,23)
    $ConsoleSelect.Text              = 'Remote console'
    $ConsoleSelect.Checked           = $OpenConsole
    $ConsoleSelect.Add_CheckStateChanged({

     $global:OpenConsole = $ConsoleSelect.Checked })
    $form.Controls.Add($ConsoleSelect)

    #Checkbox on whether to demo actions
    $global:DemoSelect                = New-Object System.Windows.Forms.CheckBox
    $DemoSelect.Location              = New-Object System.Drawing.Point(300,200)
    $DemoSelect.Size                  = New-Object System.Drawing.Size(200,23)
    $DemoSelect.Text                  = 'Demo'
    $DemoSelect.Checked               = $Demo
    $DemoSelect.Add_CheckStateChanged({

     $global:Demo = $DemoSelect.Checked })
    $form.Controls.Add($DemoSelect)

    #Text above list box of VMs
    $label                            = New-Object System.Windows.Forms.Label
    $label.Location                   = New-Object System.Drawing.Point(10,20)
    $label.Size                       = New-Object System.Drawing.Size(280,20)
    $label.Text                       = 'Select VMs from the list below:'
    $form.Controls.Add($label)

    #List box for selection of VMs
    $global:listBox                   = New-Object System.Windows.Forms.Listbox
    $listBox.Location                 = New-Object System.Drawing.Point(10,40)
    $listBox.Size                     = New-Object System.Drawing.Size(260,250)
    $listBox.SelectionMode            = 'MultiExtended'
    ForEach ($vm in $vmlist)
    {


        [void] $listBox.Items.Add($vm.Name)
    }
    $listBox.Height = 250
    $form.Controls.Add($listBox)
}

#region main
################################################################################
#              Main                                                            #
################################################################################
Clear-Host
$global:vmlist = Import-Csv $vmListFile

Define_GUI
$result = $form.ShowDialog()
if ($result -eq [System.Windows.Forms.DialogResult]::OK)
{


    #Write-Host ("Button Pressed") -ForegroundColor Green
    $selection = $listBox.SelectedItems


    If ($selection)
    {


        Write-Host ("Selected VMs:   " + $selection) -ForegroundColor Yellow
        Write-Host ("Pause for Apps: " + $PauseforApps) -ForegroundColor Green
        Write-Host ("Add to MDT:     " + $AddtoMDT) -ForegroundColor Green
        Write-Host ("Start VM:       " + $StartVM) -ForegroundColor Green
        Write-Host ("Open Console:   " + $OpenConsole) -ForegroundColor Green
        Write-Host ("Demo:           " + $Demo) -ForegroundColor Green

        Initialize_Env
        Add-Type -AssemblyName 'PresentationFramework'

        If ($ResourcePoolName -ne "") {

     $ResourcePool = Get-ResourcePool -Name $ResourcePoolName }
        Else {

     $ResourcePool = Get-Cluster -Name $ClusterName }

        ForEach ($vm in $vmlist)
        {


            If ($selection.Contains($vm.Name))
            {


                $Exists = get-vm -name $vm.name -ErrorAction SilentlyContinue
                If ($Exists)
                {


                    #Reset the VM and replace its hard drive with a blank disk
                    Write-Host ("Resetting VM: " + $vm.Name) -ForegroundColor Yellow
                    If (!$Demo) {

     ResetVM $vm }
                }
                Else
                {


                    #Create a new VM
                    Write-Host ("Creating new VM: " + $vm.Name) -ForegroundColor Yellow
                    If (!$Demo) {

     CreateVM -VM $vm }
                }

                If ($AddtoMDT)
                {


                    If (!$SQLConnected) {

     Connect-MDTDatabase $SQLServer $SQLPort $SQLDatabase $SQLUser $SQLPassword } #Connect to MDT Database
                    If (!$Demo)
                    {


                        $nic = Get-NetworkAdapter -vm $vm.name
                        $MacAddress = ($nic.MacAddress).ToUpper()
                    }
                    If ($SQLConnected)
                    {


                        $mdtentry = Get-MDTComputer $MacAddress #Check to see if there is already an entry in the MDT databse for this VM
                        If (-Not $mdtentry)
                        {


                            #Add a new Computer entry to the MDT database
                            Write-Host ("Add new entry to MDT database: " + $vm.Name + "; " + $MacAddress) -ForegroundColor Yellow
                            If (!$Demo) {

     New-MDTComputer -Description $vm.Name -MacAddress $MacAddress -Settings @{

    TaskSequenceID=$vm.TaskSeq; OSInstall="YES"; SkipApplications="yes"; SkipTaskSequence="yes"} -verbose }
                        }
                    }
                }

                If ($PauseforApps)
                {


                    #Prompt to add applications to computer in MDT
                    [void] [System.Windows.MessageBox]::Show( "Add applications to the computer in MDT. Press OK when complete.", $vm.Name, "OK", "Information" )
                }

                If ($StartVM)
                {


                    #Power on VM
                    Write-Host ("Power on VM: " + $vm.Name) -ForegroundColor Yellow
                    If (!$Demo) {

     Get-VM -Name $vm.Name | Start-VM -Confirm:$false }

                    If ($OpenConsole)
                    {


                        #Open Remote Console to VM
                        Write-Host ("Open Remote Console to VM: " + $vm.Name) -ForegroundColor Yellow
                        If (!$Demo)  {

     Get-VM -Name $vm.Name | Open-VMConsoleWindow }
                    }
                }
            }
        }
    }
    else
    {


        Write-Host ("No VMs Selected") -ForegroundColor Yellow
    }
}
else
{


    #Write-Host ("Cancel Button Pressed") -ForegroundColor Red
}
#endregion main