文章目录
-
- 一、注册gitee并配置
- 二、常用操作命令:
-
- 2.1 pull&push
- 2.2 add&commit
- 2.3 常见错误
-
- 2.3.1 `fatal: bad boolean config value '“false”' for 'http.sslverify`
- 2.3.2`error: RPC failed curl 56 OpenSSL SSL read Connection was reset`。
- 2.3.3 `unable to access ‘https:...‘: OpenSSL SSL_read: Connection was reset, errno 10054`。
- 2.3.4 github push时 登录失败,但明明输入的是正确的账号密码
- 2.3.5 `remote: Support for password authentication was removed on August 13, 2021.(SSH令牌解决法)`
- 2.3.6 `git commit 提交不了 error: pathspec 'project'' did not match any file(s) known to git.`
- 2.3.7 `error: failed to push some refs to ''xxx.git'`
- 2.3.8 `warning: LF will be replaced by CRLF inXXX`
- 三、其它
gitee使用教程
参考资料: 《gitee使用教程,创建项目仓库并上传代码》、 《同一台机器配置多个SSH,同时绑定Coding,Github和Gitee》、 《不会码云Gitee怎样实战使用?看完它你就知道了》。
一、注册gitee并配置
1.1 配置git
$git config --global user.name "xxx"           //配置用户名
$git config --global user.email "xxx"          //配置注册邮箱
$git config --global --list                    //查看当前用户(global)配置
user.name=zhxnlp
user.email=xxx@gmail.com
http.postbuffer=524288000
1.2配置ssh免密访问
配置免密访问 Gitee.com 。为了能够向刚创建的仓库提交代码,需要配置加密的密匙到 Gitee.com ,在实现通信加密的同时,不需要用户每次都验证账号输入密码。
- 打开Git Bash,进入~/.ssh目录
cd ~/.ssh
ssh-keygen -t rsa -b 4096 -C "[email protected]"#生成 github_rsa公钥
ssh-keygen -t rsa -C "[email protected]"#生成 gitee_rsa公钥
在提示Enter passphrase 和 Enter same passphrase again : 都按回车
在提示“Enter file in which to save the key” 时分别输入github_rsa和Gitee.rsa。
注意:这里的[email protected]只是生成的 sshkey 的名称,并不约束或要求具体命名为某个邮箱。
在.ssh目录中,touch ~/.ssh/config新建两个文本文件 config 和 known_hosts。在 config 文件中加入以下内容:
# gitee 指定私钥路径
Host gitee.com
HostName gitee.com
PreferredAuthentications publickey
IdentityFile ~/.ssh/id_rsa
User zhxnlp
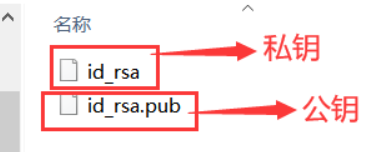
- 绑定Gitee SSH
- 打开gitee_rsa.pub,将里面的内容全部复制
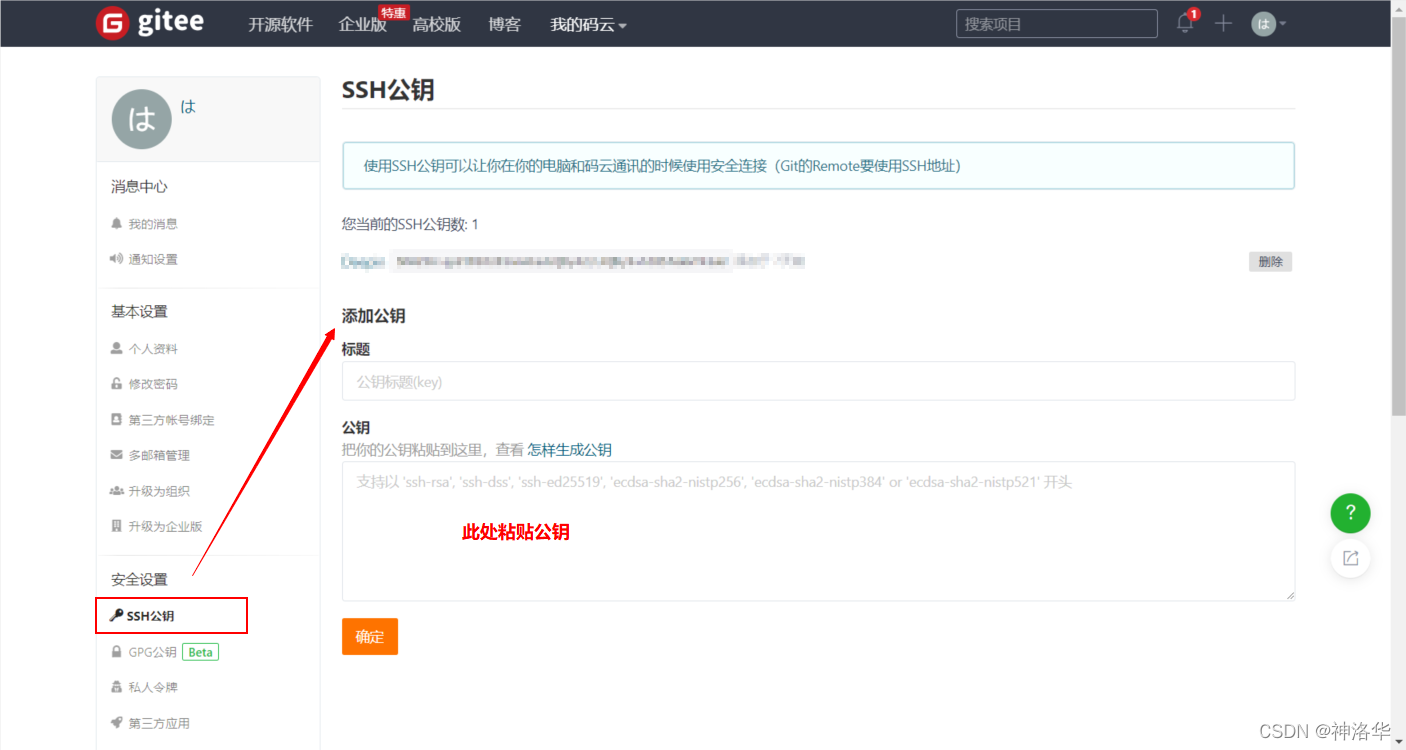
- 登录Gitee,在任何页面的右上角点击个人资料照片处,点击【设置】
- 点击左栏【安全设置】下的【SSH公钥】
- 将前面复制的公钥,粘贴在【添加公钥】下的“公钥”字段中
- 点击【确定】,然后输入账户密码即可成功添加公钥
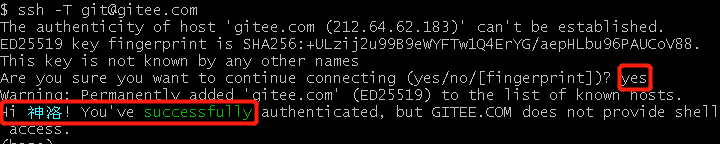
- 完成后在命令行测试,首次建立链接会要求信任主机。命令
ssh -T [email protected]
1.3 克隆gitee仓库和提交
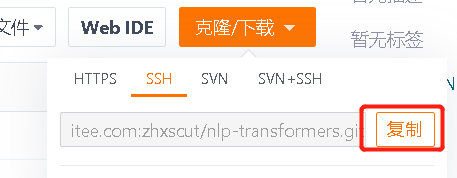
新建gitee文件夹,打开git bash,输入git clone [email protected]:zhxscut/nlp-transformers.git。
git clone后面地址就是仓库的ssh地址:
之后就是正常提交环节。(我的gitee仓库是已经有文件了,本地克隆后没有再git init初始化)
二、常用操作命令:
2.1 pull&push
初始化本地仓库,推送到空的git 仓库。
create a new repository on the command line
echo "# nlp-transformers" >> README.md
git init#本地仓库初始化
git add README.md
git add .#添加当前目录所有文件
git commit -m "first commit"
#此时本地仓库默认分支是master,直接提交需要合并到远程仓库mian,比较麻烦
git branch -M main#将本地仓库默认改为mian分支
git remote add origin https://github.com/zhxnlp/nlp-transformers.git
git push -u origin main
推送现有本地仓库
#git remote add origin https://github.com/zhxnlp/nlp-transformers.git
#git branch -M main
git pull origin mian
git push -u origin main

git rm -r --cached filename#取消提交缓存
git config core.autocrlf false#把windows格式(CRLF(也就是回车换行))转换成Unix格式(LF)。
每次提交貌似都要全部提交,即git add.
2.2 add&commit
git add .                    #添加当前目录所有文件
git status                   #查看状态
git commit -m "first commit"
git rm --cached filename     #移除这个文件缓存
git log #                    #查看所有产生的 commit 记录
git commit -am .             #add和commit合并
git branch a                 #新建分支a
git checkout a				 #切换分支a
git checkout -b a            #新建并自动切换分支
git branch -d				 #删除分支。如果a分支的代码还没有合并到master,则无法删除
git branch -D				 #强制删除分支
2.3 常见错误
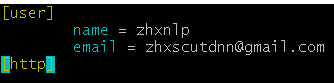
2.3.1 fatal: bad boolean config value '“false”' for 'http.sslverify
从仓库克隆到本地时报错,是因为config --list的最后一行为false。输入git config --global --edit将最后一行删掉。
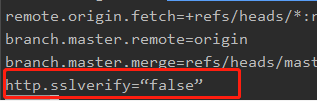
也可以看到自己的账户信息
2.3.2error: RPC failed curl 56 OpenSSL SSL read Connection was reset。
git clone时出现错误原因是curl的postBuffer的默认值较小,需要在终端调整为到合适的大小,这里调整到500M
git config --global http.postBuffer 524288000
#之后可以输入以下命令查看
git config --list
2.3.3 unable to access ‘https:...‘: OpenSSL SSL_read: Connection was reset, errno 10054。
使用git clone 指令获取github项目时报错。解决方法,将url链接地址中的https改写为git。push时报错可以重启git bash。
git clone https://github.com/....git
Cloning into 'vue'...
fatal: unable to access 'https://github.com/....git/': OpenSSL SSL_read: Connection was reset, errno 10054

git clone git://github.com/....git
push时失败报这个错:
解决方法一:取消 git 对 SSL 的检验:git config --global http.sslVerify "false"
解决方法二:在git隐藏文件夹下:将 .git/cofig 文件中的 url 进行修改
url = https://github.com/zhxnlp/nlp-transformers.git改为url = [email protected]:zhxnlp/nlp-transformers.git
2.3.4 github push时 登录失败,但明明输入的是正确的账号密码
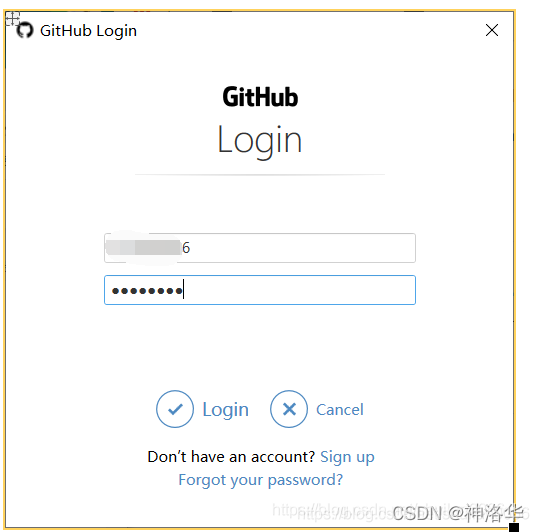
执行 :git update-git-for-windows
执行后,会更新git git更新 重新push的界面如下
这样只要你网页等登录github ,就可以登录了
2.3.5 remote: Support for password authentication was removed on August 13, 2021.(SSH令牌解决法)
大意:远程:2021 年 8 月 13 日移除了对密码身份验证的支持。请改用个人访问令牌。
即github不支持密码验证的方案了,用personal access token代替。
-
在Github上生成token
GitHub 帐户,转到Settings => Developer Settings => Personal Access Token => Generate New Token (Give your password) => Fill up the form(选择所有选项) => Generate token =>复制generated Token。它将类似于ghp_sFhFsSHhTzMDreGRLjmks4Tzuzgthdvfsrta(刷新就看不到了,要及时保存) -
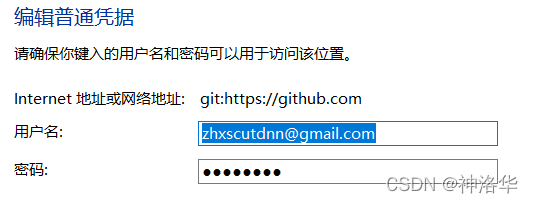
将本地的凭证改为
Personal Access Token
控制面板 -> 凭据管理器(或者直接控制面板搜索凭证打开) -> Windows凭据 -> 找到git:https://github.com,将凭据改为前面生成的token即可。
之前没有github凭证的,单击添加通用凭据=> 互联网地址将是git:https://github.com,用户名为gith邮箱。密码是GitHub 个人访问令牌。
2.3.6 git commit 提交不了 error: pathspec 'project'' did not match any file(s) known to git.
在Linux系统中,commit信息使用单引号,而windows系统,commit信息使用双引号。
所以在git bash中git commit -m ‘提交说明’ 这样是可以的,但是在win命令行中就要使用双引号
2.3.7 error: failed to push some refs to ''xxx.git'
报错:hint: Updates were rejected because the remote contains work that you do
估计是本地和远程仓库代码不一致冲突了。
git push origin master -f强制覆盖远程仓库- 在git push前执行git pull命令,如下:
git pull origin mian
git push origin main
2.3.8 warning: LF will be replaced by CRLF inXXX
git add时报错The file will have its original line endings in your working directory,warning: LF will be replaced by CRLF in 软件应用、论文、杂类/GitHub 详细教程 .md。
解决办法: git config --global core.autocrlf false。
三、其它
3.1 ipynb文件转为md文件
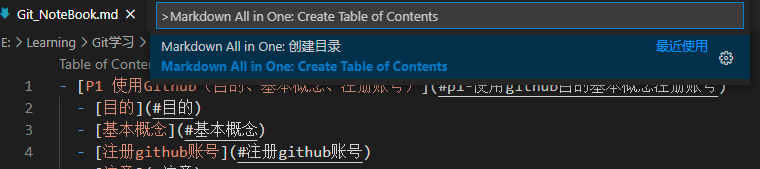
3.2 解决github或gitee上传的md文件中[TOC]标签无法生成目录
- 打开VScode,点击扩展,搜索
Markdown All in One插件,安装 - 在VScode中打开md文件
- 使用Ctrl+Shift+P快捷键,输入命令
Markdown All in One: Create Table of Contents,回车