一、安装
- MaixPy IDE下载
- 在windows下则安装
maixpy-ide-windows-0.2.5.exe - 安装后会自动打开IDE,并且展示一个示例,该示例是把摄像头实时拍摄的图像输出到 LCD

二、使用
-
选择开发板

-
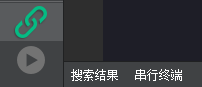
插上开发板,左下角可以
连接,运行
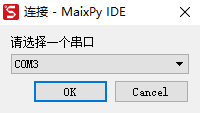
-
选择连接的串口
-
连接上串口后,点
运行,右侧会显示图像等信息。

-
示例代码:
import sensor, image, time, lcd lcd.init(freq=15000000) sensor.reset() # Reset and initialize the sensor. It will # run automatically, call sensor.run(0) to stop sensor.set_pixformat(sensor.RGB565) # Set pixel format to RGB565 (or GRAYSCALE) sensor.set_framesize(sensor.QVGA) # Set frame size to QVGA (320x240) sensor.skip_frames(time = 2000) # Wait for settings take effect. clock = time.clock() # Create a clock object to track the FPS. while(True): clock.tick() # Update the FPS clock. img = sensor.snapshot() # Take a picture and return the image. lcd.display(img) # Display on LCD print(clock.fps()) # Note: MaixPy's Cam runs about half as fast when connected # to the IDE. The FPS should increase once disconnected. -
打开串口终端,可以查看输出的日志信息:

-
工具下面有
机器视觉和视频工具等工具可以使用:

