JDBCTemplate 简介
JDBCTemplate 是 Spring 框架提供的工具类,其对 JDBC 做了高度封装,从而简化原始繁琐的 JDBC 操作
JDBCTemplate 示例
导入相关依赖
<dependency>
    <groupId>org.springframework</groupId>
    <artifactId>spring-jdbc</artifactId>
    <version>5.3.10</version>
</dependency>

<dependency>
    <groupId>org.springframework</groupId>
    <artifactId>spring-tx</artifactId>
    <version>5.3.10</version>
</dependency>
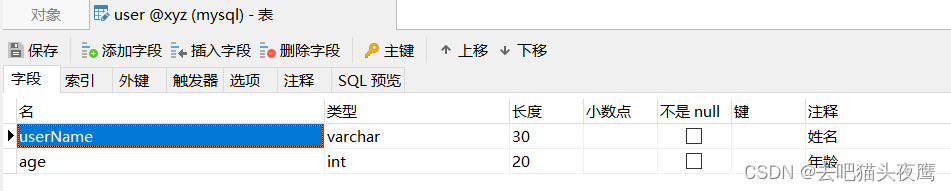
创建数据库 user 表和 User 实体类
package Entity;

public class User {
	private String userName;
	private int age;

	public String getUserName() {
		return userName;
	}

	public void setUserName(String userName) {
		this.userName = userName;
	}

	public int getAge() {
		return age;
	}

	public void setAge(int age) {
		this.age = age;
	}

	@Override
	public String toString() {
		return "User{" + "userName='" + userName + '\'' + ", age=" + age + '}';
	}
}
创建 JdbcTemplate 对象执行数据库操作
@Test
public void test1() throws PropertyVetoException {
	ComboPooledDataSource dataSource = new ComboPooledDataSource();
	dataSource.setDriverClass("com.mysql.jdbc.Driver");
	dataSource.setJdbcUrl("jdbc:mysql://localhost:3306/xyz?characterEncoding=utf8");
	dataSource.setUser("root");
	dataSource.setPassword("admin");
	JdbcTemplate jdbcTemplate = new JdbcTemplate();
	jdbcTemplate.setDataSource(dataSource);
	jdbcTemplate.update("insert into user values(?,?)", "皮卡丘", 5);
}
需配置一个数据源,通过 JdbcTemplate 的 setDataSource() 方法设置数据源,然后进行相应操作即可
通过 Spring 产生数据源和 JdbcTemplate
创建数据源
jdbc.driver=com.mysql.jdbc.Driver
jdbc.url=jdbc:mysql://localhost:3306/xyz?characterEncoding=utf8
jdbc.username=root
jdbc.password=admin
<context:property-placeholder location="classpath:jdbc.properties"/>
<bean id="dataSource" class="com.mchange.v2.c3p0.ComboPooledDataSource">
<property name="driverClass" value="${jdbc.driver}"/>
<property name="jdbcUrl" value="${jdbc.url}"/>
<property name="user" value="${jdbc.username}"/>
<property name="password" value="${jdbc.password}"/>
</bean>将数据库连接信息写在 jdbc.properties 文件中,加载后通过 EL 表达式读取
创建 JdbcTemplate
<bean id="jdbcTemplate" class="org.springframework.jdbc.core.JdbcTemplate">
    <property name="dataSource" ref="dataSource"/>
</bean>
创建 JdbcTemplate ,注入 dataSource
从 ApplicationContext 中获取 JdbcTemplate 对象
@Test
public void test2() {
	ApplicationContext app = new ClassPathXmlApplicationContext("applicationContext.xml");
	JdbcTemplate jdbcTemplate = app.getBean(JdbcTemplate.class);
	jdbcTemplate.update("insert into user values(?,?)", "皮卡丘", 5);
}
JDBCTemplate 常用操作
增删改
对于增删改操作,只需调用 JdbcTemplate 对象的 update() 方法,填入 sql 语句和参数即可
以改操作为例
@Test
public void test3() {
	ApplicationContext app = new ClassPathXmlApplicationContext("applicationContext.xml");
	JdbcTemplate jdbcTemplate = app.getBean(JdbcTemplate.class);
	jdbcTemplate.update("update user set age=? where userName=?", 10, "皮卡丘");
}
查
对于多结果的查询操作,需调用 JdbcTemplate 对象的 query() 方法,第一个参数填入 sql 语句,第二个参数传入 BeanPropertyRowMapper 对象,用于将查询结果与实体类一一映射,自动封装
@Test
public void test4() {
	ApplicationContext app = new ClassPathXmlApplicationContext("applicationContext.xml");
	JdbcTemplate jdbcTemplate = app.getBean(JdbcTemplate.class);
	List<User> users = jdbcTemplate.query("select * from user", new BeanPropertyRowMapper<User>(User.class));
	System.out.println(users);
}对于单结果的查询操作,需调用 JdbcTemplate 对象的 queryForObject() 方法,同样需填入 sql 语句和相应的 BeanPropertyRowMapper 对象
@Test
public void test5() {
	ApplicationContext app = new ClassPathXmlApplicationContext("applicationContext.xml");
	JdbcTemplate jdbcTemplate = app.getBean(JdbcTemplate.class);
	User user = jdbcTemplate.queryForObject("select * from user where userName=?", new BeanPropertyRowMapper<User>(User.class), "皮卡丘");
	System.out.println(user);
}
聚合查询
对于聚合查询操作,同样需调用 JdbcTemplate 对象的 queryForObject() 方法,并填入 sql 语句,区别在于需要指定返回类型,如下例中查询记录总数,返回 Integer 类型,则参数填入 Integer.class
@Test
public void test6() {
	ApplicationContext app = new ClassPathXmlApplicationContext("applicationContext.xml");
	JdbcTemplate jdbcTemplate = app.getBean(JdbcTemplate.class);
	Integer count = jdbcTemplate.queryForObject("select count(*) from user", Integer.class);
	System.out.println(count);
}