目录
(1)user指令用于配置运行nginx服务器的进程的用户和用户组
(1)master_process:用来指定是否开启工作线程
(2)worker_process:用于配置nginx生成工作进程的数量
一、nginx核心配置文件结构
nginx核心配置文件:/usr/local/nginx/conf/nginx.conf
nginx.conf配置文件中默认有三大块:全局块、events块、http块
http块中可以配置多个server块,每个server块又可以配置多个location块
二、全局块
1.user指令
(1)user指令用于配置运行nginx服务器的进程的用户和用户组
user 用户名 [组名]也可以在编译的时候指定:
./configure --user=user --group=group如果两个地方都设置了,最终生效的是配置文件中的配置。
注:如果指定用户,则该用户只能访问其权限下的文件,如果不是其权限下的文件访问不到,会报403
(2)使用实例
#修改配置文件
cd /usr/local/nginx/conf/
vim nginx.conf

##########################
设置user 为xp
##########################

#测试配置文件是否正确
cd /usr/local/nginx/sbin/
./nginx -t

#如果报错也正常,因为你的系统里面没有xp这个用户,我们添加xp用户,继续测试,成功
useradd xp
./nginx -t

#新建一个页面
cd /usr/local/nginx/sbin
mkdir -p /root/html
cd /root/html/
vim index.html

######################
<html>我是xp2222</html>
######################

#修改配置文件
cd /usr/local/nginx/conf/
vim nginx.conf

#############################
如图1,修改root对应的路径
#############################

#重启访问,此时是会报错的403
cd /usr/local/nginx/sbin/
./nginx -t
./nginx -s reload

#然后我们将页面复制到用户对应的目录下面,访问可以。
#原因是:之前访问报错,因为用户和组都是root,但是我们设置的是xp,所以不能访问
cd /home/xp/
cp -r /root/html/ ./
cd /usr/local/nginx/conf/
vim nginx.conf

#############################
如图2,修改root对应的路径
#############################

#重启访问,此时是会报错的403
cd /usr/local/nginx/sbin/
./nginx -t
./nginx -s reload

#此时可以访问,因为是xp用户下,而不是root用户 

2.work process指令
(1)master_process:用来指定是否开启工作线程
master_process on|off实例:
#修改配置
cd /usr/local/nginx/conf/
vim nginx.conf

#############################
master_process off;
#############################

#重启,注意,这里需要先stop再启动,直接reload不起效果
cd ../
cd sbin/
./nginx -t
./nginx -s stop
./nginx

(2)worker_process:用于配置nginx生成工作进程的数量
建议将该值和cpu内核数保持一致
worker_peocesses num/auto;3.daemon指令
daemon:设定nginx是否以守护进程的方式启动。(默认是守护进程)
守护进程是linux后台执行的一种服务进程,特点是独立于控制终端,不会随着终端关闭而停止。
daemon on|off;4.pid指令
pid:用来配置nginx当前master进程的进程号ID存储的文件路径。
该属性可以通过./configure --pid-path=PATH来指定。
如果两边都指定,以配置文件为准
#路径默认:/usr/local/nginx/logs/nginx.pid
pid 路径;
5.error_log指令
error_log:用来配置nginx的错误日志存放路径
#默认路径:logs/error.log
error_log 路径 [日志级别] ;


#注1:error_log不仅可以配置在全局块,还可以再http,server,location
#注2:日志级别:建议不要设置成info以下的级别
debug|info|notice|warn|warn|error|crit|alert|emerg,
6.include指令
include:用来引入其他配置文件,使nginx的配置更加灵活
#include可以在任意位置进行配置
include 文件;
三、event块
event块对服务器性能影响很大,常用语调优。
1.accept_mutex指令
accept_mutex:用来设置nginx网络连接序列化
accept_mutex on|off;使用场景:
惊群现象:我们有3个工作线程,这个时候来个任务,如果是off,会把所有工作进程都惊醒,然后三个工作线程去抢这个任务,注定有两个线程抢不到,这个时候适合设置成on,只触发一个。
同样三个工作线程,一下子来了3个任务,一个个惊醒的效率低于一下子惊醒所有,这个时候适合off
2.multi_accept指令
multi_accept:用来设置是否允许同时接受多个网络连接
multi_accept on|off;如果multi_accept被设置成off,nginx一个工作线程只能同时接受一个连接,否则一个工作线程可以同时接受所有新连接。
3.worker_connections指令
worker_connections:用来配置单个worker进程最大的连接数。默认512
#默认512
worker_connections 数量;
这里的连接不仅仅包括和前端用户建立的连接,而是包括所有可能的连接数。
另外,number值不能大于操作系统支持打开的最大文件句柄数量
4.use指令
use:用来设置nginx服务器选择哪种事件驱动来处理网络消息
use method;此处所选择时间处理模型是nginx优化部分的一个重要内容,method的可选值有select/poll/epoll/kqueue等,我们的centos环境要求linux的内核在2.6以上,就是为了能够使用epoll函数来优化nginx
另外,这些值的选择,我们也可以在编译的时候使用:
--with-select_modele,--without-select_modele,--with-poll_modele,--without-poll_modele
设置是否需要将对应的事件驱动模块编译到nginx的内核
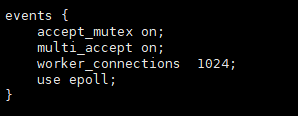
5.配置虚拟机的event
因为我们的请求不多,所以避免惊群。并且一个工作线程我们运行接收多个网络连接。连接数量默认1024。使用epoll事件驱动,效率较高
events {
    accept_mutex on;
    multi_accept on;
    worker_connections  1024;
    use epoll;
}
四、http块
1.定义MIME-Type
我们都知道浏览器中可以显示的内容有HTML,XML,GIF等种类繁多的文件、媒体等资源,浏览器为了区分这些资源,就需要使用MIME Type。所以说MIME Type是网络资源的媒体类型。nginx作为web服务器,也需要能够识别前端请求的资源类型。
在nginx配置文件中,默认有两行配置:
 include       mime.types;
 default_type  application/octet-stream;
(1)default_type:用来配置nginx相应前端请求默认的MIME类型
位置:http,server,location
#默认值:text/plain
default_type mime-type;

# mime.types文件中默认匹配好了MIMT类型与对应类型文件后缀名
include       mime.types;

#常见类型
text/plain:文本
text/html:解析html的文本
application/json:json
(2)实例

2.自定义服务日志
nginx中日志类型分为access.log、error.log
access.log:用来记录用户所有的访问请求
error.log:记录nginx本身运行时的错误信息,不会记录用户的访问请求。
nginx服务器支持对服务日志的格式、大小、输出等进行设置,需要使用到两个指令,分别是access_log和log_format指令
(1)access_log:用来设置用户访问日志的相关属性
#语法
access_log 设置路径 [设置格式名称[buffer=size]]

#默认值
access_log logs/access.log combined;

#位置
http,server,location
(2)log_format:用来指定日志的输出格式
#语法
log_format 格式名称,与上述保持一致 [escape=default|json|none] 字符串类型设置自定义格式;

#默认值
log_format combined "...";

#位置
http
(3)实例
我们这样会输出写死的内容,如果想输出其他内容,上面注释里有

3.sendfile
sendfile:用来设置nginx服务器是否使用sendfile()传输文件,该属性可以大大提高nginx处理静态资源的性能
#语法
sendfile on|off

#默认值
sendfile off;

#位置
http、server、location
4.keepalive_timeout
keepalive_timeout:用来设置长连接的超时时间
(1)为什么要使用keepalive_timeout
- 我们都知道http是一种无状态协议,客户端向服务发送一个TCP请求,服务端相应完毕后断开连接
- 如果客户端向服务端发送多个请求,每个请求都需要重新创建一次连接,效率太低,使用keepalive_timeout模式,可以告诉服务端在处理完一个请求后保持这个TCP打开状态,若接收到来自这个客户端的其他请求,则继续使用该连接
(2)使用
#语法,时间单位为s
keepalive_timeout 时间;

#默认值
keepalive_timeout 75s;

#位置
http、server、location
5.keepalive_requests
keepalive_requests:用来设置一个keep-alive连接使用的次数
#语法
keepalive_requests 数量;

#默认
keepalive_requests 100;

#位置
http、server、location
五、server块和location块
server块和location块是重点,我们这边先简单过一下,后面会仔细讲解。
对于一些既可以在server块配置也可以在location块配置的参数,优先生效location块,然后再server块
六、nginx服务器基础配置实例
1.需求
- 访问http://192.168.210.146:8081/server1/location1,访问的是index_sr1_location1.html
- 访问http://192.168.210.146:8081/server1/location2,访问的是index_sr1_location2.html
- 访问http://192.168.210.146:8082/server2/location1,访问的是index_sr2_location1.html
- 访问http://192.168.210.146:8082/server2/location2,访问的是index_sr2_location2.html
- 如果资源不存在,返回404页面
- 将/server1和/server2的配置使用不同的配置文件分隔,将文件放到/home/xp/conf.d目录下,然后使用include合并
- 为/server1和/server2创建各自的访问日志文件
2.准备工作
#新建一个用户,我们这里是xp,如果已经建好了跳过此步骤
useradd xp


#安装tree
yum install -y tree

#按照图片设置一些静态资源
#除了5个html,其他都是目录

#我们把之前自己设置过的nginx.conf丢弃,弄一个全新的配置文件
cd /usr/local/nginx/conf/
mv nginx.conf nginx_1.conf
cp nginx.conf.default nginx.conf

3.设置配置文件
配置nginx.conf:
#配置文件
cd /usr/local/nginx/conf/
vim nginx.conf

################################################
user  xp;
worker_processes  2;
error_log logs/error.log;
pid logs/nginx.pid;
daemon on;

events {
    accept_mutex on;
    multi_accept on;
    worker_connections  1024;
    use epoll;
}


http {
    include       mime.types;
    default_type  application/octet-stream;
    sendfile        on;
    keepalive_timeout  65;
    #日志的设置后面会细讲,这里先写死
    log_format server1 '====>server1 access log format';
    log_format server2 '====>server2 access log format';

    include /home/xp/conf.d/*.conf;

    server {
        listen       80;
        server_name  localhost;


        location / {
            root   html;
            index  index.html index.htm;
        }


        error_page   500 502 503 504  /50x.html;
        location = /50x.html {
            root   html;
        }

    }

}

################################################
配置server1.conf和server2.conf:
cd /home/xp/conf.d/

#配置server1.conf
vim server1.conf

############################################
server{
	listen 8081;
	server_name localhost;
	access_log /home/xp/myweb/server1/logs/access.log server1;

	location /server1/location1{
		root /home/xp/myweb;
		index index_sr1_location1.html;
	}

        location /server1/location2{
                root /home/xp/myweb;
                index index_sr1_location2.html;
        }

	error_page 404 /404.html;
	location = /404.html {
		root /home/xp/myweb;
                index 404.html;
	}


}

############################################


#配置server2.conf
vim server2.conf

############################################
server{
        listen 8082;
        server_name localhost;
        access_log /home/xp/myweb/server2/logs/access.log server2;

        location /server2/location1{
                root /home/xp/myweb;
                index index_sr2_location1.html;
        }

        location /server2/location2{
                root /home/xp/myweb;
                index index_sr2_location2.html;
        }

        error_page 404 /404.html;
        location = /404.html {
                root /home/xp/myweb;
                index 404.html;
        }


}

############################################
4.测试
http://192.168.210.146:8082/server2/location1/
七、打赏请求
如果本篇博客对您有所帮助,打赏一点呗,谢谢了呢~