准备:
1、ffmpeg库文件,编译好的,这个可以自己编译
一、新建工程
1、
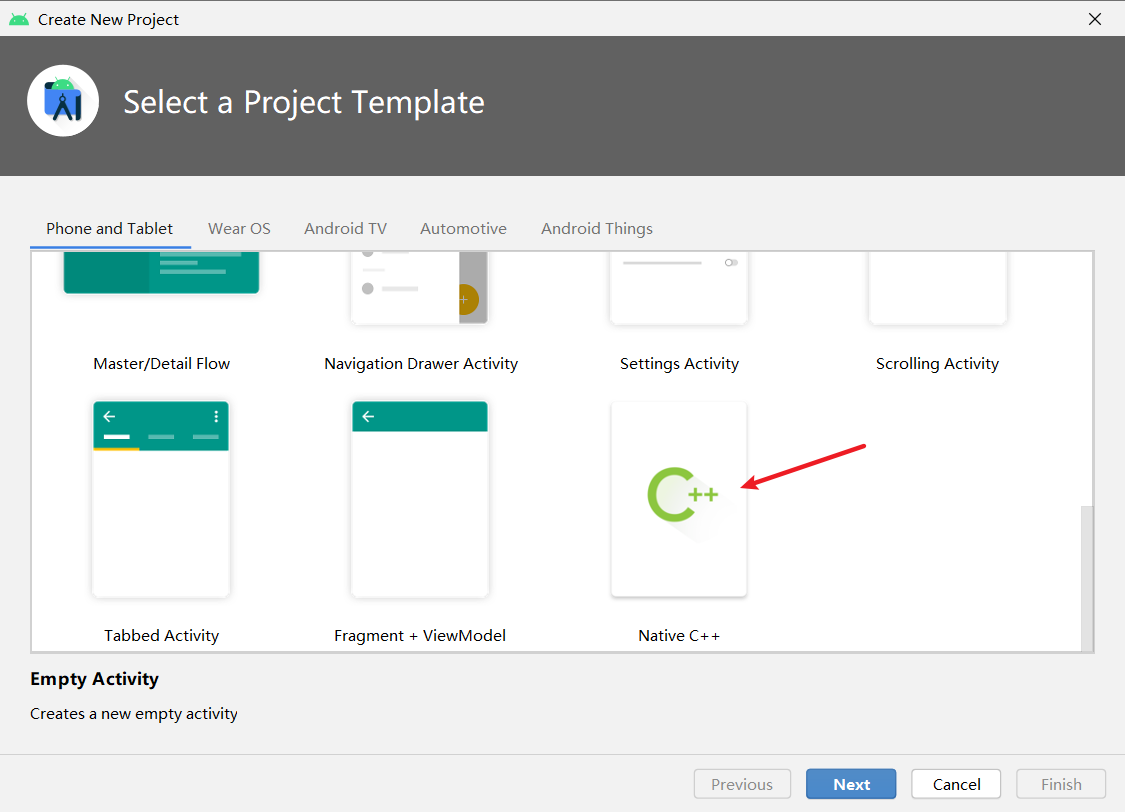
2、
像上面一样创建个C++的工程
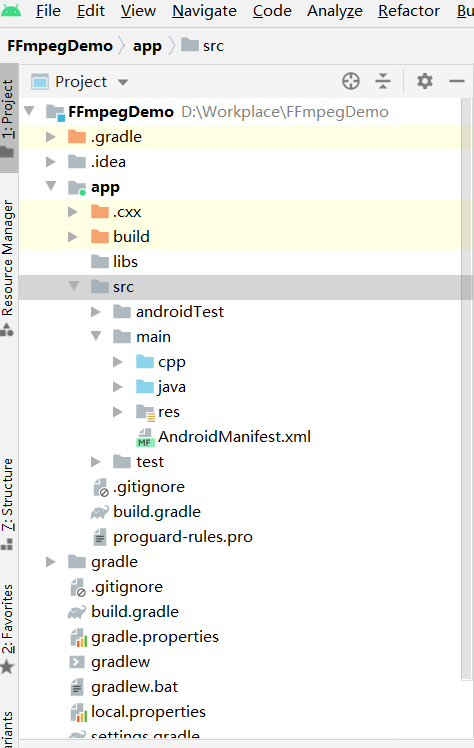
二、导入ffmpeg库
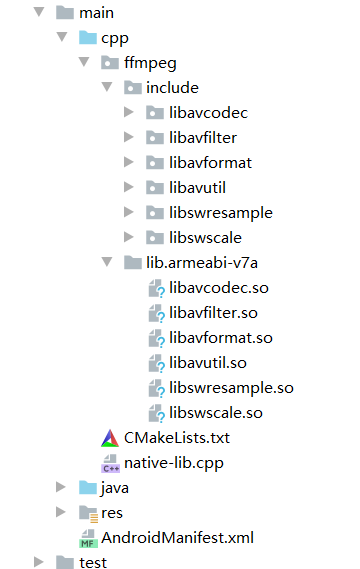
include:这个是放的ffmpeg的头文件
lib.armeabi-v7a 这个是存放的so文件,我这里只放了armeabi-v7a,如果要放其他的abi架构可以同样放入
三、配置文件
1、配置gradle
要注意的只有2点
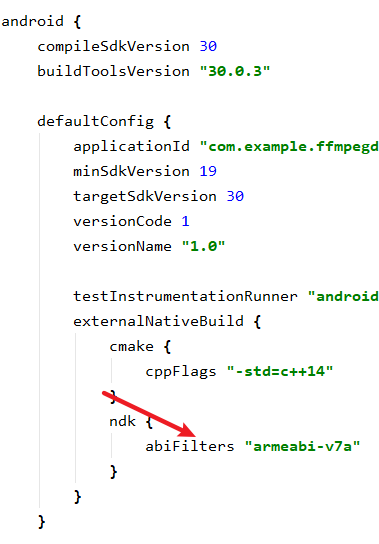
这个地方是上面架构 就写什么架构
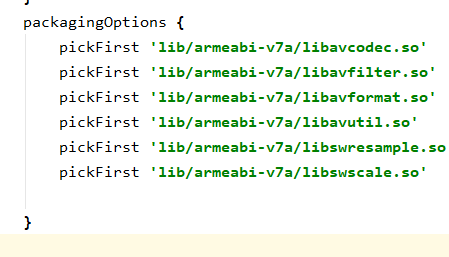

如果有报错这个就导入上面的配置
好了gradle就配置好了
2、CmakeLists的配置(重要)
# For more information about using CMake with Android Studio, read the
# documentation: https://d.android.com/studio/projects/add-native-code.html

# Sets the minimum version of CMake required to build the native library.

cmake_minimum_required(VERSION 3.10.2)

# Declares and names the project.

project("ffmpegdemo")

# Creates and names a library, sets it as either STATIC
# or SHARED, and provides the relative paths to its source code.
# You can define multiple libraries, and CMake builds them for you.
# Gradle automatically packages shared libraries with your APK.

add_library( # Sets the name of the library.
             native-lib

             # Sets the library as a shared library.
             SHARED

             # Provides a relative path to your source file(s).
             native-lib.cpp )
add_library(avcodec
        SHARED
        IMPORTED)
set_target_properties(avcodec
        PROPERTIES IMPORTED_LOCATION
        ${CMAKE_SOURCE_DIR}/ffmpeg/lib/armeabi-v7a/libavcodec.so)

add_library(avfilter
        SHARED
        IMPORTED)
set_target_properties(avfilter
        PROPERTIES IMPORTED_LOCATION
        ${CMAKE_SOURCE_DIR}/ffmpeg/lib/armeabi-v7a/libavfilter.so)

add_library(avformat
        SHARED
        IMPORTED)
set_target_properties(avformat
        PROPERTIES IMPORTED_LOCATION
        ${CMAKE_SOURCE_DIR}/ffmpeg/lib/armeabi-v7a/libavformat.so)

add_library(avutil
        SHARED
        IMPORTED)
set_target_properties(avutil
        PROPERTIES IMPORTED_LOCATION
        ${CMAKE_SOURCE_DIR}/ffmpeg/lib/armeabi-v7a/libavutil.so)


add_library(swresample
        SHARED
        IMPORTED)
set_target_properties(swresample
        PROPERTIES IMPORTED_LOCATION
        ${CMAKE_SOURCE_DIR}/ffmpeg/lib/armeabi-v7a/libswresample.so)

add_library(swscale
        SHARED
        IMPORTED)
set_target_properties(swscale
        PROPERTIES IMPORTED_LOCATION
        ${CMAKE_SOURCE_DIR}/ffmpeg/lib/armeabi-v7a/libswscale.so)

include_directories(${CMAKE_SOURCE_DIR}/ffmpeg/include)

# Searches for a specified prebuilt library and stores the path as a
# variable. Because CMake includes system libraries in the search path by
# default, you only need to specify the name of the public NDK library
# you want to add. CMake verifies that the library exists before
# completing its build.

find_library( # Sets the name of the path variable.
              log-lib

              # Specifies the name of the NDK library that
              # you want CMake to locate.
              log )

# Specifies libraries CMake should link to your target library. You
# can link multiple libraries, such as libraries you define in this
# build script, prebuilt third-party libraries, or system libraries.

target_link_libraries( # Specifies the target library.
                       native-lib
                        avcodec
                        avfilter
                        avformat
                        avutil
                        swresample
                        swscale

                       # Links the target library to the log library
                       # included in the NDK.
                       ${log-lib} )
贴上我的这个工程的cmakelists文件
下面来解释下

1、看这个add_library,,这个含义是导入ffmpeg中accodec库 最为动态库,
2、set_target_properties:设置avcodec的导入路径
3、${CMAKE_SOURCE_DIR}:这个是cmake的内部变量是CMakeLists的目录
其他的库的配置同这个一样的

include_directories:这个是cmake 搜索头文件的命令,你源码文件里导入的#include 都是需要在这里找
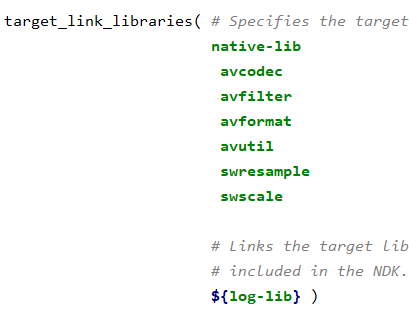
这个是连接ffmpeg的库,就是上面定义过的变量,会连接到工程中
3、java文件的配置
 static {


        System.loadLibrary("native-lib");
        System.loadLibrary("avcodec");
        System.loadLibrary("avfilter");
        System.loadLibrary("avformat");
        System.loadLibrary("avutil");
        System.loadLibrary("swresample");
        System.loadLibrary("swscale");
    }
这个需要添加到MainActivity中
public native String stringFromJNI();
#include <jni.h>
#include <string>

extern "C"
{
    #include <libavcodec/avcodec.h>
}

extern "C" JNIEXPORT jstring JNICALL
Java_com_example_ffmpegdemo_MainActivity_stringFromJNI(
        JNIEnv* env,
        jobject /* this */) {
    std::string hello = "Hello from C++";
   const char* configs=avcodec_configuration();

    return env->NewStringUTF(configs);
}
注意:
1、
extern "C"
{
    #include <libavcodec/avcodec.h>
}
需要用extern “C” 括起来,因为ffmpeg是C写的
2、Java_com_example_ffmpegdemo_MainActivity_stringFromJNI
这个路径是java的包的路径+类名+方法名称
4、测试下
const char* configs=avcodec_configuration();
我们在native-lib.cpp中写入这个代码,调用ffmpeg的编码配置
然后回传给java 看看效果,如果可以打印配置就证明成功了