前言:
学习B站UP主狂神说视频笔记整理视频链接
Data
简介
对于数据访问层,无论是SQL(关系型数据库)还是NOSQL(非关系型数据库),Spring Boot底层都是采用Spring Data的方式进行统一处理。
Spring Boot底层都是采用Spring Data的方式进行统一处理各种数据库,Spring Data 也是Spring 中与Spring Boot、Spring Cloud等齐名的知名项目。
快速上手
导入依赖
      <!--Mysql驱动-->
        <dependency>
            <groupId>mysql</groupId>
            <artifactId>mysql-connector-java</artifactId>
            <scope>runtime</scope>
        </dependency>
        <!--SpringbootJDBC-->
        <dependency>
            <groupId>org.springframework.boot</groupId>
            <artifactId>spring-boot-starter-jdbc</artifactId>
        </dependency>
配置数据源
在SpringBoot配置文件中
# 配置数据源 serverTimezone=UTC 设置时区
spring:
 datasource:
    url: jdbc:mysql://localhost:3306/mybatis?useSSL=true&useUnicode=true&characterEncoding=utf8
    username: root
    password: 123456
    driver-class-name: com.mysql.cj.jdbc.Driver
测试使用
@SpringBootTest
public class DataTest {


    @Autowired
    DataSource dataSource;
    @Test
    public void testData() throws SQLException {


        //查看默认数据源
        System.out.println(dataSource.getClass());

       //获取数据库链接
        Connection connection = dataSource.getConnection();
        System.out.println(connection);
        connection.commit();
    }
}
运行的时候发现出现时区报错
java.sql.SQLException: The server time zone value 'Öйú±ê׼ʱ¼ä' is unrecognized or represents more than one time zone. You must configure either the server or JDBC driver (via the 'serverTimezone' configuration property) to use a more specific time zone value if you want to utilize time zone support.

	at com.mysql.cj.jdbc.exceptions.SQLError.createSQLException(SQLError.java:129)
	at com.mysql.cj.jdbc.exceptions.SQLError.createSQLException(SQLError.java:97)
	at com.mysql.cj.jdbc.exceptions.SQLError.createSQLException(SQLError.java:89)
	at com.mysql.cj.jdbc.exceptions.SQLError.createSQLException(SQLError.java:63)
	at com.mysql.cj.jdbc.exceptions.SQLError.createSQLException(SQLError.java:73)
	at com.mysql.cj.jdbc.exceptions.SQLExceptionsMapping.translateException(SQLExceptionsMapping.java:76)
	at com.mysql.cj.jdbc.ConnectionImpl.createNewIO(ConnectionImpl.java:836)
	at com.mysql.cj.jdbc.ConnectionImpl.<init>(ConnectionImpl.java:456)
	at com.mysql.cj.jdbc.ConnectionImpl.getInstance(ConnectionImpl.java:246)
	at com.mysql.cj.jdbc.NonRegisteringDriver.connect(NonRegisteringDriver.java:198)
	at com.zaxxer.hikari.util.DriverDataSource.getConnection(DriverDataSource.java:138)
	at com.zaxxer.hikari.pool.PoolBase.newConnection(PoolBase.java:358)
	at com.zaxxer.hikari.pool.PoolBase.newPoolEntry(PoolBase.java:206)
	at com.zaxxer.hikari.pool.HikariPool.createPoolEntry(HikariPool.java:477)
	at com.zaxxer.hikari.pool.HikariPool.checkFailFast(HikariPool.java:560)
	at com.zaxxer.hikari.pool.HikariPool.<init>(HikariPool.java:115)
	at com.zaxxer.hikari.HikariDataSource.getConnection(HikariDataSource.java:112)
需要在配置文件中设置时区信息serverTimezone
于是我们更改配置
# 配置数据源 serverTimezone=UTC 设置时区
spring:
 datasource:
    url: jdbc:mysql://localhost:3306/mybatis?serverTimezone=UTC&useSSL=true&useUnicode=true&characterEncoding=utf8
    username: root
    password: 123456
    driver-class-name: com.mysql.cj.jdbc.Driver
拿到connection 就可以进行一下原来我们JDBC的相应操作
Template
在SringBoot中有很多Template(模板)它是已经配置好了的Bean
也就是说我们可以拿来即用
查看jdbcTemplate源码
@Configuration(
    proxyBeanMethods = false
)
@ConditionalOnMissingBean({

    JdbcOperations.class})
class JdbcTemplateConfiguration {


    JdbcTemplateConfiguration() {


    }

    //JdbcTemplate 拿来即用 在项目启动时已经存在容器当中
    @Bean
    @Primary
    JdbcTemplate jdbcTemplate(DataSource dataSource, JdbcProperties properties) {


        JdbcTemplate jdbcTemplate = new JdbcTemplate(dataSource);
        Template template = properties.getTemplate();
        jdbcTemplate.setFetchSize(template.getFetchSize());
        jdbcTemplate.setMaxRows(template.getMaxRows());
        if (template.getQueryTimeout() != null) {


            jdbcTemplate.setQueryTimeout((int)template.getQueryTimeout().getSeconds());
        }

        return jdbcTemplate;
    }
}
使用JdbcTemplate
查询
@RestController
public class JdbcController {


    @Autowired
    private JdbcTemplate jdbcTemplate;

    @RequestMapping("/jdbc/userlist")
    public String getuserlist(){


        String sql ="select * from user";
        //查出来的内容是list 所以方法选queryForList
        List<Map<String, Object>> maps = jdbcTemplate.queryForList(sql);
        return  maps.toString();
    }
}
新增
    @RequestMapping("/jdbc/getUserAdd")
    public String getUserAdd(){


        String sql="insert into user (id,name,pwd) values(6,'小王','123456')";
        //SpringBoot 帮我们自动提交了事务
        //增删改都可以使用 update
        jdbcTemplate.update(sql);
        return "ok";
    }
修改
    @RequestMapping("/jdbc/getUserUpdate")
    public String getUserUpdate(){


        //预编译的SQL
        String sql="update user set name=?.pwd=? where id=2";
        Object[] objects=new Object[2];
        objects[0]="小王";
        objects[1]="321";
        //update重载方法 使用预编译的sql
        jdbcTemplate.update(sql,objects);
        return "ok";
    }
自定义数据源Druid
源码分析
在DataSourceAutoConfiguration源码中:
 @Configuration(
        proxyBeanMethods = false
    )
    @Conditional({

    DataSourceAutoConfiguration.PooledDataSourceCondition.class})
    @ConditionalOnMissingBean({

    DataSource.class, XADataSource.class})
    @Import({

    Hikari.class, Tomcat.class, Dbcp2.class, Generic.class, DataSourceJmxConfiguration.class})
    protected static class PooledDataSourceConfiguration {


        protected PooledDataSourceConfiguration() {


        }
    }
SpringBoot默认引入了Hikari,Tomcat,Dbcp2等数据源
其中默认使用的是Hikari
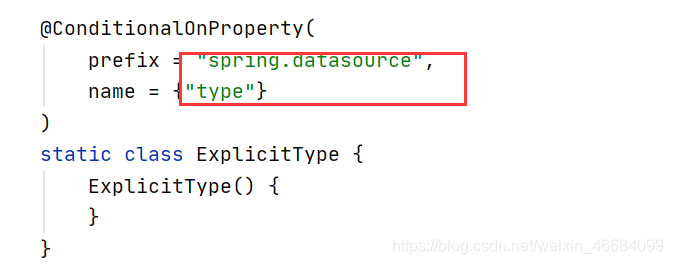
如果我们需要自定义数据源,只需要在配置文件中spring.datasource.type进行定义即可
Druid简介
Druid是阿里巴巴开源平台上一个数据库连接池实现,结合了C3PO、DBCP、PROXOOL等 DB池的优点,同时加入了日志监控。
Druid 可以很好的监控DB池连接和SQL的执行情况,天生就是针对监控而生的DB连接池。
Spring Boot 2.0以上默认使用Hikari 数据源,可以说Hikari与Driud都是当前Java Web上最优秀的数据源,我们来重点介绍Spring Boot如何集成 Druid数据源,如何实现数据库监控。
快速上手
导入依赖
在Maven中可以找到各种版本Maven Repository
<!-- https://mvnrepository.com/artifact/com.alibaba/druid -->
<dependency>
    <groupId>com.alibaba</groupId>
    <artifactId>druid</artifactId>
    <version>1.1.22</version>
</dependency>
配置Druid
# 切换成DruidDataSource的配置
spring:
 datasource:
    type: com.alibaba.druid.pool.DruidDataSource
  #Spring Boot 默认是不注入这些属性值的,需要自己绑定
    #druid 数据源专有配置
    initialSize: 5
    minIdle: 5
    maxActive: 20
    maxWait: 60000
    timeBetweenEvictionRunsMillis: 60000
    minEvictableIdleTimeMillis: 300000
    validationQuery: SELECT 1 FROM DUAL
    testWhileIdle: true
    testOnBorrow: false
    testOnReturn: false
    poolPreparedStatements: true

    #配置监控统计拦截的filters,stat:监控统计、log4j:日志记录、wall:防御sql注入
    #如果允许时报错  java.lang.ClassNotFoundException: org.apache.log4j.Priority
    #则导入 log4j 依赖即可,Maven 地址:https://mvnrepository.com/artifact/log4j/log4j
    filters: stat,wall,log4j
    maxPoolPreparedStatementPerConnectionSize: 20
    useGlobalDataSourceStat: true
    connectionProperties: druid.stat.mergeSql=true;druid.stat.slowSqlMillis=500
导入log4j依赖
实现druid强大的监控功能需要导入log4j的依赖
<!-- https://mvnrepository.com/artifact/log4j/log4j -->
<dependency>
    <groupId>log4j</groupId>
    <artifactId>log4j</artifactId>
    <version>1.2.17</version>
</dependency>
编写Druid配置类
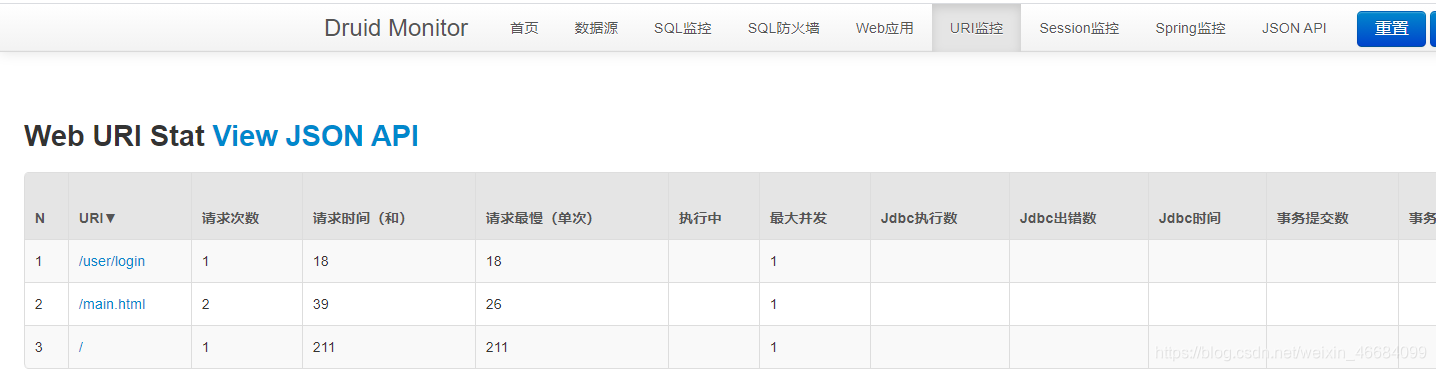
Druid 数据源具有监控的功能,并提供了一个 web 界面方便用户查看,类似安装 路由器 时,人家也提供了一个默认的 web 页面。
所以第一步需要设置 Druid 的后台管理页面,比如 登录账号、密码 等;配置后台管理;
/**
 * Druid配置类
 * 需要程序员自己为 DruidDataSource 绑定全局配置文件中的参数,
 * 再添加到容器中,而不再使用 Spring Boot 的自动生成了;
 * 我们需要 自己添加 DruidDataSource 组件到容器中,并绑定属性;
 * @author Tu_Yooo
 * @Date 2021/4/30 14:08
 */
@Configuration
public class DruidConfig {


    @Bean
    @ConfigurationProperties(prefix = "spring.datasource")
    public DataSource DruidDataSource(){


        return new DruidDataSource();
    }

    //后台监控
    //ServletRegistrationBean它相当于web.xml中 配置Servlet
    @Bean
    public ServletRegistrationBean<StatViewServlet> statViewServlet(){


        ServletRegistrationBean<StatViewServlet> bean = new ServletRegistrationBean<StatViewServlet>(new StatViewServlet(), "/druid/*");
        // 这些参数可以在 com.alibaba.druid.support.http.StatViewServlet
        // 的父类 com.alibaba.druid.support.http.ResourceServlet 中找到
        //后台需要配置 账户密码
        Map<String, String> initParameters =new HashMap<String, String>();
        initParameters.put("loginUsername","admin"); //注意 map的key是固定的 不能改变!!!!
        initParameters.put("loginPassword","123456");
        //允许谁可以访问
        initParameters.put("allow","");// "" 代表允许所有人访问 localhost 代表只能本机访问
        //initParams.put("kuangshen", "192.168.1.20");表示禁止此ip访问
        bean.setInitParameters(initParameters);//设置初始化参数
        return bean;
    }

    //过滤器
    @Bean
    public FilterRegistrationBean webRegistrationFilter(){


        FilterRegistrationBean bean = new FilterRegistrationBean();
        bean.setFilter(new WebStatFilter());
        //过滤哪些请求?
        HashMap<String, String> initParameters = new HashMap();
        //这些请求不进行统计
        initParameters.put("exclusions","*.js,*.css,/druid/*");

        bean.setInitParameters(initParameters);
        //"/*" 表示过滤所有请求
        bean.setUrlPatterns(Arrays.asList("/*"));
        return bean;
    }
}
因为SpringBoot内置servlet容器,所以没有web.xml,
如果我们想使用Web.xml的方式,就可以使用替代Bean
ServletRegistrationBean------>Servlet
FilterRegistrationBean ------->Filter
Mybatis
导入依赖
<dependency>
    <groupId>org.mybatis.spring.boot</groupId>
    <artifactId>mybatis-spring-boot-starter</artifactId>
    <version>2.1.1</version>
</dependency>
配置数据库连接信息(不变)
spring:
  datasource:
    username: root
    password: 123456
    #?serverTimezone=UTC解决时区的报错
    url: jdbc:mysql://localhost:3306/springboot?serverTimezone=UTC&useUnicode=true&characterEncoding=utf-8
    driver-class-name: com.mysql.cj.jdbc.Driver
    type: com.alibaba.druid.pool.DruidDataSource
创建实体类,导入 Lombok!
@Data
public class User {


    private Integer id;
    private String name;
    private String pwd;
}
编写Mapper接口及创建mapper目录
// 这个主键标识 此接口是一个Mybatis接口
@Mapper
@Repository //被spring管理
public interface UserMapper {


    List<User> queryUserList();

    User queryUserByid(int id);

    int addUser(User user);

}
在resource目录下创建文件
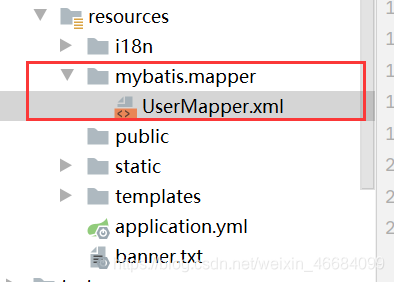
编写UserMapper.xml映射文件
<?xml version="1.0" encoding="UTF-8" ?>
<!DOCTYPE mapper
        PUBLIC "-//mybatis.org//DTD Mapper 3.0//EN"
        "http://mybatis.org/dtd/mybatis-3-mapper.dtd">
<mapper namespace="com.tony.dao.UserMapper">

    <select id="queryUserList" resultType="com.tony.pojo.User">
        select * from user
    </select>

    <select id="queryUserByid" resultType="com.tony.pojo.User" parameterType="int">
        select * from user where id=#{id}
    </select>

    <insert id="addUser" parameterType="com.tony.pojo.User">
        insert into user (id,name,pwd) values (#{id},#{name},#{pwd})
    </insert>

</mapper>
配置mybatis别名及指定mapper文件位置
在application.yml中配置
mybatis:
  type-aliases-package: com.tony.pojo
  mapper-locations: classpath:mybatis/mapper/*.xml
测试使用

扩展配置mybatis日志输出
mybatis:
  type-aliases-package: com.tony.pojo
  mapper-locations: classpath:mybatis/mapper/*.xml
  configuration:
    log-impl: org.apache.ibatis.logging.stdout.StdOutImpl