一、@PropertySource、@ImportResource和@Bean
1、@PropertySource
作用:加载指定的配置文件。
在上一讲的案例中我们使用@Value与@ConfigurationProperties从全局配置文件application.properties或application.yaml中取值,然后为实体类的属性赋值。然而,当应用比较大的时候,如果所有的内容都处于同一个配置文件中,就会显得比较臃肿,同时也不太好理解和维护,此时可以将一个文件拆分为多个,而这被拆分的多个配置文件就可以通过使用@PropertySource来指定所需加载的配置文件。
接着上一讲的案例,我们将application.properties中关于Teacher属性的信息提取出来,在resources目录下新建一个teacher.properties,然后通过@PropertySource来指定所需加载的配置文件teacher.properties。如下:
teacher.properties:
teacher.name=李四yaml
teacher.age=30
teacher.birth=1991/04/12
[email protected]
teacher.professor=false
teacher.book-list=1,2,3,4,5
teacher.score-map.a=Apple
teacher.score-map.b=Bar
teacher.score-map.c=car
teacher.student.name=小王
teacher.student.address=福建
此时Teacher类的写法如下:
@PropertySource("classpath:teacher.properties")
@Component
@ConfigurationProperties(prefix = "teacher")
public class Teacher {
    private String name;
    private Integer age;
    private Date birth;
    private String email;
    private Boolean isProfessor;
    private List<String> bookList;
    private Map<Object, Object> scoreMap;
    private Student student;

    //省略get和set方法

    @Override
    public String toString() {
        return "Teacher{" +
                "name='" + name + '\'' +
                ", age=" + age +
                ", birth=" + birth +
                ", email='" + email + '\'' +
                ", isProfessor=" + isProfessor +
                ", bookList=" + bookList +
                ", scoreMap=" + scoreMap +
                ", student=" + student +
                '}';
    }
}
相反,如果定义的文件类型是yaml,那么 @PropertySource和@Value需要结合使用才开始完成属性值注入,如果不使用@Value,得到的值就是null。而并不是有些博客所说的yaml和properties的使用方式一致。如下:
teacher.yaml:
teacher:
  name: tomyaml
  age: 36
  birth: 1981/09/21
  email: [email protected]
  professor: false
  bookList:
    - 三国演义
    - 水浒传
    - 红楼梦
    - 西游记
  scoreMap: {语文: 95, 数学: 87, 英语: 82}
  student:
    name: 刘菲
    address: 浙江
此时Teacher类的写法如下:
package com.yht.entity;

import org.hibernate.validator.constraints.Email;
import org.springframework.beans.factory.annotation.Value;
import org.springframework.boot.context.properties.ConfigurationProperties;
import org.springframework.context.annotation.PropertySource;
import org.springframework.context.annotation.PropertySources;
import org.springframework.stereotype.Component;
import org.springframework.validation.annotation.Validated;

import java.util.Date;
import java.util.List;
import java.util.Map;

/**
 * @ConfigurationProperties: 本类中的所有属性都和配置文件中的值进行绑定
 */
@PropertySource("classpath:teacher.yaml")
@Component
@ConfigurationProperties(prefix = "teacher")
public class Teacher {
    @Value("${name}")
    private String name;
    @Value("${age}")
    private Integer age;
    @Value("${birth}")
    private Date birth;
    @Value("${email}")
    private String email;
    @Value("${professor}")
    private Boolean isProfessor;
    @Value("${bookList}")
    private List<String> bookList;
    @Value("${scoreMap}")
    private Map<Object, Object> scoreMap;
    @Value("${student}")
    private Student student;

      //省略get和set方法

    @Override
    public String toString() {
        return "Teacher{" +
                "name='" + name + '\'' +
                ", age=" + age +
                ", birth=" + birth +
                ", email='" + email + '\'' +
                ", isProfessor=" + isProfessor +
                ", bookList=" + bookList +
                ", scoreMap=" + scoreMap +
                ", student=" + student +
                '}';
    }
}
2、@ImportResource
作用:用于导入Spring的配置文件,让配置文件里面的内容生效。
在SpringBoot里面没有Spring的配置文件,而对于那些我们自己编写的配置文件,也无法自动识别。此时若是想让Spring的配置文件生效,就可以将@ImportResource标注在一个配置类上,从而将spring配置文件加载到容器里。
(1)在service包下创建UserSerivce。
public class UserService {
}
(2)在resources目录下创建bean.xml,并注入userService。
<?xml version="1.0" encoding="UTF-8"?>
<beans xmlns="http://www.springframework.org/schema/beans"
       xmlns:xsi="http://www.w3.org/2001/XMLSchema-instance"
       xmlns:p="http://www.springframework.org/schema/p"
       xsi:schemaLocation="http://www.springframework.org/schema/beans
                           http://www.springframework.org/schema/beans/spring-beans.xsd">
  <bean id="userService" class="com.yht.service.UserService">

  </bean>
</beans>
(3)通过@ImportResource导入bean.xml。
@ImportResource(locations = {"classpath:bean.xml"})
@SpringBootApplication
public class HelloApplication {
    public static void main( String[] args ) {
        SpringApplication.run(HelloApplication.class);
    }
}
(4)进行测试,得到结果为:true。
@SpringBootTest(classes = HelloApplication.class)
@RunWith(SpringRunner.class)
public class PropertiesTest {
    @Autowired
    ApplicationContext ioc;

    @Test
    public void testUserService(){
        System.out.println(ioc.containsBean("userService"));
    }
}
注意:ApplicationCotenxt导包一定要是对的(import org.springframework.context.ApplicationContext)。
3、@Bean
作用:给容器中添加组件给容器中添加组件
前面那种方式固然可以引入bean.xml,但SpringBoot推荐使用全注解的方式,这里就需要配置类注解和@Bean一起使用。
(1)给UserService类添加注解@Service。
@Service
public class UserService {
}
(2)创建配置类。
@Configuration
public class MyConfig {

    //将方法的返回值添加到容器中;容器中这个组件默认的id就是方法名
    @Bean
    public UserService getInstance(){
        return new UserService();
    }
}
(3)进行测试,得到结果为:true。
二、配置文件的占位符
1、随机数
${random.value},${random.int},${random.long},${random.int(10)},${random.int(1024,65536)}2、获取配置的值/指定默认值
teacher.name=tom
teacher.student.name=${person.name: jerry}_dog
3、案例
(1)application.properties文件
#num为随机数
person.num=${random.int(10)}
#name1为tom,name2未指定
person.name1=tom
#student1是tom的学生
person.student1.name=${person.name1}_student
#student2是name2的学生,如果name2的值未指定,则默认值为jerry
person.student2.name=${person.name2: Jerry}_student
(2)创建实体类Person和Student。
Person:
@Component
@ConfigurationProperties(prefix = "person")
public class Person {
    private Integer num;
    private String name1;
    private String name2;
    private Student student1;
    private Student student2;
    //省略get和set以及toString

}
Student:
public class Student {
    private String name;
    private String address;
//省略get和set以及toString

}
(3)测试。
@SpringBootTest(classes = HelloApplication.class)
@RunWith(SpringRunner.class)
public class PersonTest {
    Person person;
    @Test
    public void testPerson(){
        System.out.println(person);
    }

}
三、SpringBoot的多Profile文件
一般在整个项目从开发测试到上线的过程中,都需要在不同情况下进行测试,这就需要多次修改配置文件。例如,开发环境连接的数据库ip和测试、生产环境的不同;开发环境开发的app版本和测试、生产线上的app版本信息也不同。在前面的介绍中,尽管在springboot中使用application.properties (或者yml)作为整个项目的全局配置文件,但是生产、测试环境往往都会有些不同于开发环境的配置,这个时候就需要使用profile,而且它可以抽取application.yml中的配置信息到其他文件。当我们的项目越来越大时,项目配置信息太多,application.yml配置文件会比较大,这时我们可以通过定义profile,将一些配置信息从application.yml中抽取到一个单独的文件中,如建立以下文件:
application-devFtp.yml 只存放开发环境ftp相关的配置信息
application-devRedis.yml 只存放开发环境redis相关的配置信息
application-testFtp.yml 只存放测试环境ftp相关的配置信息
application-testRedis.yml 只存放测试环境redis相关的配置信息
然后在application.yml中 ,切换开发环境,配置spring.profiles.active=dev, devFtp,devRedis 来引入dev、devFtp、devRedis的配置即可。切换测试环境只需要通过配置spring.profiles.active=test,testFtp,testRedis 来引入test、testFtp、testRedis的配置即可。
此外,yml支持多文档块的方式创建多环境,是用 --- (三个-)表示一个文档块 ,如果不指定启动别的文档块,默认启动第一个文档块,可以通过 spring.profiles.actice=dev 来指定启动别的文档块,如下:
server:
  port: 8081
spring:
  profiles:
    active: dev
---
server:
  port: 8082
spring:
  profiles: dev

---
server:
  port: 8083
spring:
  profiles: produce

---
server:
  port: 8084
spring:
  profiles: test
图解如下:

除了可以在yaml文件中通过active中指定启动环境,还有其他几种方式:
(1)在编辑器idea,eclipse的run configurations中指定参数 --spring.profiles.active=dev

(2)命令行:
java -jar spring-boot.jar --spring.profiles.active=test; //打成包的项目之后在cmd命令行中运行的命令,可以直接在测试的时候,配置传入命令行参数

(3)使用虚拟机参数方式:
-Dspring.profiles.active=dev 注意:-D是固定写法

四、SpringBoot配置文件的加载位置
spring boot 启动会扫描以下位置的application.properties或者application.yml文件作为Spring boot的默认配置文件
- –file:./config/
- –file:./
- –classpath:/config/
- –classpath:/
以上是按照优先级从高到低的顺序,所有位置的文件都会被加载,高优先级配置内容会覆盖低优先级配置内容。
如下:


SpringBoot会从这四个位置全部加载主配置文件,如果高优先级中配置文件属性与低优先级配置文件不冲突的属性,则会共同存在—互补配置。举个例子:我们在resources目录下的applicatioon.properties中加入配置(项目的访问路径)如下:
server.context-path=/springboot
此时,我们通过启动程序,在浏览器地址栏输入http://localhost:8084/springboot/hello,得到页面返回结果如下:
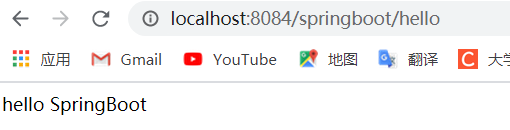
即便是在工程下的config文件夹下的application.properties文件中没有配置项目的访问路径,但依旧形成了互补配置。
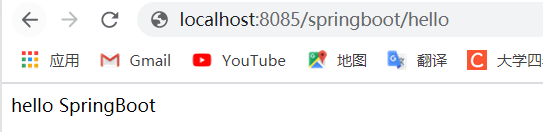
此外,我们还可以通过spring.config.location来改变默认的配置文件位置。当项目打包好以后,可以使用命令行参数的形式,在启动项目的时候来指定配置文件的新位置,从而指定配置文件和默认加载的这些配置文件共同起作用形成互补配置。例如:在D盘目录下,创建一个application.properties文件,定义端口为8085 。操作如下:
(1)打包项目,启动命令行:java -jar spring-boot-02-config-02.0.0.1-SNAPSHOT.jar --spring.config.location=D:/application.properties 。
(2)在浏览器地址栏输入http://localhost:8085/springboot/hello,得到页面返回结果如下:
五、外部配置加载顺序
SpringBoot也可以从以下位置加载配置:优先级从高到低;高优先级的配置覆盖低优先级的配置,所有的配置会形成互补配置。
1、命令行参数
- 所有的配置都可以在命令行上进行指定;
- 多个配置用空格分开; –配置项=值
java -jar spring-boot-02-config-02-0.0.1-SNAPSHOT.jar --server.port=8087 --server.context-path=/abc
2、来自java:comp/env的JNDI属性
3、Java系统属性(System.getProperties())
4、操作系统环境变量
5、RandomValuePropertySource配置的random.*属性值
6、jar包外部的application-{profile}.properties或application.yml(带spring.profile)配置文件
7、jar包内部的application-{profile}.properties或application.yml(带spring.profile)配置文件
8、jar包外部的application.properties或application.yml(不带spring.profile)配置文件
9、jar包内部的application.properties或application.yml(不带spring.profile)配置文件
10、@Configuration注解类上的@PropertySource
11、通过SpringApplication.setDefaultProperties指定的默认属性