1、安装依赖(官网直接链接)

vs2019
(1)转到Visual Studio下载页面。
(2)点击免费下载的Visual Studio的2019箱,社区部分:
名为vs_community__313888930.1524151023.exe或类似的可执行文件保存在您的Downloads文件夹中。
(3)双击可执行文件以启动Visual Studio安装程序。
(4)在打开的窗口中,单击“ 继续”。Visual Studio Installer配置需要几分钟时间。
(5)从“ 工作负载”选项卡中,使用复选框选择通用Windows平台开发和使用C ++进行桌面开发。
扫描二维码关注公众号,回复:
13344924 查看本文章


(6)在Individual components选项卡下,选择MSBuild:屏幕右侧的安装详细信息显示您的安装选择:
(7)不做任何其他更改。单击安装。安装开始,大约需要30分钟才能完成。
(8)如果在安装完成后看到重新启动计算机的提示,请将其关闭。
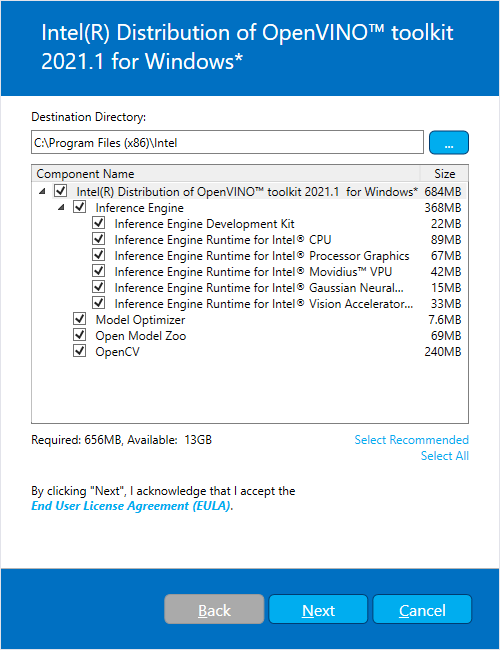
2、安装openvino2021.1

3、设置环境变量

4、配置模型优化器
5、测试demo

测试demo的时候4个demo只有demo_speech_recognition.bat能正常运行……不过之后的模型优化和推理引擎正常使用,遂不予理会。
6、模型转化。tensorflow 1.14 的pb模型转IR

python mo_tf.py --input_model XX.pb --output_dir . --data_type FP32 --input_shape [1,128,128,3]获得 XX.mapping XX.xml XX.bin
7、推理引擎推理
配置include lib dll


输入从pb所需要BHWC变成BCHW 注意通道转换
#include <inference_engine.hpp>
using namespace InferenceEngine;

int main(){
// ------------ 1. Load inference engine ------------------
	Core ie;
// ------------ 2. Read IR Generated by ModelOptimizer (.xml and .bin files) -------
	CNNNetwork network = ie.ReadNetwork(xml_path, bin_path);
// -------- 3. Configure input & output --------------------------
//  -------- Prepare input blobs -----------------------------------
    InputsDataMap inputsInfo = network.getInputsInfo();
	for (auto& item : inputsInfo) {
		string imageInputName = item.first;
		item.second->setPrecision(Precision::FP32);
	}

	//  -------- Prepare output blobs -----------------------------------
	OutputsDataMap outputsInfo = network.getOutputsInfo();
    vector<string> OutputsBlobs_names;
	for (auto& item_out : outputsInfo){
        OutputsBlobs_names.push_back(item_out.first);
		item_out.second->setPrecision(Precision::FP32);
    }

	// ----------- 4. Loading model to the device ------------------------
	std::cout << "Loading model to the device" << endl;
	ExecutableNetwork executable_network = ie.LoadNetwork(network, "CPU");

	// ------------ 5. Create infer request ------------------------------------------
	InferRequest infer_request = executable_network.CreateInferRequest();
	InferenceEngine::Blob::Ptr lrInputBlob = infer_request.GetBlob(imageInputName);
	float*  buffer = lrInputBlob->buffer().as<float*>();

    // ------------ 6.  Process output ------------------------------------------

    buffer=//网络输入

    infer_request.Infer();

    for (auto OutputsBlob_name : OutputsBlobs_names) {
		Blob::Ptr OutputBlob = infer_request.GetBlob(OutputsBlob_name);
		float* buffer_out = OutputBlob->buffer().as<PrecisionTrait<Precision::FP32>::value_type*>();//网络输出

}

}