上一篇博客提到了一个小插曲,就是要用c#做界面,底层用python来做一个深度学习的平台。这篇博客先不戳核心,暂时先回顾下怎么用c#来调用python。我亲手实验了如下三种方式,然后引出我后面做深度学习平台要用的方式。
方式一:通过IronPython库来实现
新建了一个winform项目,如下选择管理NuGet程序包选项

在浏览中选择IronPython包,选择安装即可

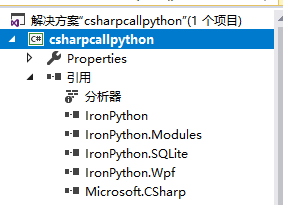
安装完毕后相关dll会自动被引用到该工程中,不需要手动添加
如下是我的设计界面(此界面包括了三种方式测试,接下来会一步步的展示)

comboBox1中设置的选项如下(+,-,*)表示三种运算


按钮![]() 回调函数中代码如下:
回调函数中代码如下:
ScriptRuntime scriptRuntime = ScriptRuntime.CreateFromConfiguration();
ScriptEngine pyEngine = scriptRuntime.GetEngine("python");
ScriptSource source = pyEngine.CreateScriptSourceFromFile("test_IronPython1.py");//设置脚本文件
ScriptScope scope = pyEngine.CreateScope();

 try
 {
    scope.SetVariable("arg1", Convert.ToInt32(textBox1.Text));
    scope.SetVariable("arg2", Convert.ToInt32(textBox2.Text));
    scope.SetVariable("arg3", comboBox1.SelectedIndex + 1);
  }
  catch(Exception)
  {
     MessageBox.Show("输入有误");
  }

  source.Execute(scope);
  label1.Text = scope.GetVariable("result").ToString();
这里test_IronPython1.py中代码如下:
num1=arg1
num2=arg2
op=arg3
if op==1:
    result=num1+num2
elif op==2:
    result=num1-num2
elif op==3:
    result=num1*num2
else:
    result=num1*1.0/num2
该python文件中没有设置函数,直接以脚本的形式呈现,但在上面的c#代码中,可以通过getVariable来获取指定变量的内容而可以进行交互。执行效果如下:

输入加数和被加数后,点击按钮![]() ,便可以获得数据
,便可以获得数据
下面展示通过调用python文件中的函数来执行功能代码
test_ironpython_function按钮的回调函数代码如下:
ScriptEngine pyEngine = IronPython.Hosting.Python.CreateEngine();//创建Python解释器对象
dynamic py = pyEngine.ExecuteFile(@"test_IronPython2.py");//读取脚本文件

string reStr = py.cal(Convert.ToInt32(textBox1.Text), Convert.ToInt32(textBox2.Text), comboBox1.SelectedIndex + 1);//调用脚本文件中对应的函数
label1.Text = "";
label1.Text = reStr;

reStr = py.main();//调用脚本文件中对应的函数
MessageBox.Show(reStr);

//或者

ScriptRuntime pyRuntime = IronPython.Hosting.Python.CreateRuntime(); //创建一下运行环境
dynamic obj = pyRuntime.UseFile(@"test_IronPython2.py"); //调用一个Python文件
string Str2 = obj.main2(Convert.ToInt32(textBox1.Text), Convert.ToInt32(textBox2.Text), comboBox1.SelectedIndex + 1);//调用脚本文件中对应的函数
MessageBox.Show(Str2);
代码中‘’//或者"上面代码和下面代码是两种调用函数的实现方式,效果是一样的。
代码中"//或者“上面的代码测试了两个函数中共享变量的效果,这种方式下,是可以通过共享变量让不同函数中代码发生关联。test_IronPython2.py中代码如下:
global s
s=-1;
def cal(num1,num2,op):
    global s
    s=num1
    if op==1:
       result=num1+num2
    elif op==2:
       result=num1-num2
    elif op==3:
       result=num1*num2
    else:
       result=num1*1.0/num2
    return str(result)

def main():
    global s
    return str(s)

def main2(arg1,arg2,arg3):
  try:
    num1=arg1
    num2=arg2
    op=arg3
    return cal(num1,num2,op)
  except Exception as err:
    return str(err)
执行效果如下:

点击确定后

二. 通过程序设置命令行执行py文件方式
test_python_exe按钮的回调函数如下:
 try
            {
                Process p = new Process();
                string path = @"D:\mycode\test_python_exe.py";//待处理python文件的路径,本例中放在debug文件夹下
                string sArguments = path;
                ArrayList arrayList = new ArrayList();
                arrayList.Add(Convert.ToInt32(textBox1.Text));
                arrayList.Add(Convert.ToInt32(textBox2.Text));
                arrayList.Add(comboBox1.SelectedIndex + 1);
                foreach (var param in arrayList)//添加参数
                {
                    sArguments += " " + param;
                }

                p.StartInfo.FileName = @"C:\Anaconda3\python.exe"; //python2.7的安装路径
                p.StartInfo.Arguments = sArguments;//python命令的参数
                p.StartInfo.UseShellExecute = false;
                p.StartInfo.RedirectStandardOutput = true;
                p.StartInfo.RedirectStandardInput = true;
                p.StartInfo.RedirectStandardError = true;
                p.StartInfo.CreateNoWindow = true;
                p.Start();//启动进程
                p.BeginOutputReadLine();
                p.OutputDataReceived += new DataReceivedEventHandler(p_OutputDataReceived);
                p.Close();
                // p.WaitForExit();

                MessageBox.Show("执行完毕!");
            }
            catch(Exception ec)
            {
                Console.WriteLine(ec);
            }
test_python_exe.py中代码如下:
import sys
def cal(num1,num2,op):
    if op==1:
       result=num1+num2
    elif op==2:
       result=num1-num2
    elif op==3:
       result=num1*num2
    else:
       result=num1 - num2
    return str(result)

if __name__=='__main__':
    print(cal(int(sys.argv[1]), int(sys.argv[2]), int(sys.argv[3])))
这里推荐是可以先在cmd环境下把所设置的命令行语句跑下,验证下py文件里有无错,及py路径是否设置错,方便排查问题,执行效果如下:

三. 把py文件打包成exe文件,然后再通过命令行方式直接把exe文件跑起来
test_pyinstall按钮的回调函数中代码如下:
 try
            {
                Process p = new Process();
                string sArguments = "";
                ArrayList arrayList = new ArrayList();
                arrayList.Add(Convert.ToInt32(textBox1.Text));
                arrayList.Add(Convert.ToInt32(textBox2.Text));
                arrayList.Add(comboBox1.SelectedIndex + 1);
                foreach (var param in arrayList)//添加参数
                {
                    sArguments += " " + param;
                }

                p.StartInfo.FileName = @"D:\mycode\dist\test_python_exe.exe"; //python2.7的安装路径
                p.StartInfo.Arguments = sArguments;//python命令的参数
                p.StartInfo.UseShellExecute = false;
                p.StartInfo.RedirectStandardOutput = true;
                p.StartInfo.RedirectStandardInput = true;
                p.StartInfo.RedirectStandardError = true;
                p.StartInfo.CreateNoWindow = true;
                p.Start();//启动进程
                string output = p.StandardOutput.ReadToEnd();
                Console.WriteLine(output);
                p.Close();
                MessageBox.Show("执行完毕!");
            }
            catch (Exception ec)
            {
                Console.WriteLine(ec);
            }
没有安装pyinstaller的童鞋,需要手动安装下:
执行命令:pip install pyinstaller可以实现安装,中间如果出现报错module 'enum' has no attribute 'IntFlag'

表示当前自带enum34版本和安装pyinstaller中需要的enum34版本不一致,需要先卸载再安装pyinstaller

安装完毕后执行
pyinstaller -F test_python_exe.py
便可以将上面的py文件生成一个可执行exe文件

执行上面的c#代码,效果如下:

如上三种方式介绍完毕。
三种方式中,第一种当前只支持python2.x系列,无法满足深度学习所需要的的python 3.x的要求,故采用第二种方式,第三种方式需要打包操作,且执行效率慢。