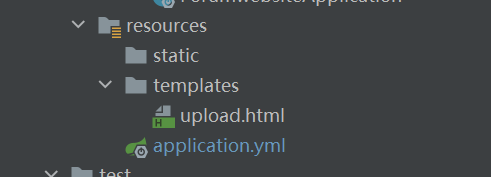
首先配置yml文件

建立 QiNiuYunConfig
package studio.banner.forumwebsite.config;
import com.google.gson.Gson;
import com.qiniu.common.QiniuException;
import com.qiniu.http.Response;
import com.qiniu.storage.Region;
import com.qiniu.storage.UploadManager;
import com.qiniu.storage.model.DefaultPutRet;
import com.qiniu.util.Auth;
import com.qiniu.storage.Configuration;
import lombok.Data;
import org.springframework.beans.factory.annotation.Value;
import org.springframework.stereotype.Component;

import java.io.FileInputStream;
/**
 * Created with IntelliJ IDEA.
 *
 * @Author: HYK
 * @Date: 2021/05/15/9:55
 * @Description:七牛云配置文件
 */

@Data
@Component
public class QiNiuYunConfig {


    @Value("${qiniu.accessKey}")
    private String accessKey;
    @Value("${qiniu.secretKey}")
    private String secretKey;
    @Value("${qiniu.bucket}")
    private String bucket;
    @Value("${qiniu.path}")
    private String path;
    private String localFilePath = "D:\\photos\\1.jpg";
    private String key = null;
//    String fileName = "studio/wyf-study/qiniu.jpg";
//    String domainOfBucket = "http://devtools.qiniu.com";

    public String uploadImgToQiNiu(FileInputStream file, String filename)  {


        // 构造一个带指定Zone对象的配置类,注意后面的zone各个地区不一样的
        Configuration cfg = new Configuration(Region.region2());
        cfg.useHttpsDomains = false;
        UploadManager uploadManager = new UploadManager(cfg);
        // 生成密钥
        Auth auth = Auth.create(accessKey, secretKey);
        try {


            String upToken = auth.uploadToken(bucket);
            try {


                Response response = uploadManager.put(file, filename, upToken, null, null);
                // 解析上传成功的结果
                DefaultPutRet putRet = new Gson().fromJson(response.bodyString(), DefaultPutRet.class);

                // 这个returnPath是获得到的外链地址,通过这个地址可以直接打开图片
//                String returnPath = getPath() + "/" + putRet.key;


          这里要改成自己的外链域名
                String returnPath="http://qtga4eaxm.hn-bkt.clouddn.com/"+putRet.key;
                return returnPath;
            } catch (QiniuException ex) {


                Response r = ex.response;
                System.err.println(r.toString());
                try {


                    System.err.println(r.bodyString());
                } catch (QiniuException ex2) {


                    //ignore
                }
            }
        } catch (Exception e) {


            e.printStackTrace();
        }
        return "";
    }
}
建立QiNiuYunController
import io.swagger.annotations.Api;
import org.springframework.beans.factory.annotation.Autowired;
import org.springframework.stereotype.Controller;
import org.springframework.ui.Model;
import org.springframework.web.bind.annotation.*;
import org.springframework.web.multipart.MultipartFile;
import org.springframework.web.servlet.ModelAndView;
import studio.banner.forumwebsite.bean.RespBean;
import studio.banner.forumwebsite.config.QiNiuYunConfig;

import java.io.FileInputStream;
import java.io.IOException;
import java.util.UUID;

/**
 * Created with IntelliJ IDEA.
 *
 * @Author: HYK
 * @Date: 2021/05/15/10:29
 * @Description:七牛云接口
 */
@Api(tags = "七牛云接口",value = "QiNiuYunController")
@Controller
public class QiNiuYunController {


    @Autowired
    private QiNiuYunConfig qiNiuYunConfig;

    @PostMapping("/qiniu")
//    @ResponseBody
    public RespBean qiNiuYunUpload(@RequestParam("file") MultipartFile file,
                                   Model model) throws IOException {


        String filename = file.getOriginalFilename();
        FileInputStream inputStream = (FileInputStream) file.getInputStream();
        //为文件重命名:uuid+filename
        filename = UUID.randomUUID()+ filename;
        String link = qiNiuYunConfig.uploadImgToQiNiu(inputStream, filename);
        model.addAttribute("link",link);
        System.out.println(link);
        return RespBean.ok("图片上传成功",link);
    }
    @GetMapping("/test")
    public  ModelAndView qiniutest(){


        ModelAndView modelAndView=new ModelAndView();
        modelAndView.setViewName("upload");
        return modelAndView;
    }

}
添加upload.html

<!DOCTYPE html>
<html lang="en" xmlns:th="http://www.thymeleaf.org">
<head>
    <meta http-equiv="Content-Type" content="multipart/form-data; charset=utf-8" />
    <meta charset="UTF-8">
    <title>上传文件</title>
</head>
<body>
<form action="/qiniu" method="post" enctype="multipart/form-data">
    <label>上传图片</label>
    <input type="file" name="file"/>
    <input type="submit" value="上传"/>
    <p>回显图片:</p>
    <img th:src="${link}"/>
</form>
</body>
</html>
运行
输入 http://localhost:8080/test