一、Handler
1、Handler写在主线程中
public class HandlerActivity extends Activity {


    private ImageView imagChange;
    //  定义切换的图片数组id
    int imgids[] = new int[]{


            R.drawable.ic_pikachu1, R.drawable.ic_pikachu2,
            R.drawable.ic_pikachu3, R.drawable.ic_pikachu4
    };
    int imgStart = 0;
    Handler handler = new Handler() {


        @Override
        //重写handleMessage方法,根据msg中what的值判断是否执行后续操作
        public void handleMessage(@NonNull Message msg) {


            super.handleMessage(msg);
            if (msg.what == 0x110) {


                imagChange.setImageResource(imgids[imgStart++ % 4]);
            }
        }
    };

    @Override
    protected void onCreate(@Nullable Bundle savedInstanceState) {


        super.onCreate(savedInstanceState);
        setContentView(R.layout.activity_handler);
        imagChange = findViewById(R.id.img);

        //使用定时器,每隔200毫秒让handler发送一个空信息
        new Timer().schedule(new TimerTask() {


            @Override
            public void run() {


                handler.sendEmptyMessage(0x110);
            }
        }, 0, 200);
    }
}
<ImageView
        android:id="@+id/img"
        android:layout_width="260dp"
        android:layout_height="260dp" />
效果:定时切换图片
2、Handler写在子线程中,由主线程给子线程发送消息
输入一个数,计算质数
public class HandleActivity extends Activity {


    static final String UPPER_NUM = "upper";
    EditText mEtNum;
    CalThread calThread;

    // 定义一个线程类
    class CalThread extends Thread {


        public Handler mHandler;

        public void run() {


            Looper.prepare();
            mHandler = new Handler() {


                @Override
                public void handleMessage(@NonNull Message msg) {


                    super.handleMessage(msg);
                    if (msg.what == 0x120) {


                        int upper = msg.getData().getInt(UPPER_NUM);
                        List<Integer> nums = new ArrayList<Integer>();
                        // 计算从2开始、到upper的所有质数
                        outer:
                        for (int i = 2; i <= upper; i++) {


                            // 用i处于从2开始、到i的平方根的所有数
                            for (int j = 2; j <= Math.sqrt(i); j++) {


                                // 如果可以整除,表明这个数不是质数
                                if (i != 2 && i % j == 0) {


                                    continue outer;
                                }
                            }
                            nums.add(i);
                            // Toast.makeText(HandleActivity.this, "质数分别为:" + nums.toString(), Toast.LENGTH_SHORT).show();
                        }
                        Log.d("Handler.class", "质数分别为:" + nums.toString());
                    }
                }
            };
            Looper.loop();
        }
    }

    @Override
    protected void onCreate(@Nullable Bundle savedInstanceState) {


        super.onCreate(savedInstanceState);
        setContentView(R.layout.activity_headle);
        mEtNum = findViewById(R.id.etNum);
        calThread = new CalThread();
        // 启动新线程
        calThread.start();
    }

    // 为按钮的点击事件提供事件处理函数
    public void cal(View view) {


        //  创建消息
        Message msg = new Message();
        msg.what = 0x120;
        Bundle bundle = new Bundle();
        bundle.putInt(UPPER_NUM, Integer.parseInt(mEtNum.getText().toString()));
        msg.setData(bundle);
        // 向新线程中的Handler发送消息
        calThread.mHandler.sendMessage(msg);
    }
}
<EditText
        android:id="@+id/etNum"
        android:layout_width="match_parent"
        android:layout_height="wrap_content"
        android:hint="请输入一个数!!"
        android:inputType="number" />

    <Button
        android:layout_width="wrap_content"
        android:layout_height="wrap_content"
        android:layout_gravity="center_horizontal"
        android:onClick="cal"
        android:text="计算" />
输入数字16,结果如下显示:

加强版,更新UI对应控件,再次由子线程向主线程中发送消息
public class HandleActivity extends Activity {


    static final String UPPER_NUM = "upper";
    public Handler mainHandler;
    private EditText mEtNum;
    private TextView mTest;
    CalThread calThread;

    // 定义一个线程类
    class CalThread extends Thread {


        public Handler mHandler;

        public void run() {


            Looper.prepare();
            mHandler = new Handler() {


                @Override
                public void handleMessage(@NonNull Message msg) {


                    super.handleMessage(msg);
                    if (msg.what == 0x120) {


                        int upper = msg.getData().getInt(UPPER_NUM);
                        ArrayList<Integer> nums = new ArrayList<Integer>();
                        // 计算从2开始、到upper的所有质数
                        outer:
                        for (int i = 2; i <= upper; i++) {


                            // 用i处于从2开始、到i的平方根的所有数
                            for (int j = 2; j <= Math.sqrt(i); j++) {


                                // 如果可以整除,表明这个数不是质数
                                if (i != 2 && i % j == 0) {


                                    continue outer;
                                }
                            }
                            nums.add(i);
                        }
                        Log.d("Handler.class", "质数分别为:" + nums.toString());
                        Message message = new Message();
                        message.what = 0x110;
                        Bundle bundle = new Bundle();
                        bundle.putIntegerArrayList("Result", nums);
                        message.setData(bundle);
                        mainHandler.sendMessage(message);
                    }
                }
            };
            Looper.loop();
        }
    }

    @Override
    protected void onCreate(@Nullable Bundle savedInstanceState) {


        super.onCreate(savedInstanceState);
        setContentView(R.layout.activity_headle);
        mEtNum = findViewById(R.id.etNum);
        mTest = findViewById(R.id.test);
        calThread = new CalThread();
        // 启动新线程
        calThread.start();
        mainHandler = new Handler() {


            @Override
            public void handleMessage(@NonNull Message msg) {


                super.handleMessage(msg);
                if (msg.what == 0x110) {


                    Bundle bundles = new Bundle();
                    bundles = msg.getData();
                    ArrayList<Integer> nums = bundles.getIntegerArrayList("Result");
                    mTest.setText("指数为:" + nums.toString());
                }
            }
        };
    }

    // 为按钮的点击事件提供事件处理函数
    public void cal(View view) {


        //  创建消息
        Message msg = new Message();
        msg.what = 0x120;
        Bundle bundle = new Bundle();
        bundle.putInt(UPPER_NUM, Integer.parseInt(mEtNum.getText().toString()));
        msg.setData(bundle);
        // 向新线程中的Handler发送消息
        calThread.mHandler.sendMessage(msg);
    }
}
<EditText
     android:id="@+id/etNum"
     android:layout_width="match_parent"
     android:layout_height="wrap_content"
     android:hint="请输入一个数!!"
     android:inputType="number" />

<Button
     android:layout_width="wrap_content"
     android:layout_height="wrap_content"
     android:layout_gravity="center_horizontal"
     android:onClick="cal"
     android:text="计算" />

<TextView
     android:id="@+id/test"
     android:layout_width="wrap_content"
     android:layout_height="wrap_content"
     android:layout_gravity="center_horizontal"
     android:text="获取质数" />

3、在子线程中发送,在主线程中接收,在子线程中处理,在主线程中更新
(1)在UI中创建自定义的Handler对象
(2) 设置按钮的点击监听事件,点击按钮之后,会启动一个线程
(3) 线程启动后,Handler对象会获取一个Message,设置Message的obj属性为“更改后的内容”,然后将Message发送出去
(4)在自定义的Handler中,实现了handleMessage方法,在这个方法中,我们接收到message,然后将message中的obj取出,更新TextView。
public class testActivity extends Activity {
private TextView mTVOriginal;
private EditText mETInput;
private Button mBtnModify;
@Override
protected void onCreate(@Nullable Bundle savedInstanceState) {
super.onCreate(savedInstanceState);
setContentView(R.layout.activity_test);
initView();
}
private void initView() {
mTVOriginal = findViewById(R.id.original);
mETInput = findViewById(R.id.etInput);
mBtnModify = findViewById(R.id.btnModify);
mBtnModify.setOnClickListener(new View.OnClickListener() {
@Override
public void onClick(View v) {
Thread thread = new MyThread();
thread.start();
}
});
}
class MyThread extends Thread {
@Override
public void run() {
super.run();
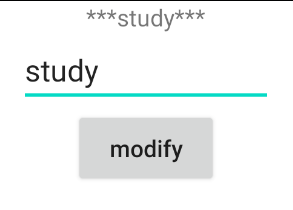
String str = "***" + mETInput.getText().toString() + "***";
Message msg = handler.obtainMessage();
msg.obj = str;
handler.sendMessage(msg);
Log.d("子线程", "这里是发送消息的线程,发送的内容是:" + str + " 线程名是:" + Thread.currentThread().getName());
}
}
Handler handler = new Handler() {
@Override
public void handleMessage(@NonNull Message msg) {
super.handleMessage(msg);
String sttr = (String) msg.obj;
mTVOriginal.setText(sttr);
Log.d("主线程", "这里是更改UI的线程,接收到的内容是:" + sttr + " 线程名是:" + Thread.currentThread().getName());
}
};
}
<TextView
    android:id="@+id/original"
    android:layout_width="wrap_content"
    android:layout_height="wrap_content"
    android:text="原来的内容"/>

<EditText
    android:id="@+id/etInput"
    android:layout_width="wrap_content"
    android:layout_height="wrap_content"
    android:hint="请输入内容!!!"/>

<Button
    android:id="@+id/btnModify"
    android:layout_width="wrap_content"
    android:layout_height="wrap_content"
    android:textAllCaps="false"
    android:text="modify"/>

运行后,结果如下所示:

4、 点击按钮,开始播放幻灯片。
/**
 * 实现点击按钮,开始播放幻灯片,每张幻灯片间隔1s
 */
public class HandlerActivity extends Activity {


    private ImageView imagChange;
    private Button mBtnStart;
    //  定义切换的图片数组id
    int imgids[] = new int[]{


            R.drawable.ic_pikachu1, R.drawable.ic_pikachu2,
            R.drawable.ic_pikachu3, R.drawable.ic_pikachu4
    };
    int imgIndex = 0;

    @Override
    protected void onCreate(@Nullable Bundle savedInstanceState) {


        super.onCreate(savedInstanceState);
        setContentView(R.layout.activity_handler);
        initView();
    }

    private void initView() {


        imagChange = findViewById(R.id.img);
        mBtnStart = findViewById(R.id.btnStart);

        mBtnStart.setOnClickListener(new View.OnClickListener() {


            @Override
            public void onClick(View v) {


                Thread thread = new MyThread();
                thread.start();
            }
        });
    }

    class MyThread extends Thread {


        @Override
        public void run() {


            super.run();
            while (true) {


                Object obj = new Object();
                synchronized (obj) {


                    Message msg = handler.obtainMessage();
                    msg.obj = imgIndex;
                    handler.sendMessage(msg);
                    imgIndex++;
                    try {


                        Thread.sleep(1 * 1000);
                    } catch (InterruptedException e) {


                        e.printStackTrace();
                    }
                    if (imgIndex >= imgids.length) {


                        imgIndex = 0;
                    }
                }
            }
        }
    }

    Handler handler = new Handler() {


        @Override
        //重写handleMessage方法,根据msg中what的值判断是否执行后续操作
        public void handleMessage(@NonNull Message msg) {


            super.handleMessage(msg);
            int i = (int) msg.obj;
            BitmapDrawable bd = (BitmapDrawable) imagChange.getDrawable();
            if (bd != null && !bd.getBitmap().isRecycled()) {


                bd = null;
            }
            imagChange.setImageResource(imgids[i]);
        }
    };
}
<ImageView
    android:id="@+id/img"
    android:layout_width="260dp"
    android:layout_height="260dp" />

<Button
    android:id="@+id/btnStart"
    android:layout_width="wrap_content"
    android:layout_height="wrap_content"
    android:text="start" />