

1. 前言
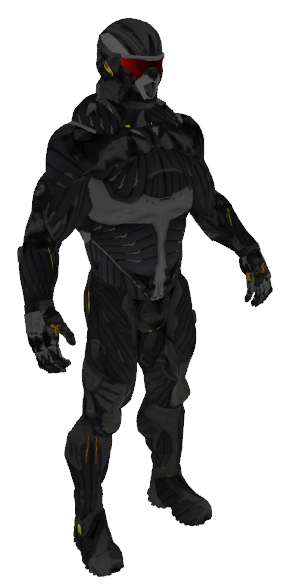
我们已经介绍了利用shader实现的光照模型对物体进行光照渲染的方法。接下来,我们希望能够在OpenGL环境中载入通过艺术家或者三维扫描获取的三维模型,并将光照施加在三维模型上,实现光照渲染。
为了能够在OpenGL中实现对三维模型的加载和渲染,需要解决两个问题:如何将三维模型载入到环境中以及如何对载入的三维模型进行渲染。幸运的是,已经存在现成的库帮助我们解析各种格式的三维模型数据。为了与learnopengl教程一致,我们使用Assimp(Open Asset Import Library)作为模型导入的工具。
2. Assimp配置
本章中我们介绍如何在OpenGL环境中配置Assimp。首先我们在官网下载Assimp的源代码,链接为:https://www.assimp.org/index.php/downloads.
我下载的是3.3.1版本。这里需要注意的是,如果你下载的是已经编译的版本,很可能不能正常运行。经过我的实验发现,其跨平台兼容性确实是不够鲁棒。所以最好的办法还是下载后根据自己的平台编译。
我的IDE是VS2019,64位系统。使用Cmake对源代码进行编译,得到assimp-vc140-mt.dll和assimp-vc140-mt.lib。路径为cmake工程项目输出路径/code/Debug

将dll和lib配置在你的OpenGL项目对应的路径下,并且添加源代码的include到包含目录,并且把assimp-vc140-mt.lib添加链接库,这样就完成了对Assimp的配置。
如果你希望了解更具体的步骤,可以参看:https://www.jianshu.com/p/4f3a1271ce0b.
3. 基于Assimp的模型加载
在完成对Assimp的配置后,接下来我们希望实现将三维模型数据解析并加载到OpenGL环境中。我们来看一下具体的代码:
class Model{

public:
    // model data
    vector<Texture> textures_loaded; //存储纹理
    vector<Mesh> meshes;//存储三维模型的网格信息
    string directory;//存储路径
    bool gammaCorrection;

//Method:
    Model(string const& path, bool gamma = false);
    void Draw(Shader& shader);

private:
    void loadModel(string const& path);
    void processNode(aiNode* node, const aiScene* scene);
    Mesh processMesh(aiMesh* mesh, const aiScene* scene);
    vector<Texture> loadMaterialTextures(aiMaterial* mat, aiTextureType type, string typeName);

}

unsigned int TextureFromFile(const char* path, const string& directory, bool gamma)//加载纹理图像
这段伪代码描述了一个三维模型处理的类Model,包含三维模型的网格数据与纹理数据的加载,解析等功能。这里我们主要分析一下网格的存储结构和绘制的方法。
网格的存储结构基于Mesh类。Assimp的处理流程不是针对一个独立的mesh进行读取的,而是首先加载一个场景,之后扫描场景中的独立节点,并将其存储为一个mesh。
首先是载入场景:
void loadModel(string const& path){
Assimp::Importer importer;
        const aiScene* scene = importer.ReadFile(path, aiProcess_Triangulate | aiProcess_GenSmoothNormals | aiProcess_FlipUVs | aiProcess_CalcTangentSpace);
}
之后是对场景进行节点扫描,并逐个处理:
void processNode(aiNode* node, const aiScene* scene)
{
    // process each mesh located at the current node
    for (unsigned int i = 0; i < node->mNumMeshes; i++)
    {
        aiMesh* mesh = scene->mMeshes[node->mMeshes[i]];
        meshes.push_back(processMesh(mesh, scene));
    }
}
最后就是将Mesh的数据读取出来:
Mesh processMesh(aiMesh* mesh, const aiScene* scene){

        // data to fill
        vector<Vertex> vertices;
        vector<unsigned int> indices;

        // walk through each of the mesh's vertices
        for (unsigned int i = 0; i < mesh->mNumVertices; i++)
        {
            Vertex vertex;
            glm::vec3 vector;
            // positions
            vector.x = mesh->mVertices[i].x;
            vector.y = mesh->mVertices[i].y;
            vector.z = mesh->mVertices[i].z;
            vertex.Position = vector;
            // normals
            if (mesh->HasNormals())
            {
                vector.x = mesh->mNormals[i].x;
                vector.y = mesh->mNormals[i].y;
                vector.z = mesh->mNormals[i].z;
                vertex.Normal = vector;
            }
            vertices.push_back(vertex);
        }
        for (unsigned int i = 0; i < mesh->mNumFaces; i++)
        {
            aiFace face = mesh->mFaces[i];
            // retrieve all indices of the face and store them in the indices vector
            for (unsigned int j = 0; j < face.mNumIndices; j++)
                indices.push_back(face.mIndices[j]);
        }

}
Mesh的读取代码,我们删除了纹理部分,以方便理解。当把Mesh的数据读取后,learnopengl还给了一个单独的mesh类,用于存储数据。在下一章,我们介绍如何利用shader来绘制mesh。
4. Mesh绘制
我们首先来介绍一下Mesh类中与shader着色器初始化有关的代码。
void setupMesh()
{
        // create buffers/arrays
        glGenVertexArrays(1, &VAO);
        glGenBuffers(1, &VBO);
        glGenBuffers(1, &EBO);

        glBindVertexArray(VAO);
        // load data into vertex buffers
        glBindBuffer(GL_ARRAY_BUFFER, VBO);
        // A great thing about structs is that their memory layout is sequential for all its items.
        // The effect is that we can simply pass a pointer to the struct and it translates perfectly to a glm::vec3/2 array which
        // again translates to 3/2 floats which translates to a byte array.
        glBufferData(GL_ARRAY_BUFFER, vertices.size() * sizeof(Vertex), &vertices[0], GL_STATIC_DRAW);

        glBindBuffer(GL_ELEMENT_ARRAY_BUFFER, EBO);
        glBufferData(GL_ELEMENT_ARRAY_BUFFER, indices.size() * sizeof(unsigned int), &indices[0], GL_STATIC_DRAW);

        // set the vertex attribute pointers
        // vertex Positions
        glEnableVertexAttribArray(0);
        glVertexAttribPointer(0, 3, GL_FLOAT, GL_FALSE, sizeof(Vertex), (void*)0);
        // vertex normals
        glEnableVertexAttribArray(1);
        glVertexAttribPointer(1, 3, GL_FLOAT, GL_FALSE, sizeof(Vertex), (void*)offsetof(Vertex, Normal));
        // vertex texture coords
        glEnableVertexAttribArray(2);
        glVertexAttribPointer(2, 2, GL_FLOAT, GL_FALSE, sizeof(Vertex), (void*)offsetof(Vertex, TexCoords));
        // vertex tangent
        glEnableVertexAttribArray(3);
        glVertexAttribPointer(3, 3, GL_FLOAT, GL_FALSE, sizeof(Vertex), (void*)offsetof(Vertex, Tangent));
        // vertex bitangent
        glEnableVertexAttribArray(4);
        glVertexAttribPointer(4, 3, GL_FLOAT, GL_FALSE, sizeof(Vertex), (void*)offsetof(Vertex, Bitangent));

        glBindVertexArray(0);
}
基本上都是按照绑定的基本流程做的,值得一提的是数据导入的方式。在learnopengl课程早期定义的正方体或者三角形,都是以数组的形式传入。这里数据的传入是用vector容器来传入的。起初我自己尝试过一些数据导入的方法,如数组指针等,都不成功。参考该程序,事实上我们就掌握了导入数据的核心方法,这样即使我们不适用Assimp,使用其他的导入库,我们也能够实现数据的导入与绘制。这里的Vertex被封装成一个结构体:
struct Vertex {
    // position
    glm::vec3 Position;
    // normal
    glm::vec3 Normal;
    // texCoords
    glm::vec2 TexCoords;
    // tangent
    glm::vec3 Tangent;
    // bitangent
    glm::vec3 Bitangent;
};
接下来我们看一下绘制的代码:
void Draw(Shader& shader)
    {
        // bind appropriate textures
        unsigned int diffuseNr = 1;
        unsigned int specularNr = 1;
        unsigned int normalNr = 1;
        unsigned int heightNr = 1;
        for (unsigned int i = 0; i < textures.size(); i++)
        {
            glActiveTexture(GL_TEXTURE0 + i); // active proper texture unit before binding
            // retrieve texture number (the N in diffuse_textureN)
            string number;
            string name = textures[i].type;
            if (name == "texture_diffuse")
                number = std::to_string(diffuseNr++);
            else if (name == "texture_specular")
                number = std::to_string(specularNr++); // transfer unsigned int to stream
            else if (name == "texture_normal")
                number = std::to_string(normalNr++); // transfer unsigned int to stream
            else if (name == "texture_height")
                number = std::to_string(heightNr++); // transfer unsigned int to stream

            // now set the sampler to the correct texture unit
            glUniform1i(glGetUniformLocation(shader.ID, (name + number).c_str()), i);
            // and finally bind the texture
            glBindTexture(GL_TEXTURE_2D, textures[i].id);
        }

        // draw mesh
        glBindVertexArray(VAO);
        glDrawElements(GL_TRIANGLES, indices.size(), GL_UNSIGNED_INT, 0);
        glBindVertexArray(0);

        // always good practice to set everything back to defaults once configured.
        glActiveTexture(GL_TEXTURE0);
    }
其中,纹理代码的绘制占据了很大部分,这部分我们忽略。主要还是看对网格的绘制
glBindVertexArray(VAO);
glDrawElements(GL_TRIANGLES, indices.size(), GL_UNSIGNED_INT, 0);
glBindVertexArray(0);
根据绑定的数组和对应的索引,shader绘制出三角面片的数据。这样,我们就在窗口画出了网格。
如果你希望获得整个原始代码,可以通过以下链接获得数据:
模型: