一.主服务器
注意控制器中访问上传图像服务器的路径。(如何检查:在上传图像服务器的保存图像目录uploads_image/新建一个index.jsp,启动上传图像服务器,访问path,如果访问jsp成功,代表路径没问题)
@RequestMapping("/fileupload3")
public String fileuoload3(MultipartFile upload,HttpServletRequest request) throws Exception {
System.out.println("跨服务器文件上传...");
String path = "http://localhost:8088/springmvc_day06_spring_image_war_exploded/uploads_image/";
String filename = upload.getOriginalFilename();
Client client = Client.create();
WebResource webResource = client.resource(path + filename);
System.out.println(request.getSession().getServletContext().getRealPath("/uploads"));
webResource.put(upload.getBytes());
return "success";
主服务器没什么好说的,使用springmvc实现在本服务器上传比较简单。
二.上传图像服务器(坑比较多)
1.是web项目即可,只需要建立一个保存文件的目录uploads_image/。不必须用springmvc框架,这可能会避免很多不必要的问题!
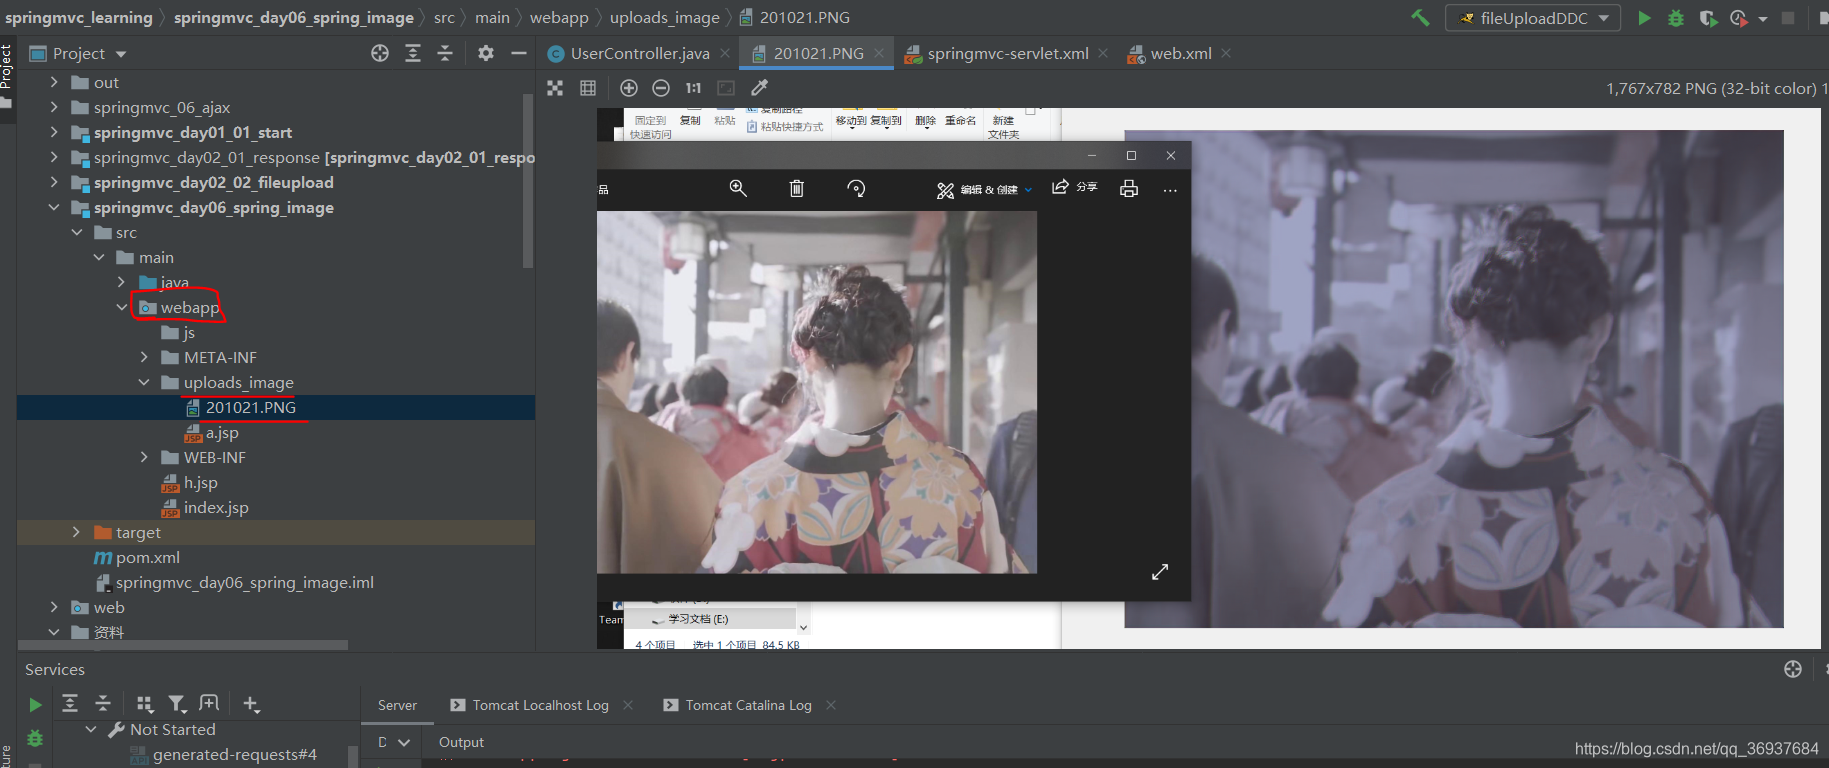
上传图像服务器的项目结构,很简单(我的.xml都放在WEB-INF/)
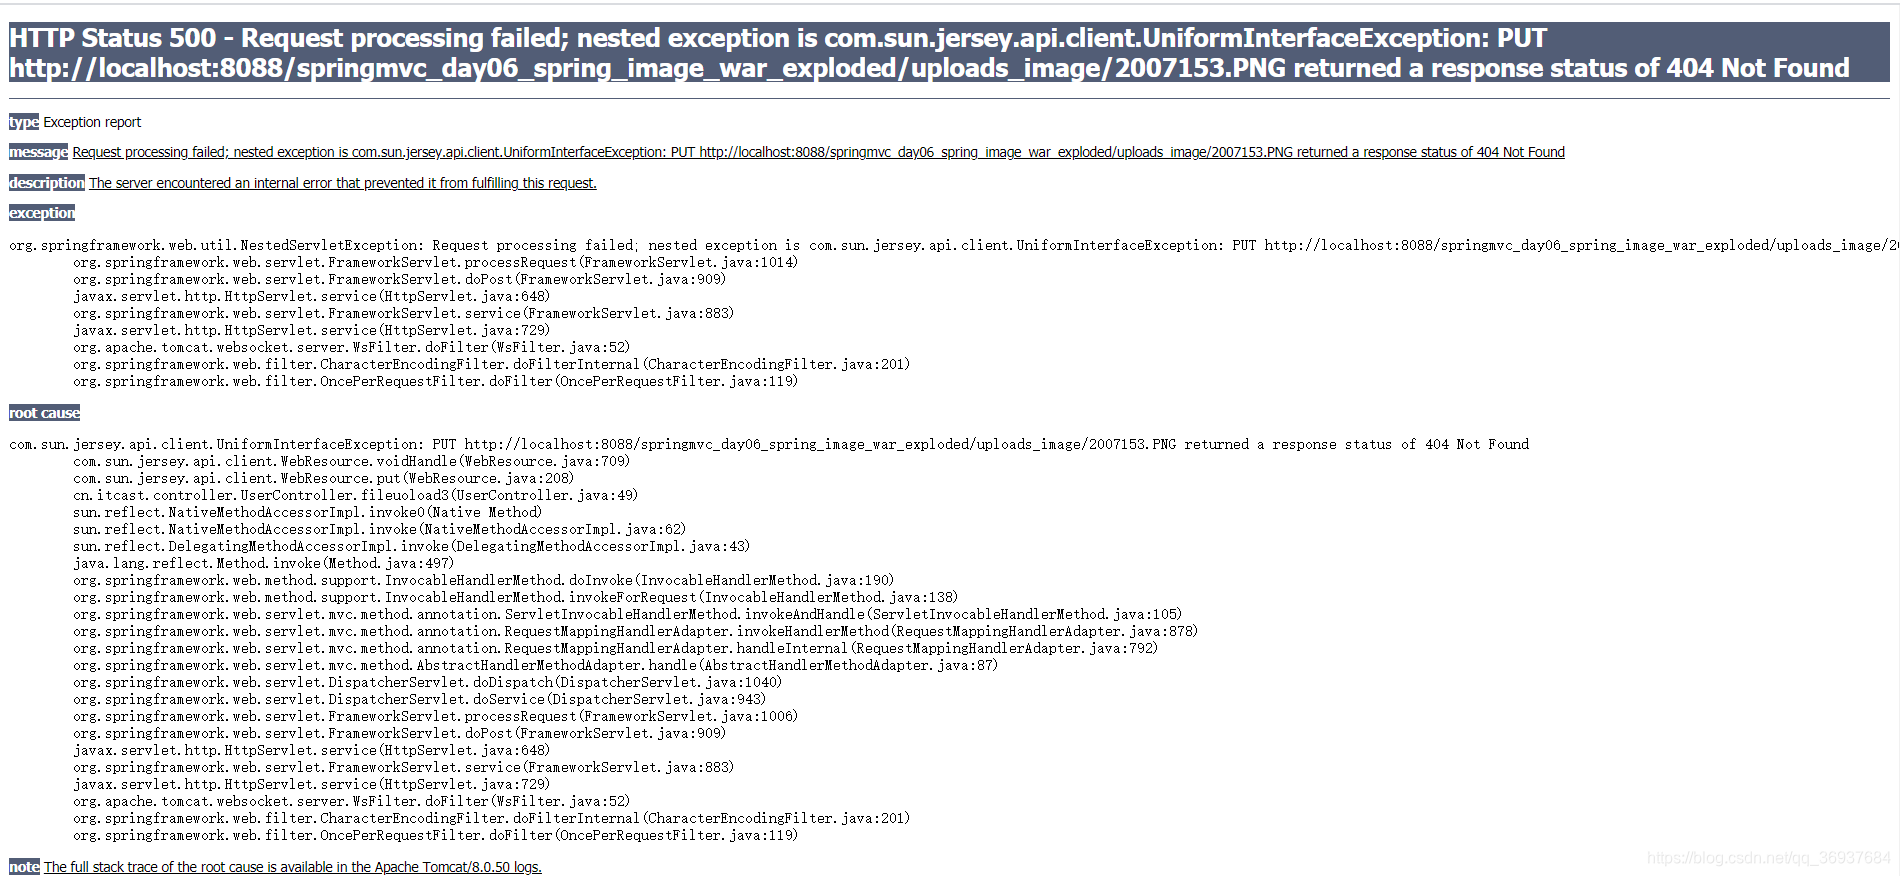
2.如果上传图像服务器使用了springmvc框架,注意不能拦截静态资源。需要在springmvc-servlet.xml中加一行<mvc:default-servlet-handler/ > ,否则会报404错误!
springmvc-servlet.xml
<?xml version="1.0" encoding="UTF-8"?>
<beans xmlns="http://www.springframework.org/schema/beans"
xmlns:mvc="http://www.springframework.org/schema/mvc"
xmlns:context="http://www.springframework.org/schema/context"
xmlns:xsi="http://www.w3.org/2001/XMLSchema-instance"
xsi:schemaLocation=" http://www.springframework.org/schema/beans http://www.springframework.org/schema/beans/spring-beans.xsd
http://www.springframework.org/schema/mvc http://www.springframework.org/schema/mvc/spring-mvc.xsd
http://www.springframework.org/schema/context http://www.springframework.org/schema/context/spring-context.xsd">
<context:component-scan base-package="indi.huishi"></context:component-scan>
<bean id="internalResourceViewResolver" class="org.springframework.web.servlet.view.InternalResourceViewResolver">
<property name="prefix" value="/WEB-INF/pages/"></property>
<property name="suffix" value=".jsp"></property>
</bean>
<mvc:default-servlet-handler/>
<mvc:annotation-driven />
</beans>
web.xml
<?xml version="1.0" encoding="UTF-8"?>
<web-app xmlns:xsi="http://www.w3.org/2001/XMLSchema-instance" xmlns="http://java.sun.com/xml/ns/j2ee" xmlns:web="http://xmlns.jcp.org/xml/ns/javaee" xsi:schemaLocation="http://java.sun.com/xml/ns/j2ee http://java.sun.com/xml/ns/j2ee/web-app_2_4.xsd http://xmlns.jcp.org/xml/ns/javaee http://java.sun.com/xml/ns/javaee/web-app_2_5.xsd" version="2.4">
  <filter>
    <filter-name>CharacterEncodingFilter</filter-name>
    <filter-class>org.springframework.web.filter.CharacterEncodingFilter</filter-class>
    <init-param>
      <param-name>encoding</param-name>
      <param-value>utf-8</param-value>
    </init-param>
  </filter>
  <filter-mapping>
    <filter-name>CharacterEncodingFilter</filter-name>
    <url-pattern>/*</url-pattern>
  </filter-mapping>


  <servlet>
    <servlet-name>springmvc</servlet-name>
    <servlet-class>org.springframework.web.servlet.DispatcherServlet</servlet-class>
  </servlet>
  <servlet-mapping>
    <servlet-name>springmvc</servlet-name>
    <url-pattern>/</url-pattern>
  </servlet-mapping>

</web-app>
3.上传图像服务器的tomcat 的web.xml中设置写操作,保存之后重启tomcat ,否则也会报错!
        <init-param>
            <param-name>readonly</param-name>
            <param-value>false</param-value>
        </init-param>
4.如果主服务器使用默认8080端口号,那么在tomcat上传图像服务器的server.xml 中改为非8080端口(例如8088),可以解决端口号冲突。(如何检查:netstat -aon | findstr 8088)
  <Service name="Catalina">
    <Connector port="8088" protocol="HTTP/1.1"
               connectionTimeout="20000"
               redirectPort="8443" />
    <Connector port="8089" protocol="AJP/1.3" redirectPort="8443" />
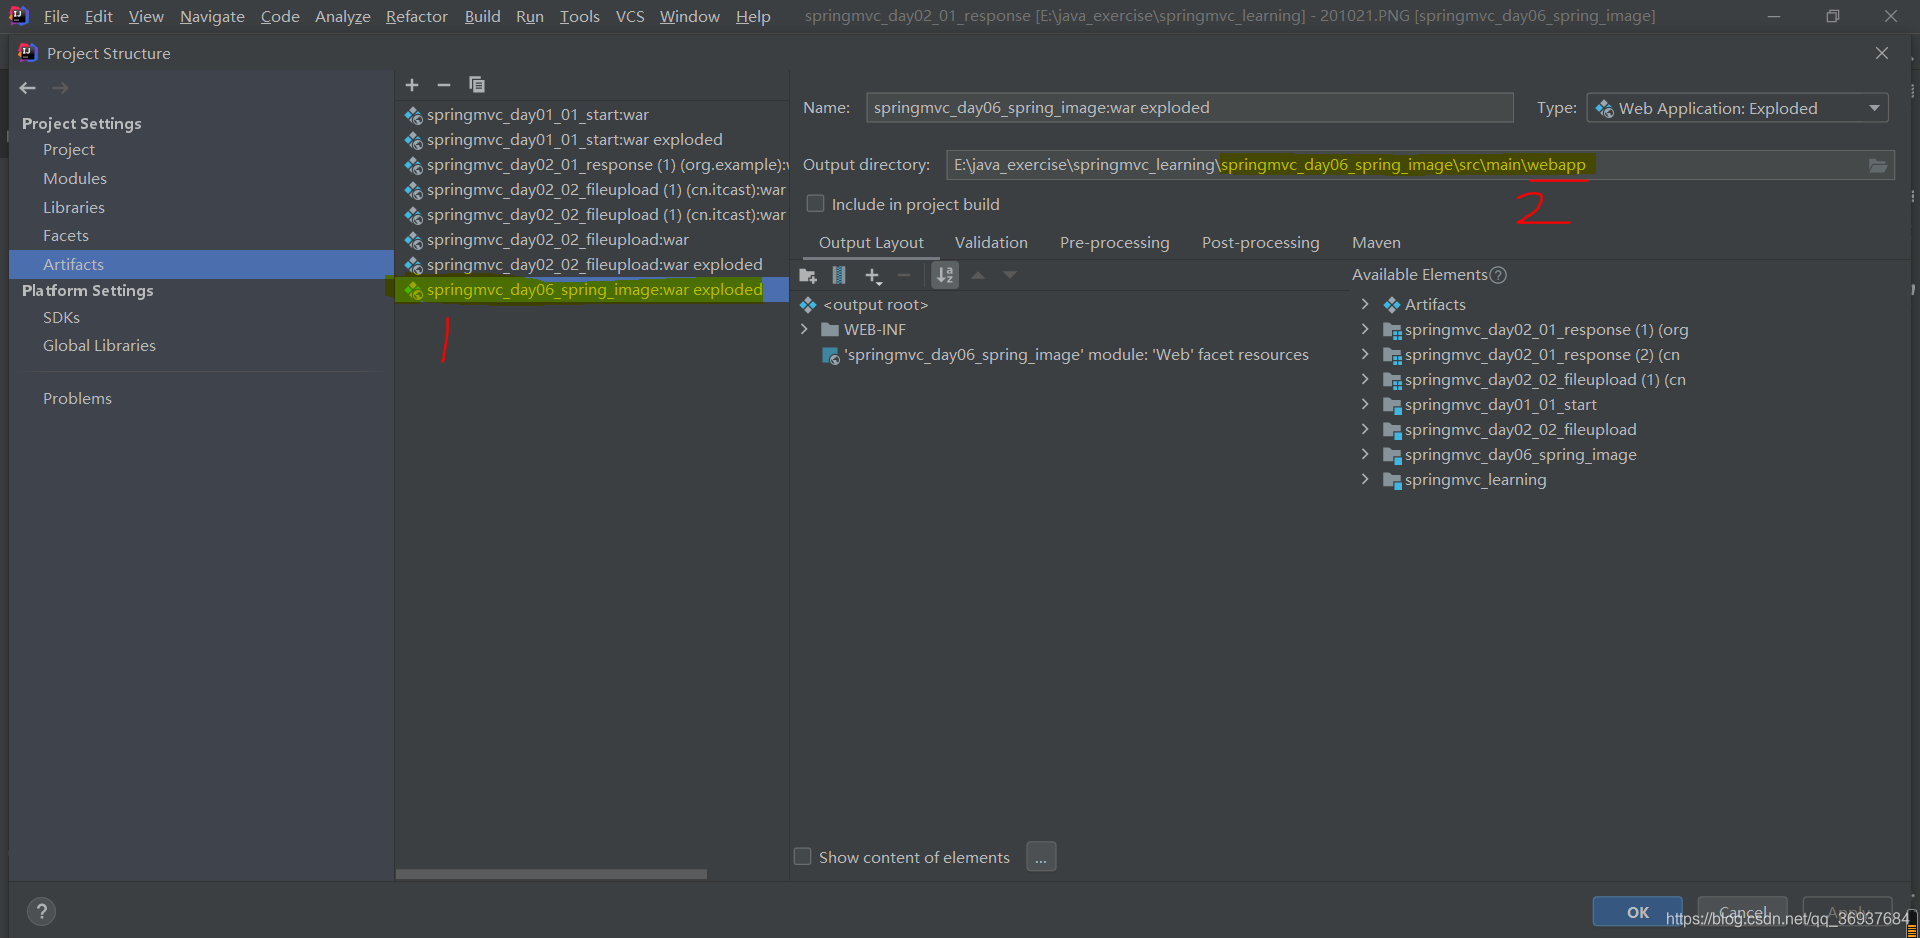
5.※ 确认artifacts使用的是war exploded而不是war(war会将结果保存在本地tomcat的webapp目录下!) [下图1]
6.※ 对应的output directory以当前模块的webapp(或者web/WebContent)结束(而不是target或者out目录!),因为图片保存目录uploads_image在webapp下。[下图2]
5和6的错误可能会造成运行没问题,但是保存目录中找不到上传的图片!
然后将新的war exploded加入tomcat中,重启tomcat。