参考博文:使用 OpenPose 在 OpenCV 中进行多人姿势估计
https://learnopencv.com/multi-person-pose-estimation-in-opencv-using-openpose/
**COCO 输出格式**
鼻子– 0,颈部– 1,右肩– 2,右肘– 3,右手腕– 4,
左肩– 5,左肘– 6,左手腕– 7,右臀部– 8,
右膝– 9 , 右脚踝 – 10, 左臀部 – 11, 左膝盖 – 12,
踝关节 – 13 ,右眼 – 14, 左眼 – 15, 右耳 – 16,
左耳 – 17, 背景 – 18
1,项目下载
a,github链接:
https://github.com/spmallick/learnopencv/tree/master/OpenPose-Multi-Person
b,资源
https://download.csdn.net/download/qq_43033547/29966326
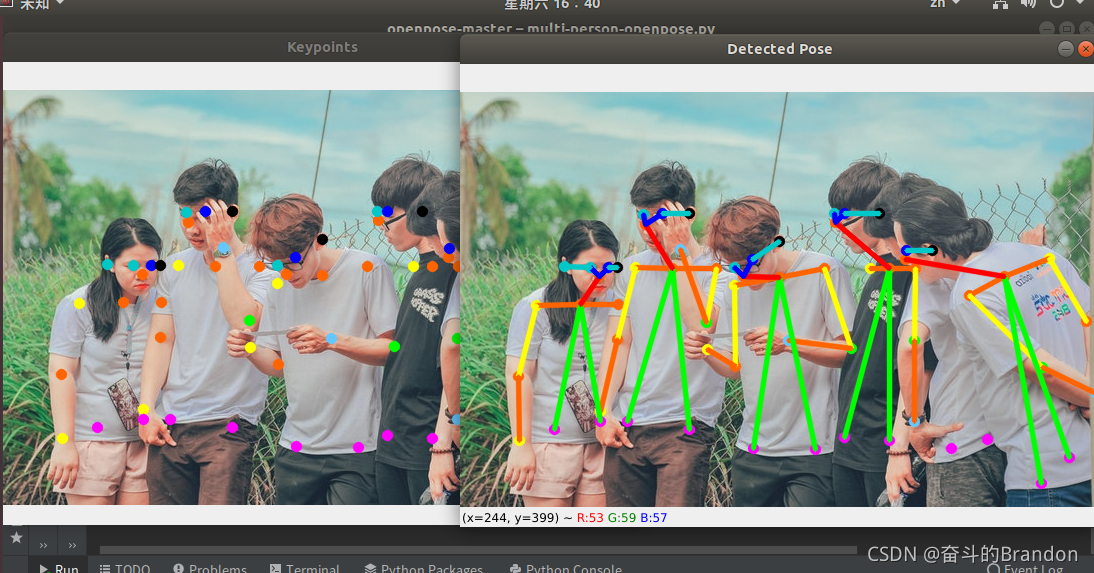
2,运行效果
pycharm打开项目,并运行。
3,说明
#Specify the paths for the 2 files

protoFile = "pose/coco/pose_deploy_linevec.prototxt"
#指定了神经网络的架构——不同层的排列方式等。

weightsFile = "pose/coco/pose_iter_440000.caffemodel"
#用于存储训练模型的权重

#Read the network into Memory
net = cv2.dnn.readNetFromCaffe(protoFile, weightsFile)
加载图像并创建输入 blob
image1 = cv2.imread("group.jpg")
# Fix the input Height and get the width according to the Aspect Ratio
inHeight = 368

inWidth = int((inHeight/frameHeight)*frameWidth)


inpBlob = cv2.dnn.blobFromImage(image1, 1.0 / 255, (inWidth, inHeight),

                          (0, 0, 0), swapRB=False, crop=False)
前传过网
1
net.setInput(inpBlob)
2
output = net.forward()
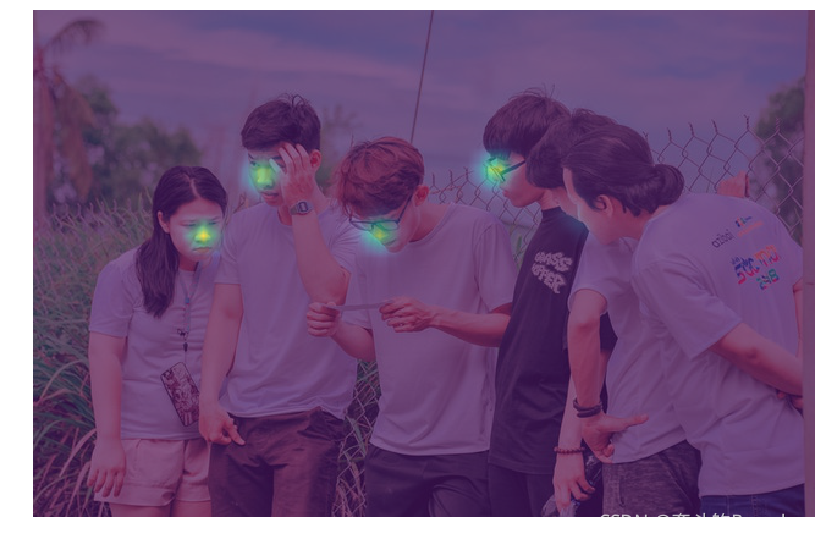
样本输出
我们首先将输出调整为与输入相同的大小。然后我们检查鼻子关键点对应的置信度图。您还可以使用 cv2.addWeighted 函数对图像上的 probMap 进行 alpha 混合。
i = 0
probMap = output[0, i, :, :]
probMap = cv2.resize(probMap, (frameWidth, frameHeight))

plt.imshow(cv2.cvtColor(image1, cv2.COLOR_BGR2RGB))
plt.imshow(probMap, alpha=0.6)
关键点检测
参考
https://learnopencv.com/multi-person-pose-estimation-in-opencv-using-openpose/