效果图:

planTable.js
let days = ["21-05", "21-06", "21-07", "21-08", "21-09", "21-10","21-11"]
let plans = ["计划一", "计划二", "计划三"]
// let times = ['7:00', '7:30', '8:00', '8:30', '9:00', '9:30', '10:00', '10:30', '11:00', '11:30', '12:00', '12:30', '13:00', '13:30', '14:00', '14:30', '15:00', '15:30', '16:00', '16:30', '17:00', '17:30', '18:00', '18:30', '19:00', '19:30', '20:00', '20:30', '21:00', '21:30', '22:00', '22:30', '23:00']
let meeting = [
    // 安排的数组,开始时间和持续时间,标题
    [{
        index:0,
        days:"21-05",
        subject: '111',
        start:0,
        time: 5, //定义需要的天数
        pass: 0
    }],
    [{
        index:1,
        days:"21-06",
        subject: "222",
        start:1,
        time: 5,
        pass: 1
    }],
    [{
        index:2,
        days:"21-07",
        subject: "333",
        start: 2,
        time:3,
        pass: 2
    }]
]
export {
    days,
    plans,
    meeting,
}
plan组件
<template>
  <div class="father">
    <span class="commonTop">工作计划</span>
    <!-- 工作计划 -->
    <table :style="{ height: myhoverHeight }" class="mytable">
      <thead class="mythead">
        <tr>
          <th></th>
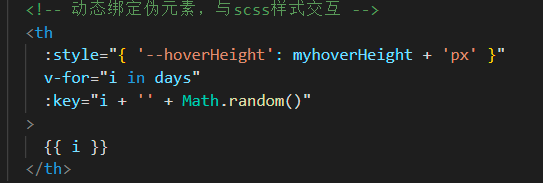
          <!-- 动态绑定伪元素,与scss样式交互 -->
          <th
            :style="{ '--hoverHeight': myhoverHeight + 'px' }"
            v-for="i in days"
            :key="i + '' + Math.random()"
          >
            {

   { i }}
          </th>
        </tr>
      </thead>
      <tbody>
        <tr
          v-for="(i, index) in info"
          :key="i + new Date().valueOf() + Math.random() + ''"
        >
          <th class="plans" scope="col">{

   { plans[index] }}</th>
          <td
            v-for="j in i"
            :colspan="j == 1 ? 1 : j['time']"
            :key="Math.random() + j + new Date().valueOf() + ''"
            :class="
              j.pass == 0
                ? 'cell1'
                : j.pass == 1
                ? 'cell2'
                : j.pass == 2
                ? 'cell3'
                : 'cell'
            "
          >
            <div>
              {

   {
                meeting[index][0].days === j.days
                  ? meeting[index][0].subject
                  : ""
              }}
            </div>
            <!--
                   v-for="(j, inindex) in i"
                  {

   { meeting[index][0].index === inindex ? meeting[index][0].subject : "" }}
                -->
          </td>
        </tr>
      </tbody>
    </table>
    <!-- 工作计划 -->
  </div>
</template>
<script>
import { days, plans, meeting } from "@/utils/planTable.js";
export default {
  data() {
    return {
      info: [],
      days: days,
      plans: plans,
      meeting: meeting,
      hoverHeight: 0,
    };
  },
  computed: {
    myhoverHeight() {
      return this.hoverHeight;
    },
  },
  mounted() {
    // 工作计划表
    // 根据预约信息数组,处理成表格可以使用的形式
    // 预约信息是该周每天的预约情况,0-6表示星期一到星期天
    let info = [],
      xLength = this.days.length,
      yLength = this.plans.length;
    for (let i = 0; i < yLength; i++) {
      info[i] = [];
      for (let j = 0; j < xLength; j++) {
        info[i].push(1);
      }
    }
    for (let i = 0; i < yLength; i++) {
      //x周
      let m = meeting[i];
      for (let k of m) {
        info[k.start][i] = k;
      }
    }
    this.info = info;
    this.hoverHeight = 90 * yLength + yLength * 20;
  },
};
</script>
<style lang="scss" scoped>
// 工作计划
.mytable {
  width: 100%;
  .mythead {
    th {
      width: 90px;
      font-size: 18px;
      color: rgb(121, 120, 120);
      text-align: center;
      border-right: 1px solid #eee;
      line-height: 55px;
      position: relative;
      &::after {
        content: "";
        width: 1px;
        top: 55px;
        left: -3px;
        height: var(--hoverHeight);
        position: absolute;
        background: #eee;
      }
    }
    th:last-child {
      &::before {
        content: "";
        width: 1px;
        right: -1px;
        top: 55px;
        height: var(--hoverHeight);
        position: absolute;
        background: #eee;
      }
    }
  }
  td {
    width: 90px;
    line-height: 90px;
    border: none;
    padding: 10px 0px;
  }
}
tbody * {
  padding: 0;
  .plans {
    font-size: 18px;
    color: rgb(121, 120, 120);
  }
}
.mytd:hover {
  /*background: red;*/
  border: 2px solid blue;
}
// 针对不同状态的的样式
.cell {
  opacity: 0;
}
.cell1 {
  div {
    align-items: center;
    vertical-align: middle;
    background: #fff5ef;
    box-sizing: border-box;
    border-left: 3px solid #f88d4e !important;
  }
}
.cell2 {
  div {
    background: #e5faf1;
    box-sizing: border-box;
    border-left: 3px solid #76fac1 !important;
  }
}
.cell3 {
  div {
    background: #e7f2fc;
    box-sizing: border-box;
    border-left: 3px solid #80bff8 !important;
  }
}
// 工作计划
</style>
使用:在父组件中直接注册调用
记录其它知识点
1、table表格设置border边框重复问题
外表格样式:<table border="1" cellspacing="0" cellpadding="0" style="border-collapse: collapse;”>
内表格样式:<table border="1" cellspacing="0" cellpadding="0" style="border-collapse: collapse;border-width:0px; border-style:hidden;">2、scss与定义的数据交互使用:上述代码中有


