一、搭建环境
环境是:一人一狗
狗类:
package com.wzq.pojo;

import org.springframework.beans.factory.annotation.Value;
import org.springframework.context.annotation.Scope;
import org.springframework.stereotype.Component;

public class Dog {


    private String name;

    public void shout(){


        System.out.println("汪汪汪~");
    }

    public String getName() {


        return name;
    }

    public void setName(String name) {


        this.name = name;
    }
}
人有一只狗,人的实体类:
package com.wzq.pojo;

import org.springframework.beans.factory.annotation.Autowired;
import org.springframework.beans.factory.annotation.Value;
import org.springframework.context.annotation.Scope;
import org.springframework.stereotype.Component;

public class User {


    private int id;
    private String name;
    private Dog dog;

    public int getId() {


        return id;
    }

    public void setId(int id) {


        this.id = id;
    }

    public String getName() {


        return name;
    }

    public void setName(String name) {


        this.name = name;
    }

    public Dog getDog() {


        return dog;
    }

    public void setDog(Dog dog) {


        this.dog = dog;
    }

    @Override
    public String toString() {


        return "User{" +
                "id=" + id +
                ", name='" + name + '\'' +
                ", dog=" + dog +
                '}';
    }
}
二、使用JavaConfig实现配置
Spring可以完全使用Java来代替xml
在JavaConfig中有几个重要的注解,分别是:
-
@Configuration:指定这个类为配置类 -
@ComponentScan("包"):扫描指定包下的类全都注册到Ioc容器中等价于
.xml中的:<!-- 指定扫描包,这个包下的注解就会生效 --> <context:component-scan base-package="com.wzq.pojo" /> -
@Import(某配置类.class):导入其他配置类扫描二维码关注公众号,回复: 13123202 查看本文章
等价于
.xml的:<import resource="xxxx.xml" /> -
@Bean:把具体的某个类注册为Bean等价于
.xml的:<bean id="" class="" > </bean>
下面开始演示:
新建包,随后新建一个BeansConfig.class类,这个类是配置类,它的任务是把人和狗注册为Bean:
package com.wzq.config;

import com.wzq.pojo.Dog;
import com.wzq.pojo.User;
import org.springframework.context.annotation.Bean;
import org.springframework.context.annotation.ComponentScan;
import org.springframework.context.annotation.Configuration;

//指定这个类为配置类
@Configuration
//扫描包
@ComponentScan("com.wzq.pojo")
public class BeansConfig {


    //把某个类注册
    @Bean
    public User user(){


        return new User();
    }

    @Bean
    public Dog dog(){


        return new Dog();
    }
}
三、使用注解开发
注意:以下操作在被注册为bean的类中操作
| 注解 | 说明 | 等价于 |
|---|---|---|
@Component |
注册某个类为bean与上面提到的 @Bean作用一致 |
<bean id="" class=""></bean> |
@Value("值") |
用于给基本数据类型注入值 | <property name="" value=""/> |
@Autowired |
在上篇博客已经提及 | |
@Scope("作用域名称") |
指定这个类的作用域 | <bean scope="singleton" /> |
在web开发中,会按照MVC三层架构分层,为了更好的区分,Spring 多出了几个衍生注解,他们的作用与@Component一致:
| 注解 | 层 |
|---|---|
@Repository |
dao层 |
@Service |
service层 |
@Controller |
controller层 |
下面实现一下:
人类:
package com.wzq.pojo;

import org.springframework.beans.factory.annotation.Autowired;
import org.springframework.beans.factory.annotation.Value;
import org.springframework.context.annotation.Scope;
import org.springframework.stereotype.Component;

@Component(value = "user111")
@Scope("singleton")
public class User {


    @Value("1")
    private int id;
    @Value("wzq")
    private String name;
    @Autowired
    private Dog dog;

    public int getId() {


        return id;
    }

    public void setId(int id) {


        this.id = id;
    }

    public String getName() {


        return name;
    }

    public void setName(String name) {


        this.name = name;
    }

    public Dog getDog() {


        return dog;
    }

    public void setDog(Dog dog) {


        this.dog = dog;
    }

    @Override
    public String toString() {


        return "User{" +
                "id=" + id +
                ", name='" + name + '\'' +
                ", dog=" + dog +
                '}';
    }
}
狗类:
package com.wzq.pojo;

import org.springframework.beans.factory.annotation.Value;
import org.springframework.context.annotation.Scope;
import org.springframework.stereotype.Component;

@Component
@Scope("singleton")
public class Dog {


    @Value("wzq's dog")
    private String name;

    public void shout(){


        System.out.println("汪汪汪~");
    }

    public String getName() {


        return name;
    }

    public void setName(String name) {


        this.name = name;
    }

    @Override
    public String toString() {


        return "Dog{" +
                "name='" + name + '\'' +
                '}';
    }
}
四、测试
import com.wzq.config.BeansConfig;
import com.wzq.pojo.User;
import org.junit.Test;
import org.springframework.context.ApplicationContext;
import org.springframework.context.annotation.AnnotationConfigApplicationContext;
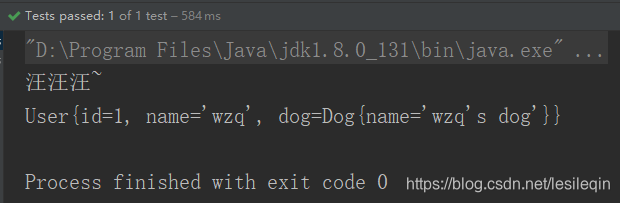
public class MyTest {
@Test
public void Test(){
ApplicationContext context = new AnnotationConfigApplicationContext(BeansConfig.class);
User user = context.getBean("user111", User.class);
user.getDog().shout();
System.out.println(user);
}
}