Visual Studio 2019远程调试 Linux Docker中的 .net core应用程序
Visual Studio 2019远程调试 Linux Docker中的 .net core应用程序
在国内的服务器上进行远程调试还是比较麻烦的,因为我们没办法正常通过Curl获取到VsDbg包,或者下载极其缓慢,po主是完全获取不到,直接报错下载异常。下边呢,我就带大家一步一步的重现问题,以及我解决该问题的方法
步骤还原(多图预警)
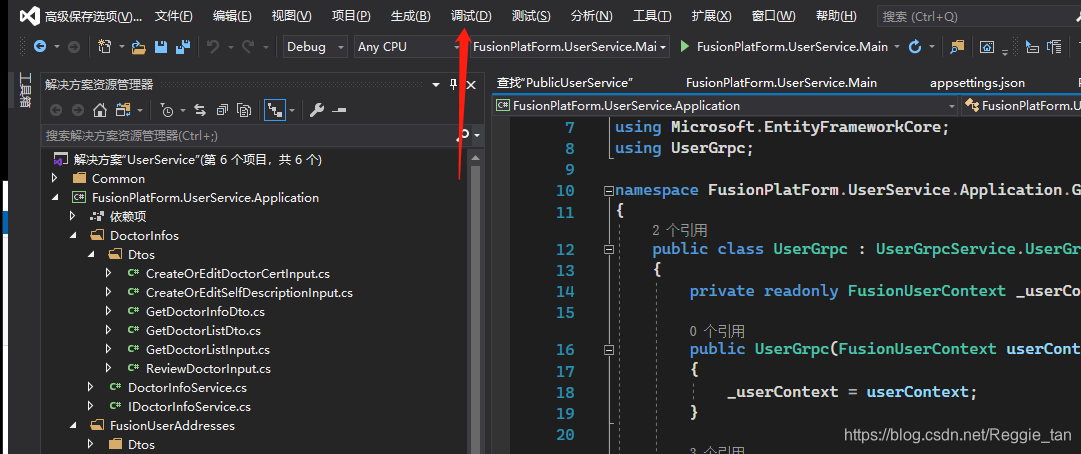
第一步:点击菜单栏中的调试
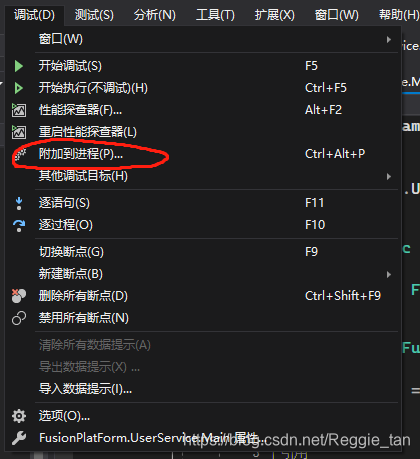
第二部:附加到进程
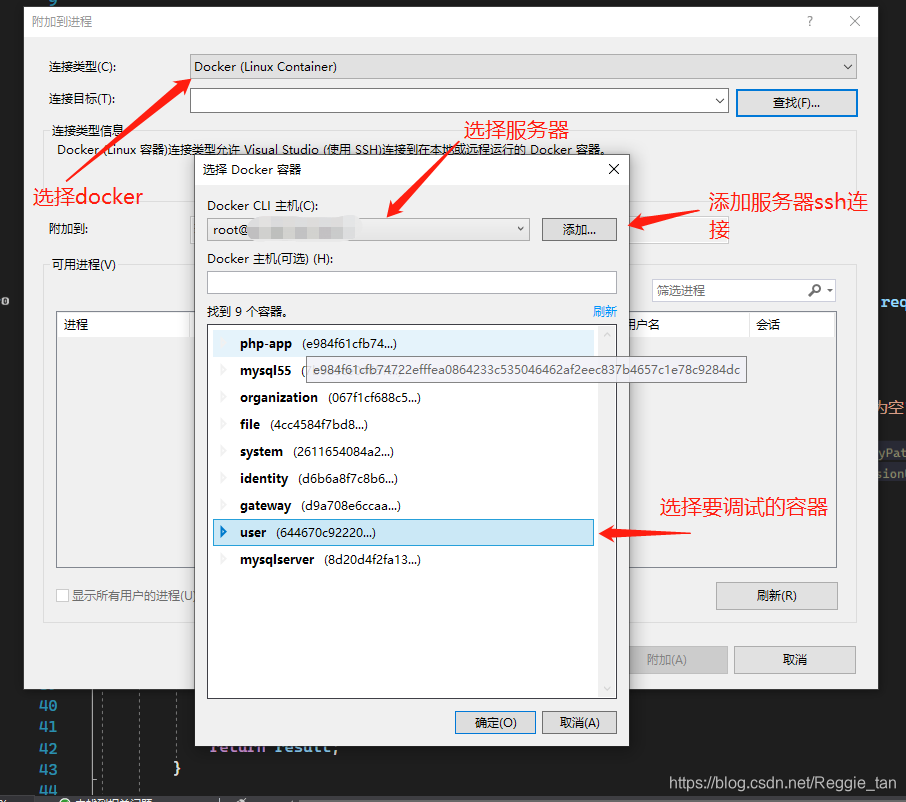
第三步:选择要调试服务所在的Docker镜像
第四步:找到 dotnet进程并附加
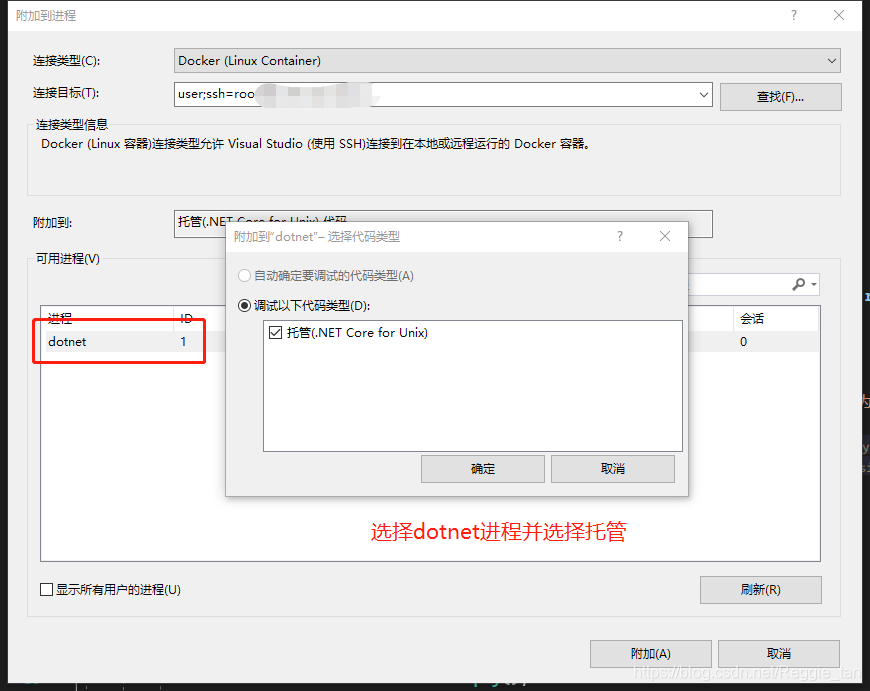
然后,我们就得到了这个错误提示
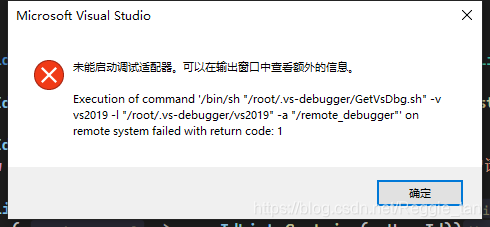
研读 VS Code远程调试方案(Aaron Powell大神原文),找到了GetVsDbg.sh(下载)脚本文件下载地址,此时下载该文件,并手动放入Docker镜像中。参考上图报错信息,填写命令。
#首先进入镜像的挂载文件夹,移动sh脚本到/root/.vs-debugger文件夹
mv GetVsDbg.sh /root/.vs-debugger
#原封不动的运行报错中的脚本命令
/bin/sh "/root/.vs-debugger/GetVsDbg.sh" -v vs2019 -l "/root/.vs-debugger/vs2019" -a "/remote_debugger"

#然后这边会提示安装信息
Info: Previous installation at '/root/.vs-debugger/vs2019' not found
Info: Using vsdbg version '16.9.20122.2'
Using arguments
    Version                    : 'vs2019'
    Location                   : '/root/.vs-debugger/vs2019'
    SkipDownloads              : 'false'
    LaunchVsDbgAfter           : 'false'
    RemoveExistingOnUpgrade    : 'false'
Info: Using Runtime ID 'linux-x64'
HTTP/2 200
Downloading https://vsdebugger.azureedge.net/vsdbg-16-9-20122-2/vsdbg-linux-x64.tar.gz
#报错了,没法下载
ERROR: Could not download https://vsdebugger.azureedge.net/vsdbg-16-9-20122-2/vsdbg-linux-x64.tar.gz
Ok,发现问题所在了。Docker中 vsdbg-linux-x64.tar.gz 下载失败了。这就好说了,复制命令行中的下载地址,在浏览器中下载。
然后接下来我们打开GetVsDbg.sh文件看看他都运行了哪些命令,以及 vsdbg-linux-x64.tar.gz 这个文件下载好后都做了哪些操作。
转到402行
download()
{


    if [ "$__UseZip" = false ]; then
        vsdbgFileExtension=".tar.gz"
    else
        echo "Warning: Version '${__VsDbgMetaVersion}' is only avaliable in zip."
        vsdbgFileExtension=".zip"
    fi
    vsdbgCompressedFile="vsdbg-${__RuntimeID}${vsdbgFileExtension}"
    target="$(echo "${

    __VsDbgVersion}" | tr '.' '-')"
    url="https://vsdebugger.azureedge.net/vsdbg-${target}/${vsdbgCompressedFile}"

    check_internet_connection "$url"

    echo "Downloading ${url}"
    if hash wget 2>/dev/null; then
        wget -q "$url" -O "$vsdbgCompressedFile"
    elif hash curl 2>/dev/null; then
        curl -s "$url" -o "$vsdbgCompressedFile"
    fi

	#异常就是这里抛出的
    if [ $? -ne  0 ]; then
        echo
        echo "ERROR: Could not download ${url}"
        exit 1;
    fi

    __VsdbgCompressedFile=$vsdbgCompressedFile
}
看到了报错的地方,然后我们再往下看,这个下载方法是在509行调用的
if [ "$__UseAltDebuggerLocation" = false ]; then
    if [ "$__SkipDownloads" = true ]; then
        echo "Info: Skipping downloads"
    else
        prepare_install_location
        cd "$__InstallLocation" || fail "Command failed: 'cd \"$__InstallLocation\"'"

        # For the rest of this script we can assume the working directory is the install path

        # Check to see if we already have a compressed file to extract, if not, we need to download it.
        if [ -z "$__VsdbgCompressedFile" ]; then
            if [ -z "$__RuntimeID" ]; then
                get_dotnet_runtime_id
            elif [ "$__ExactVsDbgVersionUsed" = "false" ]; then
                # Remap the old distro-specific runtime ids unless the caller specified an exact build number.
                # We don't do this in the exact build number case so that old builds can be used.
                remap_runtime_id
            fi

            echo "Info: Using Runtime ID '$__RuntimeID'"
            #########################此处调用下载方法#################################
            #########################此处调用下载方法#################################
            #########################此处调用下载方法#################################
            download
        fi

        extract

        echo "$__VsDbgVersion" > success.txt
        # per greggm, this 'cd' can fail sometimes and is to be expected.
        # shellcheck disable=SC2164
        cd "$__InitialCWD"
        echo "Info: Successfully installed vsdbg at '$__InstallLocation'"
    fi
fi
解读脚本可知,在这个 __VsdbgCompressedFile 变量没有值的时候,他会唤醒下载,然而该变量的赋值只有两种途径,一种是通过 脚本命令 -e 直接赋值,另外一种就是调用 download() 方法进行赋值。
得知这些以后,我选择的是改动他的sh脚本的 download() 方法,删除掉下载过程,直接把文件放在正确位置让其继续进行后续步骤即可
修改后的 download() 方法
download()
{


    if [ "$__UseZip" = false ]; then
         vsdbgFileExtension=".tar.gz"
     else
         echo "Warning: Version '${__VsDbgMetaVersion}' is only avaliable in zip."
         vsdbgFileExtension=".zip"
     fi
     vsdbgCompressedFile="vsdbg-${__RuntimeID}${vsdbgFileExtension}"

     echo "file: ${vsdbgCompressedFile}"

     #target="$(echo "${__VsDbgVersion}" | tr '.' '-')"
     #url="https://vsdebugger.azureedge.net/vsdbg-${target}/${vsdbgCompressedFile}"

    # check_internet_connection "$url"

    # echo "Downloading ${url}"
     #if hash wget 2>/dev/null; then
     #    wget -q "$url" -O "$vsdbgCompressedFile"
     #elif hash curl 2>/dev/null; then
     #    curl -s "$url" -o "$vsdbgCompressedFile"
     #fi

     #if [ $? -ne  0 ]; then
     #    echo
      #   echo "ERROR: Could not download ${url}"
     #    exit 1;
     #fi

    __VsdbgCompressedFile=$vsdbgCompressedFile

    echo "file downloaded: ${__VsdbgCompressedFile}"
}
然后,把 从浏览器下载的 vsdbg-linux-x64.tar.gz 文件上传到docker镜像,并且移动到 /root/.vs-debugger/vs2019/ 文件夹,再次运行 /bin/sh “/root/.vs-debugger/GetVsDbg.sh” -v vs2019 -l “/root/.vs-debugger/vs2019” -a “/remote_debugger” 命令。
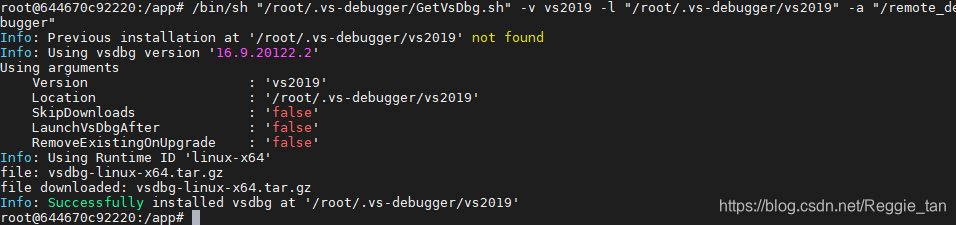
大功告成!安装完毕!
让我们从头操作,再次通过VS2019附加到Docker镜像中的进程。此时发现没有报错,我们测个接口试试
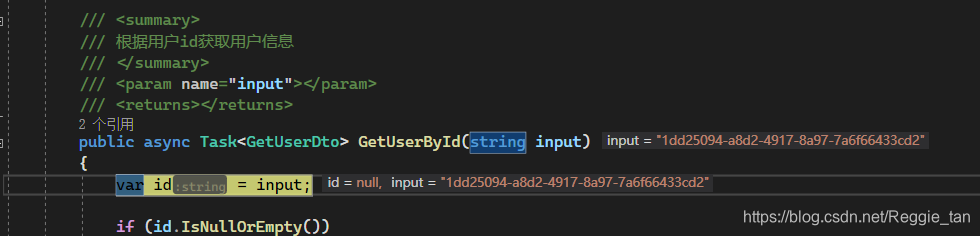
Bang! 成功进入调试
至此,问题解决~