第一步、新建.net core 3.1 项目:SkyApm.Sample.Backend
这里需要注意,core2.1对应的skyapm是0.9的版本, 0.9的版本只能支持skywalking的7.0及以下的版本。现在安装skywalking的版本大多数是 8.0及以上的。
所以这个时候你用core2.1只能兼容skyapm0.9,也就是说无法兼容到skywalking8.0及以上版本。
第二步:在Nuget里面添加3个skyapm的组件

组件名字 如下:
<ItemGroup><PackageReference Include="SkyAPM.Agent.AspNetCore" Version="1.0.0" />
<PackageReference Include="SkyAPM.Diagnostics.AspNetCore" Version="1.0.0" />
<PackageReference Include="SkyAPM.Utilities.DependencyInjection" Version="1.0.0" />
</ItemGroup>
第三步:修改:launchSettings.json

添加"ASPNETCORE_HOSTINGSTARTUPASSEMBLIES": "SkyAPM.Agent.AspNetCore"

可以复制这个文件:
{
"iisSettings": {
"windowsAuthentication": false,
"anonymousAuthentication": true,
"iisExpress": {
"applicationUrl": "http://localhost:5002/",
"sslPort": 0
}
},
"profiles": {
"IIS Express": {
"commandName": "IISExpress",
"launchBrowser": true,
"environmentVariables": {
"ASPNETCORE_ENVIRONMENT": "Development",
"ASPNETCORE_HOSTINGSTARTUPASSEMBLIES": "SkyAPM.Agent.AspNetCore"
}
},
"SkyWalking.Sample.Backend": {
"commandName": "Project",
"environmentVariables": {
"ASPNETCORE_ENVIRONMENT": "Development",
"ASPNETCORE_HOSTINGSTARTUPASSEMBLIES": "SkyAPM.Agent.AspNetCore"
},
"applicationUrl": "http://localhost:5002/"
}
}
}
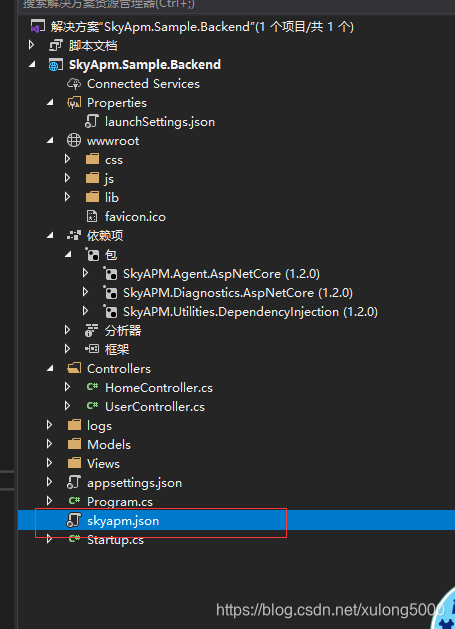
第四步:新增一个文件 在根目录下:文件名为 skyapm.json
修改 skyapm.json 文件
这里需要修改的是skywalking 里面的oap服务地址: "Servers": "172.16.2.14:11800",
{
"SkyWalking": {
"ServiceName": "asp-net-core-backend",
"Namespace": "",
"HeaderVersions": [
"sw8"
],
"Sampling": {
"SamplePer3Secs": -1,
"Percentage": -1.0
},
"Logging": {
"Level": "Information",
"FilePath": "logs/skyapm-{Date}.log"
},
"Transport": {
"Interval": 3000,
"ProtocolVersion": "v8",
"QueueSize": 30000,
"BatchSize": 3000,
"gRPC": {
"Servers": "172.16.2.14:11800",
"Timeout": 100000,
"ConnectTimeout": 100000,
"ReportTimeout": 600000
}
}
}
}
第五步:Program文件内容,其实不需要做任何修改。默认的代码就可以:如下:
namespace SkyApm.Sample.Backend
{
public class Program
{
public static void Main(string[] args)
{
CreateHostBuilder(args).Build().Run();
}public static IHostBuilder CreateHostBuilder(string[] args) =>
Host.CreateDefaultBuilder(args)
.ConfigureWebHostDefaults(webBuilder =>
{
webBuilder.UseStartup<Startup>();
});
}
}
第六步: Startup.cs文件需要添加一个ioc注入
在ConfigureServices方法里面添加 services.AddSkyApmExtensions();这一行代码就可以。
public void ConfigureServices(IServiceCollection services)
{
services.AddSkyApmExtensions();
services.AddControllersWithViews();
}
该类的全部代码如下:其实其他的都不需要改动,只需要添加上面的 services.AddSkyApmExtensions();
namespace SkyApm.Sample.Backend
{
public class Startup
{
public Startup(IConfiguration configuration)
{
Configuration = configuration;
}public IConfiguration Configuration { get; }
// This method gets called by the runtime. Use this method to add services to the container.
public void ConfigureServices(IServiceCollection services)
{
services.AddSkyApmExtensions();
services.AddControllersWithViews();
}// This method gets called by the runtime. Use this method to configure the HTTP request pipeline.
public void Configure(IApplicationBuilder app, IWebHostEnvironment env)
{
if (env.IsDevelopment())
{
app.UseDeveloperExceptionPage();
}
else
{
app.UseExceptionHandler("/Home/Error");
// The default HSTS value is 30 days. You may want to change this for production scenarios, see https://aka.ms/aspnetcore-hsts.
app.UseHsts();
}
app.UseHttpsRedirection();
app.UseStaticFiles();app.UseRouting();
app.UseAuthorization();
app.UseEndpoints(endpoints =>
{
endpoints.MapControllerRoute(
name: "default",
pattern: "{controller=Home}/{action=Index}/{id?}");
});
}
}
}
运行效果:

