前端学习的第一天,完成了对HTML5的学习,第二天开始进入CSS,首先介绍CSS的样式声明,后面介绍CSS的各种选择器。CSS是对样式进行控制的,HTML类似于房间里的一个一个物品,而CSS则是一个设计师设计这些物品在哪摆放,如何摆放
一、样式声明
引入CSS的样式有四种方式:外部样式、嵌入样式、内联样式、导入样式,其中比较推荐使用的是外部样式,因为这样可以降低程序的耦合度,下面分别介绍
外部样式
使用link标签引入外部样式,其中:
- link 标签放在
head标签内部 - 样式文件要以
.css为扩展名 - 一个页面往往需要引入多个样式文件
| 属性 | 说明 |
|---|---|
| rel | 定义当前文档与被链接文档之间的关系 |
| href | 外部样式文件 |
| type | 文档类型 |
<link rel="stylesheet" href="1html.css" type="text/css">
嵌入样式
使用style标签可以在文档内定义内部样式规则
<style>
    h2{


        background-color: rebeccapurple;
    }
</style>
内联样式
可以为某个标签单独设置样式。
<h2 style="background-color: red;">CSS样式学习</h2>
导入样式
使用 @import 可以在原样式规则中导入其他样式表,可以在外部样式、style标签中使用。可以使用以下两种方式导入
<style>
    @import url(1html.css);
</style>
二、选择器
要对某个物品进行摆放,首先就是要选中该物品,CSS中提供了丰富的选择器,具体可以看w3c的总结CSS选择器
2.1 基本选择器
| 选择器 | 示例 | 描述 |
|---|---|---|
| .class | .intro | 选择 class=“intro” 的所有元素 |
| #id | #firstname | 选择 id=“firstname” 的所有元素 |
| * | * | 选择所有元素 |
| element | p | 选择所有元素 |
| element,element | div,p | 选择所有div元素和所有p元素 |
| element element | div p | 选择div元素内部的所有p元素(不只是子元素,后代元素) |
| element>element | div>p | 选择父元素为div元素的所有p元素(只是子元素) |
| element+element | div+p | 选择紧接在div元素之后的所有p元素 |
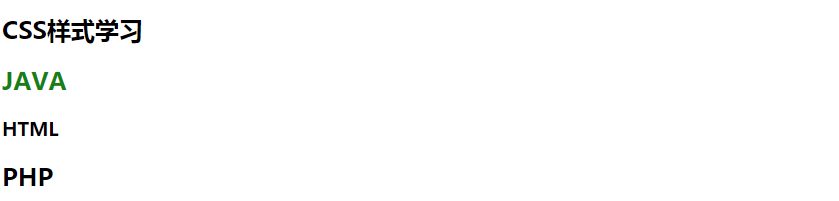
一些示例:
<style>
    article h1+h2{


        color: green;
    }
</style>
<body>
    <main>
        <article>
            <h1>CSS样式学习</h1>
            <h2>JAVA</h2>
            <aside>
                <h1>HTML</h1>
            </aside>
            <h2>PHP</h2>
        </article>
    </main>
</body>
选择article下的子元素中h1下紧接是h2的元素
2.2 类选择器
类选择器是为一类状态声明样式规则,下面是使用方法
<style>
    .success {


        border: solid red 2px;
        color: red;
        margin-bottom: 20px;
    }
    .error {


        border: solid green 2px;
        color: green;
        margin-bottom: 20px;
    }
</style>

<div class="error">表单错误</div>
<div class="success">操作成功</div>
<div class="success">操作成功</div>

2.3 属性选择器
根据属性来为元素设置样式也是常用的场景。
| 选择器 | 示例 | 描述 |
|---|---|---|
| [attribute] | [target] | 带有 target 属性所有元素 |
| [attribute=value] | [target=_blank] | targe 属性 等于"_blank" 的所有元素 |
| [attribute~=value] | [title~=css] | title 属性包含单词 “css” 的所有元素 |
| [attribute|=value] | [title|=hd] | title 属性值为 "hd"的单词,或hd-cms 以-连接的的独立单词 |
| [attribute*=value] | a[src*=“css”] | src 属性中包含 “css” 字符的每个 元素 |
| [attribute^=value] | a[src^=“css”] | src 属性值以 “css” 开头的每个 元素 |
| [attribute$=value] | a[src$=".jpeg"] | src 属性以 “.jpeg” 结尾的所有 元素 |
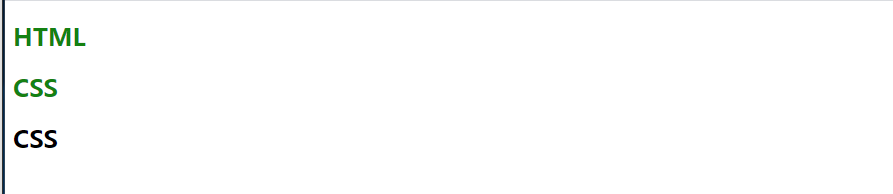
<style>
    h1[title |= "HTML"]{


        color: green;
    }
</style>
<body>
    <main>
        <article>
            <h1 title="HTML">HTML</h1>
            <h1 title="HTML-CSS">CSS</h1>
            <h1 title="HTMLCSS">CSS</h1>
        </article>
    </main>
</body>
2.4 伪类选择器
为元素的不同状态或不确定存在的元素设置样式规则。
| 状态 | 示例 | 说明 |
|---|---|---|
| :link | a:link | 选择所有未被访问的链接 |
| :visited | a:visited | 选择所有已被访问的链接 |
| :hover | a:hover | 鼠标移动到元素上时 |
| :active | a:active | 点击正在发生时 |
| :focus | input::focus | 选择获得焦点的 input 元素 |
| :root | :root | 选择文档的根元素即html。 |
| :empty | p:empty | 选择没有子元素的每个元素(包括文本节点)。 |
| :first-child | p:first-child | 选择属于父元素的第一个子元素的每个元素 |
| :last-child | p:last-child | 选择属于其父元素最后一个子元素每个元素。 |
| :first-of-type | p:first-of-type | 选择属于其父元素的首个元素的每个元素 |
| :last-of-type | p:last-of-type | 选择属于其父元素的最后元素的每个元素。 |
| :only-of-type | p:only-of-type | 选择属于其父元素唯一的元素的每个元素。 |
| :only-child | p:only-child | 选择属于其父元素的唯一子元素的每个元素。 |
| :nth-child(n) | p:nth-child(2) | 选择属于其父元素的第二个子元素的每个元素。 |
| :nth-child(odd) | p:nth-child(odd) | 选择属于其父元素的奇数元素。 |
| :nth-child(even) | p:nth-child(even) | 选择属于其父元素的偶数元素。 |
| :nth-of-type(n) | p:nth-of-type(2) | 选择属于其父元素第二个元素的每个元素。 |
| :nth-last-child(n) | p:nth-last-child(2) | 同上,从最后一个子元素开始计数。 |
| :nth-last-of-type(n) | p:nth-last-of-type(2) | 同上,但是从最后一个子元素开始计数。 |
| :not(selector) | :not§ | 选择非元素的每个元素 |
2.4.1超链接伪类
<style>
    a:link{


        color: black;
    }
    a:visited{


        color: green;
    }
    a:hover{


        color: blue;
    }
    input:focus {


        background: blue;
        outline: none
    }

    input:hover {


        background: red;
    }

    input:active {


        background: green;
    }
</style>
<a href="https://www.baidu.com" target="_blank">百度</a>
<input type="text">
2.4.2锚点伪类
用于设置如果访问到该锚点,则变成相应的样式
<style>
    div {


        height: 900px;
    }

    div:target {


        color: red;
    }
</style>
<a href="#form">HTML</a>
<div></div>
<div id="form">
    html表单
</div>
上面的效果是,当我点击HTML时跳转到html表单,同时颜色变为红色
2.4.3:empty
<style>
    :empty{


        border: solid 2px red;
        height: 200px;
        width: 100px;
    }
</style>
<p>HTML</p>
<p></p>
2.4.4 结构伪类
:first-child
下面结果就是article标签中的第一个span标签变为红色
<!DOCTYPE html>
<html lang="en">
<head>
    <meta charset="UTF-8">
    <meta name="viewport" content="width=device-width, initial-scale=1.0">
    <title>Document</title>
    <style>
        article span:first-child{


            color: red;
        }
    </style>
</head>
<body>
    <article>
        <span>HTML</span>
        <aside>
            <span>JAVA</span>
            <span>HDFS</span>
        </aside>
    </article>
</body>
</html>

first-of-type
选择元素中span标签并且是第一个,下面的HTML中选择article子类元素中的第一个span
<!DOCTYPE html>
<html lang="en">
<head>
    <meta charset="UTF-8">
    <meta name="viewport" content="width=device-width, initial-scale=1.0">
    <title>Document</title>
    <style>
        article span:first-of-type{


            color: red;
        }
    </style>
</head>
<body>
    <article>
        <span>HTML学习</span>
        <aside>
            <span>JAVA学习</span><br>
            <span>HDFS学习</span>
        </aside>
        <span>HDFS学习2</span>
    </article>
</body>
</html>

nth-child(n)
选择第二个元素并且是span标签的
<!DOCTYPE html>
<html lang="en">

<head>
    <meta charset="UTF-8">
    <meta name="viewport" content="width=device-width, initial-scale=1.0">
    <title>Document</title>
    <style>
        article span:nth-child(2) {


            color: red;
        }
    </style>
</head>

<body>
    <article>
        <span>HTML学习</span>
        <aside>
            <span>JAVA学习</span>
            <span>HDFS学习</span>
        </aside>
        <span>HDFS学习2</span>
    </article>

</body>
</html>

:nth-of-type(n)
选择第二个span 元素,不管中间的其他元素

计算数量
<!DOCTYPE html>
<html lang="en">
<head>
    <meta charset="UTF-8">
    <meta name="viewport" content="width=device-width, initial-scale=1.0">
    <title>Document</title>
    <style>
        /*
            利用n的特性可以设置不同的效果:2n+1:偶数、2n:奇数、n+3:从第三个开始、-n+3:只设置前三个

        */
        table tr>td:nth-child(2n){


            background-color: green;

        }
    </style>
</head>
<body>
    <table border="1">
        <tr>
            <td>html</td>
            <td>css</td>
            <td>js</td>
            <td>java</td>
        </tr>
    </table>
</body>
</html>

2.4.5 表单伪类
| 选择器 | 示例 | 说明 |
|---|---|---|
| :enabled | input:enabled | 选择每个启用的 input 元素 |
| :disabled | input:disabled | 选择每个禁用的 input 元素 |
| :checked | input:checked | 选择每个被选中的 input 元素 |
| :required | input:required | 包含required属性的元素 |
| :optional | input:optional | 不包含required属性的元素 |
| :valid | input:valid | 验证通过的表单元素 |
| :invalid | input:invalid | 验证不通过的表单 |
<!DOCTYPE html>
<html lang="en">

<head>
    <meta charset="UTF-8">
    <meta name="viewport" content="width=device-width, initial-scale=1.0">
    <title>Document</title>
    <style>
        input:enabled {


            background: red;
        }

        input:disabled {


            background: #dddddd;
        }
        /* 当单选框被选中时,颜色变绿 */
        input:checked+label {


            color: green;
        }
    </style>
</head>

<body>
    <input type="text" disabled>
    <input type="text" name="info">

    <input type="radio" name="sex" checked id="boy">
    <label for="boy">男</label>
    <input type="radio" name="sex" checked id="girl">
    <label for="girl">女</label>
</body>

</html>
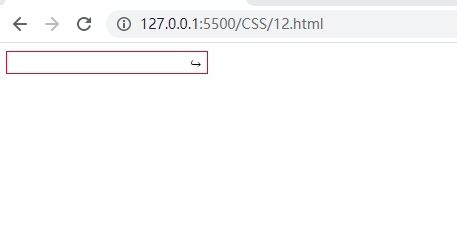
2.4.6 字符伪类
| 状态 | 示例 | 说明 |
|---|---|---|
| :first-letter | p:first-letter | 选择每个元素的首字母 |
| :first-line | p:first-line | 选择每个元素的首行 |
| :before | p:before | 在每个元素的内容之前插入内容 |
| :after | p:after | 在每个元素的内容之后插入内容 |
<!DOCTYPE html>
<html lang="en">

<head>
    <meta charset="UTF-8">
    <meta name="viewport" content="width=device-width, initial-scale=1.0">
    <title>Document</title>
    <style>
        div {


            border: solid 1px red;
            width: 200px;
            white-space: nowrap;
        }

        div>input[type="text"] {


            border: none;
            outline: none;
        }

        div>input[type="text"]+span:after {


            content: "\21AA";
            font-size: 14px;
            cursor: pointer;
        }
        div>input+span{


            margin-left: 10px;
        }
    </style>

</head>

<body>
    <div>
        <input type="text"><span></span>
    </div>

</body>

</html>
这样做出来的效果就是一个简易的搜索框
三、元素权重
CSS是重叠样式表,所谓重叠就是允许多个样式同时合作用,但是如果遇到冲突时,将会产生优先级权重的问题,使用不同的选择器会产生不同的权重,而CSS的权重规则是可以计算的,例如
| 规则 | 粒度 |
|---|---|
| ID | 0100 |
| class,类属性值 | 0010 |
| 标签,伪元素 | 0001 |
| * | 0000 |
| 行内样式 | 1000 |
<!DOCTYPE html>
<html lang="en">
<head>
    <meta charset="UTF-8">
    <meta name="viewport" content="width=device-width, initial-scale=1.0">
    <title>Document</title>
    <style>
        /* 权重为0021 */
        h2[class="color"][id]{


            color: red;
        }
        /* 权重为 0012 */
        article h2[class="color"]{


            color: green;
        }
    </style>
</head>
<body>
    <article>
        <h2 id="hot" class="color">HTML</h2>
    </article>

</body>
</html>
| 1000 |
<!DOCTYPE html>
<html lang="en">
<head>
    <meta charset="UTF-8">
    <meta name="viewport" content="width=device-width, initial-scale=1.0">
    <title>Document</title>
    <style>
        /* 权重为0021 */
        h2[class="color"][id]{


            color: red;
        }
        /* 权重为 0012 */
        article h2[class="color"]{


            color: green;
        }
    </style>
</head>
<body>
    <article>
        <h2 id="hot" class="color">HTML</h2>
    </article>

</body>
</html>