引言
Docker可以比喻为集装箱,比如水果箱,行李箱,药品箱都放在运输船上,彼此隔离,又共用船的空间。在开发中这些集装箱可以是.net开发环境,php开发环境,java开发环境,彼此隔离且共用Linux虚拟机。你跟我讲这些概念干嘛,我都知道,我要看的是如何部署Nginx服务,稍安勿躁,下面就来详细的介绍。
1、安装Nginx
- 查看Docker中是否下载Nginx镜像
[root@localhost ~]# docker images
REPOSITORY          TAG                 IMAGE ID            CREATED             SIZE
hello-world         latest              bf756fb1ae65        5 months ago        13.3kB
java                latest              d23bdf5b1b1b        3 years ago         643MB
- 在远程镜像仓库中查找最新版Nginx
[root@localhost ~]# docker search nginx
NAME                               DESCRIPTION                                     STARS               OFFICIAL            AUTOMATED
nginx                              Official build of Nginx.                        13267               [OK]
jwilder/nginx-proxy                Automated Nginx reverse proxy for docker con…   1814                                    [OK]
richarvey/nginx-php-fpm            Container running Nginx + PHP-FPM capable of…   775                                     [OK]
linuxserver/nginx                  An Nginx container, brought to you by LinuxS…   113
bitnami/nginx                      Bitnami nginx Docker Image                      83                                      [OK]
- 选择OFFICIAL是OK的进行安装(OK表示是官方认证的)
[root@localhost ~]# docker pull nginx
Using default tag: latest
latest: Pulling from library/nginx
afb6ec6fdc1c: Pull complete
b90c53a0b692: Pull complete
11fa52a0fdc0: Pull complete
Digest: sha256:6fff55753e3b34e36e24e37039ee9eae1fe38a6420d8ae16ef37c92d1eb26699
Status: Downloaded newer image for nginx:latest
docker.io/library/nginx:latest
- 下载完成,配置启动一个 Nginx 容器实例
[root@localhost ~]# docker run --rm --name nginx-cool -p 8080:80 -d nginx
ceb98cfb95cf1bbd1e2319816034d1e5f1b64cf3ce21665fda0353d661f15073
上面命令的各个参数含义如下:
- -d:在后台运行
- -p: 端口进行映射,将本地 8080 端口映射到容器内部的 80 端口
- --rm:容器停止运行后,自动删除容器文件
- --name nginx-cool:容器的名字,自己定义
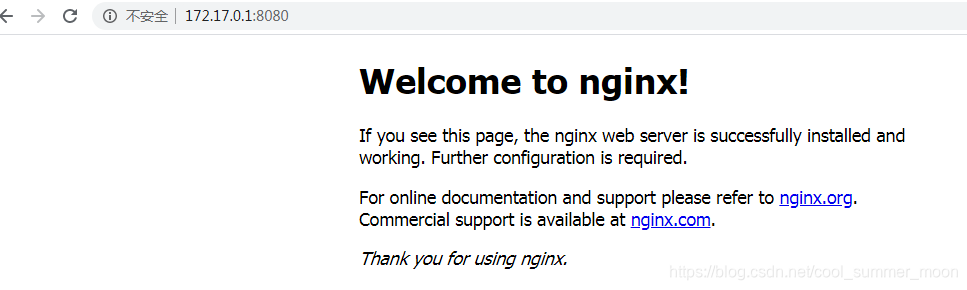
- 访问Nginx
提示:windows宿主机访问centOS7虚拟机中的docker服务需要再window中配置路由
192.168.158.131 是centOS7虚拟机地址
172.17.0.1 是Docker容器地址
C:\Users\Administrator>ROUTE -p add 172.17.0.0 mask 255.255.0.0 192.168.158.131
2、修改Nginx配置
- 新建配置文件存放目录
[root@localhost ~]# mkdir /home/nginx
[root@localhost ~]# cd /home/nginx/
- 查看启动的Nginx运行状态
[root@localhost nginx]# docker ps
CONTAINER ID        IMAGE               COMMAND                  CREATED             STATUS              PORTS                  NAMES
421580da5063        nginx               "nginx -g 'daemon of…"   5 seconds ago       Up 4 seconds        0.0.0.0:8080->80/tcp   nginx-cool
- 把容器里面的 Nginx 配置文件拷贝到本地
#命令的含义是,把nginx容器的/etc/nginx拷贝到当前目录。不要漏掉最后那个点
[root@localhost nginx]# docker cp 421580da5063:/etc/nginx .
- 修改拷贝到本地的配置文件夹名称
[root@localhost nginx]# ll
total 4
drwxr-xr-x. 3 root root 4096 May 15 16:15 nginx
[root@localhost nginx]# mv nginx conf
[root@localhost nginx]# ll
total 4
drwxr-xr-x. 3 root root 4096 May 15 16:15 conf
- 停止容器
[root@localhost ~]# docker stop nginx-cool
nginx-cool
3、映射网页目录
- 新建index.html,并写入<h1>Hello World</h1>
[root@localhost nginx]# mkdir html
[root@localhost nginx]# cd html/
[root@localhost html]# touch index.html
[root@localhost html]# vi index.html
- 重新启动一个新的容器,映射配置
[root@localhost nginx]# docker run --rm --name nginx-cool \
> -v "$PWD/html":/usr/share/nginx/html \
> -v "$PWD/conf":/etc/nginx \
> -p 8080:80 -d \
> nginx
f9538490e4bdf03192fa0d42cb697b33bec0e6ef7510ebda7ebcd352b64d6a36
- 访问浏览器,查看配置是否生效

- 关于https的443端口映射
[root@localhost nginx]# docker run --rm --name nginx-cool \
> -v "$PWD/html":/usr/share/nginx/html \
> -v "$PWD/conf":/etc/nginx \
> -p 8080:80 \
> -p 8081:443 -d \
> nginx
结束语
Nginx部署至此就结束了,关于配置文件的书写,在conf文件夹中,以前该怎么写,现在还是怎么写。