1 商品服务-品牌管理
1.1 效果优化与快速显示开关

将逆向工程product得到的resources\src\views\modules\product文件拷贝到gulimall/renren-fast-vue/src/views/modules/product目录下,也就是下面的两个文件

brand.vue : 显示的表单
brand-add-or-update.vue:添加和更改功能
但是显示的页面没有新增和删除功能,这是因为权限控制的原因,

<el-button v-if="isAuth('product:brand:save')" type="primary" @click="addOrUpdateHandle()">新增</el-button>
<el-button v-if="isAuth('product:brand:delete')" type="danger" @click="deleteHandle()" :disabled="dataListSelections.length <= 0">批量删除</el-button>
查看“isAuth”的定义位置:

它是在“index.js”中定义,暂时将它设置为返回值为true,即可显示添加和删除功能。

再次刷新页面能够看到,按钮已经出现了:

进行添加 测试成功, 进行修改 也会自动回显

build/webpack.base.conf.js 中注释掉createLintingRule()函数体,不进行lint语法检查
brand.vue
<template>
  <div class="mod-config">
    <el-form
      :inline="true"
      :model="dataForm"
      @keyup.enter.native="getDataList()"
    >
      <el-form-item>
        <el-input
          v-model="dataForm.key"
          placeholder="参数名"
          clearable
        ></el-input>
      </el-form-item>
      <el-form-item>
        <el-button @click="getDataList()">查询</el-button>
        <el-button
          v-if="isAuth('product:brand:save')"
          type="primary"
          @click="addOrUpdateHandle()"
          >新增</el-button
        >
        <el-button
          v-if="isAuth('product:brand:delete')"
          type="danger"
          @click="deleteHandle()"
          :disabled="dataListSelections.length <= 0"
          >批量删除</el-button
        >
      </el-form-item>
    </el-form>
    <el-table
      :data="dataList"
      border
      v-loading="dataListLoading"
      @selection-change="selectionChangeHandle"
      style="width: 100%"
    >
      <el-table-column
        type="selection"
        header-align="center"
        align="center"
        width="50"
      >
      </el-table-column>
      <el-table-column
        prop="brandId"
        header-align="center"
        align="center"
        label="品牌id"
      >
      </el-table-column>
      <el-table-column
        prop="name"
        header-align="center"
        align="center"
        label="品牌名"
      >
      </el-table-column>
      <el-table-column
        prop="logo"
        header-align="center"
        align="center"
        label="品牌logo地址"
      >
      </el-table-column>
      <el-table-column
        prop="descript"
        header-align="center"
        align="center"
        label="介绍"
      >
      </el-table-column>
      <el-table-column
        prop="showStatus"
        header-align="center"
        align="center"
        label="显示状态"
      >
        <template slot-scope="scope">
          <el-switch
            v-model="scope.row.showStatus"
            active-color="#13ce66"
            inactive-color="#ff4949"
            :active-value="1"
            :inactive-value="0"
            @change="updateBrandStatus(scope.row)"
          >
          </el-switch>
        </template>
      </el-table-column>
      <el-table-column
        prop="firstLetter"
        header-align="center"
        align="center"
        label="检索首字母"
      >
      </el-table-column>
      <el-table-column
        prop="sort"
        header-align="center"
        align="center"
        label="排序"
      >
      </el-table-column>
      <el-table-column
        fixed="right"
        header-align="center"
        align="center"
        width="150"
        label="操作"
      >
        <template slot-scope="scope">
          <el-button
            type="text"
            size="small"
            @click="addOrUpdateHandle(scope.row.brandId)"
            >修改</el-button
          >
          <el-button
            type="text"
            size="small"
            @click="deleteHandle(scope.row.brandId)"
            >删除</el-button
          >
        </template>
      </el-table-column>
    </el-table>
    <el-pagination
      @size-change="sizeChangeHandle"
      @current-change="currentChangeHandle"
      :current-page="pageIndex"
      :page-sizes="[10, 20, 50, 100]"
      :page-size="pageSize"
      :total="totalPage"
      layout="total, sizes, prev, pager, next, jumper"
    >
    </el-pagination>
    <!-- 弹窗, 新增 / 修改 -->
    <add-or-update
      v-if="addOrUpdateVisible"
      ref="addOrUpdate"
      @refreshDataList="getDataList"
    ></add-or-update>
  </div>
</template>

<script>
import AddOrUpdate from "./brand-add-or-update";
export default {


  data() {


    return {


      dataForm: {


        key: "",
      },
      dataList: [],
      pageIndex: 1,
      pageSize: 10,
      totalPage: 0,
      dataListLoading: false,
      dataListSelections: [],
      addOrUpdateVisible: false,
    };
  },
  components: {


    AddOrUpdate,
  },
  activated() {


    this.getDataList();
  },
  methods: {


    updateBrandStatus(data){


      console.log("最新信息",data);
      let {

     brandId,showStatus} = data;
       this.$http({


        url: this.$http.adornUrl("/product/brand/update"),
        method: "post",
        data: this.$http.adornData({

     brandId,showStatus:showStatus},false)
      }).then(({

      data }) => {


       this.$message({


         type:"success",
         message:"状态更新成功"
       })
      });
    },
    // 获取数据列表
    getDataList() {


      this.dataListLoading = true;
      this.$http({


        url: this.$http.adornUrl("/product/brand/list"),
        method: "get",
        params: this.$http.adornParams({


          page: this.pageIndex,
          limit: this.pageSize,
          key: this.dataForm.key,
        }),
      }).then(({

      data }) => {


        if (data && data.code === 0) {


          this.dataList = data.page.list;
          this.totalPage = data.page.totalCount;
        } else {


          this.dataList = [];
          this.totalPage = 0;
        }
        this.dataListLoading = false;
      });
    },
    // 每页数
    sizeChangeHandle(val) {


      this.pageSize = val;
      this.pageIndex = 1;
      this.getDataList();
    },
    // 当前页
    currentChangeHandle(val) {


      this.pageIndex = val;
      this.getDataList();
    },
    // 多选
    selectionChangeHandle(val) {


      this.dataListSelections = val;
    },
    // 新增 / 修改
    addOrUpdateHandle(id) {


      this.addOrUpdateVisible = true;
      this.$nextTick(() => {


        this.$refs.addOrUpdate.init(id);
      });
    },
    // 删除
    deleteHandle(id) {


      var ids = id
        ? [id]
        : this.dataListSelections.map((item) => {


            return item.brandId;
          });
      this.$confirm(
        `确定对[id=${

       ids.join(",")}]进行[${

       id ? "删除" : "批量删除"}]操作?`,
        "提示",
        {


          confirmButtonText: "确定",
          cancelButtonText: "取消",
          type: "warning",
        }
      ).then(() => {


        this.$http({


          url: this.$http.adornUrl("/product/brand/delete"),
          method: "post",
          data: this.$http.adornData(ids, false),
        }).then(({

      data }) => {


          if (data && data.code === 0) {


            this.$message({


              message: "操作成功",
              type: "success",
              duration: 1500,
              onClose: () => {


                this.getDataList();
              },
            });
          } else {


            this.$message.error(data.msg);
          }
        });
      });
    },
  },
};
</script>
brand-add-or-update.vue
<template>
  <el-dialog
    :title="!dataForm.id ? '新增' : '修改'"
    :close-on-click-modal="false"
    :visible.sync="visible"
  >
    <el-form
      :model="dataForm"
      :rules="dataRule"
      ref="dataForm"
      @keyup.enter.native="dataFormSubmit()"
      label-width="140px"
    >
      <el-form-item label="品牌名" prop="name">
        <el-input v-model="dataForm.name" placeholder="品牌名"></el-input>
      </el-form-item>
      <el-form-item label="品牌logo地址" prop="logo">
        <el-input v-model="dataForm.logo" placeholder="品牌logo地址"></el-input>
      </el-form-item>
      <el-form-item label="介绍" prop="descript">
        <el-input v-model="dataForm.descript" placeholder="介绍"></el-input>
      </el-form-item>
      <el-form-item label="显示状态" prop="showStatus">
        <el-switch
          v-model="dataForm.showStatus"
          active-color="#13ce66"
          inactive-color="#ff4949"
        >
        </el-switch>
      </el-form-item>
      <el-form-item label="检索首字母" prop="firstLetter">
        <el-input
          v-model="dataForm.firstLetter"
          placeholder="检索首字母"
        ></el-input>
      </el-form-item>
      <el-form-item label="排序" prop="sort">
        <el-input v-model="dataForm.sort" placeholder="排序"></el-input>
      </el-form-item>
    </el-form>
    <span slot="footer" class="dialog-footer">
      <el-button @click="visible = false">取消</el-button>
      <el-button type="primary" @click="dataFormSubmit()">确定</el-button>
    </span>
  </el-dialog>
</template>

<script>
export default {


  data() {


    return {


      visible: false,
      dataForm: {


        brandId: 0,
        name: "",
        logo: "",
        descript: "",
        showStatus: "",
        firstLetter: "",
        sort: "",
      },
      dataRule: {


        name: [{

      required: true, message: "品牌名不能为空", trigger: "blur" }],
        logo: [
          {

      required: true, message: "品牌logo地址不能为空", trigger: "blur" },
        ],
        descript: [
          {

      required: true, message: "介绍不能为空", trigger: "blur" },
        ],
        showStatus: [
          {


            required: true,
            message: "显示状态[0-不显示;1-显示]不能为空",
            trigger: "blur",
          },
        ],
        firstLetter: [
          {

      required: true, message: "检索首字母不能为空", trigger: "blur" },
        ],
        sort: [{

      required: true, message: "排序不能为空", trigger: "blur" }],
      },
    };
  },
  methods: {


    init(id) {


      this.dataForm.brandId = id || 0;
      this.visible = true;
      this.$nextTick(() => {


        this.$refs["dataForm"].resetFields();
        if (this.dataForm.brandId) {


          this.$http({


            url: this.$http.adornUrl(
              `/product/brand/info/${

       this.dataForm.brandId}`
            ),
            method: "get",
            params: this.$http.adornParams(),
          }).then(({

      data }) => {


            if (data && data.code === 0) {


              this.dataForm.name = data.brand.name;
              this.dataForm.logo = data.brand.logo;
              this.dataForm.descript = data.brand.descript;
              this.dataForm.showStatus = data.brand.showStatus;
              this.dataForm.firstLetter = data.brand.firstLetter;
              this.dataForm.sort = data.brand.sort;
            }
          });
        }
      });
    },
    // 表单提交
    dataFormSubmit() {


      this.$refs["dataForm"].validate((valid) => {


        if (valid) {


          this.$http({


            url: this.$http.adornUrl(
              `/product/brand/${

       !this.dataForm.brandId ? "save" : "update"}`
            ),
            method: "post",
            data: this.$http.adornData({


              brandId: this.dataForm.brandId || undefined,
              name: this.dataForm.name,
              logo: this.dataForm.logo,
              descript: this.dataForm.descript,
              showStatus: this.dataForm.showStatus,
              firstLetter: this.dataForm.firstLetter,
              sort: this.dataForm.sort,
            }),
          }).then(({

      data }) => {


            if (data && data.code === 0) {


              this.$message({


                message: "操作成功",
                type: "success",
                duration: 1500,
                onClose: () => {


                  this.visible = false;
                  this.$emit("refreshDataList");
                },
              });
            } else {


              this.$message.error(data.msg);
            }
          });
        }
      });
    },
  },
};
</script>
1.2 添加上传
这里我们选择将图片放置到阿里云上,使用对象存储。

阿里云上使使用对象存储方式:

创建Bucket(作为项目)

上传文件:上传成功后,取得图片的URL

这种方式是手动上传图片,实际上我们可以在程序中设置自动上传图片到阿里云对象存储。

上传的账号信息存储在应用服务器
上传先找应用服务器要一个policy上传策略,生成防伪签名
使用代码上传
查看阿里云关于文件上传的帮助: https://help.aliyun.com/document_detail/32009.html?spm=a2c4g.11186623.6.768.549d59aaWuZMGJ

1 添加依赖包
在Maven项目中加入依赖项(推荐方式)

在 Maven 工程中使用 OSS Java SDK,只需在 pom.xml 中加入相应依赖即可。以 3.8.0 版本为例,在 <dependencies 内加入如下内容:
<dependency>
    <groupId>com.aliyun.oss</groupId>
    <artifactId>aliyun-sdk-oss</artifactId>
    <version>3.8.0</version>
</dependency>

2 上传文件流
以下代码用于上传文件流:
// Endpoint以杭州为例,其它Region请按实际情况填写。
String endpoint = "http://oss-cn-hangzhou.aliyuncs.com";
// 云账号AccessKey有所有API访问权限,建议遵循阿里云安全最佳实践,创建并使用RAM子账号进行API访问或日常运维,请登录 https://ram.console.aliyun.com 创建。
String accessKeyId = "<yourAccessKeyId>";
String accessKeySecret = "<yourAccessKeySecret>";

// 创建OSSClient实例。
OSS ossClient = new OSSClientBuilder().build(endpoint, accessKeyId, accessKeySecret);

// 上传文件流。
InputStream inputStream = new FileInputStream("<yourlocalFile>");
ossClient.putObject("<yourBucketName>", "<yourObjectName>", inputStream);

// 关闭OSSClient。
ossClient.shutdown();


上面代码的信息可以通过如下查找:

endpoint的取值:点击概览就可以看到你的endpoint信息,endpoint在这里就是上海等地区,如 oss-cn-qingdao.aliyuncs.com
bucket域名:就是签名加上bucket,如gulimall-fermhan.oss-cn-qingdao.aliyuncs.com
accessKeyId和accessKeySecret需要创建一个RAM账号:

选上编程访问
创建用户完毕后,会得到一个“AccessKey ID”和“AccessKeySecret”,然后复制这两个值到代码的“AccessKey ID”和“AccessKeySecret”。

另外还需要添加访问控制权限:

@Test
public void testUpload() throws FileNotFoundException {


    // Endpoint以杭州为例,其它Region请按实际情况填写。
    String endpoint = "oss-cn-shanghai.aliyuncs.com";
    // 云账号AccessKey有所有API访问权限,建议遵循阿里云安全最佳实践,创建并使用RAM子账号进行API访问或日常运维,请登录 https://ram.console.aliyun.com 创建。
    String accessKeyId = "LTAI4G4W1RA4JXz2QhoDwHhi";
    String accessKeySecret = "R99lmDOJumF2x43ZBKT259Qpe70Oxw";

    // 创建OSSClient实例。
    OSS ossClient = new OSSClientBuilder().build(endpoint, accessKeyId, accessKeySecret);

    // 上传文件流。
    InputStream inputStream = new FileInputStream("C:\\Users\\Administrator\\Pictures\\timg.jpg");
    ossClient.putObject("gulimall-images", "time.jpg", inputStream);

    // 关闭OSSClient。
    ossClient.shutdown();
    System.out.println("上传成功.");
}
更为简单的使用方式,是使用SpringCloud Alibaba

扫描二维码关注公众号,回复:
12887209 查看本文章

1 添加依赖
<dependency>
    <groupId>com.alibaba.cloud</groupId>
    <artifactId>spring-cloud-starter-alicloud-oss</artifactId>
    <version>2.2.0.RELEASE</version>
</dependency>

2 创建“AccessKey ID”和“AccessKeySecret”

3 配置key,secret和endpoint相关信息
      access-key: LTAI4G4W1RA4JXz2QhoDwHhi
      secret-key: R99lmDOJumF2x43ZBKT259Qpe70Oxw
      oss:
        endpoint: oss-cn-shanghai.aliyuncs.com

4 注入OSSClient并进行文件上传下载等操作
package com.yxj.gulimall.product;

import com.aliyun.oss.OSS;
import com.aliyun.oss.OSSClient;
import com.aliyun.oss.OSSClientBuilder;
import com.yxj.gulimall.product.entity.BrandEntity;
import com.yxj.gulimall.product.service.BrandService;
import org.junit.Test;
import org.junit.runner.RunWith;
import org.springframework.beans.factory.annotation.Autowired;
import org.springframework.boot.test.context.SpringBootTest;
import org.springframework.test.context.junit4.SpringRunner;

import java.io.FileInputStream;
import java.io.FileNotFoundException;
import java.io.InputStream;

@RunWith(SpringRunner.class)
@SpringBootTest
public class GulimallProductApplicationTests {


    @Autowired
    OSSClient ossClient;


    @Test
    public void testUpload() throws FileNotFoundException {

         // 上传文件流。
        InputStream inputStream = new FileInputStream("C:\\Users\\YAOXINJIA\\Desktop\\soft.png");
        ossClient.putObject("gulimall-yaoxinjia", "soft.png", inputStream);

       // 关闭OSSClient。
        ossClient.shutdown();

        System.out.println("上传完成...");

    }

}
但是这样来做还是比较麻烦,如果以后的上传任务都交给gulimall-product来完成,显然耦合度高。最好单独新建一个Module来完成文件上传任务。
创建第三方模块


oss依赖
添加依赖,将原来gulimall-common中的“spring-cloud-starter-alicloud-oss”依赖移动到该项目中
        <dependency>
            <groupId>com.alibaba.cloud</groupId>
            <artifactId>spring-cloud-starter-alicloud-oss</artifactId>
            <version>2.2.0.RELEASE</version>
        </dependency>

        <dependency>
            <groupId>com.yxj.gulimall</groupId>
            <artifactId>gulimall-common</artifactId>
            <version>1.0-SNAPSHOT</version>
            <exclusions>
                <exclusion>
                    <groupId>com.baomidou</groupId>
                    <artifactId>mybatis-plus-boot-starter</artifactId>
                </exclusion>
            </exclusions>
        </dependency>

另外也需要在“pom.xml”文件中,添加如下的依赖管理
<dependencyManagement>

        <dependencies>
            <dependency>
                <groupId>org.springframework.cloud</groupId>
                <artifactId>spring-cloud-dependencies</artifactId>
                <version>${spring-cloud.version}</version>
                <type>pom</type>
                <scope>import</scope>
            </dependency>
            <dependency>
                <groupId>com.alibaba.cloud</groupId>
                <artifactId>spring-cloud-alibaba-dependencies</artifactId>
                <version>2.1.0.RELEASE</version>
                <type>pom</type>
                <scope>import</scope>
            </dependency>
        </dependencies>
    </dependencyManagement>
主启动类@EnableDiscoveryClient
@EnableDiscoveryClient  // 在主启动类中开启服务的注册和发现

在nacos中注册
在nacos创建命名空间“ gulimall-third-party ”

在“ gulimall-third-party”命名空间中,创建“ gulimall-third-party.yml”文件
spring:
  cloud:
    alicloud:
      access-key: LTAI4G4W1RA4JXz2QhoDwHhi
      secret-key: R99lmDOJumF2x43ZBKT259Qpe70Oxw
      oss:
        endpoint: oss-cn-shanghai.aliyuncs.com


编写配置文件
application.yml
server:
  port: 30000

spring:
  application:
    name: gulimall-third-party
  cloud:
    nacos:
      discovery:
        server-addr: 127.0.0.1:8848

logging:
  level:
    com.yxj.gulimall.product: debug


bootstrap.properties
spring.cloud.nacos.config.name=gulimall-third-party
spring.cloud.nacos.config.server-addr=127.0.0.1:8848
spring.cloud.nacos.config.namespace=9054e55c-b667-428c-b71d-0f2b42a6acff
spring.cloud.nacos.config.extension-configs[0].data-id=oss.yml
spring.cloud.nacos.config.extension-configs[0].group=DEFAULT_GROUP
spring.cloud.nacos.config.extension-configs[0].refresh=true


nacos端新建oss.yml
spring:
    cloud:
        alicloud:
            access-key: LTAI4G3ewgWMxsrnaaeDuT1B
            secret-key: Kdk4YLfj0prQOfPHzzQf9sIbdD0YeV
            oss:
                endpoint: oss-cn-qingdao.aliyuncs.com
 编写测试类
 package com.yxj.gulimall.thirdparty;

@SpringBootTest
class GulimallThirdPartyApplicationTests {


    @Autowired
    OSSClient ossClient;

    @Test
    public void testUpload() throws FileNotFoundException {


        // Endpoint以杭州为例,其它Region请按实际情况填写。
        String endpoint = "oss-cn-qingdao.aliyuncs.com";
        // 云账号AccessKey有所有API访问权限,建议遵循阿里云安全最佳实践,创建并使用RAM子账号进行API访问或日常运维,请登录 https://ram.console.aliyun.com 创建。
        String accessKeyId = "LTAI4G4W1RA4JXz2QhoDwHhi";
        String accessKeySecret = "R99lmDOJumF2x43ZBKT259Qpe70Oxw";

        // 创建OSSClient实例。
        OSS ossClient = new OSSClientBuilder().build(endpoint, accessKeyId, accessKeySecret);

         //上传文件流。
        InputStream inputStream = new FileInputStream("C:\\Users\\HAN\\Downloads\\123.jpg");
        ossClient.putObject("gulimall-fermhan", "333.jpg", inputStream);

        // 关闭OSSClient。
        ossClient.shutdown();
        System.out.println("上传成功.");
    }
}


    @Test
    public void testUpload() throws FileNotFoundException {


        FileInputStream inputStream = new FileInputStream("C:\\Users\\Downloads\\yxj.jpg");
        // 参数1位bucket  参数2位最终名字
        ossClient.putObject("gulimall-fermhan","321.jpg",inputStream);
        ossClient.shutdown();
    }
改进:服务端签名后直传
背景

采用JavaScript客户端直接签名(参见JavaScript客户端签名直传)时,AccessKeyID和AcessKeySecret会暴露在前端页面,因此存在严重的安全隐患。因此,OSS提供了服务端签名后直传的方案。

服务端签名后直传的原理如下:

用户发送上传Policy请求到应用服务器。
应用服务器返回上传Policy和签名给用户。
用户直接上传数据到OSS。

编写“com.yxj.gulimall.thirdparty.controller.OssController”类:
@RestController
public class OssController {


    @Autowired
    OSS ossClient;
    @Value ("${spring.cloud.alicloud.oss.endpoint}")
    String endpoint ;

    @Value("${spring.cloud.alicloud.oss.bucket}")
    String bucket ;

    @Value("${spring.cloud.alicloud.access-key}")
    String accessId ;
    @Value("${spring.cloud.alicloud.secret-key}")
    String accessKey ;
    @RequestMapping("/oss/policy")
    public Map<String, String> policy(){


        String host = "https://" + bucket + "." + endpoint; // host的格式为 bucketname.endpoint

        String format = new SimpleDateFormat("yyyy-MM-dd").format(new Date());
        String dir = format; // 用户上传文件时指定的前缀。

        Map<String, String> respMap=null;
        try {


            long expireTime = 30;
            long expireEndTime = System.currentTimeMillis() + expireTime * 1000;
            Date expiration = new Date(expireEndTime);
            PolicyConditions policyConds = new PolicyConditions();
            policyConds.addConditionItem(PolicyConditions.COND_CONTENT_LENGTH_RANGE, 0, 1048576000);
            policyConds.addConditionItem(MatchMode.StartWith, PolicyConditions.COND_KEY, dir);

            String postPolicy = ossClient.generatePostPolicy(expiration, policyConds);
            byte[] binaryData = postPolicy.getBytes("utf-8");
            String encodedPolicy = BinaryUtil.toBase64String(binaryData);
            String postSignature = ossClient.calculatePostSignature(postPolicy);

            respMap= new LinkedHashMap<String, String>();
            respMap.put("accessid", accessId);
            respMap.put("policy", encodedPolicy);
            respMap.put("signature", postSignature);
            respMap.put("dir", dir);
            respMap.put("host", host);
            respMap.put("expire", String.valueOf(expireEndTime / 1000));

        } catch (Exception e) {


            // Assert.fail(e.getMessage());
            System.out.println(e.getMessage());
        } finally {


            ossClient.shutdown();
        }
        return respMap;
    }
}
测试: http://localhost:30000/oss/policy 返回签名
{
    "accessid":"LTAI4G3ewgWMxsrnaaeDuT1B",
    "policy":"eyJleHBpcmF0aW9uIjoiMjAyMS0wMi0xNFQxMDoyOToxMS43ODhaIiwiY29uZGl0aW9ucyI6W1siY29udGVudC1sZW5ndGgtcmFuZ2UiLDAsMTA0ODU3NjAwMF0sWyJzdGFydHMtd2l0aCIsIiRrZXkiLCIyMDIxLTAyLTE0Il1dfQ==",
    "signature":"0OXDXrQ1vRNl61N5IaZXRFckCKM=",
    "dir":"2021-02-14",
    "host":"https://gulimall-fermhan.oss-cn-qingdao.aliyuncs.com",
    "expire":"1613298551"}

}
以后在上传文件时的访问路径为“ http://localhost:88/api/thirdparty/oss/policy”,

在“gulimall-gateway”中配置路由规则:
 - id: third_party_route
   uri: lb://gulimall-gateway
   predicates:
     - Path=/api/thirdparty/**
   filters:
     - RewritePath=/api/thirdparty/(?<segment>/?.*),/$\{segment}


测试是否能够正常跳转: http://localhost:88/api/thirdparty/oss/policy
上传组件
放置项目提供的upload文件夹到components/目录下,一个是单文件上传,另外一个是多文件上传

policy.js封装一个Promise,发送/thirdparty/oss/policy请求。vue项目会自动加上api前缀
multiUpload.vue多文件上传。要改,改方式如下
singleUpload.vue单文件上传。要替换里面的action中的内容action=“http://gulimall-fermhan.oss-cn-qingdao.aliyuncs.com”
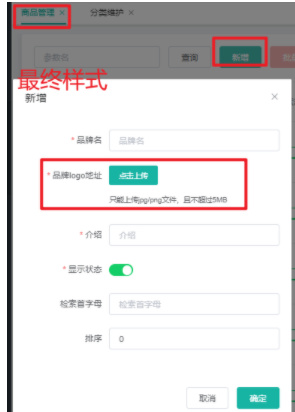
brand-add-or-update.vue中

修改el-form-item label="品牌logo地址"内容。
要使用文件上传组件,先导入import SingleUpload from “@/components/upload/singleUpload”;
填入<single-upload v-model="dataForm.logo"></single-upload>
写明要使用的组件components: { SingleUpload },

点击一下文件上传,发现发送了两个请求
localhost:88/api/thirdparty/oss/policy?t=1613300654238

我们在后端准备好了签名controller,那么前端是在哪里获取的呢

policy.js
import http from '@/utils/httpRequest.js'
export function policy() {
   return  new Promise((resolve,reject)=>{
        http({
            url: http.adornUrl("/third/party/oss/policy"),
            method: "get",
            params: http.adornParams({})
        }).then(({ data }) => {
            resolve(data);
        })
    });
}


而文件上传前调用的方法: :before-upload=“beforeUpload”
发现该方法返回了一个new Promise,调用了policy(),该方法是policy.js中的
import { policy } from "./policy";

....
beforeUpload(file) {
      let _self = this;
      return new Promise((resolve, reject) => {
        policy()
          .then(response => {
            // 意思是说policy获取到签名后,把签名信息保存起来
            // console.log("这是什么${filename}");
            _self.dataObj.policy = response.data.policy;
            _self.dataObj.signature = response.data.signature;
            _self.dataObj.ossaccessKeyId = response.data.accessid;
            _self.dataObj.key = response.data.dir +getUUID()+"_${filename}";
            _self.dataObj.dir = response.data.dir;
            _self.dataObj.host = response.data.host;
            resolve(true);
            // 总的来说什么意思呢?
            // 上传之前先请求签名,保存起来签名
            // 根据action="http://gulimall-fermhan.oss-cn-qingdao.aliyuncs.com"
            // 结合data信息,提交到云端
          })
          .catch(err => {
            console.log("出错了...",err)
            reject(false);
          });
      });
    },
在vue中看是response.data.policy,在控制台看response.policy。所以去java里面改返回值为R。return R.ok().put(“data”,respMap);
阿里云开启跨域
开始执行上传,但是在上传过程中,出现了跨域请求问题:
Access to XMLHttpRequest at 'http://gulimall-f.oss-cn-qingdao.aliyuncs.com/' from origin 'http://localhost:8001' has been blocked by CORS policy: Response to preflight request doesn't pass access control check: No 'Access-Control-Allow-Origin' header is present on the requested resource.
这又是一个跨域的问题,解决方法就是在阿里云上开启跨域访问:

再次执行文件上传。

注意上传时他的key变成了response.data.dir +getUUID()+"_${filename}";
1.3 表单校验&自定义校验器
修改brand-add-or-update如下:
 :active-value="1"         :inactive-value="0"  # 激活为1,不激活为0

<el-switch
	v-model="dataForm.showStatus"
	active-color="#13ce66"
	inactive-color="#ff4949"
	:active-value="1"
	:inactive-value="0"
>
</el-switch>

// 添加表单校验&自定义校验器
<script>
        firstLetter: [
          {


            validator: (rule, value, callback) => {


              if (value == "") {


                callback(new Error("首字母必须填写"));
              } else if (!/^[a-zA-Z]$/.test(value)) {


                callback(new Error("首字母必须a-z或者A-Z之间"));
              } else {


                callback();
              }
            },
            trigger: "blur",
          },
        ],
        sort: [{

     validator: (rule, value, callback) => {


          if (value == "") {


                callback(new Error("排序字段必须填写"));
              } else if (!Number.isInteger(parseInt(value)) || parseInt(value) < 0){


                callback(new Error("排序字段必须是一个整数"));
              } else {


                callback();
              }
        }, trigger: "blur" }]
</script>
// 修改效果如下
<template>
  <el-dialog
    :title="!dataForm.id ? '新增' : '修改'"
    :close-on-click-modal="false"
    :visible.sync="visible"
  >
    <el-form
      :model="dataForm"
      :rules="dataRule"
      ref="dataForm"
      @keyup.enter.native="dataFormSubmit()"
      label-width="140px"
    >
      <el-form-item label="品牌名" prop="name">
        <el-input v-model="dataForm.name" placeholder="品牌名"></el-input>
      </el-form-item>
      <el-form-item label="品牌logo地址" prop="logo">
        <SingleUpload v-model="dataForm.logo"></SingleUpload>
      </el-form-item>
      <el-form-item label="介绍" prop="descript">
        <el-input v-model="dataForm.descript" placeholder="介绍"></el-input>
      </el-form-item>
      <el-form-item label="显示状态" prop="showStatus">
        <el-switch
          v-model="dataForm.showStatus"
          active-color="#13ce66"
          inactive-color="#ff4949"
          :active-value="1"
          :inactive-value="0"
        >
        </el-switch>
      </el-form-item>
      <el-form-item label="检索首字母" prop="firstLetter">
        <el-input
          v-model="dataForm.firstLetter"
          placeholder="检索首字母"
        ></el-input>
      </el-form-item>
      <el-form-item label="排序" prop="sort">
        <el-input v-model="dataForm.sort" placeholder="排序"></el-input>
      </el-form-item>
    </el-form>
    <span slot="footer" class="dialog-footer">
      <el-button @click="visible = false">取消</el-button>
      <el-button type="primary" @click="dataFormSubmit()">确定</el-button>
    </span>
  </el-dialog>
</template>

<script>
import SingleUpload from "@/components/upload/singleUpload";
export default {


  data() {


    return {


      visible: false,
      dataForm: {


        brandId: 0,
        name: "",
        logo: "",
        descript: "",
        showStatus: 1,
        firstLetter: "",
        sort: 0,
      },
      dataRule: {


        name: [{

      required: true, message: "品牌名不能为空", trigger: "blur" }],
        logo: [
          {

      required: true, message: "品牌logo地址不能为空", trigger: "blur" },
        ],
        descript: [
          {

      required: true, message: "介绍不能为空", trigger: "blur" },
        ],
        showStatus: [
          {


            required: true,
            message: "显示状态[0-不显示;1-显示]不能为空",
            trigger: "blur",
          },
        ],
        firstLetter: [
          {


            validator: (rule, value, callback) => {


              if (value == "") {


                callback(new Error("首字母必须填写"));
              } else if (!/^[a-zA-Z]$/.test(value)) {


                callback(new Error("首字母必须a-z或者A-Z之间"));
              } else {


                callback();
              }
            },
            trigger: "blur",
          },
        ],
        sort: [{

     validator: (rule, value, callback) => {


          if (value == "") {


                callback(new Error("排序字段必须填写"));
              } else if (!Number.isInteger(parseInt(value)) || parseInt(value) < 0){


                callback(new Error("排序字段必须是一个整数"));
              } else {


                callback();
              }
        }, trigger: "blur" }],
      },
    };
  },
  methods: {


    init(id) {


      this.dataForm.brandId = id || 0;
      this.visible = true;
      this.$nextTick(() => {


        this.$refs["dataForm"].resetFields();
        if (this.dataForm.brandId) {


          this.$http({


            url: this.$http.adornUrl(
              `/product/brand/info/${

       this.dataForm.brandId}`
            ),
            method: "get",
            params: this.$http.adornParams(),
          }).then(({

      data }) => {


            if (data && data.code === 0) {


              this.dataForm.name = data.brand.name;
              this.dataForm.logo = data.brand.logo;
              this.dataForm.descript = data.brand.descript;
              this.dataForm.showStatus = data.brand.showStatus;
              this.dataForm.firstLetter = data.brand.firstLetter;
              this.dataForm.sort = data.brand.sort;
            }
          });
        }
      });
    },
    // 表单提交
    dataFormSubmit() {


      this.$refs["dataForm"].validate((valid) => {


        if (valid) {


          this.$http({


            url: this.$http.adornUrl(
              `/product/brand/${

       !this.dataForm.brandId ? "save" : "update"}`
            ),
            method: "post",
            data: this.$http.adornData({


              brandId: this.dataForm.brandId || undefined,
              name: this.dataForm.name,
              logo: this.dataForm.logo,
              descript: this.dataForm.descript,
              showStatus: this.dataForm.showStatus,
              firstLetter: this.dataForm.firstLetter,
              sort: this.dataForm.sort,
            }),
          }).then(({

      data }) => {


            if (data && data.code === 0) {


              this.$message({


                message: "操作成功",
                type: "success",
                duration: 1500,
                onClose: () => {


                  this.visible = false;
                  this.$emit("refreshDataList");
                },
              });
            } else {


              this.$message.error(data.msg);
            }
          });
        }
      });
    },
  },
  components: {


    SingleUpload,
  },
};
</script>
1.4 JSR303数据校验
问题引入:填写form时应该有前端校验,后端也应该有校验
前端
前端的校验是element-ui表单验证
Form 组件提供了表单验证的功能,只需要通过 rules 属性传入约定的验证规则,并将 Form-Item 的 prop 属性设置为需校验的字段名即可。

后端
@NotNull等
步骤1:使用校验注解
在Java中提供了一系列的校验方式,它这些校验方式在“javax.validation.constraints”包中,提供了如@Email,@NotNull等注解。
<!--jsr3参数校验器-->
<dependency>
    <groupId>org.springframework.boot</groupId>
    <artifactId>spring-boot-starter-validation</artifactId>
</dependency>
里面依赖了hibernate-validator
在非空处理方式上提供了@NotNull,@NotBlank和@NotEmpty
1 @NotNull

The annotated element must not be null. Accepts any type.
注解元素禁止为null,能够接收任何类型

2 @NotEmpty

the annotated element must not be null nor empty.

该注解修饰的字段不能为null或""

Supported types are:

支持以下几种类型

CharSequence (length of character sequence is evaluated)字符序列(字符序列长度的计算)
Collection (collection size is evaluated)
集合长度的计算
Map (map size is evaluated)
map长度的计算
Array (array length is evaluated)
数组长度的计算
3 @NotBlank

The annotated element must not be null and must contain at least one non-whitespace character. Accepts CharSequence.
该注解不能为null,并且至少包含一个非空格字符。接收字符序列。

@Valid
步骤2:controller中加校验注解@Valid,开启校验,
@RequestMapping("/save")
public R save(@Valid @RequestBody BrandEntity brand){
    brandService.save(brand);

    return R.ok();
}
测试: http://localhost:88/api/product/brand/save

在postman种发送上面的请求
{
    "timestamp": "2020-04-29T09:20:46.383+0000",
    "status": 400,
    "error": "Bad Request",
    "errors": [
        {
            "codes": [
                "NotBlank.brandEntity.name",
                "NotBlank.name",
                "NotBlank.java.lang.String",
                "NotBlank"
            ],
            "arguments": [
                {
                    "codes": [
                        "brandEntity.name",
                        "name"
                    ],
                    "arguments": null,
                    "defaultMessage": "name",
                    "code": "name"
                }
            ],
            "defaultMessage": "不能为空",
            "objectName": "brandEntity",
            "field": "name",
            "rejectedValue": "",
            "bindingFailure": false,
            "code": "NotBlank"
        }
    ],
    "message": "Validation failed for object='brandEntity'. Error count: 1",
    "path": "/product/brand/save"
}
能够看到"defaultMessage": “不能为空”,这些错误消息定义在“hibernate-validator”的“\org\hibernate\validator\ValidationMessages_zh_CN.properties”文件中。在该文件中定义了很多的错误规则:
javax.validation.constraints.AssertFalse.message     = 只能为false
javax.validation.constraints.AssertTrue.message      = 只能为true
javax.validation.constraints.DecimalMax.message      = 必须小于或等于{value}
javax.validation.constraints.DecimalMin.message      = 必须大于或等于{value}
javax.validation.constraints.Digits.message          = 数字的值超出了允许范围(只允许在{integer}位整数和{fraction}位小数范围内)
javax.validation.constraints.Email.message           = 不是一个合法的电子邮件地址
javax.validation.constraints.Future.message          = 需要是一个将来的时间
javax.validation.constraints.FutureOrPresent.message = 需要是一个将来或现在的时间
javax.validation.constraints.Max.message             = 最大不能超过{value}
javax.validation.constraints.Min.message             = 最小不能小于{value}
javax.validation.constraints.Negative.message        = 必须是负数
javax.validation.constraints.NegativeOrZero.message  = 必须是负数或零
javax.validation.constraints.NotBlank.message        = 不能为空
javax.validation.constraints.NotEmpty.message        = 不能为空
javax.validation.constraints.NotNull.message         = 不能为null
javax.validation.constraints.Null.message            = 必须为null
javax.validation.constraints.Past.message            = 需要是一个过去的时间
javax.validation.constraints.PastOrPresent.message   = 需要是一个过去或现在的时间
javax.validation.constraints.Pattern.message         = 需要匹配正则表达式"{regexp}"
javax.validation.constraints.Positive.message        = 必须是正数
javax.validation.constraints.PositiveOrZero.message  = 必须是正数或零
javax.validation.constraints.Size.message            = 个数必须在{min}和{max}之间

org.hibernate.validator.constraints.CreditCardNumber.message        = 不合法的信用卡号码
org.hibernate.validator.constraints.Currency.message                = 不合法的货币 (必须是{value}其中之一)
org.hibernate.validator.constraints.EAN.message                     = 不合法的{type}条形码
org.hibernate.validator.constraints.Email.message                   = 不是一个合法的电子邮件地址
org.hibernate.validator.constraints.Length.message                  = 长度需要在{min}和{max}之间
org.hibernate.validator.constraints.CodePointLength.message         = 长度需要在{min}和{max}之间
org.hibernate.validator.constraints.LuhnCheck.message               = ${validatedValue}的校验码不合法, Luhn模10校验和不匹配
org.hibernate.validator.constraints.Mod10Check.message              = ${validatedValue}的校验码不合法, 模10校验和不匹配
org.hibernate.validator.constraints.Mod11Check.message              = ${validatedValue}的校验码不合法, 模11校验和不匹配
org.hibernate.validator.constraints.ModCheck.message                = ${validatedValue}的校验码不合法, ${modType}校验和不匹配
org.hibernate.validator.constraints.NotBlank.message                = 不能为空
org.hibernate.validator.constraints.NotEmpty.message                = 不能为空
org.hibernate.validator.constraints.ParametersScriptAssert.message  = 执行脚本表达式"{script}"没有返回期望结果
org.hibernate.validator.constraints.Range.message                   = 需要在{min}和{max}之间
org.hibernate.validator.constraints.SafeHtml.message                = 可能有不安全的HTML内容
org.hibernate.validator.constraints.ScriptAssert.message            = 执行脚本表达式"{script}"没有返回期望结果
org.hibernate.validator.constraints.URL.message                     = 需要是一个合法的URL

org.hibernate.validator.constraints.time.DurationMax.message        = 必须小于${inclusive == true ? '或等于' : ''}${days == 0 ? '' : days += '天'}${hours == 0 ? '' : hours += '小时'}${minutes == 0 ? '' : minutes += '分钟'}${seconds == 0 ? '' : seconds += '秒'}${millis == 0 ? '' : millis += '毫秒'}${nanos == 0 ? '' : nanos += '纳秒'}
org.hibernate.validator.constraints.time.DurationMin.message        = 必须大于${inclusive == true ? '或等于' : ''}${days == 0 ? '' : days += '天'}${hours == 0 ? '' : hours += '小时'}${minutes == 0 ? '' : minutes += '分钟'}${seconds == 0 ? '' : seconds += '秒'}${millis == 0 ? '' : millis += '毫秒'}${nanos == 0 ? '' : nanos += '纳秒'}

想要自定义错误消息,可以覆盖默认的错误提示信息,如@NotBlank的默认message是
public @interface NotBlank {

	String message() default "{javax.validation.constraints.NotBlank.message}";
}

可以在添加注解的时候,修改message:
@NotBlank(message = "品牌名必须非空")
private String name;


当再次发送请求时,得到的错误提示信息:
{
    "timestamp": "2020-04-29T09:36:04.125+0000",
    "status": 400,
    "error": "Bad Request",
    "errors": [
        {
            "codes": [
                "NotBlank.brandEntity.name",
                "NotBlank.name",
                "NotBlank.java.lang.String",
                "NotBlank"
            ],
            "arguments": [
                {
                    "codes": [
                        "brandEntity.name",
                        "name"
                    ],
                    "arguments": null,
                    "defaultMessage": "name",
                    "code": "name"
                }
            ],
            "defaultMessage": "品牌名必须非空",
            "objectName": "brandEntity",
            "field": "name",
            "rejectedValue": "",
            "bindingFailure": false,
            "code": "NotBlank"
        }
    ],
    "message": "Validation failed for object='brandEntity'. Error count: 1",
    "path": "/product/brand/save"
}

但是这种返回的错误结果并不符合我们的业务需要。


BindResult
步骤3:给校验的Bean后,紧跟一个BindResult,就可以获取到校验的结果。拿到校验的结果,就可以自定义的封装。
@RequestMapping("/save")
public R save(@Valid @RequestBody BrandEntity brand, BindingResult result){
    if( result.hasErrors()){
        Map<String,String> map=new HashMap<>();
        //1.获取错误的校验结果
        result.getFieldErrors().forEach((item)->{
            //获取发生错误时的message
            String message = item.getDefaultMessage();
            //获取发生错误的字段
            String field = item.getField();
            map.put(field,message);
        });
        return R.error(400,"提交的数据不合法").put("data",map);
    }else {

    }
    brandService.save(brand);

    return R.ok();
}

这种是针对于该请求设置了一个内容校验,如果针对于每个请求都单独进行配置,显然不是太合适,实际上可以统一的对于异常进行处理。

统一异常处理@ControllerAdvice
步骤4:统一异常处理

可以使用SpringMvc所提供的@ControllerAdvice,通过“basePackages”能够说明处理哪些路径下的异常。
1 抽取一个异常处理类
@Slf4j
@RestControllerAdvice(basePackages = "com.atguigu.gulimall.product.controller")
public class GulimallExceptionControllerAdvice {

    @ExceptionHandler(value = Exception.class) // 也可以返回ModelAndView
    public R handleValidException(MethodArgumentNotValidException exception){

        Map<String,String> map=new HashMap<>();
        // 获取数据校验的错误结果
        BindingResult bindingResult = exception.getBindingResult();
        bindingResult.getFieldErrors().forEach(fieldError -> {
            String message = fieldError.getDefaultMessage();
            String field = fieldError.getField();
            map.put(field,message);
        });

        log.error("数据校验出现问题{},异常类型{}",exception.getMessage(),exception.getClass());

        return R.error(400,"数据校验出现问题").put("data",map);
    }
}

2 测试: http://localhost:88/api/product/brand/save

3 默认异常处理
   @ExceptionHandler(value = Throwable.class)
    public R handleException(Throwable throwable){
        log.error("未知异常{},异常类型{}",throwable.getMessage(),throwable.getClass());
        return R.error(400,"数据校验出现问题");
    }


4 错误状态码
上面代码中,针对于错误状态码,是我们进行随意定义的,然而正规开发过程中,错误状态码有着严格的定义规则,如该在项目中我们的错误状态码定义

为了定义这些错误状态码,我们可以单独定义一个常量类,用来存储这些错误状态码
package com.yxj.common.exception;

/***
 * 错误码和错误信息定义类
 * 1. 错误码定义规则为5为数字
 * 2. 前两位表示业务场景,最后三位表示错误码。例如:100001。10:通用 001:系统未知异常
 * 3. 维护错误码后需要维护错误描述,将他们定义为枚举形式
 * 错误码列表:
 *  10: 通用
 *      001:参数格式校验
 *  11: 商品
 *  12: 订单
 *  13: 购物车
 *  14: 物流
 */
public enum BizCodeEnum {


    UNKNOW_EXEPTION(10000,"系统未知异常"),

    VALID_EXCEPTION( 10001,"参数格式校验失败");

    private int code;
    private String msg;

    BizCodeEnum(int code, String msg) {


        this.code = code;
        this.msg = msg;
    }

    public int getCode() {


        return code;
    }

    public String getMsg() {


        return msg;
    }
}
5 测试: http://localhost:88/api/product/brand/save

1.5 分组校验功能(完成多场景的复杂校验)
1 groups
1 给校验注解,标注上groups,指定什么情况下才需要进行校验
groups里面的内容要以接口的形式显示出来
如:指定在更新和添加的时候,都需要进行校验。新增时不需要带id,修改时必须带id
@NotNull(message = "修改必须定制品牌id", groups = {UpdateGroup.class})
@Null(message = "新增不能指定id", groups = {AddGroup.class})
@TableId
private Long brandId;

在这种情况下,没有指定分组的校验注解,默认是不起作用的。想要起作用就必须要加groups。

2 @Validated
2 业务方法参数上使用@Validated注解

@Validated的value方法:

Specify one or more validation groups to apply to the validation step kicked off by this annotation.
指定一个或多个验证组以应用于此注释启动的验证步骤。

JSR-303 defines validation groups as custom annotations which an application declares for the sole purpose of using
them as type-safe group arguments, as implemented in SpringValidatorAdapter.

JSR-303 将验证组定义为自定义注释,应用程序声明的唯一目的是将它们用作类型安全组参数,如 SpringValidatorAdapter 中实现的那样。

Other SmartValidator implementations may support class arguments in other ways as well.

其他SmartValidator 实现也可以以其他方式支持类参数。

@RequestMapping("/save")
public R save(@Validated(AddGroup.class) @RequestBody BrandEntity brand) {
    brandService.save(brand);

    return R.ok();
}
@RequestMapping("/delete")
//@RequiresPermissions("${moduleNamez}:brand:delete")
public R delete(@RequestBody Long[] brandIds) {
    brandService.removeByIds(Arrays.asList(brandIds));

    return R.ok();
}


3 分组情况下,校验注解生效问题
3 默认情况下,在分组校验情况下,没有指定指定分组的校验注解,将不会生效,它只会在不分组的情况下生效。
1.6 自定义校验功能
场景:要校验showStatus的01状态,可以用正则,但我们可以利用其他方式解决复杂场景。比如我们想要下面的场景
/**
	 * 显示状态[0-不显示;1-显示]
	 */
@NotNull(groups = {AddGroup.class, UpdateStatusGroup.class})
@ListValue(vals = {0,1}, groups = {AddGroup.class, UpdateGroup.class, UpdateStatusGroup.class})
private Integer showStatus;

如何做:

添加依赖
<dependency>
    <groupId>javax.validation</groupId>
    <artifactId>validation-api</artifactId>
    <version>2.0.1.Final</version>
</dependency>


1 编写自定义的校验注解
必须有3个属性

message()错误信息
groups()分组校验
payload()自定义负载信息

@Documented
@Constraint(validatedBy = { ListValueConstraintValidator.class})
@Target({ METHOD, FIELD, ANNOTATION_TYPE, CONSTRUCTOR, PARAMETER, TYPE_USE })
@Retention(RUNTIME)
public @interface ListValue {
    // 使用该属性去Validation.properties中取
    String message() default "{com.atguigu.common.valid.ListValue.message}";

    Class<?>[] groups() default { };

    Class<? extends Payload>[] payload() default { };

    int[] value() default {};
}

该属性值取哪里取呢?
    common创建文件ValidationMessages.properties
    里面写上com.atguigu.common.valid.ListValue.message=必须提交指定的值 [0,1]


2 编写自定义的校验器
public class ListValueConstraintValidator implements ConstraintValidator<ListValue,Integer> {
    private Set<Integer> set=new HashSet<>();
    @Override
    public void initialize(ListValue constraintAnnotation) {
        int[] value = constraintAnnotation.value();
        for (int i : value) {
            set.add(i);
        }

    }

    @Override
    public boolean isValid(Integer value, ConstraintValidatorContext context) {


        return  set.contains(value);
    }
}

3 关联校验器和校验注解
@Constraint(validatedBy = { ListValueConstraintValidator.class})
一个校验注解可以匹配多个校验器

4 使用实例
/**
	 * 显示状态[0-不显示;1-显示]
	 */
	@ListValue(value = {0,1},groups ={AddGroup.class})
	private Integer showStatus;
2 商品服务-SPU和SKU管理
2.1 SPU&SKU&规格参数&销售属性
重新执行“sys_menus.sql”

SPU:standard product unit(标准化产品单元):是商品信息聚合的最小单位,是一组可复用、易检索的标准化信息的集合,该集合描述了一个产品的特性。
如iphoneX是SPU
SKU:stock keeping unit(库存量单位):库存进出计量的基本单元,可以是件/盒/托盘等单位。SKU是对于大型连锁超市DC配送中心物流管理的一个必要的方法。现在已经被引申为产品统一编号的简称,每种产品对应有唯一的SKU号。
如iphoneX 64G 黑色 是SKU

同一个SPU拥有的特性叫基本属性。如机身长度,这个是手机共用的属性。而每款手机的属性值不同

能决定库存量的叫销售属性。如颜色

基本属性[规格参数]与销售属性
每个分类下的商品共享规格参数,与销售属性。只是有些商品不一定要用这个分类下全部的属性;

属性是以三级分类组织起来的
规格参数中有些是可以提供检索的
规格参数也是基本属性,他们具有自己的分组
属性的分组也是以三级分类组织起来的
属性名确定的,但是值是每一个商品不同来决定的


数据库表
pms数据库下的attr属性表,attr-group表

attr-group-id:几号分组
catelog-id:什么类别下的,比如手机
根据商品找到spu-id,attr-id

属性关系-规格参数-销售属性-三级分类 关联关系

SPU-SKU属性表

荣耀V20有两个属性,网络和像素,但是这两个属性的spu是同一个,代表是同款手机。

sku表里保存spu是同一手机,sku可能相同可能不同,相同代表是同一款,不同代表是不同款。
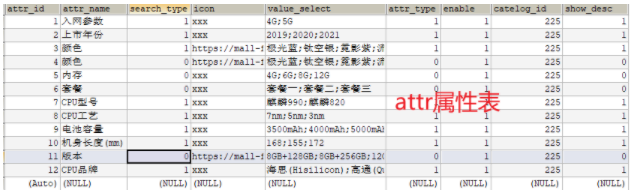
属性表说明每个属性的 枚举值

分类表有所有的分类,但有父子关系
2.2 API-属性分组-前端组件抽取&父子组件交互
sys_menus.sql
/*
SQLyog Ultimate v11.25 (64 bit)
MySQL - 5.7.27 : Database - gulimall_admin
*********************************************************************
*/


/*!40101 SET NAMES utf8 */;

/*!40101 SET SQL_MODE=''*/;

/*!40014 SET @OLD_UNIQUE_CHECKS=@@UNIQUE_CHECKS, UNIQUE_CHECKS=0 */;
/*!40014 SET @OLD_FOREIGN_KEY_CHECKS=@@FOREIGN_KEY_CHECKS, FOREIGN_KEY_CHECKS=0 */;
/*!40101 SET @OLD_SQL_MODE=@@SQL_MODE, SQL_MODE='NO_AUTO_VALUE_ON_ZERO' */;
/*!40111 SET @OLD_SQL_NOTES=@@SQL_NOTES, SQL_NOTES=0 */;
CREATE DATABASE /*!32312 IF NOT EXISTS*/`gulimall_admin` /*!40100 DEFAULT CHARACTER SET utf8mb4 */;

USE `gulimall_admin`;

/*Table structure for table `sys_menu` */

DROP TABLE IF EXISTS `sys_menu`;

CREATE TABLE `sys_menu` (
  `menu_id` bigint(20) NOT NULL AUTO_INCREMENT,
  `parent_id` bigint(20) DEFAULT NULL COMMENT '父菜单ID,一级菜单为0',
  `name` varchar(50) DEFAULT NULL COMMENT '菜单名称',
  `url` varchar(200) DEFAULT NULL COMMENT '菜单URL',
  `perms` varchar(500) DEFAULT NULL COMMENT '授权(多个用逗号分隔,如:user:list,user:create)',
  `type` int(11) DEFAULT NULL COMMENT '类型   0:目录   1:菜单   2:按钮',
  `icon` varchar(50) DEFAULT NULL COMMENT '菜单图标',
  `order_num` int(11) DEFAULT NULL COMMENT '排序',
  PRIMARY KEY (`menu_id`)
) ENGINE=InnoDB AUTO_INCREMENT=76 DEFAULT CHARSET=utf8mb4 COMMENT='菜单管理';

/*Data for the table `sys_menu` */

insert  into `sys_menu`(`menu_id`,`parent_id`,`name`,`url`,`perms`,`type`,`icon`,`order_num`) values (1,0,'系统管理',NULL,NULL,0,'system',0),(2,1,'管理员列表','sys/user',NULL,1,'admin',1),(3,1,'角色管理','sys/role',NULL,1,'role',2),(4,1,'菜单管理','sys/menu',NULL,1,'menu',3),(5,1,'SQL监控','http://localhost:8080/renren-fast/druid/sql.html',NULL,1,'sql',4),(6,1,'定时任务','job/schedule',NULL,1,'job',5),(7,6,'查看',NULL,'sys:schedule:list,sys:schedule:info',2,NULL,0),(8,6,'新增',NULL,'sys:schedule:save',2,NULL,0),(9,6,'修改',NULL,'sys:schedule:update',2,NULL,0),(10,6,'删除',NULL,'sys:schedule:delete',2,NULL,0),(11,6,'暂停',NULL,'sys:schedule:pause',2,NULL,0),(12,6,'恢复',NULL,'sys:schedule:resume',2,NULL,0),(13,6,'立即执行',NULL,'sys:schedule:run',2,NULL,0),(14,6,'日志列表',NULL,'sys:schedule:log',2,NULL,0),(15,2,'查看',NULL,'sys:user:list,sys:user:info',2,NULL,0),(16,2,'新增',NULL,'sys:user:save,sys:role:select',2,NULL,0),(17,2,'修改',NULL,'sys:user:update,sys:role:select',2,NULL,0),(18,2,'删除',NULL,'sys:user:delete',2,NULL,0),(19,3,'查看',NULL,'sys:role:list,sys:role:info',2,NULL,0),(20,3,'新增',NULL,'sys:role:save,sys:menu:list',2,NULL,0),(21,3,'修改',NULL,'sys:role:update,sys:menu:list',2,NULL,0),(22,3,'删除',NULL,'sys:role:delete',2,NULL,0),(23,4,'查看',NULL,'sys:menu:list,sys:menu:info',2,NULL,0),(24,4,'新增',NULL,'sys:menu:save,sys:menu:select',2,NULL,0),(25,4,'修改',NULL,'sys:menu:update,sys:menu:select',2,NULL,0),(26,4,'删除',NULL,'sys:menu:delete',2,NULL,0),(27,1,'参数管理','sys/config','sys:config:list,sys:config:info,sys:config:save,sys:config:update,sys:config:delete',1,'config',6),(29,1,'系统日志','sys/log','sys:log:list',1,'log',7),(30,1,'文件上传','oss/oss','sys:oss:all',1,'oss',6),(31,0,'商品系统','','',0,'editor',0),(32,31,'分类维护','product/category','',1,'menu',0),(34,31,'品牌管理','product/brand','',1,'editor',0),(37,31,'平台属性','','',0,'system',0),(38,37,'属性分组','product/attrgroup','',1,'tubiao',0),(39,37,'规格参数','product/baseattr','',1,'log',0),(40,37,'销售属性','product/saleattr','',1,'zonghe',0),(41,31,'商品维护','product/spu','',0,'zonghe',0),(42,0,'优惠营销','','',0,'mudedi',0),(43,0,'库存系统','','',0,'shouye',0),(44,0,'订单系统','','',0,'config',0),(45,0,'用户系统','','',0,'admin',0),(46,0,'内容管理','','',0,'sousuo',0),(47,42,'优惠券管理','coupon/coupon','',1,'zhedie',0),(48,42,'发放记录','coupon/history','',1,'sql',0),(49,42,'专题活动','coupon/subject','',1,'tixing',0),(50,42,'秒杀活动','coupon/seckill','',1,'daohang',0),(51,42,'积分维护','coupon/bounds','',1,'geren',0),(52,42,'满减折扣','coupon/full','',1,'shoucang',0),(53,43,'仓库维护','ware/wareinfo','',1,'shouye',0),(54,43,'库存工作单','ware/task','',1,'log',0),(55,43,'商品库存','ware/sku','',1,'jiesuo',0),(56,44,'订单查询','order/order','',1,'zhedie',0),(57,44,'退货单处理','order/return','',1,'shanchu',0),(58,44,'等级规则','order/settings','',1,'system',0),(59,44,'支付流水查询','order/payment','',1,'job',0),(60,44,'退款流水查询','order/refund','',1,'mudedi',0),(61,45,'会员列表','member/member','',1,'geren',0),(62,45,'会员等级','member/level','',1,'tubiao',0),(63,45,'积分变化','member/growth','',1,'bianji',0),(64,45,'统计信息','member/statistics','',1,'sql',0),(65,46,'首页推荐','content/index','',1,'shouye',0),(66,46,'分类热门','content/category','',1,'zhedie',0),(67,46,'评论管理','content/comments','',1,'pinglun',0),(68,41,'spu管理','product/spu','',1,'config',0),(69,41,'发布商品','product/spuadd','',1,'bianji',0),(70,43,'采购单维护','','',0,'tubiao',0),(71,70,'采购需求','ware/purchaseitem','',1,'editor',0),(72,70,'采购单','ware/purchase','',1,'menu',0),(73,41,'商品管理','product/manager','',1,'zonghe',0),(74,42,'会员价格','coupon/memberprice','',1,'admin',0),(75,42,'每日秒杀','coupon/seckillsession','',1,'job',0);

/*!40101 SET SQL_MODE=@OLD_SQL_MODE */;
/*!40014 SET FOREIGN_KEY_CHECKS=@OLD_FOREIGN_KEY_CHECKS */;
/*!40014 SET UNIQUE_CHECKS=@OLD_UNIQUE_CHECKS */;
/*!40111 SET SQL_NOTES=@OLD_SQL_NOTES */;
点击子组件,父组件触发事件
执行sys_menus.sql
接口文档地址
https://easydoc.xyz/s/78237135

属性分组
现在想要实现点击菜单的左边,能够实现在右边展示数据

根据请求地址http://localhost:8001/#/product-attrgroup

所以应该有product/attrgroup.vue。我们之前写过product/cateory.vue,现在我们要抽象到common//cateory.vue


1 左侧内容:

要在左面显示菜单,右面显示表格复制<el-row :gutter="20">,放到attrgroup.vue的<template>。20表示列间距

去element-ui文档里找到布局,
<el-row :gutter="20">
    <el-col :span="6"><div class="grid-content bg-purple"></div></el-col>
    <el-col :span="18"><div class="grid-content bg-purple"></div></el-col>
</el-row>


分为2个模块,分别占6列和18列

有了布局之后,要在里面放内容。接下来要抽象一个分类vue。新建common/category,生成vue模板。把之前写的el-tree放到<template>

<el-tree :data="menus" :props="defaultProps" node-key="catId" ref="menuTree" @node-click="nodeClick"	></el-tree>
所以他把menus绑定到了菜单上,
所以我们应该在export default {中有menus的信息
该具体信息会随着点击等事件的发生会改变值(或比如created生命周期时),
tree也就同步变化了


common/category写好后,就可以在attrgroup.vue中导入使用了
<script>
import Category from "../common/category";
export default {
  //import引入的组件需要注入到对象中才能使用。组件名:自定义的名字,一致可以省略
  components: { Category},


导入了之后,就可以在attrgroup.vue中找合适位置放好
<template>
<el-row :gutter="20">
    <el-col :span="6">
        <category @tree-node-click="treenodeclick"></category>
    </el-col>


2 右侧表格内容:

开始填写属性分组页面右侧的表格

复制gulimall-product\src\main\resources\src\views\modules\product\attrgroup.vue中的部分内容div到attrgroup.vue

批量删除是弹窗add-or-update

导入data、结合components


父子组件
要实现功能:点击左侧,右侧表格对应内容显示。

父子组件传递数据:category.vue点击时,引用它的attgroup.vue能感知到, 然后通知到add-or-update

比如嵌套div,里层div有事件后冒泡到外层div(是指一次点击调用了两个div的点击函数)

子组件(category)给父组件(attrgroup)传递数据,事件机制;

去element-ui的tree部分找event事件,看node-click()

在category中绑定node-click事件,
<el-tree :data="menus" :props="defaultProps" node-key="catId" ref="menuTree" @node-click="nodeClick"	></el-tree>

this.$emit()
子组件给父组件发送一个事件,携带上数据;
nodeClick(data,Node,component){
    console.log("子组件被点击",data,Node,component);
    this.$emit("tree-node-click",data,Node,component);
},
第一个参数事件名字随便写,
后面可以写任意多的东西,事件发生时都会传出去

this.$emit(事件名,“携带的数据”);

父组件中的获取发送的事件
在attr-group中写
<category @tree-node-click="treeNodeClick"></category>
表明他的子组件可能会传递过来点击事件,用自定义的函数接收传递过来的参数

 父组件中进行处理
//获取发送的事件数据
    treeNodeClick(data,Node,component){
     console.log("attgroup感知到的category的节点被点击",data,Node,component);
     console.log("刚才被点击的菜单ID",data.catId);
},
2.3 按接口文档开发
https://easydoc.xyz/s/78237135/ZUqEdvA4/OXTgKobR

查询功能:
GET /product/attrgroup/list/{catelogId}

按照这个url,去product项目下的attrgroup-controller里修改
/**
     * 列表
     * @param  catelogId 0的话查所有
     */
@RequestMapping("/list/{catelogId}")
public R list(@RequestParam Map<String, Object> params,@PathVariable Long catelogId){


    //        PageUtils page = attrGroupService.queryPage(params);
    PageUtils page = attrGroupService.queryPage(params,catelogId);
    return R.ok().put("page", page);
}
增加接口与实现

Query里面就有个方法getPage(),传入map,将map解析为mybatis-plus的IPage对象
自定义PageUtils类用于传入IPage对象,得到其中的分页信息
AttrGroupServiceImpl extends ServiceImpl,其中ServiceImpl的父类中有方法page(IPage, Wrapper)。对于wrapper而言,没有条件的话就是查询所有
queryPage()返回前还会return new PageUtils(page);,把page对象解析好页码信息,就封装为了响应数据
@Override // AttrGroupServiceImpl.java
public PageUtils queryPage(Map<String, Object> params, Long catelogId) {


    String key = (String) params.get("key");
    QueryWrapper<AttrGroupEntity> wrapper = new QueryWrapper<>();
    // key不为空
    if (!StringUtils.isEmpty(key)) {


        wrapper.and((obj) ->
                    obj.eq("attr_group_id", key).or().like("attr_group_name", key)
                   );
    }
    if (catelogId == 0) {


        // Query可以把map封装为IPage
        IPage<AttrGroupEntity> page =
            this.page(new Query<AttrGroupEntity>().getPage(params),
                      wrapper);
        return new PageUtils(page);
    } else {


        // 增加id信息
        wrapper.eq("catelog_id", catelogId);

        IPage<AttrGroupEntity> page =
            this.page(new Query<AttrGroupEntity>().getPage(params),
                      wrapper);
        return new PageUtils(page);
    }
}
测试

localhost:88/api/product/attrgroup/list/1

localhost:88/api/product/attrgroup/list/1?page=1&key=aa

{
    "msg": "success",
    "code": 0,
    "page": {
        "totalCount": 0,
        "pageSize": 10,
        "totalPage": 0,
        "currPage": 1,
        "list": []
    }
}
然后调整前端

发送请求时url携带id信息,${this.catId},get参数携带page信息

打击第3级分类时才查,修改attr-group.vue中的函数即可
//感知树节点被点击
treenodeclick(data, node, component) {
    if (node.level == 3) {
        this.catId = data.catId;
        this.getDataList(); //重新查询
    }
},

// 获取数据列表
getDataList() {
    this.dataListLoading = true;
    this.$http({
        url: this.$http.adornUrl(`/product/attrgroup/list/${this.catId}`),
        method: "get",
        params: this.$http.adornParams({
            page: this.pageIndex,
            limit: this.pageSize,
            key: this.dataForm.key
        })
    }).then(({ data }) => {
        if (data && data.code === 0) {
            this.dataList = data.page.list;
            this.totalPage = data.page.totalCount;
        } else {
            this.dataList = [];
            this.totalPage = 0;
        }
        this.dataListLoading = false;
    });
},
新增功能
上面演示了查询功能,下面写insert分类

但是想要下面这个效果:

下拉菜单应该是手机一级分类的,这个功能是级联选择器

级联选择器<el-cascader
级联选择的下拉同样是个options数组,多级的话用children属性即可

只需为 Cascader 的options属性指定选项数组即可渲染出一个级联选择器。通过props.expandTrigger可以定义展开子级菜单的触发方式。

去vue里找src\views\modules\product\attrgroup-add-or-update.vue

修改对应的位置为<el-cascader 。。。>

把data()里的数组categorys绑定到options上即可,更详细的设置可以用props绑定


@JsonInclude去空字段
优化:没有下级菜单时不要有下一级空菜单,在java端把children属性空值去掉,空集合时去掉字段,

可以用@JsonInclude(Inlcude.NON_EMPTY)注解标注在实体类的属性上,

@TableField(exist =false)
@JsonInclude(JsonInclude.Include.NON_EMPTY)
private List<CategoryEntity> children;
提交完后返回页面也刷新了,是用到了父子组件。在$message弹窗结束回调$this.emit

接下来要解决的问题是,修改了该vue后,新增是可以用,修改回显就有问题了,应该回显3级

<el-button
           type="text"
           size="small"
           @click="addOrUpdateHandle(scope.row.attrGroupId)"
           >修改</el-button>

<script>
    // 新增 / 修改
    addOrUpdateHandle(id) {


        // 先显示弹窗
        this.addOrUpdateVisible = true;
        // .$nextTick(代表渲染结束后再接着执行
        this.$nextTick(() => {


            // this是attrgroup.vue
            // $refs是它里面的所有组件。在本vue里使用的时候,标签里会些ref=""
            // addOrUpdate这个组件
            // 组件的init(id);方法
            this.$refs.addOrUpdate.init(id);
        });
    },
</script>
在init方法里进行回显
但是分类的id还是不对,应该是用数组封装的路径

init(id) {
    this.dataForm.attrGroupId = id || 0;
    this.visible = true;
    this.$nextTick(() => {
        this.$refs["dataForm"].resetFields();
        if (this.dataForm.attrGroupId) {
            this.$http({
                url: this.$http.adornUrl(
                    `/product/attrgroup/info/${this.dataForm.attrGroupId}`
                ),
                method: "get",
                params: this.$http.adornParams()
            }).then(({ data }) => {
                if (data && data.code === 0) {
                    this.dataForm.attrGroupName = data.attrGroup.attrGroupName;
                    this.dataForm.sort = data.attrGroup.sort;
                    this.dataForm.descript = data.attrGroup.descript;
                    this.dataForm.icon = data.attrGroup.icon;
                    this.dataForm.catelogId = data.attrGroup.catelogId;
                    //查出catelogId的完整路径
                    this.catelogPath =  data.attrGroup.catelogPath;
                }
            });
        }
    });
修改AttrGroupEntity
/**
	 * 三级分类修改的时候回显路径
	 */
@TableField(exist = false)
private Long[] catelogPath;

修改controller
/**
     * 信息
     */
@RequestMapping("/info/{attrGroupId}")
//@RequiresPermissions("product:attrgroup:info")
public R info(@PathVariable("attrGroupId") Long attrGroupId){


    AttrGroupEntity attrGroup = attrGroupService.getById(attrGroupId);
    // 用当前当前分类id查询完整路径并写入 attrGroup
    attrGroup.setCatelogPath(categoryService.findCateLogPath(attrGroup.getCatelogId()));
    return R.ok().put("attrGroup", attrGroup);
}


添加service
@Override // CategoryServiceImpl
    public Long[] findCateLogPath(Long catelogId) {


        List<Long> paths = new ArrayList<>();
        paths = findParentPath(catelogId, paths);
        // 收集的时候是顺序 前端是逆序显示的 所以用集合工具类给它逆序一下
        Collections.reverse(paths);
        return paths.toArray(new Long[paths.size()]);
    }
    /**
     * 递归收集所有父节点
     */
    private List<Long> findParentPath(Long catlogId, List<Long> paths) {


        // 1、收集当前节点id
        paths.add(catlogId);
        CategoryEntity byId = this.getById(catlogId);
        if (byId.getParentCid() != 0) {


            findParentPath(byId.getParentCid(), paths);
        }
        return paths;
    }


优化:会话关闭时清空内容,防止下次开启还遗留数据
2.4 PO、DO、TO、DTO
1 PO持久对象

PO就是对应数据库中某个表中的一条记录,多个记录可以用PO的集合。PO中应该不包含任何对数据的操作。
2 DO(Domain 0bject)领域对象
就是从现实世界中推象出来的有形或无形的业务实体。

3 TO(Transfer 0bject),数据传输对象传输的对象
不同的应用程序之间传输的对象。微服务

4 DTO(Data Transfer Obiect)数据传输对象

这个概念来源于J2EE的设汁模式,原来的目的是为了EJB的分布式应用握供粗粒度的数据实体,以减少分布式调用的次数,从而握分布式调用的性能和降低网络负载,但在这里,泛指用于示层与服务层之间的数据传输对象。

5 V0(value object)值对象
通常用干业务层之闾的数据传递,和PO一样也是仅仅包含数据而已。但应是抽象出的业务对象,可以和表对应,也可以不,这根据业务的需要。用new关韃字创建,由GC回收的

Viewobject:视图对象

接受页面传递来的对象,封装对象

将业务处理完成的对象,封装成页面要用的数据

6 BO(business object)业务对象

从业务模型的度看.见IJML元#领嵫模型的领嵫对象。封装业务逻辑的java对象,通过用DAO方法,结合PO,VO进行业务操作。businessobject:业务对象主要作用是把业务逻辑封装为一个对苤。这个对象可以包括一个或多个其它的对彖。比如一个简历,有教育经历、工怍经历、社会关系等等。我们可以把教育经历对应一个PO工作经历

7 POJO简单无规则java对象

8 DAO
2.5 设置日期数据规则
spring:
	jackson:
		date-format: yyyy-MM-dd HH:mm:ss
2.6 debug调试技巧
debug时,mysql默认的隔离级别为读已提交,为了能够在调试过程中,获取到数据库中的数据信息,可以调整隔离级别为读未提交:
SET SESSION TRANSACTION ISOLATION LEVEL READ UNCOMMITTED;
2.7 采购简要流程

2.8 bug解决
84 pubsub、publish报错
解决如下:
1 npm install --save pubsub-js
2 在src下的main.js中引用:
import PubSub from 'pubsub-js'
Vue.prototype.PubSub = PubSub

85 数据库里少了value_type字段
解决如下:
在数据库的 pms_attr 表加上value_type字段,类型为tinyint就行;
在代码中,AttyEntity.java、AttrVo.java中各添加:private Integer valueType,
在AttrDao.xml中添加:<result property="valueType" column="value_type"/>

85 规格参数显示不出来页面,原因是要在每个分组属性上至少关联一个属性。控制台foreach报错null
解决如下:
在spuadd.vue的showBaseAttrs()方法中在 //先对表单的baseAttrs进行初始化加上非空判断 if (item.attrs != null)就可以了
          data.data.forEach(item => {
            let attrArray = [];
            if (item.attrs != null) {
              item.attrs.forEach(attr => {
              attrArray.push({
                attrId: attr.attrId,
                attrValues: "",
                showDesc: attr.showDesc
              });
            });
            }

            this.dataResp.baseAttrs.push(attrArray);
          });


92 feign超时异常导致读取失败
解决如下:
在gulimall-product的application.yml添加如下即可解决(时间设置长点就行了)
ribbon:
  ReadTimeout: 30000
  ConnectTimeout: 30000

100 点击规格找不到页面,以及规格回显问题解决
1 点击规格找不到页面,解决如下:
INSERT INTO sys_menu (menu_id, parent_id, name, url, perms, type, icon, order_num) VALUES (76, 37, '规格维护', 'product/attrupdate', '', 2, 'log', 0);

2 规格回显问题不出来
原因:
因为那个属性的值类型是多选而pms_product_attr_value这个表里面的属性值存的单个值。前端展示将这个值用;切割成数组来展示的。切完数组里面只有一个值就转成字符串。所以在多选下拉就赋不了值
解决如下:
将页面attrupdate.vue中showBaseAttrs这个方法里面的代码
if (v.length == 1) {
      v = v[0] +  ''
 }
换成下面这个
if (v.length == 1 && attr.valueType == 0) {
     v = v[0] + ''
}
2.9 总结
分布式基础篇总结
1 分布式基附概念
微服务、注册中心、配置中心、远程调用、 Feign、网关
2 基础开发
springboot2.0、 SpringCloud、 Mybatis-Plus、Vue组件化、阿里云对象存储
3 环境
Vmware、 Linux、 Docker、 MYSQL、 Redis、逆向工程&人人开源
4 开发规范
数据校验JSR303、全局异常处理、全局统一返回、全局跨域处理
枚举状态,业务状态码、VO与TO与PO划分,逻组删除
Lombok @Data  @Slf4j