今天介绍一下lamp环境的配置。
服务器用的是阿里云的服务器。
L:centos、A:apache、M:mysql、P:php
(一)安装apache
我们这里安装的是httpd
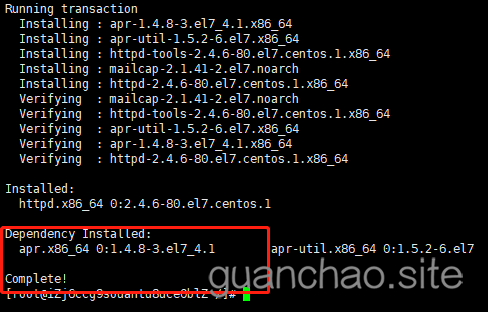
(1)安装httpd
# yum install httpd
(2)查看当前服务器是否安装httpd
# rpm -qa|grep httpd

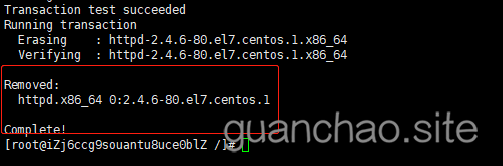
(3)卸载httpd服务器
# yum remove httpd
(4)设置httpd开机自启
# systemctl enable httpd.service
(5)启动
# service httpd start
(6):停止
# service httpd stop
(7)重启服务
# service httpd restart
(8)查看httpd的运行状态
# service httpd status
Httpd安装完成。
(二)安装mysql
我们这里安装的是maraidb(mysql和maraidb具体是什么关系,请自行百度)
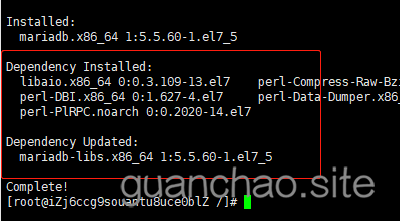
(1)安装、卸载maraidb
#  yum -y install mariadb mariadb-server
# yum remove mariadb-libs
(2)启动、停止服务
 # systemctl start mariadb
 # systemctl stop mariadb
(3)设置开机启动
# systemctl enable mariadb
(4)接下来进行MariaDB的相关简单配置
mysql_secure_installation
首先是设置密码,会提示先输入密码
Enter current password for root (enter for none):<–初次运行直接回车
设置密码
Set root password? [Y/n] <– 是否设置root用户密码,输入y并回车或直接回车
New password: <– 设置root用户的密码
Re-enter new password: <– 再输入一次你设置的密码
其他配置
Remove anonymous users? [Y/n] <– 是否删除匿名用户,回车
Disallow root login remotely? [Y/n] <–是否禁止root远程登录,回车,
Remove test database and access to it? [Y/n] <– 是否删除test数据库,回车
Reload privilege tables now? [Y/n] <– 是否重新加载权限表,回车
初始化MariaDB完成,接下来测试登录
mysql -uroot –ppassword
添加用户,设置权限
创建用户命令
mysql>create user username@localhost identified by 'password';
直接创建用户并授权的命令
mysql>grant all on *.* to username@localhost identified by 'password';
授予外网登陆权限
mysql>grant all privileges on *.* to username@'%' identified by 'password';
授予权限并且可以授权
mysql>grant all privileges on *.* to username@'hostname' identified by 'password' with grant option;
简单的用户和权限配置基本就这样了。
Maraidb安装完成。
如果安装完成之后没有mysql表 那就去/var/lib/ 把mysql文件夹删掉
(三):php安装
(1)检查当前安装的PHP包
# yum list installed | grep php
如果有安装的PHP包,先删除他们
yum remove php.x86_64 php-cli.x86_64 php-common.x86_64 php-gd.x86_64 php-ldap.x86_64 php-mbstring.x86_64 php-mcrypt.x86_64 php-mysql.x86_64 php-pdo.x86_64
(2)配置yum源
CentOS 7.0的源。
# yum install epel-release
# rpm -ivh http://rpms.famillecollet.com/enterprise/remi-release-7.rpm
(3)使用yum list命令查看可安装的包(Packege)。
# yum list --enablerepo=remi --enablerepo=remi-php56 | grep php
(4)yum源配置好了,安装PHP5.6。
# yum install --enablerepo=remi --enablerepo=remi-php56 php php-opcache php-devel php-mbstring php-mcrypt php-mysqlnd php-phpunit-PHPUnit php-pecl-xdebug php-pecl-xhprof
php安装成功.png
(5)用PHP命令查看版本。
php –version

(6)安装PHP-fpm(配合nginx使用)
yum install --enablerepo=remi --enablerepo=remi-php56 php-fpm
(四)nginx安装
(1):下载对应当前系统版本的nginx包(package)
# wget http://nginx.org/packages/centos/7/noarch/RPMS/nginx-release-centos-7-0.el7.ngx.noarch.rpm
(2)建立nginx的yum仓库
# rpm -ivh nginx-release-centos-7-0.el7.ngx.noarch.rpm
(3)下载并安装nginx
# yum install nginx

(4)启动nginx服务
# systemctl start nginx
(5)设置开机启动
# systemctl enable nginx
(6)卸载nginx
# yum remove nginx
(7)在浏览器地址栏中输入部署nginx环境的机器的IP,如果一切正常,应该能看到如下字样的内容。

有好的建议,可以在下方输入你的评论。
欢迎访问个人博客
https://guanchao.site
欢迎访问小程序: