一、注入空值和特殊符号
1、注入空值
(1)创建实体类User,提供私有属性name、age和address,并提供它们的set方法和toString()。
public class User {
    private String name;
    private Integer age;
    private String address;

    public void setName(String name) {
        this.name = name;
    }

    public void setAge(Integer age) {
        this.age = age;
    }

    public void setAddress(String address) {
        this.address = address;
    }

    @Override
    public String toString() {
        return "User{" +
                "name='" + name + '\'' +
                ", age=" + age +
                ", address='" + address + '\'' +
                '}';
    }

}
(2)在bean.xml中配置User对象,并注入name和age,address则设置为null。
<!--  向属性注入null值  -->
    <bean id="user" class="com.yht.example1.entity.User">
        <property name="name" value="刘备"></property>
        <property name="age" value="23"></property>
        <property name="address">
            <null></null>
        </property>
    </bean>
(3)执行单元测试。
    @Test
    public void testNull(){
        ApplicationContext context = new ClassPathXmlApplicationContext("bean2.xml");
        User user = (User) context.getBean("user");
        System.out.println(user);
    }
执行结果如下:

注意:null和""是不一样的。如果将address的value设置为“”,则执行结果如下:
    <bean id="user" class="com.yht.example1.entity.User">
        <property name="name" value="刘备"></property>
        <property name="age" value="23"></property>
        <property name="address" value=""></property>
</bean> 
2、注入特殊符号
注入特殊符号有两种方式:一是使用转义字符,如:<、>等等;另一种是使用CDATA来完成,将特殊符号内容写到CDATA中即可。现假设在给Book类的bName属性注入值的时候,要加入书名号《》。实现如下:
(1)创建Book类,提供bName和bAuthor属性,并提供有参构造。
public class Book {
    private String bName;
    private String bAuthor;

    public Book(String bName, String bAuthor) {
        this.bName = bName;
        this.bAuthor = bAuthor;
    }

    @Override
    public String toString() {
        return "Book{" +
                "bName='" + bName + '\'' +
                ", bAuthor='" + bAuthor + '\'' +
                '}';
    }
}
(2)在bean.xml中进行属性注入。
<!-- 向属性注入特殊字符:使用转义字符 -->
<bean id="book1" class="com.yht.example1.entity.Book">
<constructor-arg name="bName" value="<<三国演义>>"></constructor-arg>
<constructor-arg name="bAuthor" value="罗贯中"></constructor-arg>
</bean>
<!-- 向属性注入特殊字符: CDATA -->
<bean id="book2" class="com.yht.example1.entity.Book">
<constructor-arg name="bName">
<value><![CDATA[<<水浒传>>]]></value>
</constructor-arg>
<constructor-arg name="bAuthor" value="施耐庵"></constructor-arg>
</bean>(3)进行单元测试。
    @Test
    public void testSpecialChar(){
        ApplicationContext context = new ClassPathXmlApplicationContext("bean2.xml");
        Book book1 = (Book) context.getBean("book1");
        System.out.println(book1);
        Book book2 = (Book) context.getBean("book2");
        System.out.println(book2);
    }
执行结果如下:

二、属性注入
1、外部bean
外部bean的方式是将配置在bean.xml中的实例通过ref属性指向即可。我们通过Spring来简单实现一下UserService和UserDao的过程。
(1)分别创建UserService和UserDao两个类。
public class UserService {
    private UserDao userDao;

    public void setUserDao(UserDao userDao) {
        this.userDao = userDao;
    }

    public void execute(){
        userDao.findUser();
    }
}
public class UserDao {
    public void findUser(){
        System.out.println("查找用户");
    }
}
(2)在bean.xml中分配配置userService和userDao。
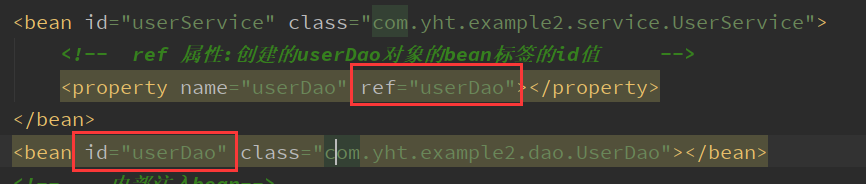
    <!--    外部注入bean-->
    <bean id="userService" class="com.yht.example2.service.UserService">
        <!--  ref 属性:创建的userDao对象的bean标签的id值     -->
        <property name="userDao" ref="userDao"></property>
    </bean>
    <bean id="userDao" class="com.yht.example2.dao.UserDao"></bean>
(3)进行单元测试。
@Test
    public void testOuterBean(){
        ApplicationContext context = new ClassPathXmlApplicationContext("bean.xml");
        UserService userService = (UserService) context.getBean("userService");
        userService.execute();
    }
执行结果如下:

注意:在ref中的值要和指定的bean实例的id值一致。
2、内部bean
内部bean相当于一种嵌套的方式。它和外部bean的区别在于:内部bean不需要写id,不能给外部访问。
(1)创建两个实体类:Emp和Dept。
public class Emp {
    private String empName;
    private Integer age;
    private Dept dept;


    public void setEmpName(String empName) {
        this.empName = empName;
    }

    public void setAge(Integer age) {
        this.age = age;
    }

    public void setDept(Dept dept) {
        this.dept = dept;
    }

    @Override
    public String toString() {
        return "Emp{" +
                "empName='" + empName + '\'' +
                ", age=" + age +
                ", dept=" + dept +
                '}';
    }
}
public class Dept {
    private String deptName;

    public void setDeptName(String deptName) {
        this.deptName = deptName;
    }

    @Override
    public String toString() {
        return "Dept{" +
                "deptName='" + deptName + '\'' +
                '}';
    }
}
(2)在bean.xml中进行内部bean的配置
    <!--    内部注入bean-->
    <bean id="emp" class="com.yht.example2.entity.Emp">
        <property name="empName" value="王飞"></property>
        <property name="age" value="21"></property>
        <property name="dept">
            <bean id="dept" class="com.yht.example2.entity.Dept">
                <property name="deptName" value="开发部"></property>
            </bean>
        </property>
    </bean>
(3)进行单元测试。
    @Test
    public void testInnerBean(){
        ApplicationContext context = new ClassPathXmlApplicationContext("bean.xml");
        Emp emp = (Emp) context.getBean("emp");
        System.out.println(emp);
    }
执行结果如下:
![]()
3、级联bean
Spring支持级联属性的配置,Spring没有对级联属性的层级数进行限制,只要配置的Bean拥有对应于级联属性的类结构,就可以配置任意层级的级联属性。级联属性的配置有两种方式:一是外部bean的方式;二是在实体类中提供该属性的get方法,然后在配置文件中通过.操作符来完成。
(1)给Emp类中的dept属性添加get方法。
    public Dept getDept() {
        return dept;
    }
(2)在bean.xml中进行配置。
    <!--        级联bean 方式一  -->
    <bean id="employee1" class="com.yht.example2.entity.Emp">
        <property name="empName" value="张帆"></property>
        <property name="age" value="11"></property>
        <property name="dept" ref="dept"></property>
    </bean>
    <bean id="dept" class="com.yht.example2.entity.Dept">
        <property name="deptName" value="开发部"></property>
    </bean>
    <!--    方式二   -->
    <bean id="employee2" class="com.yht.example2.entity.Emp">
        <property name="empName" value="康特"></property>
        <property name="age" value="32"></property>
        <property name="dept" ref="dept"></property>
        <property name="dept.deptName" value="安保部"></property>
    </bean>
(3)进行单元测试。
    @Test
    public void testContactBean(){
        ApplicationContext context = new ClassPathXmlApplicationContext("bean.xml");
        Emp emp1 = (Emp) context.getBean("employee1");
        System.out.println(emp1);
        Emp emp2 = (Emp) context.getBean("employee2");
        System.out.println(emp2);
    }
执行结果如下:

三、常见数据类型的注入
1、基本数据类型和集合类型的注入
在Spring中基本数据类型包括了Java中的八大基本数据类型以及String类型。这里我们分别对基本数据类型、数组Array、list、set以及Map的注入方式进行说明。
(1)创建ParaTest类。
public class ParaTest {
    private String name;
    private String[] strings;
    private List<Integer> lists;
    private Set<Double> sets;
    private Map<Character, String> map;

    public void setName(String name) {
        this.name = name;
    }

    public void setStrings(String[] strings) {
        this.strings = strings;
    }

    public void setLists(List<Integer> lists) {
        this.lists = lists;
    }

    public void setSets(Set<Double> sets) {
        this.sets = sets;
    }

    public void setMap(Map<Character, String> map) {
        this.map = map;
    }

    public void showMessage(){
        System.out.println("name is : " + this.name);
        System.out.println("Strings content are : " + Arrays.toString(this.strings));
        System.out.println("lists content are  : " + this.lists);
        System.out.println("sets content are  : " + this.sets);
        System.out.println("map content are  : " + this.map);
    }
}
(2)在bean.xml中配置对象,进行值的注入。
    <!--  测试基本数据类型和集合数据类型  -->
    <bean id="para" class="com.yht.example2.entity.ParaTest">
        <!--   注入String     -->
        <property name="name" value="郑秀"></property>
        <!--   注入数组     -->
        <property name="strings">
            <array>
                <value>魏国</value>
                <value>蜀国</value>
                <value>吴国</value>
            </array>
        </property>
        <!--   注入list     -->
        <property name="lists">
            <list>
                <value>13</value>
                <value>35</value>
                <value>57</value>
            </list>
        </property>
        <!--   注入set     -->
        <property name="sets">
            <set>
                <value>12.5</value>
                <value>754.1</value>
                <value>89.0</value>
            </set>
        </property>
        <!--   注入map     -->
        <property name="map">
            <map>
                <entry key="a" value="Apple"></entry>
                <entry key="b" value="bar"></entry>
                <entry key="c" value="car"></entry>
                <entry key="d" value="department"></entry>
            </map>
        </property>
    </bean>
(3)进行单元测试。
    @Test
    public void testPara(){
        ApplicationContext context = new ClassPathXmlApplicationContext("bean2.xml");
        ParaTest para = (ParaTest) context.getBean("para");
        para.showMessage();
    }
执行结果如下:

2、对象类型的注入
一般情况下,我们用的更多的可能是注入对象类型。一个人会有很多书,那么如何实现呢?
(1)在Person类中添加List<Book> ,并提供set方法()。
    private List<Book> bookList;

    public void setBookList(List<Book> bookList) {
        this.bookList = bookList;
    }
(2)在bean.xml进行配置。
    <!--  注入对象类型  -->
    <bean id="bookPerson" class="com.yht.example1.entity.Person">
        <property name="name" value="赵峰"></property>
        <property name="age" value="45"></property>
        <property name="bookList">
            <list>
                <ref bean="b1"></ref>
                <ref bean="b2"></ref>
            </list>
        </property>
    </bean>
    <bean id="b1" class="com.yht.example1.entity.Book">
        <constructor-arg name="bName" value="三国演义"></constructor-arg>
        <constructor-arg name="bAuthor" value="罗贯中"></constructor-arg>
    </bean>
    <bean id="b2" class="com.yht.example1.entity.Book">
        <constructor-arg name="bName" value="水浒传"></constructor-arg>
        <constructor-arg name="bAuthor" value="施耐庵"></constructor-arg>
    </bean>
(3)进行单元测试。
    @Test
    public void testObjectPara(){
        ApplicationContext context = new ClassPathXmlApplicationContext("bean2.xml");
        Person person= (Person) context.getBean("bookPerson");
        System.out.println(person);
    }
结果如下:

3、提取公共部分
现在假设有很多个人,他们的书都相同,就需要将书作为公共部分提取出来。步骤如下:
(1)在 spring 配置文件中引入名称空间 util。
<?xml version="1.0" encoding="UTF-8"?>
<beans xmlns="http://www.springframework.org/schema/beans"
       xmlns:xsi="http://www.w3.org/2001/XMLSchema-instance"
       xmlns:util="http://www.springframework.org/schema/util"
       xsi:schemaLocation="http://www.springframework.org/schema/beans
                           http://www.springframework.org/schema/beans/spring-beans.xsd
                           http://www.springframework.org/schema/util http://www.springframework.org/schema/util/spring-util.xsd">
(2)使用 util 标签完成 list 集合注入提取。
<?xml version="1.0" encoding="UTF-8"?>
<beans xmlns="http://www.springframework.org/schema/beans"
       xmlns:xsi="http://www.w3.org/2001/XMLSchema-instance"
       xmlns:util="http://www.springframework.org/schema/util"
       xsi:schemaLocation="http://www.springframework.org/schema/beans
                           http://www.springframework.org/schema/beans/spring-beans.xsd
                           http://www.springframework.org/schema/util http://www.springframework.org/schema/util/spring-util.xsd">
    <bean id="b1" class="com.yht.example1.entity.Book">
        <constructor-arg name="bName" value="三国演义"></constructor-arg>
        <constructor-arg name="bAuthor" value="罗贯中"></constructor-arg>
    </bean>
    <bean id="b2" class="com.yht.example1.entity.Book">
        <constructor-arg name="bName" value="水浒传"></constructor-arg>
        <constructor-arg name="bAuthor" value="施耐庵"></constructor-arg>
    </bean>
    <!--把集合注入部分提取出来-->
    <!-- 提取list集合类型属性注入-->
    <util:list id="bookList">
        <ref bean="b1"></ref>
        <ref bean="b2"></ref>
    </util:list>

    <!-- 提取list集合类型属性注入使用-->
    <bean id="person1" class="com.yht.example1.entity.Person" scope="prototype">
        <property name="name" value="王刚"></property>
        <property name="age" value="40"></property>
        <property name="bookList" ref="bookList"></property>
    </bean>
    <bean id="person2" class="com.yht.example1.entity.Person" scope="prototype">
        <property name="name" value="张凡"></property>
        <property name="age" value="32"></property>
        <property name="bookList" ref="bookList"></property>
    </bean>
</beans>
(3)进行单元测试。
    @Test
    public void testCommonContent(){
        ApplicationContext context = new ClassPathXmlApplicationContext("bean3.xml");
        Person person1 = (Person) context.getBean("person1");
        System.out.println(person1);
        Person person2 = (Person) context.getBean("person2");
        System.out.println(person2);
    }
执行结果如下:
