转载自:公众号《码农爱学习》
推荐博文:C++多线程编程(一)
推荐博文:C++多线程编程(二)
一.join & detach
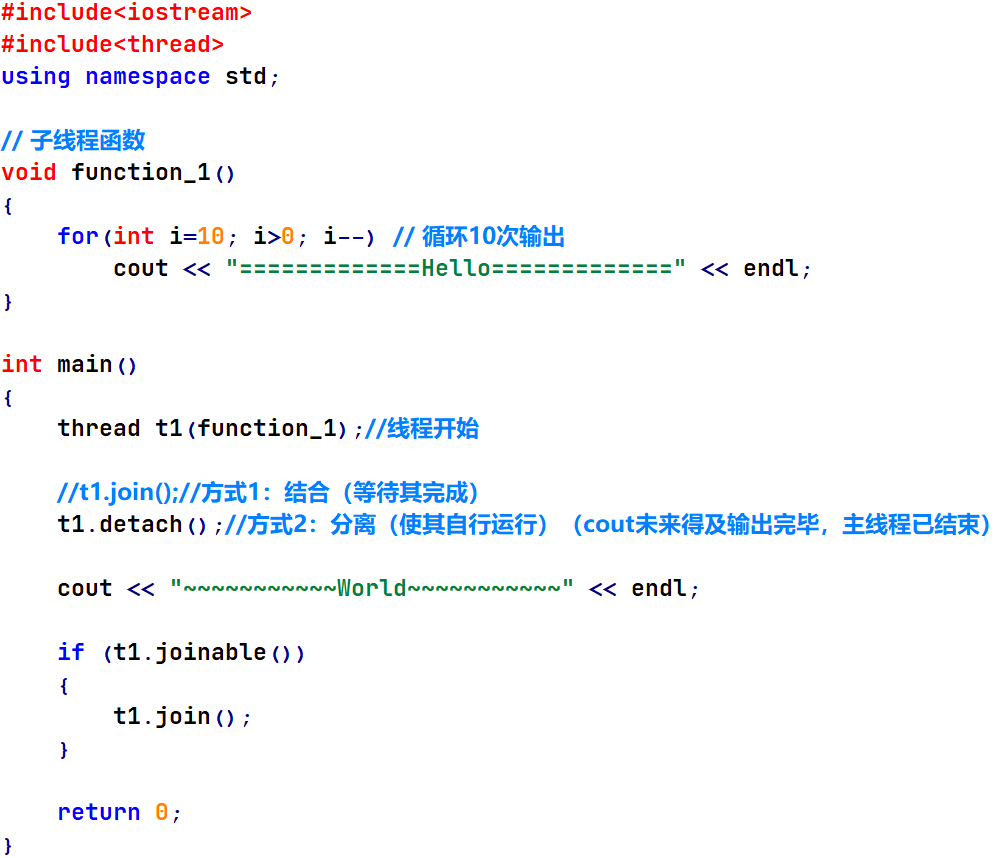
join和detach为最基本的用法,join可以使主线程(main函数)等待子线程(自定义的function_1函数)完成后再退出程序,而detach可以使子线程与主线程毫无关联的独立运行,当主线程执行完毕后直接退出程序,不管子线程是否执行完毕。
例:
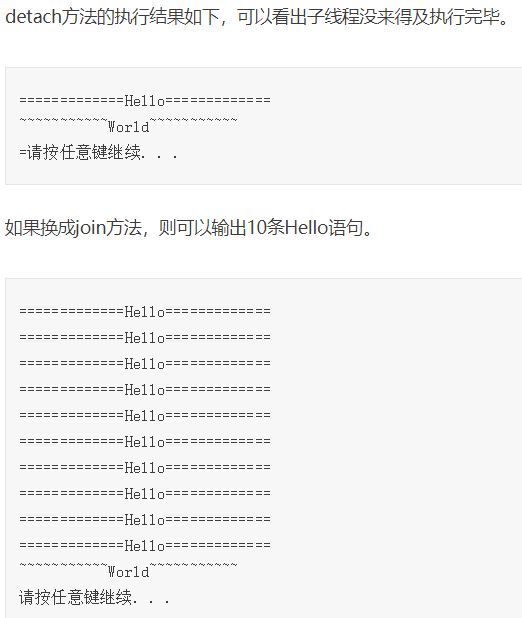
运行结果:
附上例代码:
#include<iostream>
#include<thread>
using namespace std;

// 子线程函数
void function_1()
{


	for(int i=10; i>0; i--) // 循环10次输出
		cout << "=============Hello=============" << endl;
}

int main()
{


	thread t1(function_1);//线程开始

	//t1.join();//方式1:结合(等待其完成)
	t1.detach();//方式2:分离(使其自行运行)(cout未来得及输出完毕,主线程已结束)

	cout << "~~~~~~~~~~~World~~~~~~~~~~~" << endl;

	if (t1.joinable())
	{


		t1.join();
	}

	return 0;
}
二.try-catch异常捕获机制的使用
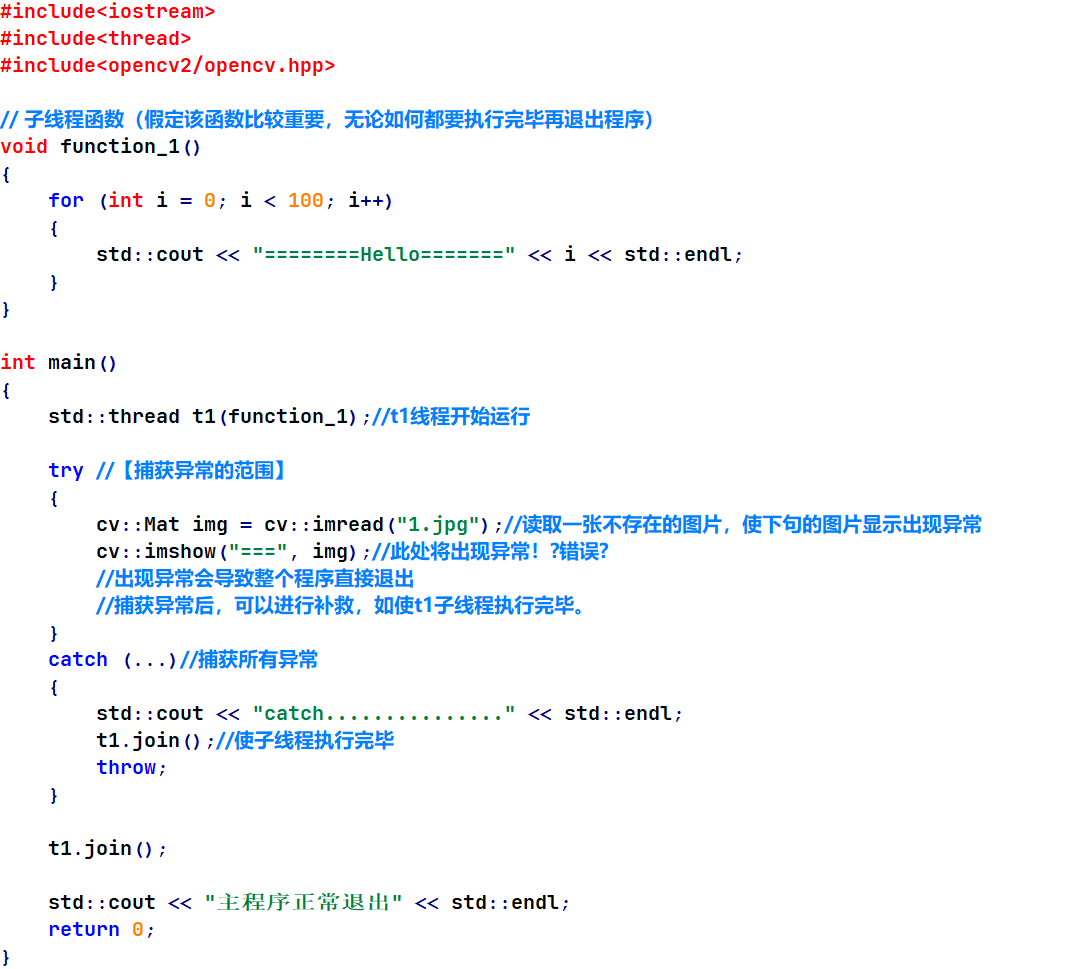
join可以使某些比较重要的函数执行完毕后再退出,但当程序出现异常时,程序仍会直接退出,join没有起到应有的作用,这是可以通过try-catch异常捕获机制,结合join方法,使某些函数(子线程)在程序出现异常时也能先执行完毕再退出,例子如下,主线程通过OpenCV读取显示一张不存在的图片产生异常。
例:
运行结果:
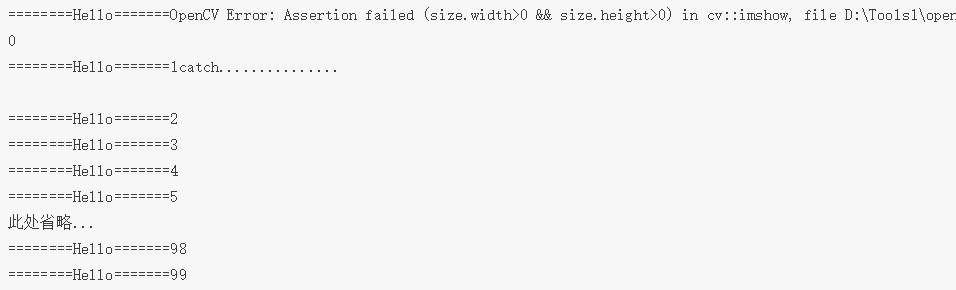
可以看出运行后产生了一个OpenCV Error,没能输出"主程序正常退出" ,但子线程在程序出现异常后依然可以继续执行完毕。
附上例代码:
#include<iostream>
#include<thread>
#include<opencv2/opencv.hpp>

// 子线程函数(假定该函数比较重要,无论如何都要执行完毕再退出程序)
void function_1()
{


	for (int i = 0; i < 100; i++)
	{


		std::cout << "========Hello=======" << i << std::endl;
	}
}

int main()
{


	std::thread t1(function_1);//t1线程开始运行

	try //【捕获异常的范围】
	{


		cv::Mat img = cv::imread("1.jpg");//读取一张不存在的图片,使下句的图片显示出现异常
		cv::imshow("===", img);//此处将出现异常!?错误?
		//出现异常会导致整个程序直接退出
		//捕获异常后,可以进行补救,如使t1子线程执行完毕。
	}
	catch (...)//捕获所有异常
	{


		std::cout << "catch..............." << std::endl;
		t1.join();//使子线程执行完毕
		throw;
	}

	t1.join();

	std::cout << "主程序正常退出" << std::endl;
	return 0;
}
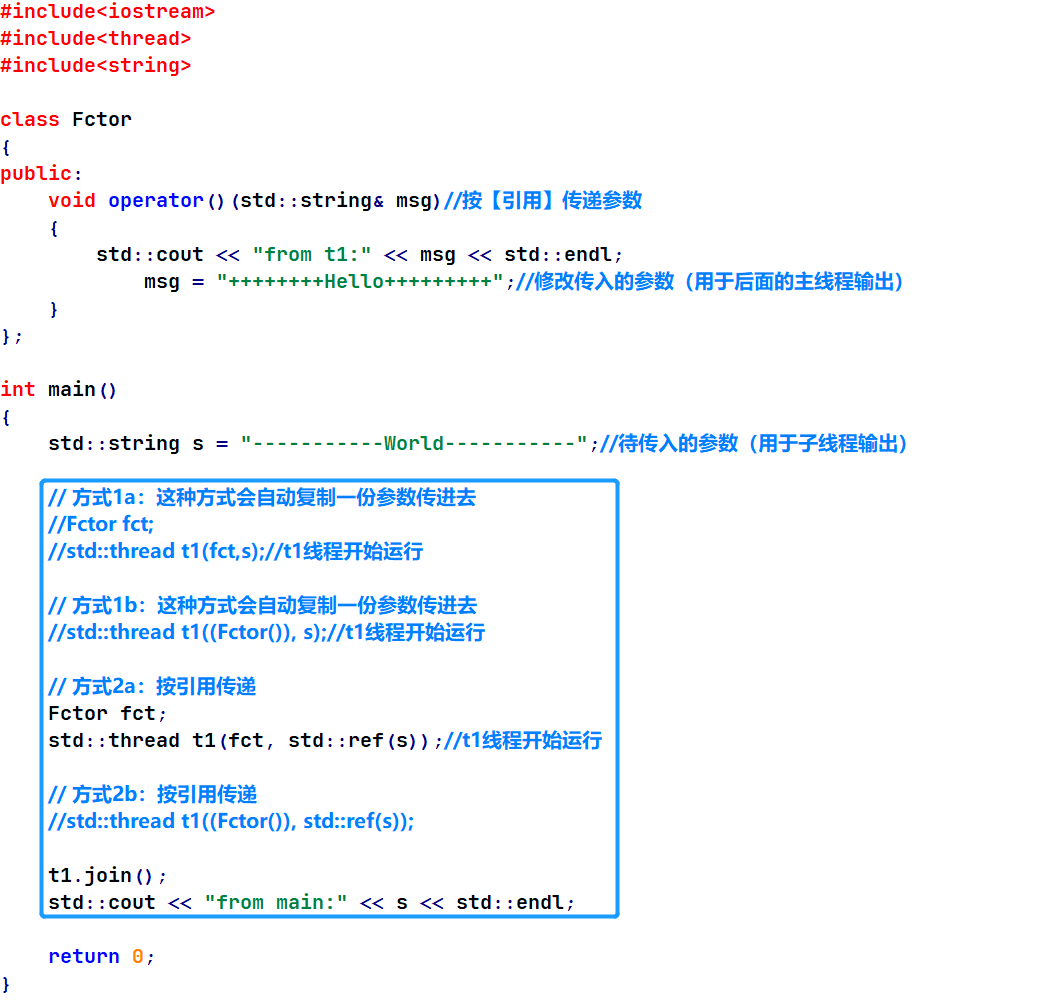
三.通过类构造子线程 & ref方法传参
C++开发中更常使用类作为子线程函数而不是单独的某个函数。
注意一点在线程按引用传递参数时的写法,需要使用std::ref方法。
例:
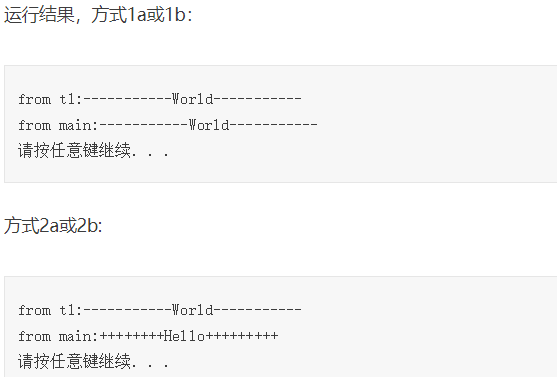
运行结果:
附上例代码:
#include<iostream>
#include<thread>
#include<string>

class Fctor
{


public:
    void operator()(std::string& msg)//按【引用】传递参数
    {


        std::cout << "from t1:" << msg << std::endl;
            msg = "++++++++Hello+++++++++";//修改传入的参数(用于后面的主线程输出)
    }
};

int main()
{


    std::string s = "-----------World-----------";//待传入的参数(用于子线程输出)

    // 方式1a:这种方式会自动复制一份参数传进去
    //Fctor fct;
    //std::thread t1(fct,s);//t1线程开始运行

    // 方式1b:这种方式会自动复制一份参数传进去
    //std::thread t1((Fctor()), s);//t1线程开始运行

    // 方式2a:按引用传递
    Fctor fct;
    std::thread t1(fct, std::ref(s));//t1线程开始运行

    // 方式2b:按引用传递
    //std::thread t1((Fctor()), std::ref(s));

    t1.join();
    std::cout << "from main:" << s << std::endl;

    return 0;
}
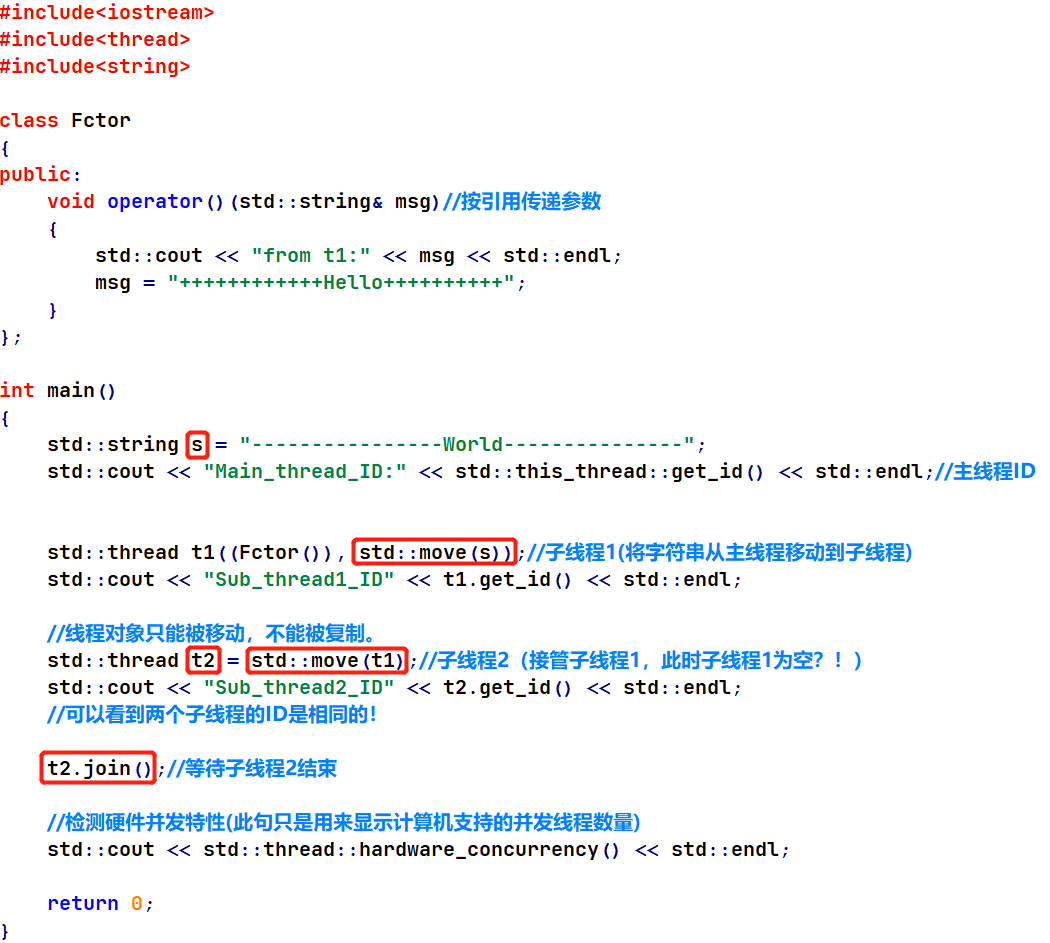
四.mov方法传参 & 线程对象移动
除了使用ref方法对子线程进行传参,还可以使用mov方法传参,此外mov还可以移动线程对象。
例:
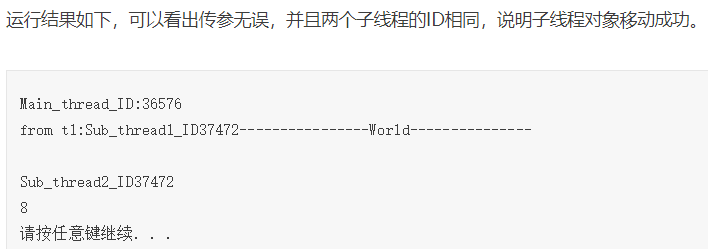
运行结果:
附上例代码:
#include<iostream>
#include<thread>
#include<string>

class Fctor
{


public:
    void operator()(std::string& msg)//按引用传递参数
    {


        std::cout << "from t1:" << msg << std::endl;
        msg = "++++++++++++Hello++++++++++";
    }
};

int main()
{


    std::string s = "----------------World---------------";
    std::cout << "Main_thread_ID:" << std::this_thread::get_id() << std::endl;//主线程ID


    std::thread t1((Fctor()), std::move(s));//子线程1(将字符串从主线程移动到子线程)
    std::cout << "Sub_thread1_ID" << t1.get_id() << std::endl;

    //线程对象只能被移动,不能被复制。
    std::thread t2 = std::move(t1);//子线程2(接管子线程1,此时子线程1为空?!)
    std::cout << "Sub_thread2_ID" << t2.get_id() << std::endl;
    //可以看到两个子线程的ID是相同的!

    t2.join();//等待子线程2结束

    //检测硬件并发特性(此句只是用来显示计算机支持的并发线程数量)
    std::cout << std::thread::hardware_concurrency() << std::endl;

    return 0;
}
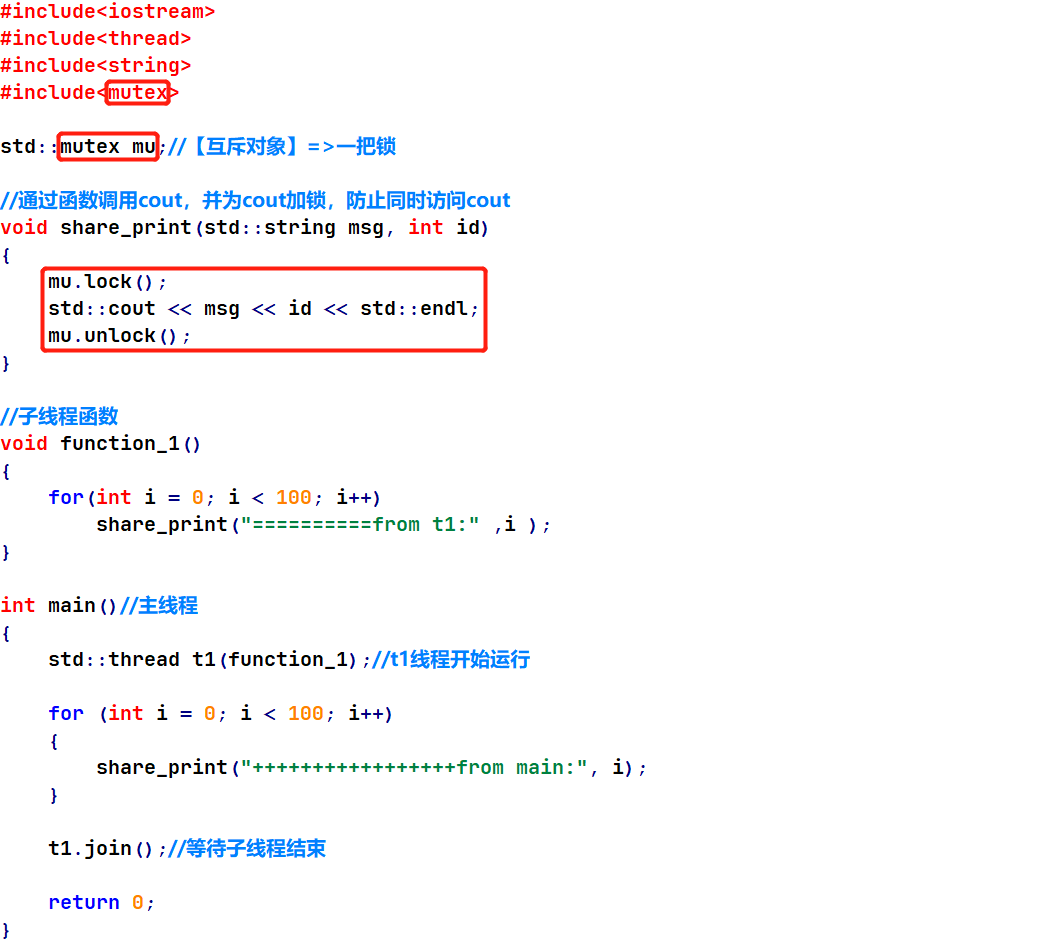
五.mutex & lock_guard
mutex即互斥量,可理解为一把锁,访问某些资源时先加锁,访问后解锁。
另一进程访问同一资源时,首先尝试加锁,如果锁处于未释放状态则无法加锁,需等待其它线程对锁的释放。
例:
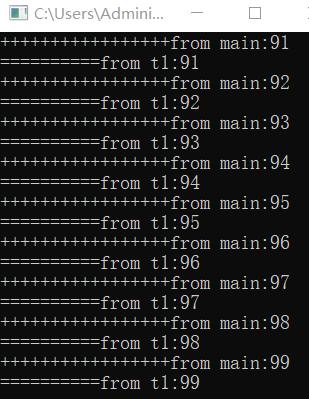
运行结果:
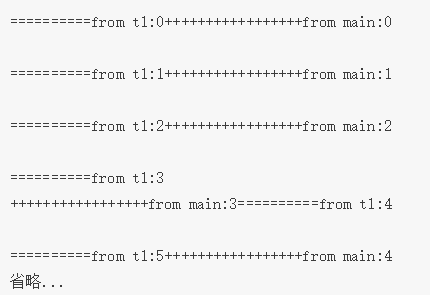
如果未使用加锁机制,两线程会互相争抢cout的使用权,从而导致输出混乱,注释掉mu.lock()与mu.unlock()后的输出结果如下:
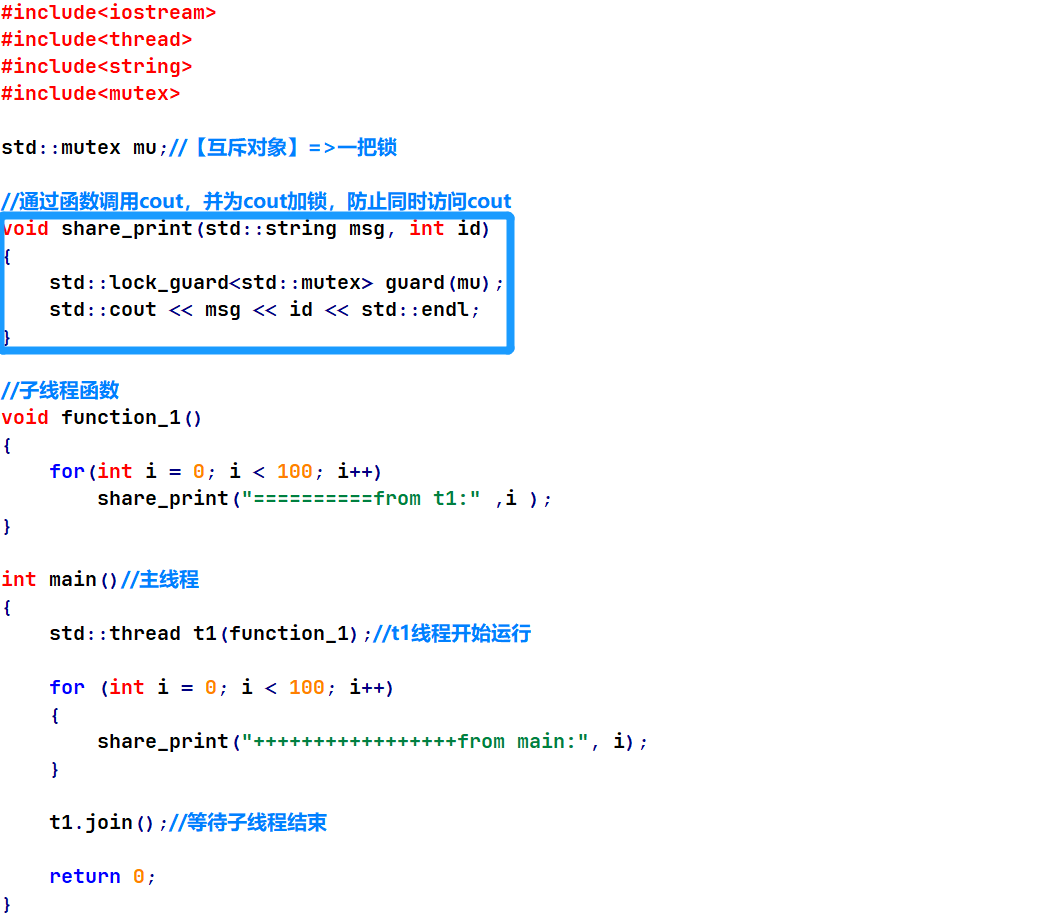
由于lock()与unlock()必须成对出现,为方便管理,出现了lock_guard,它可以对mutex进行管理,自动实现lock()与unlock(),原理是在其构造与析构中自动调用。另外,还可有附加参数。
修改上面的share_print为如下,可实现同样的效果。
例:
运行结果:
附上例代码:
void share_print(std::string msg, int id)
{


    std::lock_guard<std::mutex> guard(mu);
    std::cout << msg << id << std::endl;
}
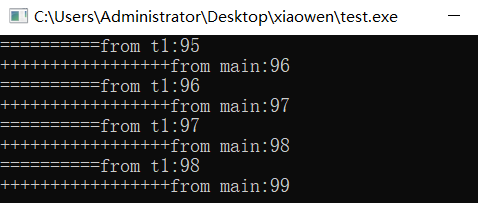
下面的代码是将share_print封装到一个类中,并添加将输出信息同时保存到文件中的功能:
例:
运行结果:
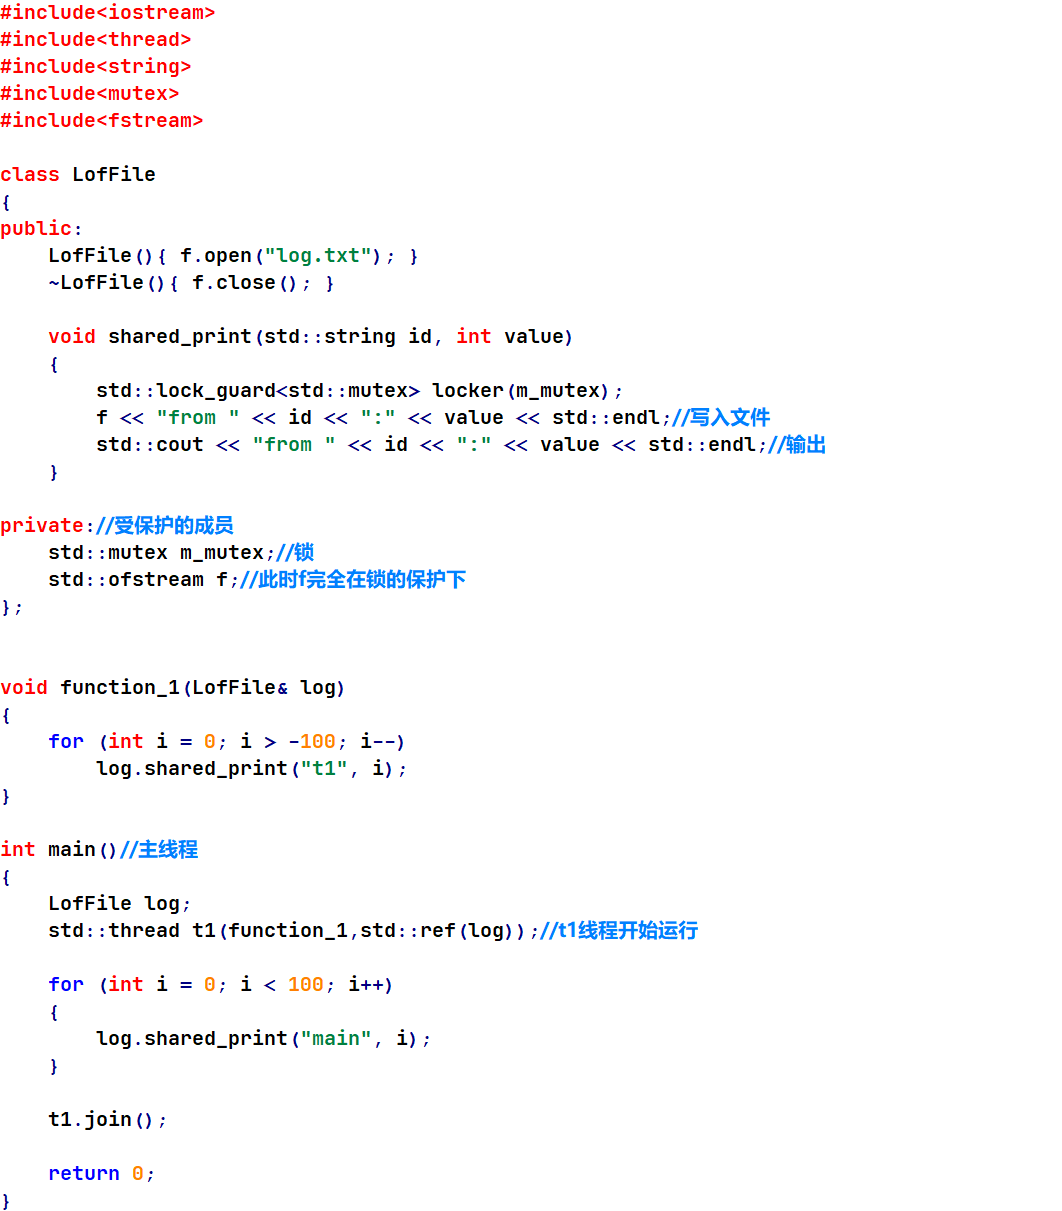
附上例代码:
#include<iostream>
#include<thread>
#include<string>
#include<mutex>
#include<fstream>

class LofFile
{


public:
    LofFile(){

     f.open("log.txt"); }
    ~LofFile(){

     f.close(); }

    void shared_print(std::string id, int value)
    {


        std::lock_guard<std::mutex> locker(m_mutex);
        f << "from " << id << ":" << value << std::endl;//写入文件
        std::cout << "from " << id << ":" << value << std::endl;//输出
    }

private://受保护的成员
    std::mutex m_mutex;//锁
    std::ofstream f;//此时f完全在锁的保护下
};


void function_1(LofFile& log)
{


    for (int i = 0; i > -100; i--)
        log.shared_print("t1", i);
}

int main()//主线程
{


    LofFile log;
    std::thread t1(function_1,std::ref(log));//t1线程开始运行

    for (int i = 0; i < 100; i++)
    {


        log.shared_print("main", i);
    }

    t1.join();

    return 0;
}
六.死锁 & adopt_lock
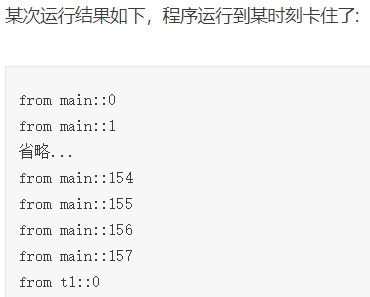
当某个资源被两把以上的锁嵌套加锁,且锁的顺序不一致时,可能发生死锁。
原因在于多个线程可能各自加了1把锁后,同时在等待对方释放剩余的锁。
最简单的解决方法是:只要锁的顺序一致,就不会死锁。
例:
运行结果:
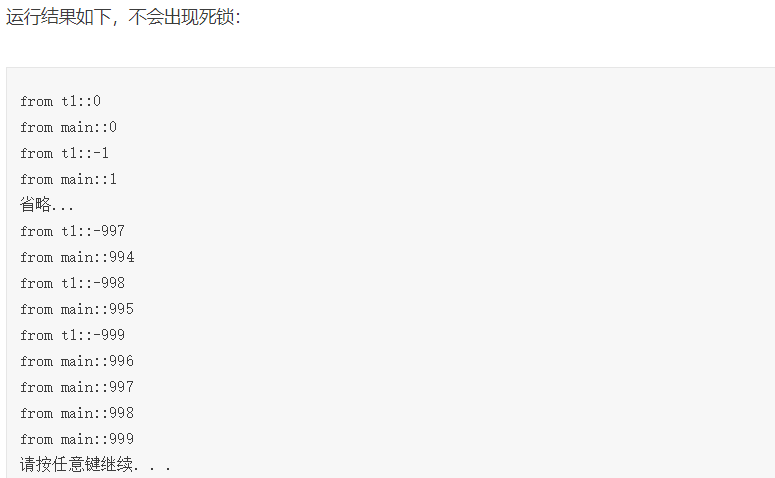
当程序比较复杂时,手动方法管理加锁顺序可能相当麻烦,这是就出现了adopt_lock参数来解决。
lock+lock_guard的adopt_lock参数自动避免死锁问题。
lock()可同时管理多个锁,顺序无影响,同时锁住多个锁,若不可,先释放,然后继续尝试。
lock_guard()的adopt_lock参数即抛弃lock操作,因为前面(必须)已加锁,只使用其自动unlock功能。
例:
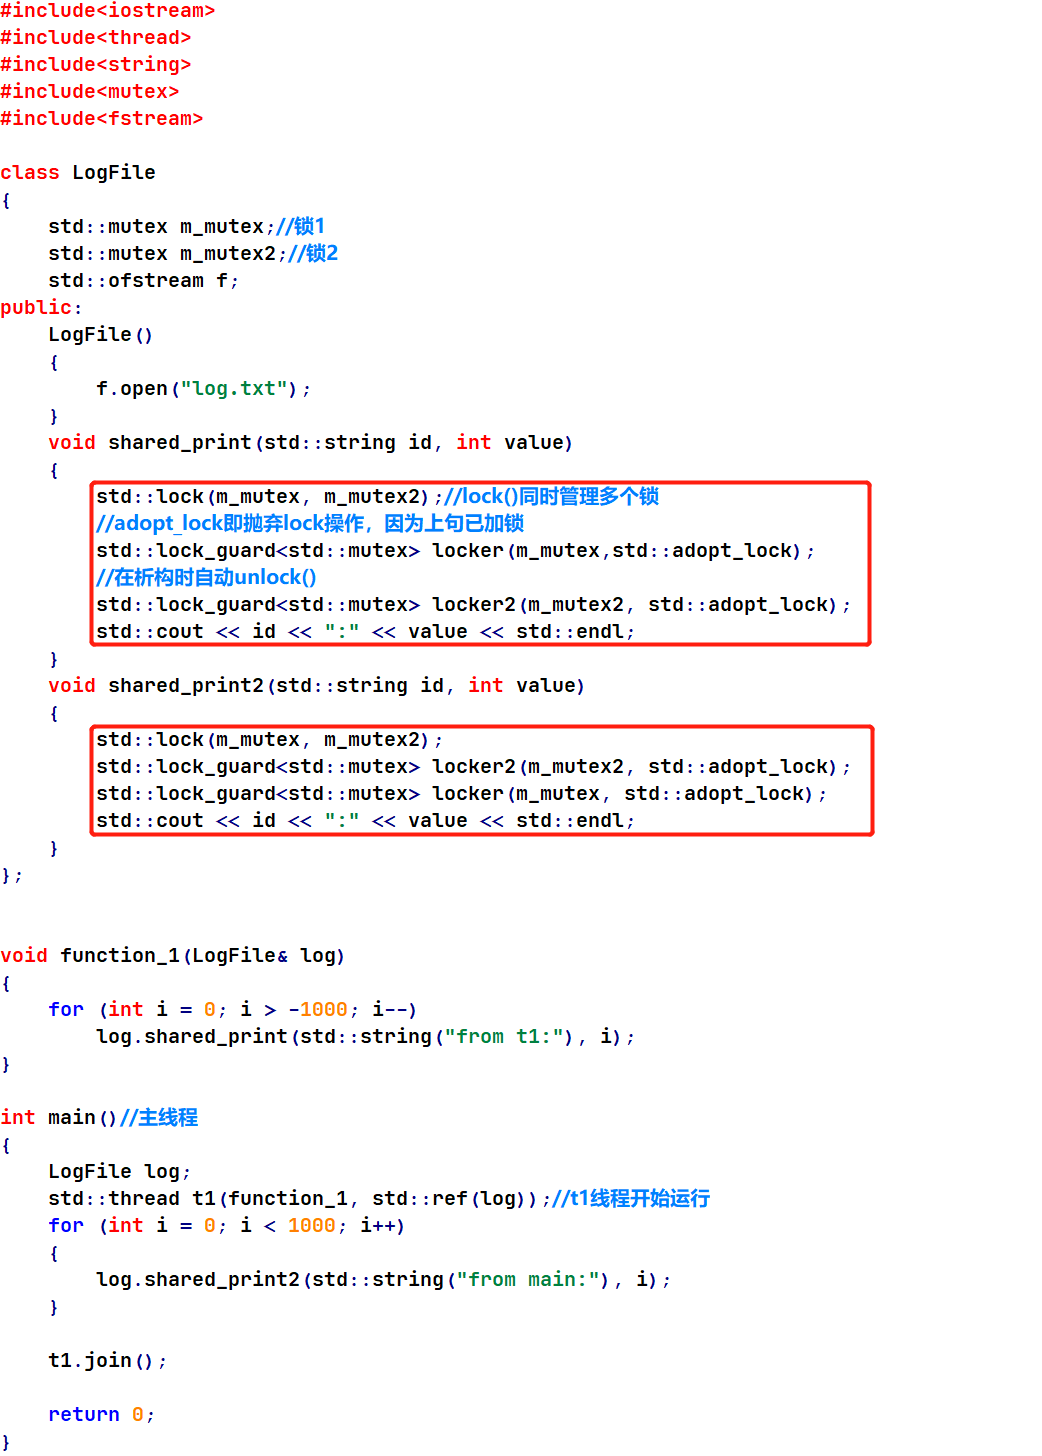
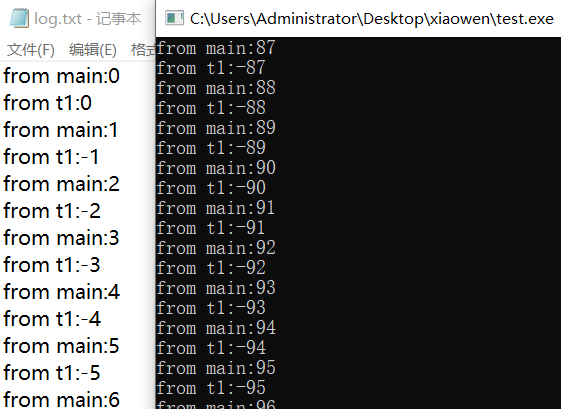
运行结果:
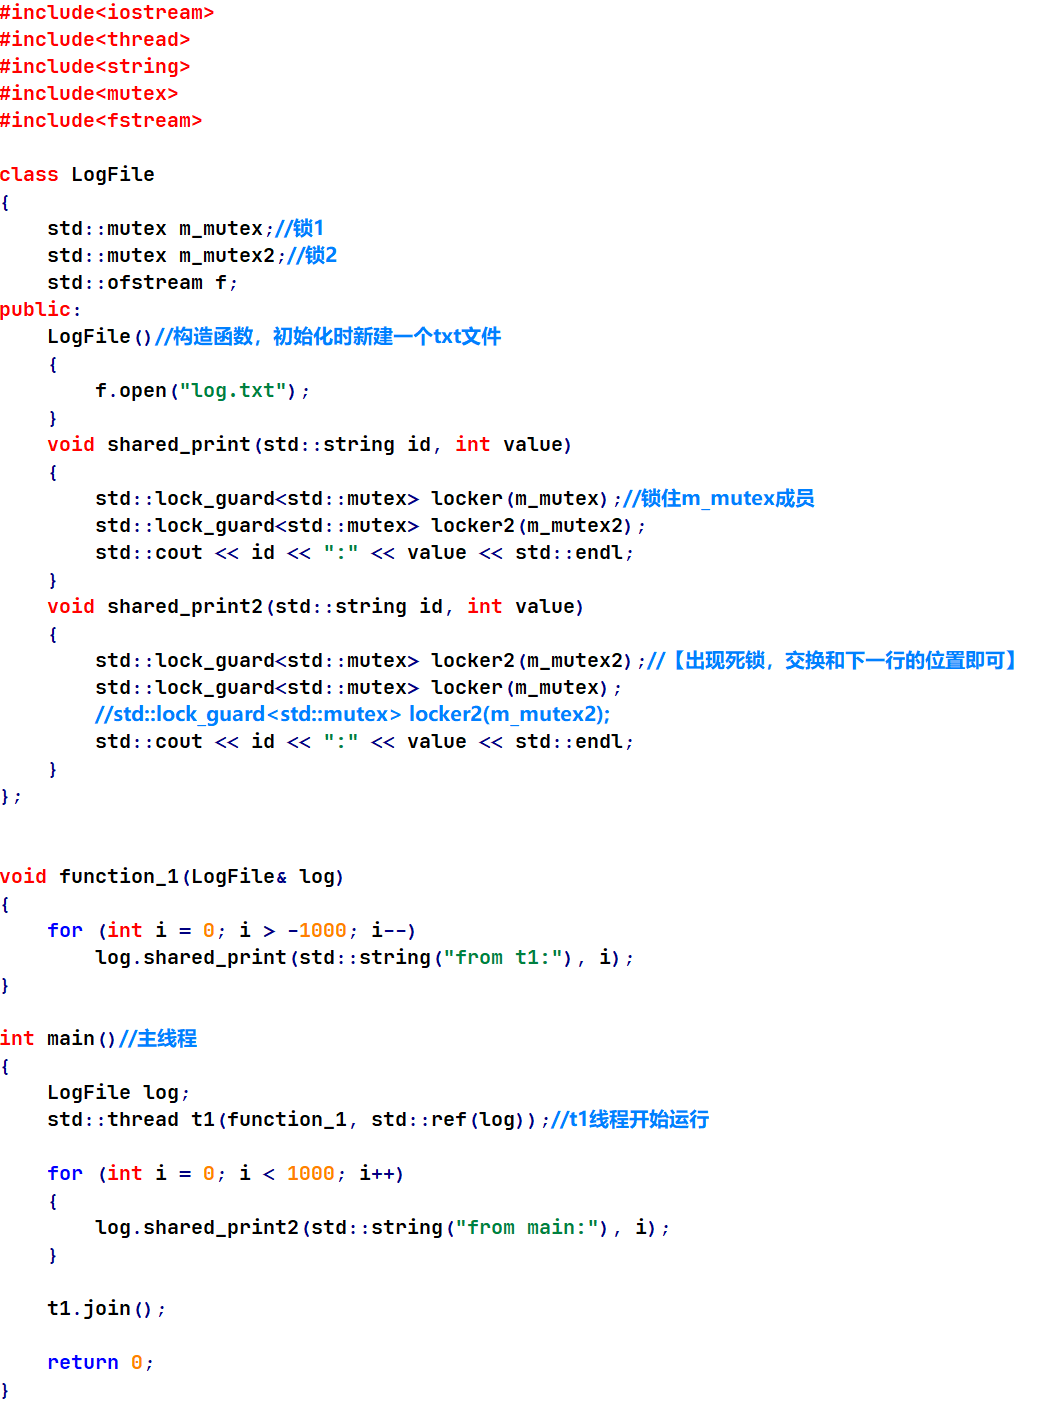
附上例代码:
#include<iostream>
#include<thread>
#include<string>
#include<mutex>
#include<fstream>

class LogFile
{


    std::mutex m_mutex;//锁1
    std::mutex m_mutex2;//锁2
    std::ofstream f;
public:
    LogFile()
    {


        f.open("log.txt");
    }
    void shared_print(std::string id, int value)
    {


        std::lock(m_mutex, m_mutex2);//lock()同时管理多个锁
		//adopt_lock即抛弃lock操作,因为上句已加锁
        std::lock_guard<std::mutex> locker(m_mutex,std::adopt_lock);
		//在析构时自动unlock()
        std::lock_guard<std::mutex> locker2(m_mutex2, std::adopt_lock);
        std::cout << id << ":" << value << std::endl;
    }
    void shared_print2(std::string id, int value)
    {


        std::lock(m_mutex, m_mutex2);
        std::lock_guard<std::mutex> locker2(m_mutex2, std::adopt_lock);
        std::lock_guard<std::mutex> locker(m_mutex, std::adopt_lock);
        std::cout << id << ":" << value << std::endl;
    }
};


void function_1(LogFile& log)
{


    for (int i = 0; i > -1000; i--)
        log.shared_print(std::string("from t1:"), i);
}

int main()//主线程
{


    LogFile log;
    std::thread t1(function_1, std::ref(log));//t1线程开始运行
    for (int i = 0; i < 1000; i++)
    {


        log.shared_print2(std::string("from main:"), i);
    }

    t1.join();

    return 0;
}
七.unique_lock
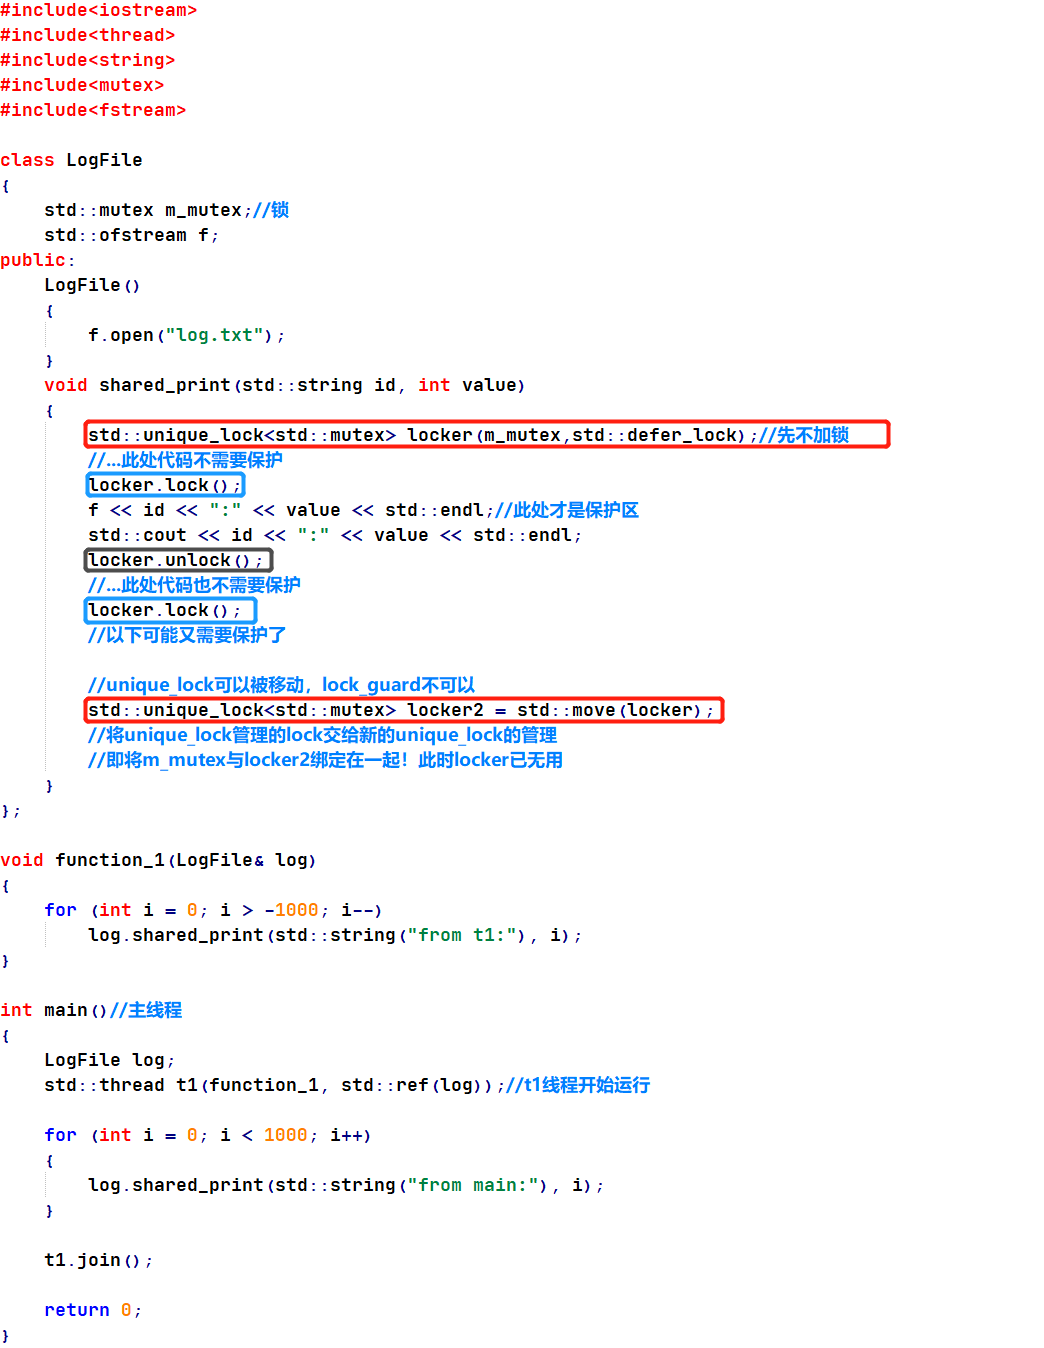
unique_lock可完成lock_guard的功能,另外还有额外的参数,实现其它功能。
unique_lock的defer_lock参数,即先不加锁,只是先绑定unique_lock与mutex,另外,可以随时进行加锁、解锁操作,某些情况下可提高效率(注意此时的加、解锁是通过unique_lock的成员函数.lock() 与 .unlock()实现的)。
unique_lock还可以交换管理权(unique_lock可以被移动,lock_guard不可以)。
例:
运行结果:
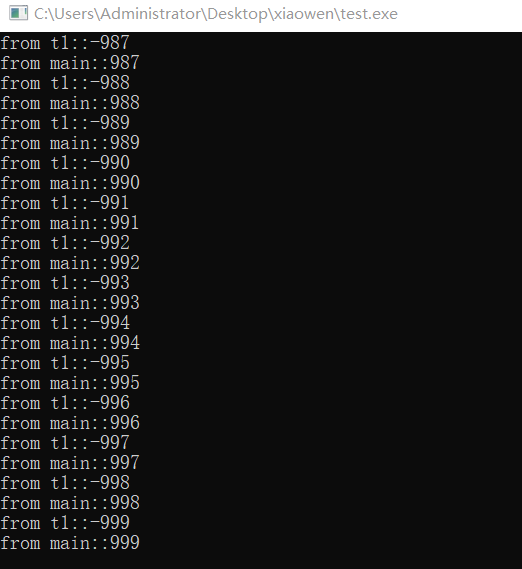
程序运行结果依然是主线程和子线程各自输出1000条信息以及将信息保存到txt文件中,和上篇中 “死锁 & adopt_lock” 的结果类似。
附上例代码:
#include<iostream>
#include<thread>
#include<string>
#include<mutex>
#include<fstream>

class LogFile
{


	std::mutex m_mutex;//锁
	std::ofstream f;
public:
	LogFile()
	{


		f.open("log.txt");
	}
	void shared_print(std::string id, int value)
	{


		std::unique_lock<std::mutex> locker(m_mutex,std::defer_lock);//先不加锁
		//...此处代码不需要保护
		locker.lock();
		f << id << ":" << value << std::endl;//此处才是保护区
		std::cout << id << ":" << value << std::endl;
		locker.unlock();
		//...此处代码也不需要保护
		locker.lock();
		//以下可能又需要保护了

		//unique_lock可以被移动,lock_guard不可以
		std::unique_lock<std::mutex> locker2 = std::move(locker);
		//将unique_lock管理的lock交给新的unique_lock的管理
		//即将m_mutex与locker2绑定在一起!此时locker已无用
	}
};

void function_1(LogFile& log)
{


	for (int i = 0; i > -1000; i--)
		log.shared_print(std::string("from t1:"), i);
}

int main()//主线程
{


	LogFile log;
	std::thread t1(function_1, std::ref(log));//t1线程开始运行

	for (int i = 0; i < 1000; i++)
	{


		log.shared_print(std::string("from main:"), i);
	}

	t1.join();
	return 0;
}
八.call_once
之前测试代码中,log.txt文件的创建(f.open(“log.txt”);)是在类的构造函数中的,如果没有使用到打印函数(shared_print()),则没必要创建该文件,若将其放入打印函数中,会被多次调用。
这时,可以使用call_once()函数并配合once_flag标记,保证即使是多线程情况下,也只被执行一次。
例:
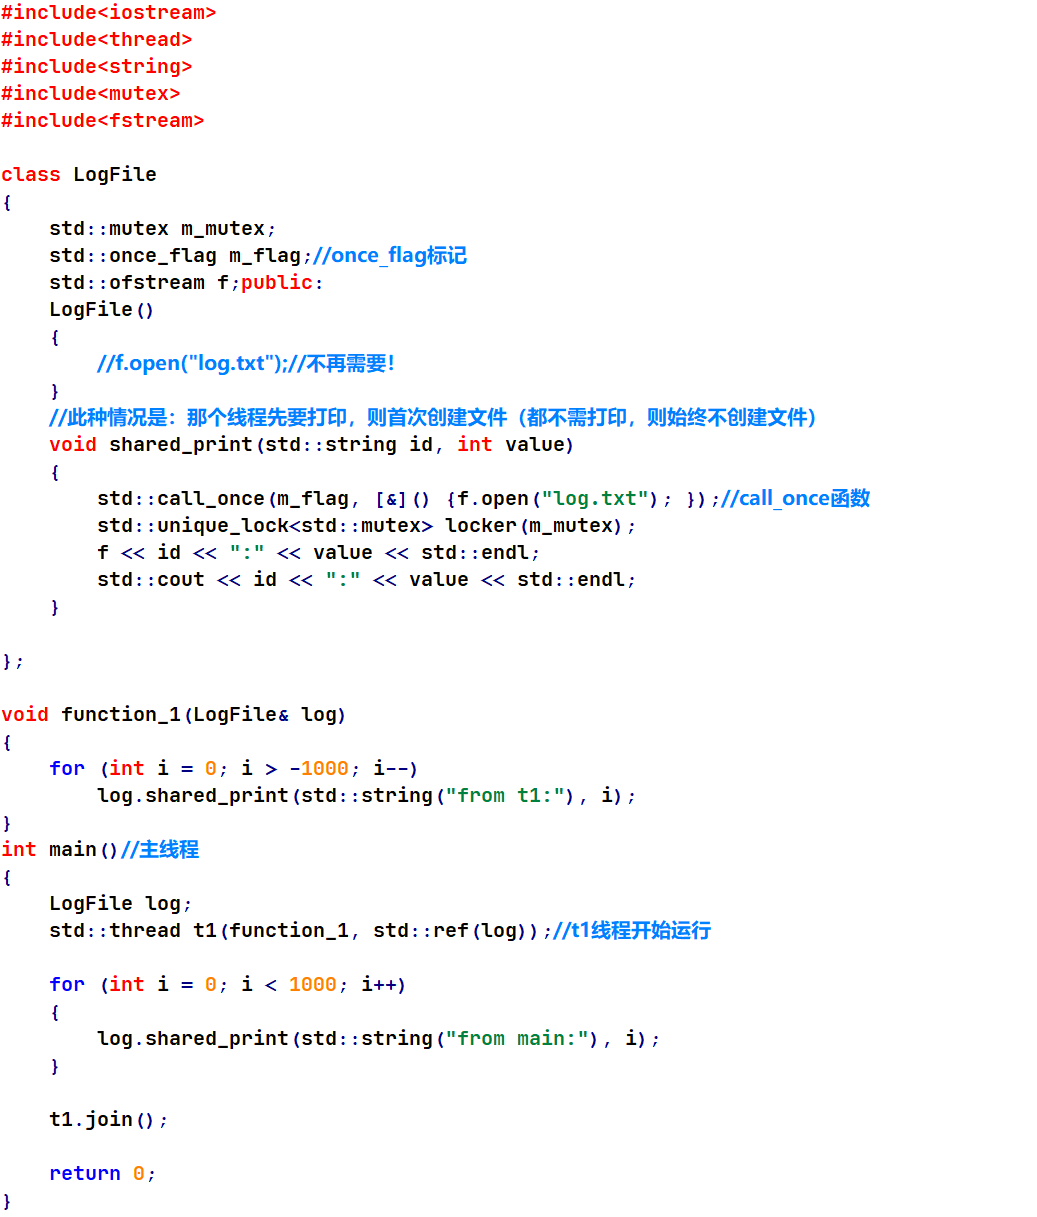
程序运行结果同上,不再展示。
附上例代码:
#include<iostream>
#include<thread>
#include<string>
#include<mutex>
#include<fstream>

class LogFile
{


    std::mutex m_mutex;
    std::once_flag m_flag;//once_flag标记
    std::ofstream f;public:
    LogFile()
    {


        //f.open("log.txt");//不再需要!
    }
    //此种情况是:那个线程先要打印,则首次创建文件(都不需打印,则始终不创建文件)
    void shared_print(std::string id, int value)
    {


        std::call_once(m_flag, [&]() {

    f.open("log.txt"); });//call_once函数
        std::unique_lock<std::mutex> locker(m_mutex);
        f << id << ":" << value << std::endl;
        std::cout << id << ":" << value << std::endl;
    }

};

void function_1(LogFile& log)
{


    for (int i = 0; i > -1000; i--)
        log.shared_print(std::string("from t1:"), i);
}
int main()//主线程
{


    LogFile log;
    std::thread t1(function_1, std::ref(log));//t1线程开始运行

    for (int i = 0; i < 1000; i++)
    {


        log.shared_print(std::string("from main:"), i);
    }

    t1.join();

    return 0;
}
九.condition_varible & wait
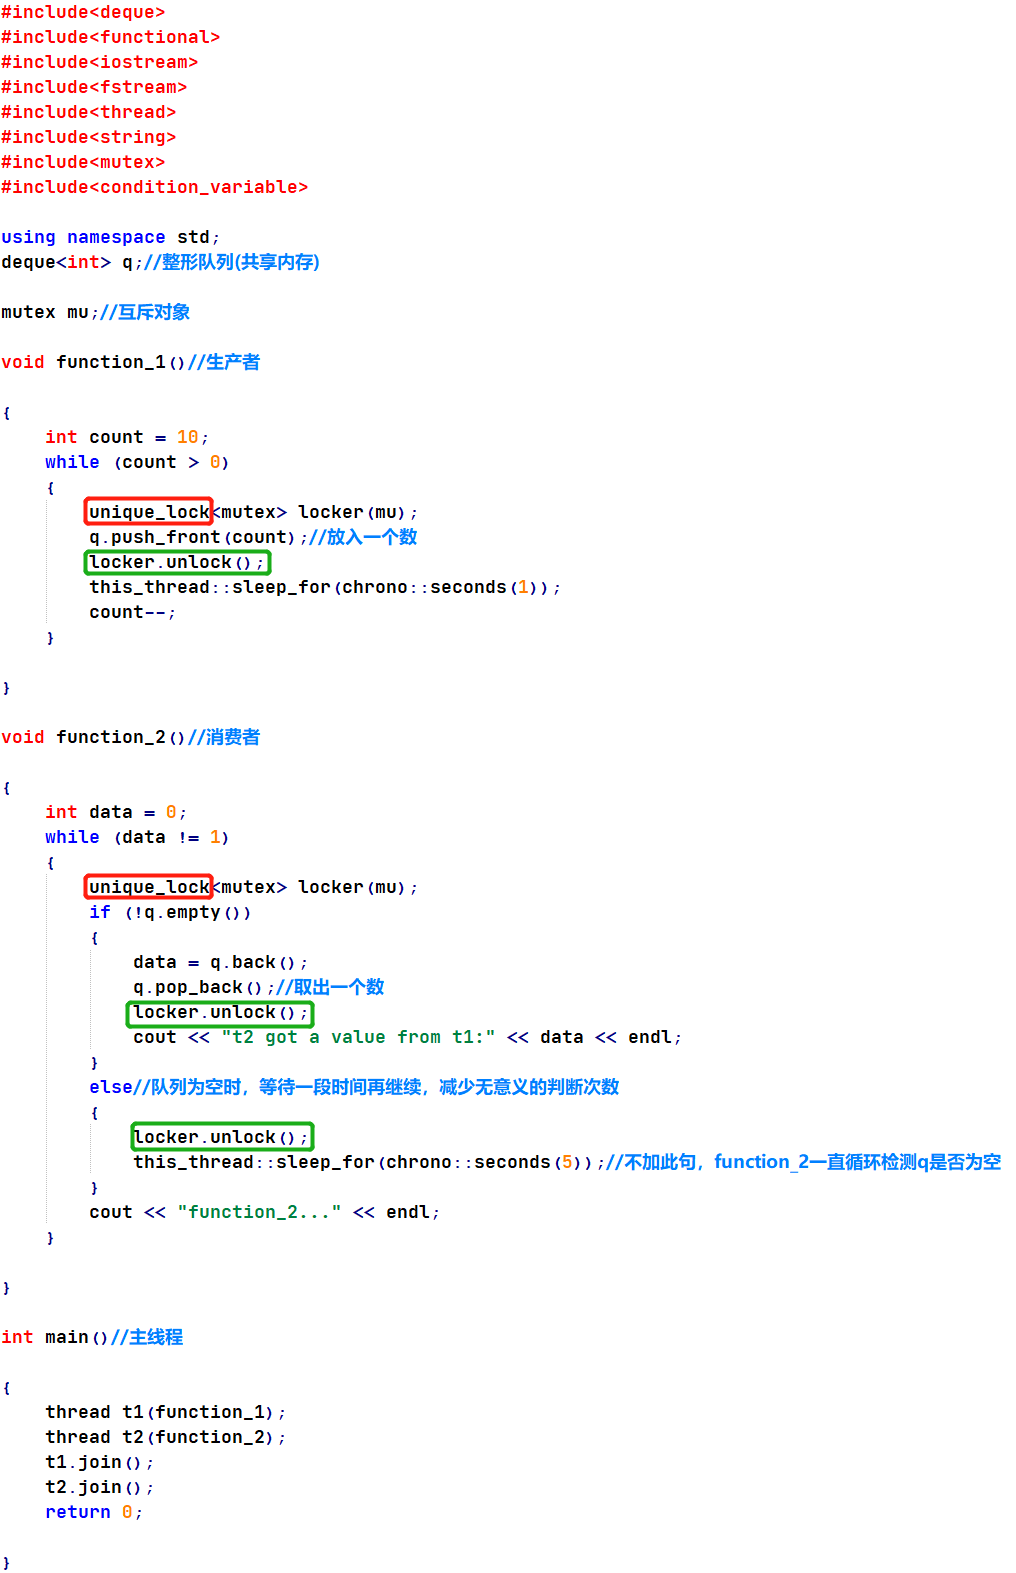
首先引入一个“ 生产者消费者问题 ”,有两个线程,线程A产生数据(生产者),线程B获取数据(消费者),线程A在产生数据时,线程B不能过来取,因而线程B的执行必须要依赖线程A。
下面的程序通过对队列结构中存取和取出数据,模拟生产和消费。采用加锁机制,保证两个子线程互斥,并且消费者线程使用循环查询机制,不断检查是否有可用数据。
例:
运行结果:
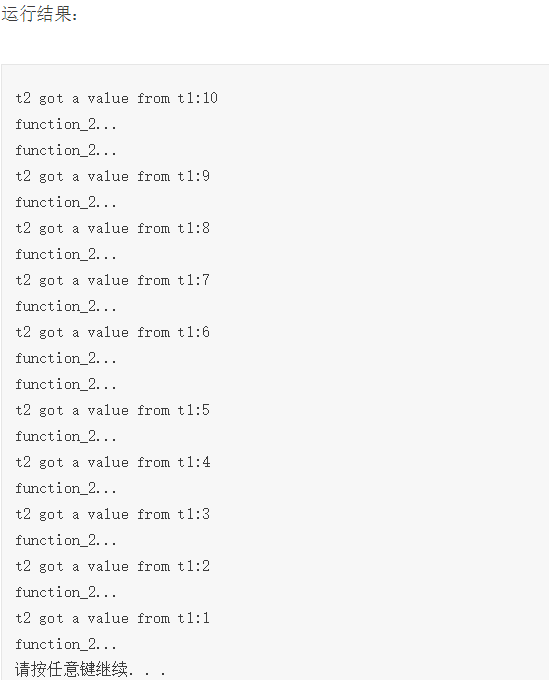
程序输出的中间过程会有些停顿,且消费者线程(function_2)存在多次查询无果的情况,注意上面程序的function_2中还特别加入了线程休眠等待(sleep_for),如果不加,function_2会不停的进行无效的查询访问,效率极低,而加入的等待时间过程,又会使function_2不能及时获取数据。
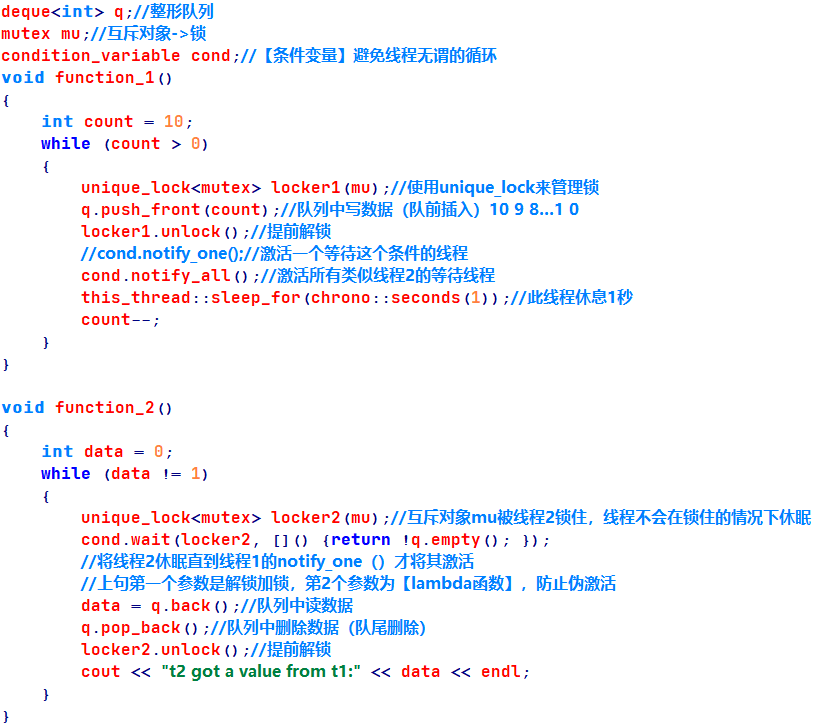
针对上面的问题,就需要引入条件变量 condition_varible,配合.wait()与.notify_one()成员函数,即可通过“ 等待通知 ”的形式使function_2在恰当的时间获得数据,避免无谓低效的查询。
修改后程序如下:
运行结果:
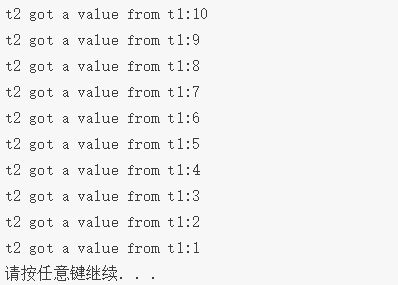
此时function_2就可以在functon_1产生数据后及时获取了,并且没有了无效的查询过程。
附上例代码:
#include<deque>
#include<functional>
#include<iostream>
#include<fstream>
#include<thread>
#include<string>
#include<mutex>
#include<condition_variable>

using namespace std;
deque<int> q;//整形队列
mutex mu;//互斥对象->锁
condition_variable cond;//【条件变量】避免线程无谓的循环

void function_1()
{


    int count = 10;
    while (count > 0)
    {


        unique_lock<mutex> locker1(mu);//使用unique_lock来管理锁
        q.push_front(count);//队列中写数据(队前插入)10 9 8...1 0
        locker1.unlock();//提前解锁
        //cond.notify_one();//激活一个等待这个条件的线程
        cond.notify_all();//激活所有类似线程2的等待线程
        this_thread::sleep_for(chrono::seconds(1));//此线程休息1秒
        count--;
    }

}

void function_2()
{


    int data = 0;
    while (data != 1)
    {


        unique_lock<mutex> locker2(mu);//互斥对象mu被线程2锁住,线程不会在锁住的情况下休眠
        cond.wait(locker2, []() {

    return !q.empty(); });//将线程2休眠直到线程1的notify_one()才将其激活
        //上句第一个参数是解锁加锁,第2个参数为【lambda函数】,防止伪激活
        data = q.back();//队列中读数据
        q.pop_back();//队列中删除数据(队尾删除)
        locker2.unlock();//提前解锁
        cout << "t2 got a value from t1:" << data << endl;
    }
}

int main()//主线程
{


	thread t1(function_1);
	thread t2(function_2);
	t1.join();
	t2.join();
	return 0;
}
十.future & async
std::async为一函数模板,用来启动一异步任务(即自动创建一线程并执行对应的线程入口函数),之后返回一个std::future对象(对象中包含线程函数的返回结果),最后通过future对象的.get()成员函数来获取结果。(如果只是简单地通过引用的方式在子线程和主线程间传递结果,需要额外的加锁机制!)
.get()成员函数等待子线程返回结果,否则一直等待(注:只能get一次,多次调用则报异常)与之类似的.wait()成员函数只等待结果,不获取结果(类似于join())
如果.get()和 .wait()都不用,主程序结束时仍等待子线程
future:理解为提供了一种访问异步操作结果的机制,即需要等待一段时间(线程执行完毕)主线程才能从子线程中拿到结果
额外向async()传递一个参数(std::launch枚举类型),实现其它功能
std::launch::deffered:表示线程入口函数被延迟到get()或wait()时才执行(但仍是主线程,没有新线程!),若没有get()或wait()则始终不执行子线程
std::launch::async:立即创建一个新线程
std::launch::async|std::launch::deffered:根据系统资源消耗情况,可能立即创建新线程,也可能延迟
例:
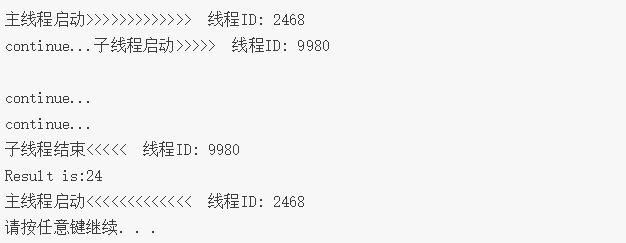
运行结果:
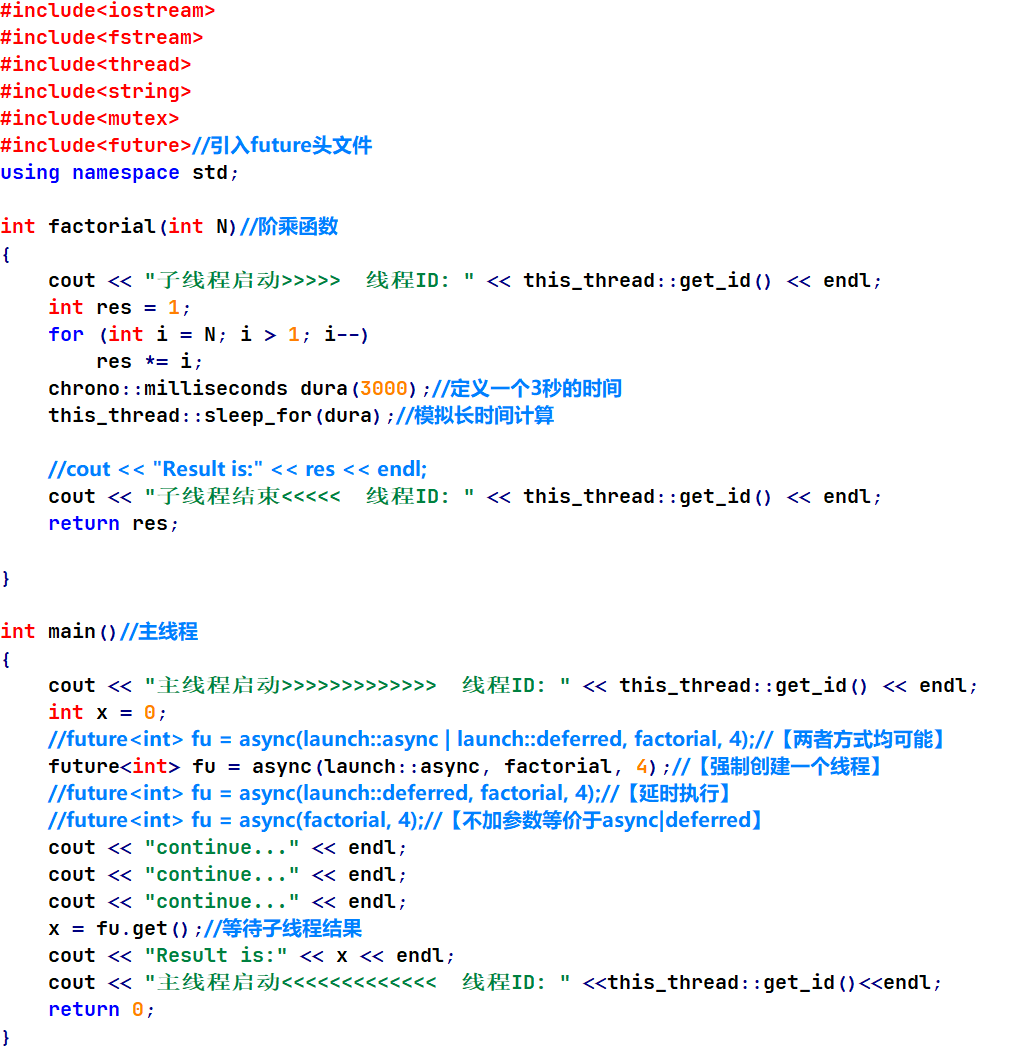
附上例代码:
#include<iostream>
#include<fstream>
#include<thread>
#include<string>
#include<mutex>
#include<future>//引入future头文件
using namespace std;

int factorial(int N)//阶乘函数
{


    cout << "子线程启动>>>>>  线程ID: " << this_thread::get_id() << endl;
    int res = 1;
    for (int i = N; i > 1; i--)
        res *= i;
    chrono::milliseconds dura(3000);//定义一个3秒的时间
    this_thread::sleep_for(dura);//模拟长时间计算

    //cout << "Result is:" << res << endl;
    cout << "子线程结束<<<<<  线程ID: " << this_thread::get_id() << endl;
    return res;

}

int main()//主线程
{


    cout << "主线程启动>>>>>>>>>>>>>  线程ID: " << this_thread::get_id() << endl;
    int x = 0;
    //future<int> fu = async(launch::async | launch::deferred, factorial, 4);//【两者方式均可能】
    future<int> fu = async(launch::async, factorial, 4);//【强制创建一个线程】
    //future<int> fu = async(launch::deferred, factorial, 4);//【延时执行】
    //future<int> fu = async(factorial, 4);//【不加参数等价于async|deferred】
    cout << "continue..." << endl;
    cout << "continue..." << endl;
    cout << "continue..." << endl;
    x = fu.get();//等待子线程结果
    cout << "Result is:" << x << endl;
    cout << "主线程启动<<<<<<<<<<<<<  线程ID: " <<this_thread::get_id()<<endl;
    return 0;
}
十一.promise
std::promise类模板(事先约定)可以在某个线程中给它赋值,然后在其它线程中,将该值取出。
例:
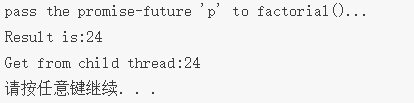
运行结果:
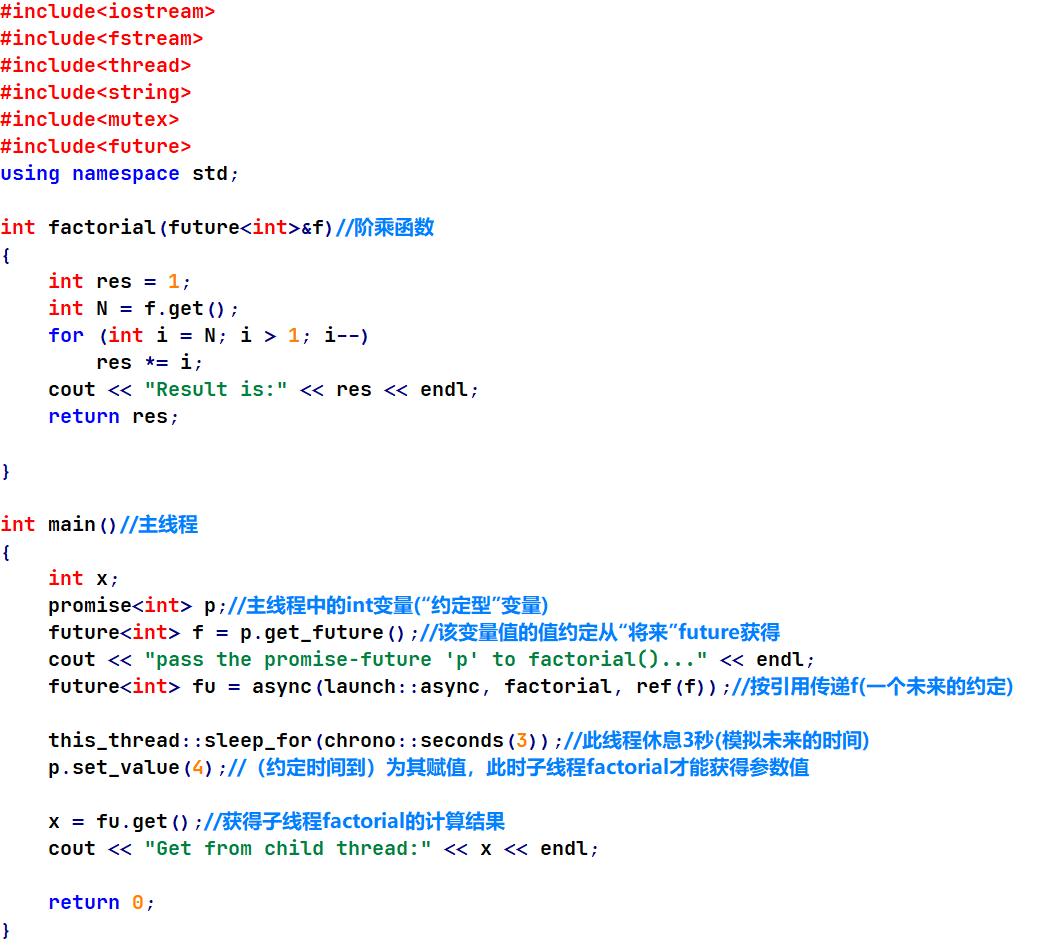
附上例代码:
#include<iostream>
#include<fstream>
#include<thread>
#include<string>
#include<mutex>
#include<future>
using namespace std;

int factorial(future<int>&f)//阶乘函数
{


    int res = 1;
    int N = f.get();
    for (int i = N; i > 1; i--)
        res *= i;
    cout << "Result is:" << res << endl;
    return res;

}

int main()//主线程
{


    int x;
    promise<int> p;//主线程中的int变量(“约定型”变量)
    future<int> f = p.get_future();//该变量值的值约定从“将来”future获得
    cout << "pass the promise-future 'p' to factorial()..." << endl;
    future<int> fu = async(launch::async, factorial, ref(f));//按引用传递f(一个未来的约定)

    this_thread::sleep_for(chrono::seconds(3));//此线程休息3秒(模拟未来的时间)
    p.set_value(4);//(约定时间到)为其赋值,此时子线程factorial才能获得参数值

    x = fu.get();//获得子线程factorial的计算结果
    cout << "Get from child thread:" << x << endl;

    return 0;
}