TorchScript简介
TorchScript是PyTorch模型的一种中间形式,可以在高性能环境(例如C ++)中运行。
一个简单示例如下:
import torch
#import torchvision

class MyCell(torch.nn.Module):
    def __init__(self):
        super(MyCell, self).__init__()

    def forward(self, x, h):
        new_h = torch.tanh(x + h)
        return new_h, new_h

my_cell = MyCell()
x = torch.rand(3, 4)
h = torch.rand(3, 4)
print(my_cell(x, h))
输出结果:

以上示例,我们基于torch.nn.Module创建了一个类MyCell,并定义了构造函数,这里的构造函数仅调用了super函数。super()函数是用于调用父类(超类)的一个方法。super是用来解决多重继承问题的,直接用类名调用父类方法在使用单继承的时候没问题,但是如果使用多继承,会涉及到查找顺序、重复调用等种种问题。同时,我们还定义了forward函数,这里的forward函数输入是2个参数,返回2个结果。该forward函数的实际内容并不是很重要,但是它是一种伪的RNN单元,即该函数真实场景应用于循环。
我们进一步改动上述MyCell类,在原有基础上增加一个self.linear成员属性(是一个函数),并在forward函数中调用该成员。torch.nn.Linear是PyTorch中的一个标准模块,如此便完成了模块的嵌套组合。
import torch
class MyCell(torch.nn.Module):
def __init__(self):
super(MyCell, self).__init__()
self.linear = torch.nn.Linear(4, 4)
def forward(self, x, h):
new_h = torch.tanh(self.linear(x) + h)
return new_h, new_h
my_cell = MyCell()
x = torch.rand(3, 4)
h = torch.rand(3, 4)
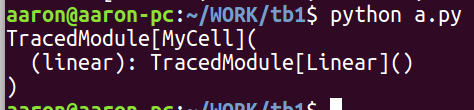
print(my_cell)
print(my_cell(x, h))输出结果:

当打印模块的时候,输出为模块的子类层次结构。比如上述打印的mycell的结果是linear子类及其参数。通过这种方式组合模块,就可以用可复用的组件轻松地创建模型。
此外,从输出结果可以看出还有grad_fn。这是PyTorch自动微分求导给出的信息,称为autograd。简而言之,该系统允许我们通过潜在的复杂程序来计算导数。该设计为模型创建提供了极大的灵活性。
下面我们用例子进一步说明模型构建的灵活性。在上述基础上新增MyDecisionGate,该模块中用到形如循环或if语句的控制流。
import torch

class MyDecisionGate(torch.nn.Module):
  def forward(self, x):
    if x.sum() > 0:
      return x
    else:
      return -x

class MyCell(torch.nn.Module):
    def __init__(self):
        super(MyCell, self).__init__()
        self.dg = MyDecisionGate()
        self.linear = torch.nn.Linear(4, 4)

    def forward(self, x, h):
        new_h = torch.tanh(self.dg(self.linear(x)) + h)
        return new_h, new_h

my_cell = MyCell()
x = torch.rand(3, 4)
h = torch.rand(3, 4)
print(my_cell)
print(my_cell(x, h))
输出结果:

追踪(tracing)
简而言之,鉴于原生PyTorch具有灵活和动态的特性,TorchScript也提供了捕获模型定义的工具。其中一个核心的概念就是模型追踪(tracing)。
import torch

class MyCell(torch.nn.Module):
    def __init__(self):
        super(MyCell, self).__init__()
        self.linear = torch.nn.Linear(4, 4)

    def forward(self, x, h):
        new_h = torch.tanh(self.linear(x) + h)
        return new_h, new_h

my_cell = MyCell()
x, h = torch.rand(3, 4), torch.rand(3, 4)
traced_cell = torch.jit.trace(my_cell, (x, h))
print(traced_cell)
traced_cell(x, h)
输出结果:
与此前一样,实例化MyCell,但是这次,使用torch.jit.trace方法调用Module,然后传入了网络的示例输入。这到底是做什么的?它已调用Module,记录了Module运行时发生的操作,并创建了torch.jit.ScriptModule实例(TracedModule的实例)。TorchScript将其定义记录在中间表示(或IR)中,在深度学习中通常称为graph。我们可以通过访问.graph属性来查看graph:
print(traced_cell.graph)
输出结果:

但是,这是一个非常低级的表示形式,图中包含的大多数信息对最终用户没有用。相反,我们可以使用.code属性为代码提供Python语法的解释:
print(traced_cell.code)
输出结果:

那么为什么我们要做所有这些呢?有以下几个原因:
- TorchScript代码可以在其自己的解释器中调用,该解释器基本上是受限制的Python解释器。该解释器不获取全局解释器锁,因此可以在同一实例上同时处理许多请求。
- 这种格式使我们可以将整个模型保存到磁盘上,并可以在另一个环境中加载,例如在以非Python语言编写的服务中。
- TorchScript为我们提供了一种表示形式,通过TorchScript我们可以对代码进行编译器优化以提供更有效的执行。
- 通过TorchScript可以与许多后端/设备运行时进行接口,这些运行时比单个操作需要更广泛的程序视图。
可以看到调用traced_cell产生的结果与直接执行Python模块结果是相同的:
运行:
import torch

class MyCell(torch.nn.Module):
    def __init__(self):
        super(MyCell, self).__init__()
        self.linear = torch.nn.Linear(4, 4)

    def forward(self, x, h):
        new_h = torch.tanh(self.linear(x) + h)
        return new_h, new_h

my_cell = MyCell()
x, h = torch.rand(3, 4), torch.rand(3, 4)
traced_cell = torch.jit.trace(my_cell, (x, h))
print(traced_cell)
traced_cell(x, h)
print(my_cell(x, h))
print(traced_cell(x, h))
输出结果:

使用 Scripting to Convert Modules
我们使用模块的第二个版本,即traced_cell(x, h)是有原因的,而不是使用带有控制流的子模块的一个版本。让我们以下述示例来阐述其背后的原因。
import torch

class MyDecisionGate(torch.nn.Module):
  def forward(self, x):
    if x.sum() > 0:
      return x
    else:
      return -x

class MyCell(torch.nn.Module):
    def __init__(self, dg):
        super(MyCell, self).__init__()
        self.dg = dg
        self.linear = torch.nn.Linear(4, 4)

    def forward(self, x, h):
        new_h = torch.tanh(self.dg(self.linear(x)) + h)
        return new_h, new_h

my_cell = MyCell(MyDecisionGate())
x, h = torch.rand(3, 4), torch.rand(3, 4)
traced_cell = torch.jit.trace(my_cell, (x, h))
print(traced_cell.code)
输出结果:

根据.code的输出,可以发现if-else的分支已经杳无踪迹!为什么?Tracing完全按照我们所说的去做:运行代码,记录发生的操作,并构造一个可以做到这一点的ScriptModule。不幸的是,在这个运行过程,诸如控制流之类的信息被抹去了。
那么如何在TorchScript中如实地表示此模块?PyTorch提供了一个脚本编译器,它可以直接分Python源代码以将其转换为TorchScript。对上述的MyDecisionGate使用脚本编译器进行转换:
scripted_gate = torch.jit.script(MyDecisionGate())  # 看这里

my_cell = MyCell(scripted_gate)
traced_cell = torch.jit.script(my_cell)  # 看这里
print(traced_cell.code)
这部分我运行出了些问题,可能是软件版本太低了,有时间使用PyTorch版本1.2.0+cu92试一试,先copy一下,有时间再查原因吧。。。。。
运行结果:
def forward(self,
    x: Tensor,
    h: Tensor) -> Tuple[Tensor, Tensor]:
  _0 = self.linear
  _1 = _0.weight
  _2 = _0.bias
  if torch.eq(torch.dim(x), 2):
    _3 = torch.__isnot__(_2, None)
  else:
    _3 = False
  if _3:
    bias = ops.prim.unchecked_unwrap_optional(_2)
    ret = torch.addmm(bias, x, torch.t(_1), beta=1, alpha=1)
  else:
    output = torch.matmul(x, torch.t(_1))
    if torch.__isnot__(_2, None):
      bias0 = ops.prim.unchecked_unwrap_optional(_2)
      output0 = torch.add_(output, bias0, alpha=1)
    else:
      output0 = output
    ret = output0
  _4 = torch.gt(torch.sum(ret, dtype=None), 0)
  if bool(_4):
    _5 = ret
  else:
    _5 = torch.neg(ret)
  new_h = torch.tanh(torch.add(_5, h, alpha=1))
  return (new_h, new_h)
现在,已经可以如实地捕获了在TorchScript中程序的行为。现在尝试运行该程序:
# New inputs
x, h = torch.rand(3, 4), torch.rand(3, 4)
print(traced_cell(x, h))
运行结果:
(tensor([[ 0.3430, -0.3471,  0.7990,  0.8313],
        [-0.4042, -0.3058,  0.7758,  0.8332],
        [-0.3002, -0.3926,  0.8468,  0.7715]],
       grad_fn=<DifferentiableGraphBackward>), tensor([[ 0.3430, -0.3471,  0.7990,  0.8313],
        [-0.4042, -0.3058,  0.7758,  0.8332],
        [-0.3002, -0.3926,  0.8468,  0.7715]],
       grad_fn=<DifferentiableGraphBackward>))
注意,本文实验的PyTorch版本是1.1.0+cu9.0。建议使用PyTorch版本1.2.0+cu92。
混合脚本(Scripting)和追踪(Tracing)
待补充。。。。。。。。。。。。。
在C++中加载TorchScript模型
Step 1:将PyTorch模型转换为Torch Script
将PyTorch模型从Python转到C++需要通过Torch Script实现。Torch Script 是PyTorch模型的一种表示,它可以被Torch Script 编译器理解、编译和序列化。 如果用普通的“eager”API编写PyTorch模型,则必须首先将模型转换为 Torch Script。
前面章节已经介绍过2种将PyTorch模型转换为Torch Script 的方法。第一种是追踪(tracing),通过实例输入对模型结构做一次评估,并记录这些输入通过模型的流动状态。该方法适用于模型有限使用控制流的情况。第二种方法是在模型中添加明确的注释,使得Torch Script 编译器可以直接解析和编译模型代码。更详细资料可以参考Torch Script reference
通过Tracing
要通过追踪方式将PyTorch模型转换为Torch Script,必须将带有样例输入的模型实例输入到torch.jit.trace函数。这将产生一个torch.jit.ScriptModule对象,该对象在forward 方法中嵌入模型评估的追踪。
具体使用示例如下:
import torch
import torchvision

# An instance of your model.
model = torchvision.models.resnet18()

# An example input you would normally provide to your model's forward() method.
example = torch.rand(1, 3, 224, 224)

# Use torch.jit.trace to generate a torch.jit.ScriptModule via tracing.
traced_script_module = torch.jit.trace(model, example)
被追踪的ScriptModule对象,现在可以被视为常规的PyTorch模块。
output = traced_script_module(torch.ones(1, 3, 224, 224))
print(output[0, :5])
输出结果:
tensor([0.7741, 0.0539, 0.6656, 0.7301, 0.2207], grad_fn=<SliceBackward>)
通过Annotation(注释)
某些情况下,例如,如果模型采用控制流的特定形式,那么直接以Torch Script 写出模型,并相应地标注模型也许是更好的选择。以下述Pytorch模型为例展开说明:
import torch

class MyModule(torch.nn.Module):
    def __init__(self, N, M):
        super(MyModule, self).__init__()
        self.weight = torch.nn.Parameter(torch.rand(N, M))

    def forward(self, input):
        if input.sum() > 0:
          output = self.weight.mv(input)
        else:
          output = self.weight + input
        return output
因为这个模块中的forward方法使用依赖于输入的控制流依,这种模块不适合于追踪方法。相反,可以将其转换为ScriptModule。为了将模块转换为ScriptModule,需要用torch.jit.script编译模块:
class MyModule(torch.nn.Module):
    def __init__(self, N, M):
        super(MyModule, self).__init__()
        self.weight = torch.nn.Parameter(torch.rand(N, M))

    def forward(self, input):
        if input.sum() > 0:
          output = self.weight.mv(input)
        else:
          output = self.weight + input
        return output

my_module = MyModule(10,20)
sm = torch.jit.script(my_module)
另外,对于nn.Module中不需要的方法(因为TorchScript对于有些python特性目前是不支持的),可以用@torch.jit.ignore将其去除。
Step 2:将Script Module序列化到文件中
对于获取到的ScriptModule对象(不管是用tracing方法还是annotation方法得到的),可以将其序列化为一个文件,以便后续在其他环境(如C++)中使用。具体序列化方式如下:
traced_script_module.save("traced_resnet_model.pt")
- 如果同时想要序列化模块
my_module,可以使用my_module.save("my_module_model.pt")。
Step 3:在C++中加载Torch Script模块
在C++中加载序列化的PyTorch模型需要用到PyTorch C++ API,即LibTorch库。LibTorch中有共享库、头文件和CMake构建配置文件。
最简化的C++应用
example-app.cpp的内容如下:
#include <torch/script.h> // One-stop header.

#include <iostream>
#include <memory>

int main(int argc, const char* argv[]) {
  if (argc != 2) {
    std::cerr << "usage: example-app <path-to-exported-script-module>\n";
    return -1;
  }


  torch::jit::script::Module module;
  try {
    // Deserialize the ScriptModule from a file using torch::jit::load().
    module = torch::jit::load(argv[1]);
  }
  catch (const c10::Error& e) {
    std::cerr << "error loading the model\n";
    return -1;
  }

  std::cout << "ok\n";
}
其中头文件<torch/script.h>包括了运行示例所必需的LibTorch库中所有的相关依赖。上述示例接收序列化的ScriptModule文件,并通过torch::jit::load()加载序列化的文件,返回结果是torch::jit::script::Module对象。
构建依赖和创建
上述代码对应的CMakeLists.txt内容如下:
cmake_minimum_required(VERSION 3.0 FATAL_ERROR)
project(custom_ops)

find_package(Torch REQUIRED)

add_executable(example-app example-app.cpp)
target_link_libraries(example-app "${TORCH_LIBRARIES}")
set_property(TARGET example-app PROPERTY CXX_STANDARD 11)
从官方下载libtorch,并解压:
其中lib目录包含链接时所需的共享库;include包含程序中用到的头文件;share目录包含必要的CMake配置,以方便上面find_package(Torch)命令的使用。
最后还需要构建应用程序。假设目录布局如下:
example-app/
  CMakeLists.txt
example-app.cpp可以运行下面的命令来从example-app/文件夹内构建应用程序:
mkdir build
cd build
cmake -DCMAKE_PREFIX_PATH=/home/data1/devtools/libtorch/ ..
make
这里DCMAKE_PREFIX_PATH值为下载libtorch后解包的位置。
编译后,运行方式如下:
./example-app <path_to_model>/traced_resnet_model.pt
Step 4:在C++中执行Script Module
上述的介绍已经能够实现在C++中加载序列化的ResNet18,现在需要做的是运行模型进行推理。具体如下:
// Create a vector of inputs.
std::vector<torch::jit::IValue> inputs;
inputs.push_back(torch::ones({1, 3, 224, 224}));

// Execute the model and turn its output into a tensor.
at::Tensor output = module.forward(inputs).toTensor();
std::cout << output.slice(/*dim=*/1, /*start=*/0, /*end=*/5) << '\n';
上述代码的前2行是模型的输入,再调用script::Module中的forward方法,返回结果的类型是IValue,需要进一步通过toTensor()转为tensor。
注意:如果想把模型以GPU运行,则只需对模型处理如下:model.to(at::kCUDA);。同时要确保模型的输入也在CUDA内存中,可以用以下方式实现:tensor.to(at::kCUDA),则会返回一个新的位于CUDA内存中的tensor。
图像分类实例
环境准备
需要预先安装cmake、opencv、 PyTroch 1.2。 在opencv安装过程可能会出现一些诸如gcc版本(本文使用的gcc5.2)过低等环境安装问题,这里就展开说明了。
C++中加载模型
以使用resnet18模型进行图像分类为例。
Step 1:将PyTorch模型转为Torch Script
运行如下脚本:
import torch
import torchvision
from torchvision import transforms
from PIL import Image
from time import time
import numpy as np

# An instance of your model.
model = torchvision.models.resnet18(pretrained=True)
model.eval()

# An example input you would normally provide to your model's forward() method.
example = torch.rand(1, 3, 224, 224)

# Use torch.jit.trace to generate a torch.jit.ScriptModule via tracing.
traced_script_module = torch.jit.trace(model, example)
traced_script_module.save("model.pt")

# evalute time
batch = torch.rand(64, 3, 224, 224)
start = time()
output = traced_script_module(batch)
stop = time()
print(str(stop-start) + "s")

# read image
image = Image.open('dog.png').convert('RGB')
default_transform = transforms.Compose([
        transforms.Resize([224, 224]),
        transforms.ToTensor(),
        transforms.Normalize(mean=[0.485, 0.456, 0.406],
                             std=[0.229, 0.224, 0.225])
      ])
image = default_transform(image)

# forward
output = traced_script_module(image.unsqueeze(0))
print(output[0, :10])

# print top-5 predicted labels
labels = np.loadtxt('synset_words.txt', dtype=str, delimiter='\n')

data_out = output[0].data.numpy()
sorted_idxs = np.argsort(-data_out)

for i,idx in enumerate(sorted_idxs[:5]):
  print('top-%d label: %s, score: %f' % (i, labels[idx], data_out[idx]))
获得 model.pt
Step 2:在C++中调用Torch Script
(1)需要先下载LibTorch并解包,在make编译时候需要指定该lib的路径。
(2)利用cmake工具对业务代码,即使用Torch Script的代码进行编译
mkdir build
cd build
cmake -DCMAKE_PREFIX_PATH=/home/aaron/WORK/tb1/libtorch/ ..
make
运行结果:

附上完整代码:
#include "torch/script.h"
#include "torch/torch.h"
//#include "torch/Tensor.h"
#include "opencv2/opencv.hpp"
#include "opencv2/imgproc/imgproc.hpp"
#include "opencv2/imgproc/types_c.h"

#include <iostream>
#include <memory>
#include <string>
#include <vector>

/* main */
int main(int argc, const char* argv[]) {
  if (argc < 4) {
    std::cerr << "usage: example-app <path-to-exported-script-module> "
      << "<path-to-image>  <path-to-category-text>\n";
    return -1;
  }

  // Deserialize the ScriptModule from a file using torch::jit::load().
  //std::shared_ptr<torch::jit::script::Module> module = torch::jit::load(argv[1]);
  torch::jit::script::Module module = torch::jit::load(argv[1]);

  //assert(module != nullptr);
  std::cout << "load model ok\n";

  // Create a vector of inputs.
  std::vector<torch::jit::IValue> inputs;
  inputs.push_back(torch::rand({64, 3, 224, 224}));

  // evalute time
  double t = (double)cv::getTickCount();
  module.forward(inputs).toTensor();
  t = (double)cv::getTickCount() - t;
  printf("execution time = %gs\n", t / cv::getTickFrequency());
  inputs.pop_back();

  // load image with opencv and transform
  cv::Mat image;
  image = cv::imread(argv[2], 1);
  cv::cvtColor(image, image, CV_BGR2RGB);
  cv::Mat img_float;
  image.convertTo(img_float, CV_32F, 1.0/255);
  cv::resize(img_float, img_float, cv::Size(224, 224));
  //std::cout << img_float.at<cv::Vec3f>(56,34)[1] << std::endl;
  //auto img_tensor = torch::CPU(torch::kFloat32).tensorFromBlob(img_float.data, {1, 224, 224, 3});

  auto img_tensor = torch::from_blob(img_float.data, {1, 224, 224, 3}); //.permute({0, 3, 1, 2}).to(torch::kCUDA);

  img_tensor = img_tensor.permute({0,3,1,2}); //.to(torch::kCUDA);

  img_tensor[0][0] = img_tensor[0][0].sub_(0.485).div_(0.229);

  img_tensor[0][1] = img_tensor[0][1].sub_(0.456).div_(0.224);
  img_tensor[0][2] = img_tensor[0][2].sub_(0.406).div_(0.225);

  //auto img_var = torch::autograd::make_variable(img_tensor, false);
  //torch::Tensor img_var = torch::autograd::make_variable(img_tensor, false);

  inputs.push_back(img_tensor);

  // Execute the model and turn its output into a tensor.
  torch::Tensor out_tensor = module.forward(inputs).toTensor();

  std::cout << out_tensor.slice(/*dim=*/1, /*start=*/0, /*end=*/10) << '\n';


  // Load labels
  std::string label_file = argv[3];
  std::ifstream rf(label_file.c_str());
  CHECK(rf) << "Unable to open labels file " << label_file;
  std::string line;
  std::vector<std::string> labels;
  while (std::getline(rf, line))
    labels.push_back(line);

  // print predicted top-5 labels
  std::tuple<torch::Tensor,torch::Tensor> result = out_tensor.sort(-1, true);
  torch::Tensor top_scores = std::get<0>(result)[0];
  torch::Tensor top_idxs = std::get<1>(result)[0].toType(torch::kInt32);

  auto top_scores_a = top_scores.accessor<float,1>();
  auto top_idxs_a = top_idxs.accessor<int,1>();

  for (int i = 0; i < 5; ++i) {
    int idx = top_idxs_a[i];
    std::cout << "top-" << i+1 << " label: ";
    std::cout << labels[idx] << ", score: " << top_scores_a[i] << std::endl;
  }

  return 0;
}
参考资料
https://pytorch.org/blog/model-serving-in-pyorch/
https://medium.com/datadriveninvestor/deploy-your-pytorch-model-to-production-f69460192217
https://github.com/iamhankai/cpp-pytorch
https://pytorch.org/tutorials/advanced/cpp_export.html#step-1-converting-your-pytorch-model-to-torch-script