solr库定时向绑定的数据库查询 及时更新solr自己库中的数据(其实就是配置个定时器一样的东西)!!!
Solr官方提供了很强大的Data Import Request Handler,同时提供了一个简单的 Scheduler,
示例中的 Scheduler 只支持增量更新,不支持定期重做索引,所以自己封装,增加重做索引的定时器.
1. 将 apache-solr-dataimportscheduler-1.0.jar 和solr自带的 apache-solr-dataimporthandler-.jar, apache-solr-dataimporthandler-extras-.jar 放到solr.war的lib目录下面
(链接:http://pan.baidu.com/s/1bpCogLD 密码:ri0u)
2.修改solr.war中WEB-INF/web.xml, (apache-tomcat-7.0.72\webapps\solr\WEB-INF目录下的web.xml文件)在servlet节点前面增加监听配置:
<listener>
          <listener-class>
                org.apache.solr.handler.dataimport.scheduler.ApplicationListener
          </listener-class>
</listener>
温馨提示:
复制上面这段时注意org.apache.solr.handler.dataimport.scheduler.ApplicationListener后面不要有空格,不然启动tomcat会有奇怪的错误,
3.将apache-solr-dataimportscheduler-.jar 中 dataimport.properties 取出并根据实际情况修改,然后在\solrhome目录下新建一个conf文件夹(与simple文件夹同目录),将dataimport.properties文件放在conf文件夹中。
#################################################
#                                               #
#       dataimport scheduler properties         #
#                                               #
#################################################

#  to sync or not to sync
#  1 - active; anything else - inactive
# 这里的配置不用修改
syncEnabled=1

#  which cores to schedule
#  in a multi-core environment you can decide which cores you want syncronized
#  leave empty or comment it out if using single-core deployment
#  修改成你所使用的core,我这里是我自定义的core:simple
syncCores=simple

#  solr server name or IP address
#  [defaults to localhost if empty]
#  这个一般都是localhost不会变
server=localhost

#  solr server port
#  [defaults to 80 if empty]
#  安装solr的tomcat端口,如果你使用的是默认的端口,就不用改了,否则改成自己的端口就好了
port=8080

#  application name/context
#  [defaults to current ServletContextListener's context (app) name]
#  这里默认不改
webapp=solr

#  URL params [mandatory]
#  remainder of URL
#  这里改成下面的形式,solr同步数据时请求的链接
params=/dataimport?command=delta-import&clean=false&commit=true

#  schedule interval
#  number of minutes between two runs
#  [defaults to 30 if empty]
#这里是设置定时任务的,单位是分钟,也就是多长时间你检测一次数据同步,根据项目需求修改
#  开始测试的时候为了方便看到效果,时间可以设置短一点
interval=1

#  重做索引的时间间隔,单位分钟,默认7200,即5天;
#  为空,为0,或者注释掉:表示永不重做索引
reBuildIndexInterval=7200

#  重做索引的参数
reBuildIndexParams=/select?qt=/dataimport&command=full-import&clean=true&commit=true

#  重做索引时间间隔的计时开始时间,第一次真正执行的时间=reBuildIndexBeginTime+reBuildIndexInterval*60*1000;
#  两种格式:2012-04-11 03:10:00 或者  03:10:00,后一种会自动补全日期部分为服务启动时的日期
reBuildIndexBeginTime=03:10:00
4.重启tomcat,浏览器访问:localhost:8080/solr\
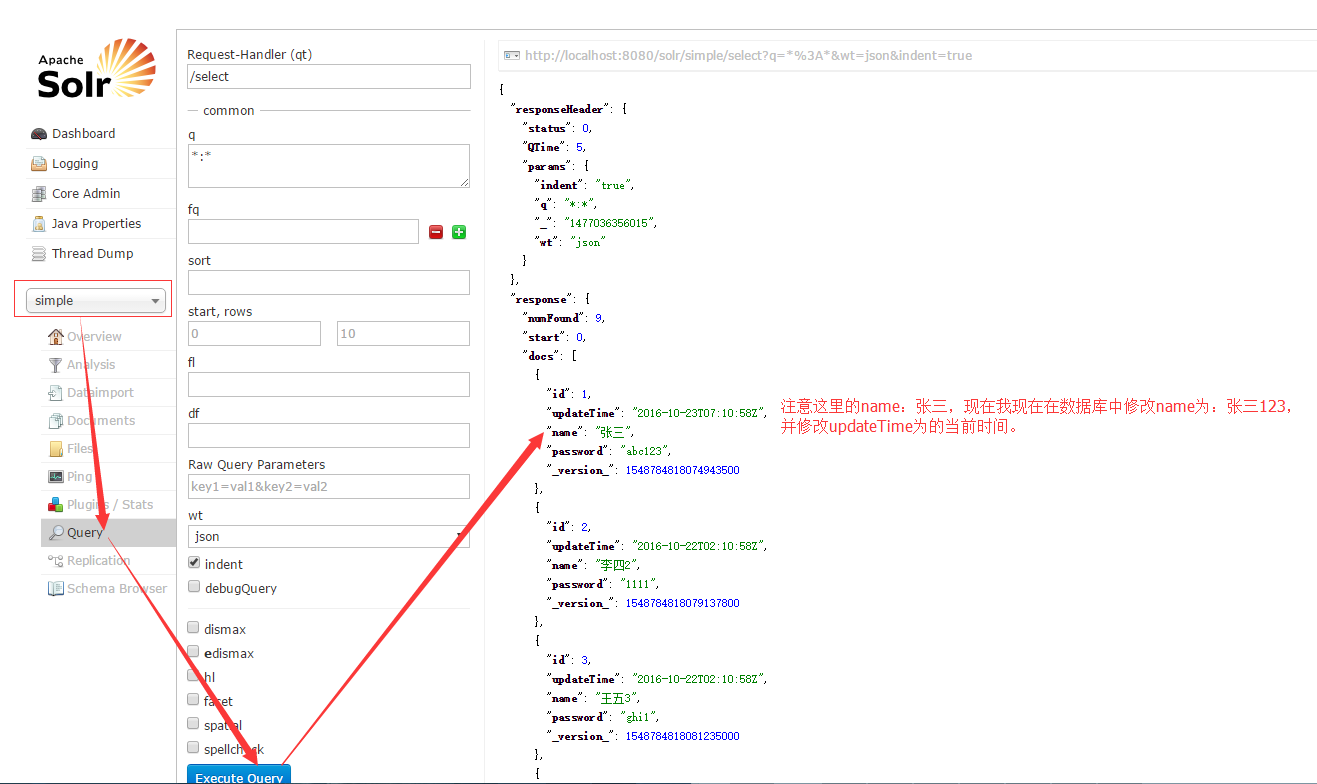
然后更改数据库数据!!!!根据自己的时间查看! 就会发现solr页面的数据也会跟着改变!!!!!!!
到这个时候,就恭喜你.你已经完工了!!!!!!