安老师今年会参与某项目自动化运维平台的搭建。在此期间,尽可能分享一些有用的知识帮助大家学习。本次分享我们来学习下Django的基本功,如何搭建一个入门版的博客(入门版,进阶版,高级版,大神版)。后续将会为大家介绍另外几个版本的博客,敬请期待!
一. 基本步骤
1. 配置虚拟环境
Python版本:2.7.15
Django版本:1.11.20
主机IP地址:192.168.117.30
数据库:SQLite
2. 创建和配置[入门版]博客
3. 优化[入门版]博客
01
配置虚拟环境
1. 安装python(2.7.15)版本的虚拟环境
[python@PYMY-DDB ~]$ pyenv virtualenv 2.7.15 MyDjango
2. 启用MyDjango虚拟环境
[python@PYMY-DDB ~]$ pyenv activate MyDjango
pyenv-virtualenv: prompt changing will be removed from future release. configure `export PYENV_VIRTUALENV_DISABLE_PROMPT=1' to simulate the behavior.
(MyDjango) [python@PYMY-DDB ~]$ python -V
Python 2.7.15
3. 安装Django
(MyDjango) [python@PYMY-DDB ~]$ pip install django
02
创建[入门版]博客项目
1. 创建easyblog项目
(MyDjango) [python@PYMY-DDB Myproject]$ pwd
/home/python/Myproject
(MyDjango) [python@PYMY-DDB Myproject]$ django-admin startproject easyblog
2. 创建APP(mysite)
(MyDjango) [python@PYMY-DDB Myproject]$ django-admin startproject easyblog
(MyDjango) [python@PYMY-DDB Myproject]$ ls -l
drwxrwxr-x 3 python python 4096 Feb 24 21:31 easyblog

(MyDjango) [python@PYMY-DDB Myproject]$ cd easyblog/

(MyDjango) [python@PYMY-DDB easyblog]$ python manage.py startapp mysite
(MyDjango) [python@PYMY-DDB easyblog]$ ls -l
total 12
drwxrwxr-x 2 python python 4096 Feb 24 21:31 easyblog
-rwxrwxr-x 1 python python  806 Feb 24 21:31 manage.py
drwxrwxr-x 3 python python 4096 Feb 24 21:31 mysite
3. 查看easyblog项目的结构
(MyDjango) [python@PYMY-DDB Myproject]$ pwd
/home/python/Myproject

(MyDjango) [python@PYMY-DDB Myproject]$ tree easyblog
easyblog
├── easyblog
│   ├── __init__.py
│   ├── __init__.pyc
│   ├── settings.py
│   ├── settings.pyc
│   ├── urls.py
│   └── wsgi.py
├── manage.py
└── mysite
    ├── admin.py
    ├── apps.py
    ├── __init__.py
    ├── migrations
    │  └── __init__.py
    ├── models.py
    ├── tests.py
    └── views.py
4. 配置settings.py
4.1 添加主机的IP地市
将
ALLOWED_HOSTS = []
改为如下:
ALLOWED_HOSTS = ['192.168.117.30']
4.2 添加APP(mysite)模块
将
INSTALLED_APPS = [
    'django.contrib.admin',
    'django.contrib.auth',
    'django.contrib.contenttypes',
    'django.contrib.sessions',
    'django.contrib.messages',
    'django.contrib.staticfiles',
]
改为如下:
INSTALLED_APPS = [
    'django.contrib.admin',
    'django.contrib.auth',
    'django.contrib.contenttypes',
    'django.contrib.sessions',
    'django.contrib.messages',
    'django.contrib.staticfiles',
    'mysite',
]
4.3 修改语言和时区
将
LANGUAGE_CODE = 'en-us'
TIME_ZONE = 'UTC'

改为如下:
ANGUAGE_CODE = 'zh_hans'
TIME_ZONE = 'Aisa/Shanghai'
5. APP项目所需的数据库的中介文件
执行以下命令,Django会默认使用SQLite存储数据库(简化文件型SQL关系数据库系统)。执行migrate命令,也会创建db.sqlite3文件。
(MyDjango) [python@PYMY-DDB easyblog]$ python manage.py migrate
Operations to perform:
  Apply all migrations: admin, auth, contenttypes, sessions
Running migrations:
  Applying contenttypes.0001_initial... OK
  Applying auth.0001_initial... OK
  Applying admin.0001_initial... OK
  Applying admin.0002_logentry_remove_auto_add... OK
  Applying contenttypes.0002_remove_content_type_name... OK
  Applying auth.0002_alter_permission_name_max_length... OK
  Applying auth.0003_alter_user_email_max_length... OK
  Applying auth.0004_alter_user_username_opts... OK
  Applying auth.0005_alter_user_last_login_null... OK
  Applying auth.0006_require_contenttypes_0002... OK
  Applying auth.0007_alter_validators_add_error_messages... OK
  Applying auth.0008_alter_user_username_max_length... OK
  Applying sessions.0001_initial... OK
此网站添加的数据都会放在db.sqlite3文件!
[python@PYMY-DDB easyblog]$ ls -l
total 64
-rw-r--r-- 1 python python 41984 Feb 24 22:48 db.sqlite3
drwxrwxr-x 2 python python  4096 Feb 26 22:31 easyblog
-rwxrwxr-x 1 python python   806 Feb 24 21:31 manage.py
drwxrwxr-x 3 python python  4096 Feb 26 22:30 mysite
6. 测试网站的IP和端口是否OK
(MyDjango) [python@PYMY-DDB easyblog]$python manage.py runserver 192.168.117.30:8000

注意:默认连接:python manage.py runserver -> http://127.0.0.1:8000
打开网页,检测IP和端口是否成功!
7. 定义数据类型(models.py)
默认情况下,Django的数据库是以Model方式操作,在程序中不直接面对数据库,而是以class类先创建好Model,然后通过操作Model达到操作数据库的目的。好处是日后如需更换数据库,无须修改大量程序代码。
(MyDjango) [python@PYMY-DDB mysite]$ pwd
/home/python/Myproject/easyblog/mysite
(MyDjango) [python@PYMY-DDB mysite]$ cat models.py
from django.db import models
from django.utils import timezone
#Create your models here.

class Post(models.Model):
    title = models.CharField(max_length=200)
    slug = models.CharField(max_length=200)
    body = models.TextField()
    pub_date = models.DateTimeField(default=timezone.now)

    class Meta:
        ordering = ('-pub_date',)

    def __unicode__(self):
        return self.title

# title 显示 文章的标题
# slug 显示文章的网址
# body显示文章的内容
# pub_date是本文的发表时间
# __unicode__ 以文章标题作为显示的内容,增加操作过程中的可读性,使用  __unicode__ 而不是str,让这个标题可以正确地支持中文标题。
# pub_date,以timezone.now的方式让其自动产生,需要pytz的模块(pip install pytz)
8. 创建数据库和同步Django间的中介文件
执行"python manage.py makemigrations mysite",让此模型生效,执行“python manage.py migrate”,同步更新数据库内容。
(MyDjango) [python@PYMY-DDB easyblog]$ python manage.py makemigrations mysite
Migrations for 'mysite':
  mysite/migrations/0001_initial.py
    - Create model Post
(MyDjango) [python@PYMY-DDB easyblog]$ python manage.py migrate
Operations to perform:
  Apply all migrations: admin, auth, contenttypes, mysite, sessions
Running migrations:
  Applying mysite.0001_initial... OK
9. 启动 admin 的管理界面
(MyDjango)[python@PYMY-DDB easyblog]$ python manage.py createsuperuser
Username (leave blank to use 'python'): admin
Email address:
Password:        -- 密码:"admin" 密码要八位数
Password (again):
This password is too short. It must contain at least 8 characters.
This password is too common.
Password:        --  密码:"python1234" ,PASS!
Password (again):
Superuser created successfully.
10. 将Post纳入管理,修改admin.py
1)导入Post类,然后通过admin.site.register注册。完成设置,通过打开http://192.168.117.30:8000,可以看到登陆页面。
2)PostAdmin类让页面显示标题,链接和日期
(MyDjango) [python@PYMY-DDB mysite]$ pwd
/home/python/Myproject/easyblog/mysite

(MyDjango) [python@PYMY-DDB mysite]$ cat admin.py
# -*- coding: utf-8 -*-
from __future__ import unicode_literals

from django.contrib import admin
from .models import Post

# Register your models here.


class PostAdmin(admin.ModelAdmin):
    list_display = ('title','slug','pub_date')

admin.site.register(Post,PostAdmin)
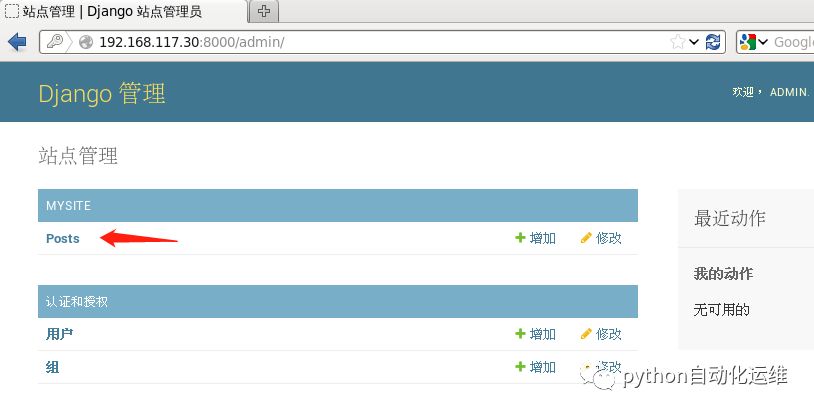
1)打开网页http://192.168.117.30:8000/admin/,登陆!

2)Posts页面,这是一个数据库管理页面,第一次进入Posts管理页面是没有任何内容的!
3)向Posts增加数据
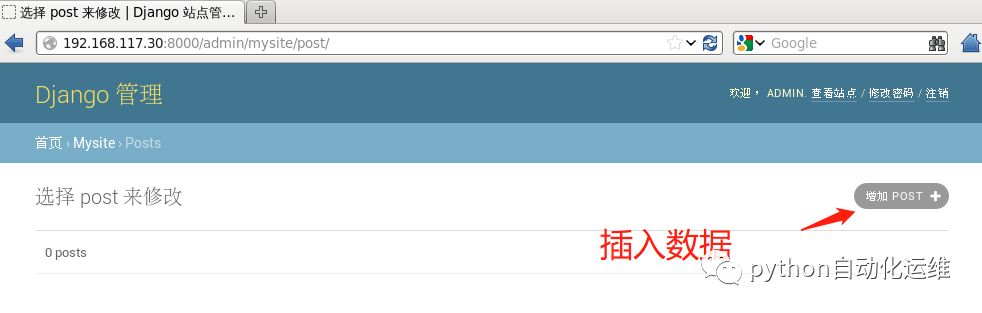
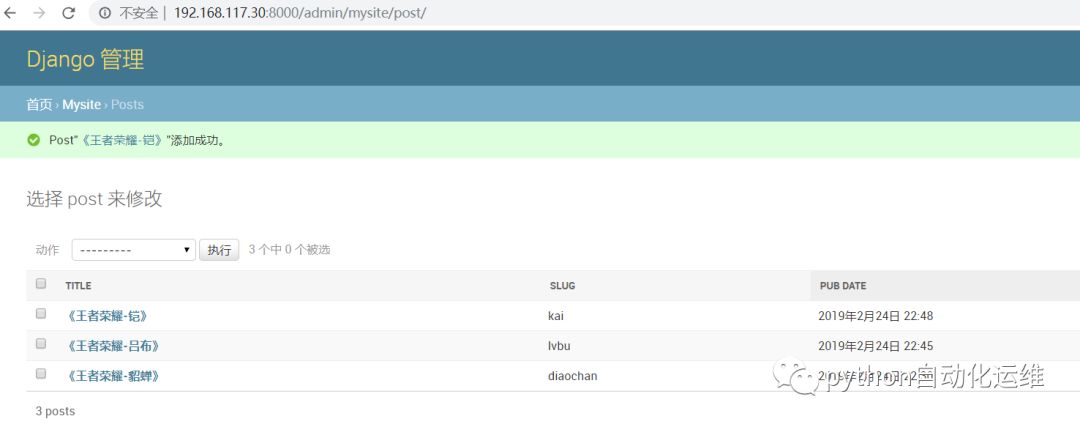
4)增加《王者荣耀-貂蝉》的数据,如此类推增加吕布和铠,slug要用英文或者数字。

5)查看Posts的页面(共新增3组数据)
11. urls.py 负责网站和程序间的对应工作
"^"表示字符串开头, "$"表示字符串结尾。"^$"指的是根网址,就会调用homepage函数。
(MyDjango) [python@PYMY-DDB easyblog]$ cat urls.py
from django.conf.urls import include,url
from django.contrib import admin
from mysite.views import homepage

urlpatterns = [
    url(r'^$', homepage),
    url(r'^admin/', include(admin.site.urls)),
]13.  创建网页输出模板 templates
12. 修改settings.py中的TEMPLATES
如何把拿到的数据进行排版下,变得更加美观,那就是通过template模板。以.html的文件形式存储在templates目录。
12.1 新建templates目录
(MyDjango) [python@PYMY-DDB easyblog]$ pwd
/home/python/Myproject/easyblog
(MyDjango) [python@PYMY-DDB easyblog]$ mkdir templates/
12.2 修改DIRS内容,新增templates目录
TEMPLATES = [
    {
        'BACKEND': 'django.template.backends.django.DjangoTemplates',
        'DIRS': [os.path.join(BASE_DIR,'templates')],
        'APP_DIRS': True,
        'OPTIONS': {
            'context_processors': [
                'django.template.context_processors.debug',
                'django.template.context_processors.request',
                'django.contrib.auth.context_processors.auth',
                'django.contrib.messages.context_processors.messages',
            ],
        },
    },
]
13. 修改views.py
views.py是负责如何把这些数据取出来,如何存进去等程序逻辑。
1)用Post.objects.all()取得所有数据项。
2)当网站有数据需要输出的时候,则通过渲染函数(render,或者网页显示)把数据存放到指定的位置中,得到的结果再交给HttpResponse输出给浏览器。
3)使用locals()函数把当前内存中的局部变量使用字典打包起来,可以在.html模板中接收到所有的局部变量。
(MyDjango) [python@PYMY-DDB mysite]$ cat views.py

# -*- coding: utf-8 -*-
from __future__ import unicode_literals
from django.template.loader import get_template
from django.shortcuts import render
from django.http import HttpResponse
from .models import Post
from datetime import datetime

# Create your views here.
def homepage(request):
    template = get_template('index.html')
    posts = Post.objects.all()
    now = datetime.now()
    html = template.render(locals())
    return HttpResponse(html)
14. 创建index.html模板
把第13步骤,接收到的局部变量posts和now都放在index.html中使用。
(MyDjango) [python@PYMY-DDB templates]$ cat index.html
<!DOCTYPE html>
<html lang="en">
<head>
    <meta charset="UTF-8">
    <title>
        欢迎光临我的博客
    </title>
</head>
<body>
    <h1>
        欢迎光临我的博客
    </h1>
    <hr>
    {{posts}}
    <hr>
    <h3> 现在时刻: {{ now }} </h3>
</body>
</html>
15. 查看页面展示效果
03
微优化[入门版]博客
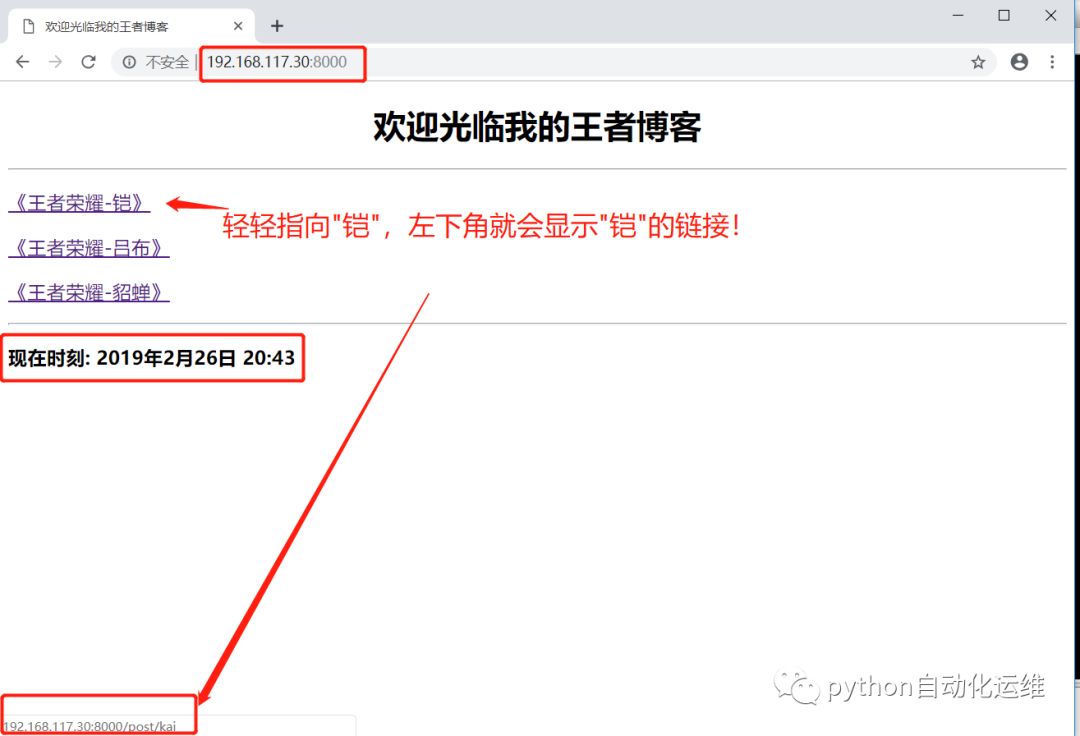
1. 修改index.html模板
1)显示标题。
2)每个标题制作一个链接(slug),放在post/下。
3)单击链接时,才会打开另外一个页面,显示该文章的内容。
4){% for %}和{% endfor %}成对使用,将post.slug和post.title循环取出。
(MyDjango) [python@PYMY-DDB templates]$ cat index.html

<!DOCTYPE html>
<html>
<head>
    <meta charset="UTF-8">
    <title>
        欢迎光临我的王者博客
    </title>
</head>
<body>
        <h1 align="center">
                欢迎光临我的王者博客
        </h1>
        <hr>
        {% for post in posts %}
            <p style='font-family:微软雅黑;font-size:14pt;font-weight:blod;'>
                <a href='/post/{{ post.slug }}' > {{ post.title }} </a>
            </p>
        {% endfor %}
        <hr>
        <h3> 现在时刻: {{ now }} </h3>
</body>
</html>
2. 修改urls.py
1)'^post/(\w+)$',把所有post/开头的网址后面的字符串都找出来当作第2个参数(第一个参数是request)传送给showpost函数。要记得在urls.py导入showpost函数。
(MyDjango) [python@PYMY-DDB easyblog]$ cat urls.py

from django.conf.urls import url, include
from django.contrib import admin

from mysite.views import homepage,showpost

urlpatterns = [
    url(r'^$', homepage),
    url(r'^post/(\w+)$', showpost),
    url(r'^admin/', include(admin.site.urls)),
]
3. 修改views.py
1)views.py新建showpost函数处理接收到的参数。
2)post = Post.objects.get(slug=slug)搜索文章。
3)redirect('/')的方式是直接返回首页。
(MyDjango) [python@PYMY-DDB easyblog]$ cat views.py

# -*- coding: utf-8 -*-
from __future__ import unicode_literals
from django.template.loader import get_template
from django.shortcuts import render
from django.shortcuts import redirect
from django.http import HttpResponse
from .models import Post
from datetime import datetime


# Create your views here.
def homepage(request):
        template = get_template('index.html')
        posts = Post.objects.all()
        now = datetime.now()
        html = template.render(locals())
        return HttpResponse(html)


def showpost(request, slug):
    template = get_template('post.html')
    try:
        post = Post.objects.get(slug=slug)
        if post != None:
            html = template.render(locals())
            return HttpResponse(html)
    except:
        return redirect('/')
4. 修改post.html模板
设计post.html和index.html有很多重复的元素。
(MyDjango) [python@PYMY-DDB easyblog]$ cat post.html
<!DOCTYPE html>
<html>
<head>
<meta charset="UTF-8">
<title>
欢迎光临我的王者博客
</title>
</head>
<body>
<h1 align="center">{{ post.title }}
</h1>
<hr>
<p style='font-family:微软雅黑;font-size:12pt;letter-spacing:2pt;'>
{{ post.body }}
</p>
<hr>
<h3 align="center"><a href = '/'>返回首页</a></h3>
</body>
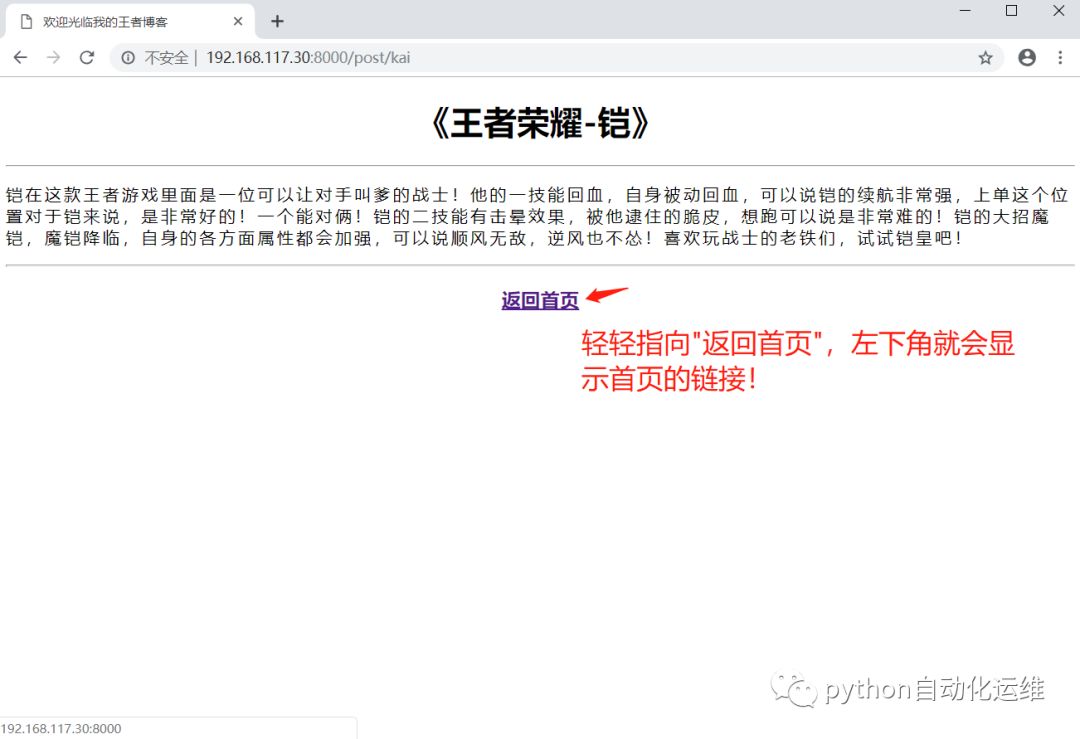
</html>5. 查看页面展示效果
1)首页
2)点击页面
总结
搭建一个入门版的博客是不是很简单呢?只需要修改下数据库的内容加上一些模板就可以搭建专属你的博客啦!细心的读者,有没有发现,优化博客一般是修改这几类文件(views.py,urls.py和html模板)呢?