文章目录
0、前言
注:本文在以下三篇文章的基础上进行的再编写
1、SpringCloud之整体聚合父工程Project
2、SpringCloud之微服务模块的创建
3、SpringCloud之提取公共代码模块
1、搭建第一个Eureka服务
①、简介
Eureka是Netflix开发的服务发现框架,本身是一个基于REST的服务,主要用于定位运行在AWS域中的中间层服务,以达到负载均衡和中间层服务故障转移的目的。SpringCloud将它集成在其子项目spring-cloud-netflix中,以实现SpringCloud的服务发现功能。
②、组成
Eureka包含两个组件:Eureka Server和Eureka Client。
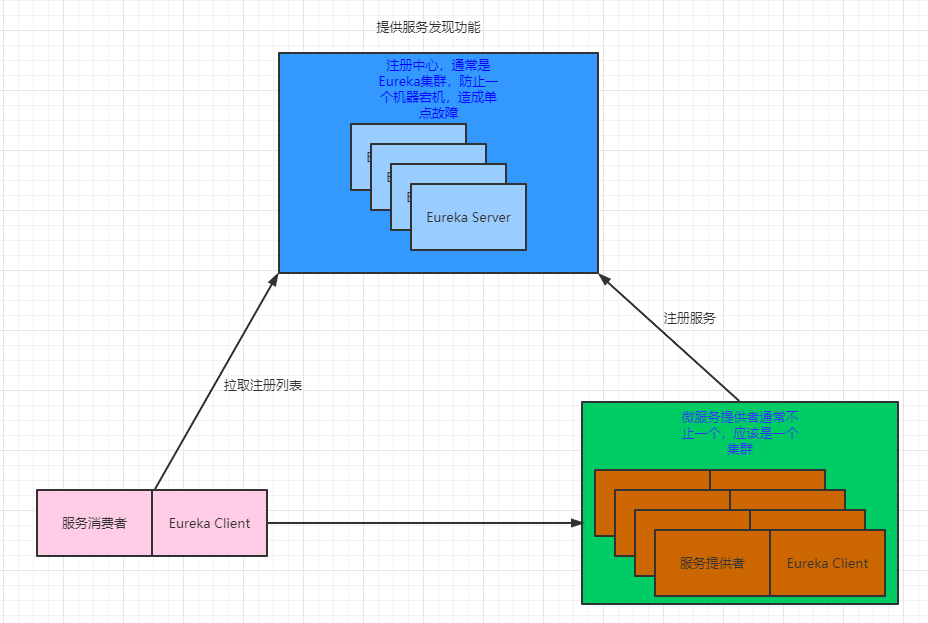
Eureka Server提供服务注册服务,各个节点启动后,会在Eureka Server中进行注册,这样EurekaServer中的服务注册表中将会存储所有可用服务节点的信息,服务节点的信息可以在界面中直观的看到。Eureka Client是一个java客户端,用于简化与Eureka Server的交互,客户端同时也就是一个内置的、使用轮询负载算法的负载均衡器。
在应用启动后,将会向
Eureka Server发送心跳,默认周期为30秒,如果Eureka Server在多个心跳周期内没有接收到某个节点的心跳,Eureka Server将会从服务注册表中把这个服务节点移除(默认90秒)。
Eureka Server之间通过复制的方式完成数据的同步,Eureka还提供了客户端缓存机制,即使所有的Eureka Server都挂掉,客户端依然可以利用缓存中的信息消费其他服务的API。综上,Eureka通过心跳检查、客户端缓存等机制,确保了系统的高可用性、灵活性和可伸缩性。
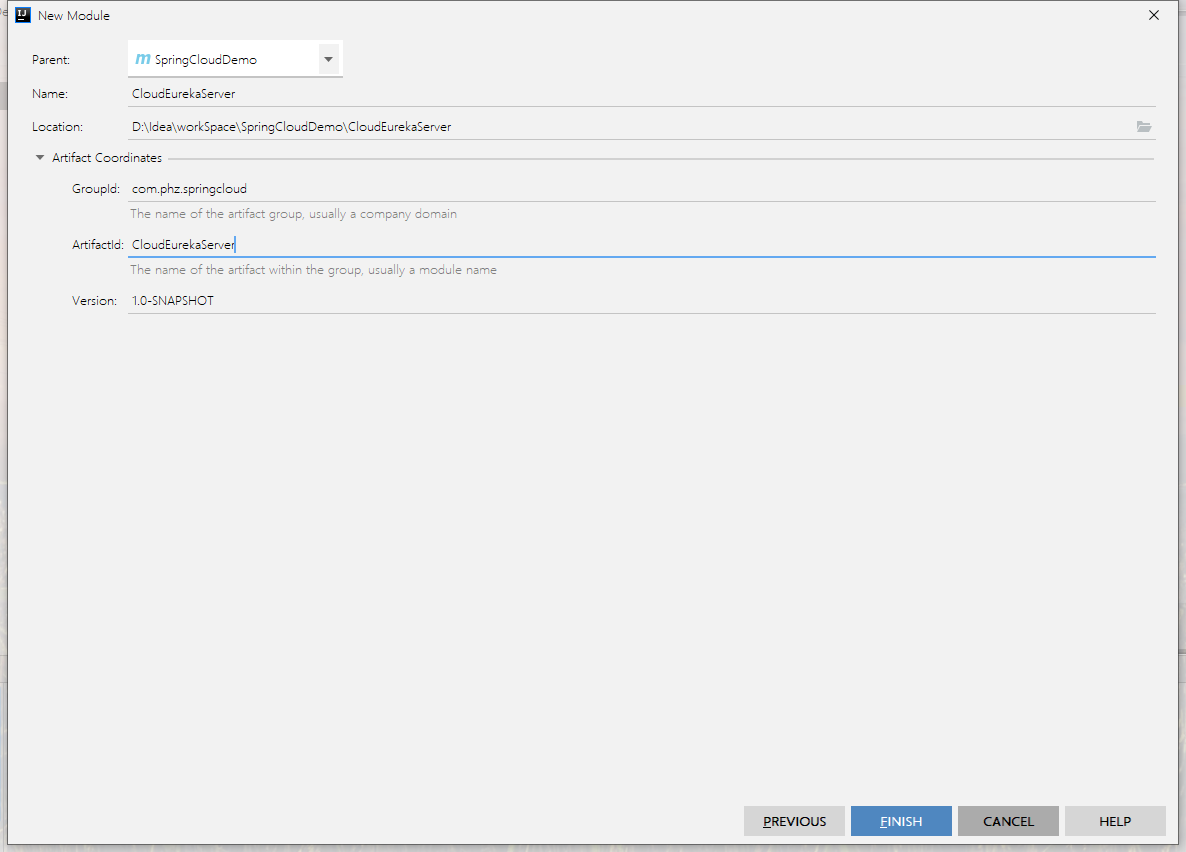
③、创建Eureka Server模块
④、编写POM
注意引入了新的坐标
spring-cloud-starter-netflix-eureka-server,且后缀是一个server,和后面的client做好区分
<?xml version="1.0" encoding="UTF-8"?>
<project xmlns="http://maven.apache.org/POM/4.0.0"
         xmlns:xsi="http://www.w3.org/2001/XMLSchema-instance"
         xsi:schemaLocation="http://maven.apache.org/POM/4.0.0 http://maven.apache.org/xsd/maven-4.0.0.xsd">
    <parent>
        <artifactId>SpringCloudDemo</artifactId>
        <groupId>com.phz.springcloud</groupId>
        <version>1.0-SNAPSHOT</version>
    </parent>
    <modelVersion>4.0.0</modelVersion>

    <artifactId>CloudEurekaServer</artifactId>

    <dependencies>
        <dependency>
            <groupId>org.springframework.cloud</groupId>
            <artifactId>spring-cloud-starter-netflix-eureka-server</artifactId>
        </dependency>
        <dependency>
            <groupId>com.phz.springcloud</groupId>
            <artifactId>CloudAPI</artifactId>
            <version>1.0-SNAPSHOT</version>
        </dependency>
        <dependency>
            <groupId>org.springframework.boot</groupId>
            <artifactId>spring-boot-starter-web</artifactId>
        </dependency>
        <dependency>
            <groupId>org.springframework.boot</groupId>
            <artifactId>spring-boot-starter-actuator</artifactId>
        </dependency>
        <dependency>
            <groupId>org.projectlombok</groupId>
            <artifactId>lombok</artifactId>
        </dependency>
        <dependency>
            <groupId>org.springframework.boot</groupId>
            <artifactId>spring-boot-test</artifactId>
        </dependency>
        <dependency>
            <groupId>junit</groupId>
            <artifactId>junit</artifactId>
            <scope>test</scope>
        </dependency>
    </dependencies>
</project>
⑤、YML
server:
  port: 7001

eureka:
  instance:
    hostname: localhost #eureka服务端的实例名称
  client:
    #false表示不想服务中心注册自己
    register-with-eureka: false
    #false表示自己就是注册中心,我的职责就是维护服务实例,并不需要去检索服务
    fetch-registry: false
    service-url:
      #设置与Eureka Server交互的地址查询服务和注册服务都需要依赖这个地址
      defaultZone: http://${

    eureka.instance.hostname}:${

    server.port}/eureka/
⑥、主启动
注册中心的主启动类要加上
@EnableEurekaServer注解,而服务模块主启动上要加上@EnableEurekaClient注解
/**
 * @author PengHuAnZhi
 * @createTime 2021/2/2 15:31
 * @projectName SpringCloudDemo
 * @className EurekaServerMain7001.java
 * @description TODO
 */
@SpringBootApplication
@EnableEurekaServer
public class EurekaMain7001 {


    public static void main(String[] args) {


        SpringApplication.run(EurekaMain7001.class, args);
    }
}
⑦、测试
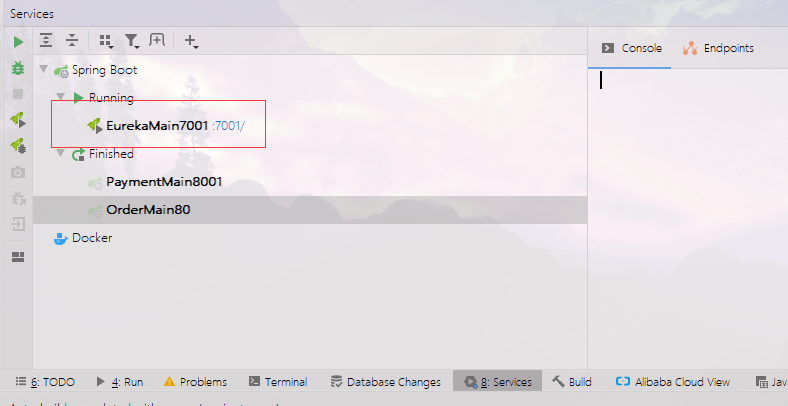
启动
EurekaServer
浏览器访问
7001端口
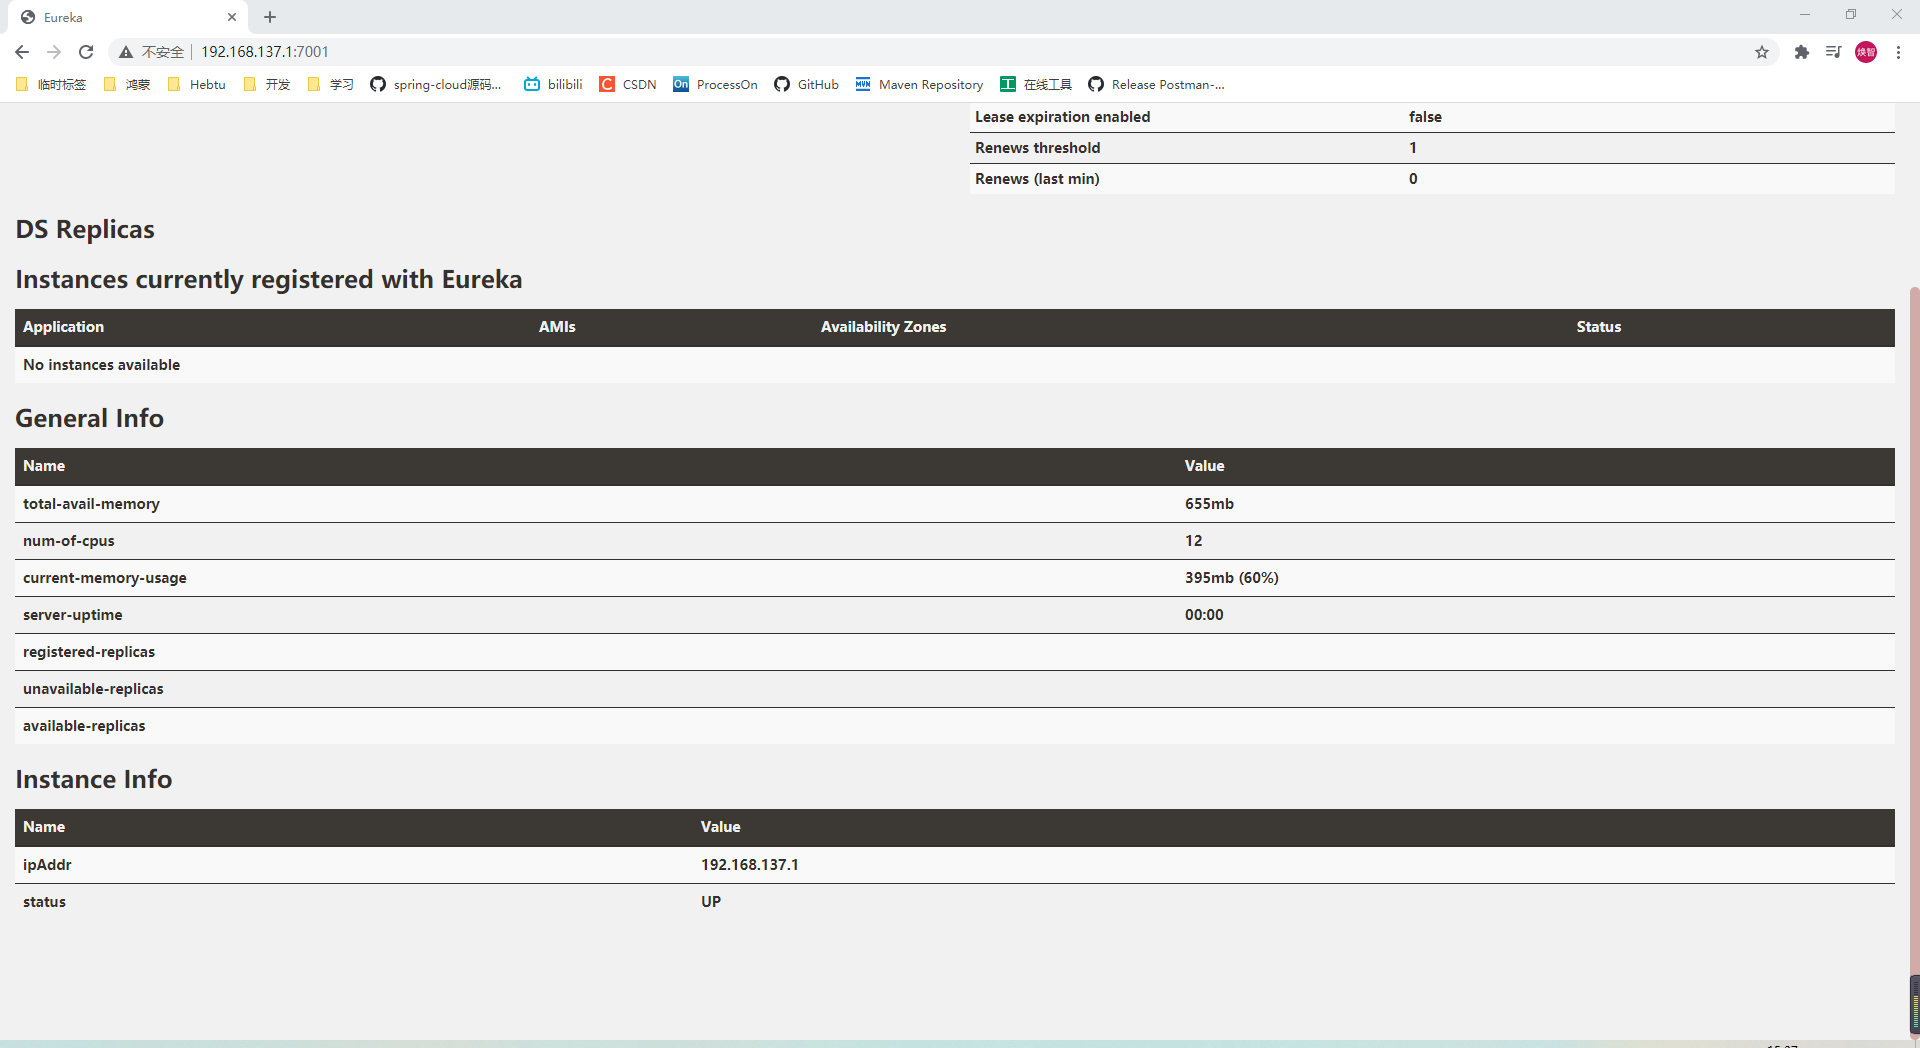
出现这个页面就说明
Eureka服务启动成功了,接下来就开始注册微服务了
2、注册服务
①服务提供者
Ⅰ、添加依赖
与
EurekaServer做好区分,后缀是client
<dependency>
    <groupId>org.springframework.cloud</groupId>
    <artifactId>spring-cloud-starter-netflix-eureka-client</artifactId>
</dependency>
Ⅱ、主启动添加注解
同样做好区分,注解为
@EnableEurekaClient
/**
 * @author PengHuAnZhi
 * @createTime 2021/1/31 17:35
 * @projectName SpringCloudDemo
 * @className PaymentMain8001.java
 * @description TODO
 */
@SpringBootApplication
@EnableEurekaClient
public class PaymentMain8001 {


    public static void main(String[] args) {


        SpringApplication.run(PaymentMain8001.class, args);
    }
}
Ⅲ、YML添加配置
新增
eureka配置节点
server:
port: 8001
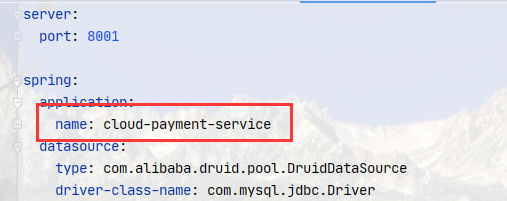
spring:
application:
name: cloud-payment-service
datasource:
type: com.alibaba.druid.pool.DruidDataSource
driver-class-name: com.mysql.jdbc.Driver
url: jdbc:mysql:///cloud?serverTimezone=Asia/Shanghai&useSSL=false&useUnicode=true&characterEncoding=utf8
username: root
password: 123456
eureka:
client:
#表示自己注册进EurekaServer,默认为true
register-with-eureka: true
#表示是否从EurekaServer抓取已有的注册信息,默认为true。单节点无所谓,集群必须设置为true才能配合ribbon使用负载均衡
fetch-registry: true
service-url:
#目标EurekaServer地址
defaultZone: http://localhost:7001/eureka
mybatis:
mapperLocations: classpath:mapper/*.xml
type-aliases-package: com.phz.entities
②、注册服务消费者
步骤与注册服务提供者几乎一致,就不赘述了
Ⅰ、添加依赖
与
EurekaServer做好区分,后缀是client
Ⅱ、主启动添加注解
同样做好区分,注解为
@EnableEurekaClient
Ⅲ、YML添加配置
新增
eureka配置节点
server:
  port: 8002

spring:
  application:
    name: cloud-order-service

eureka:
  client:
    #表示自己注册进EurekaServer,默认为true
    register-with-eureka: true
    #表示是否从EurekaServer抓取已有的注册信息,默认为true。单节点无所谓,集群必须设置为true才能配合ribbon使用负载均衡
    fetch-registry: true
    service-url:
      #目标EurekaServer地址
      defaultZone: http://localhost:7001/eureka
③、测试
注意先运行
EurekaServer,再运行EurekaClient
再次访问
7001端口,发现cloud-payment-service和cloud-order-service服务启动成功

3、本例工作流程
- 先启动
eureka注册中心 - 启动服务提供者
payment支付服务 - 支付服务启动后会把自身信息(比服务地址以别名方式主册进
eureka) - 消费者
order服务在需要调用接口时,使用服务别名去注册中心获取实际的RPC远程调用地址 - 消费者获得调用地址后,底层实际是利用
HttpClient技术实现远程调用 - 消费者获得服务地址后会缓存在本地
jvm内存中,默认每间隔30秒更新—次服务调用地址
至此。单机版
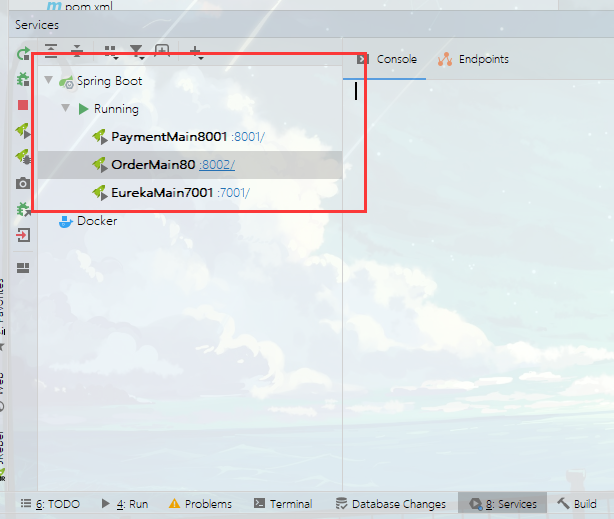
Eureka简单使用已完成,回到文章开头的图片,真正生产环境中,没有一家公司敢配置一个单机版的Eureka,因为如果这台Eureka发生宕机后,会出现单点故障,为了保证服务的高可用,真正的生产环境中都会搭建Eureka集群,实现负载均衡+故障容错。接下来开始介绍Eureka集群的搭建
4、Eureka集群的工作原理
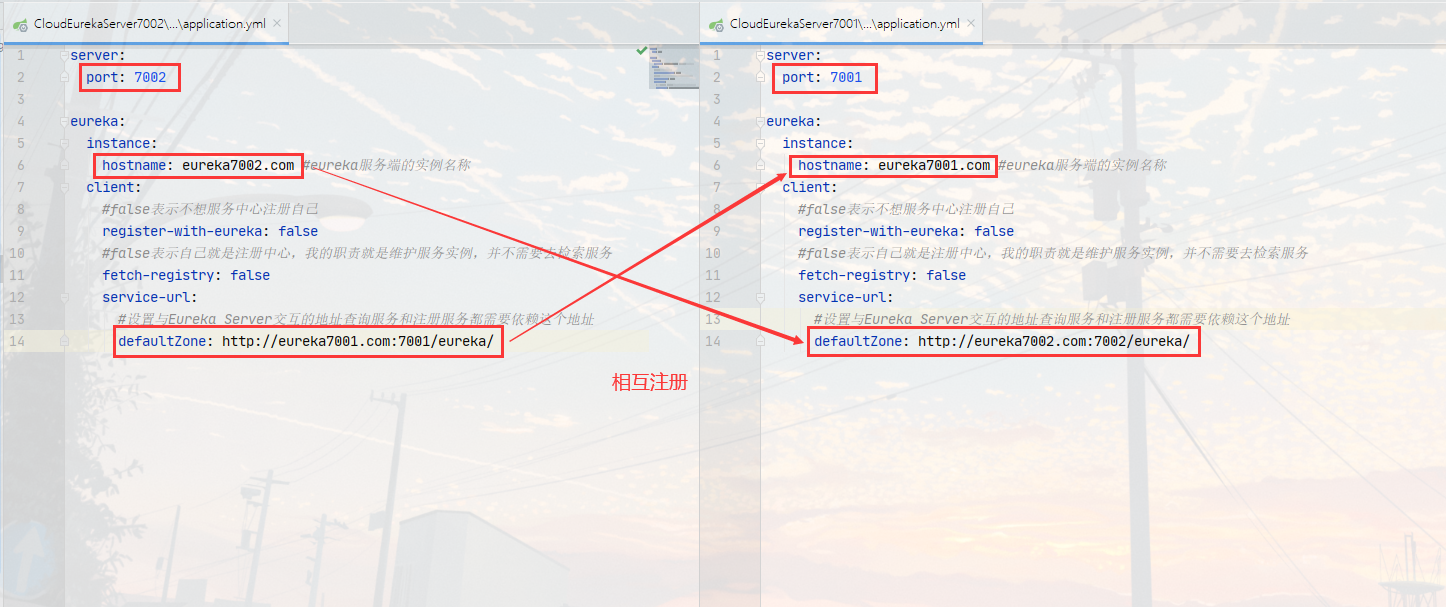
一句话就是:互相注册,相互守望

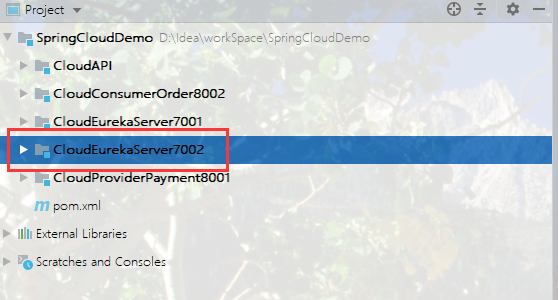
5、创建第二个Eureka Server模块
填坑,第一个
Eureka Server命名后面加个7001
①建module
②POM
复制第一个
Eureka Server的POM文件即可
③修改本地hosts配置文件
第一个
Eureka Server端口号已经使用了localhost了,第二个怎么办呢,现在我们要把两个Eureka Server看作一个整体,都应该通过127.0.0.1来访问,区别只是在于端口号不相同而已,解决办法就是修改系统的hosts配置文件
- 找到
C:\Windows\System32\drivers\etc\hosts文件,打开。
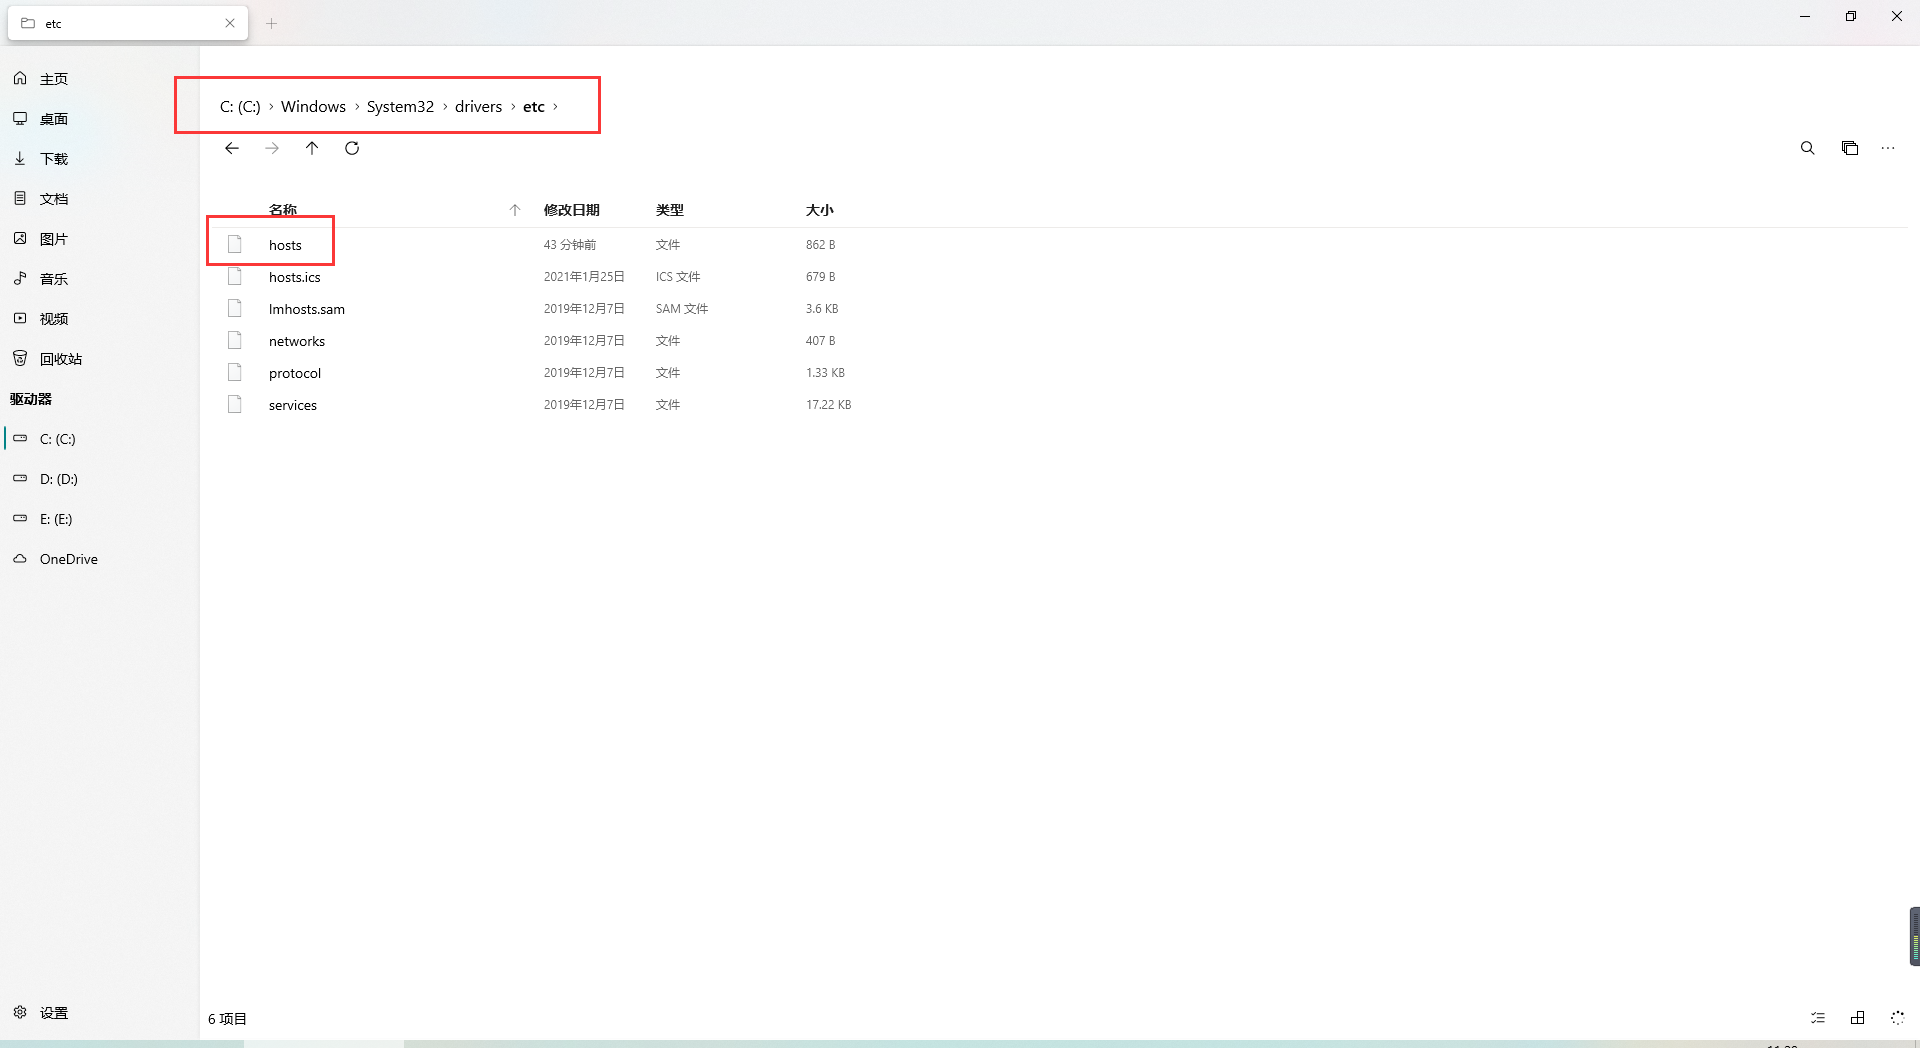
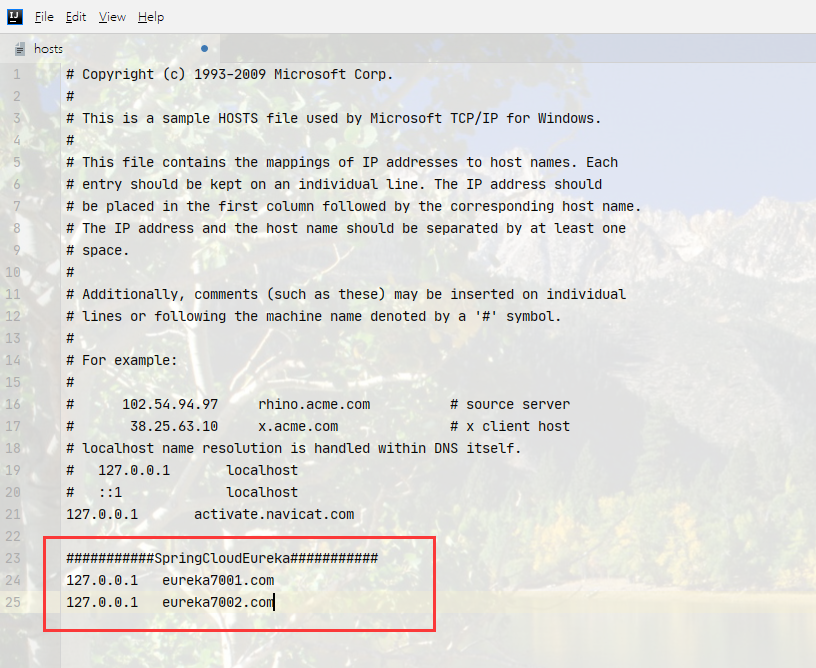
- 添加配置
###########SpringCloudEureka###########
127.0.0.1   eureka7001.com
127.0.0.1   eureka7002.com
④YML
配置文件中
hostname就不能叫localhost了,分别按照如图所示修改两个Eureka Server的YML配置文件
⑤主启动
和第一个Eureka Server一样的步骤创建主启动类
/**
 * @author PengHuAnZhi
 * @createTime 2021/2/3 11:41
 * @projectName SpringCloudDemo
 * @className EurekaMain7002.java
 * @description TODO
 */
@SpringBootApplication
@EnableEurekaServer
public class EurekaMain7002 {


    public static void main(String[] args) {


        SpringApplication.run(EurekaMain7002.class, args);
    }
}
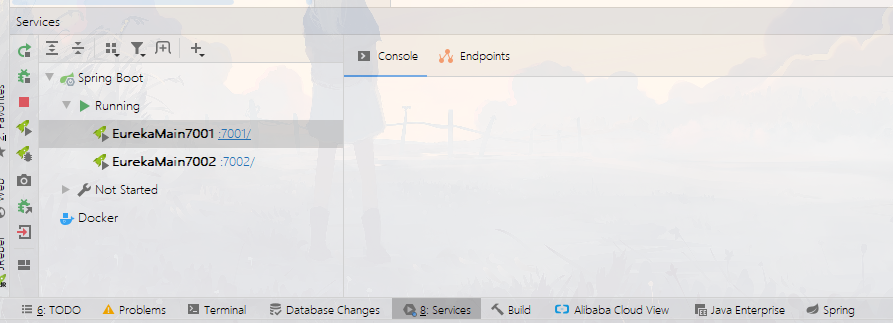
⑥、测试
启动两个
Eureka Server
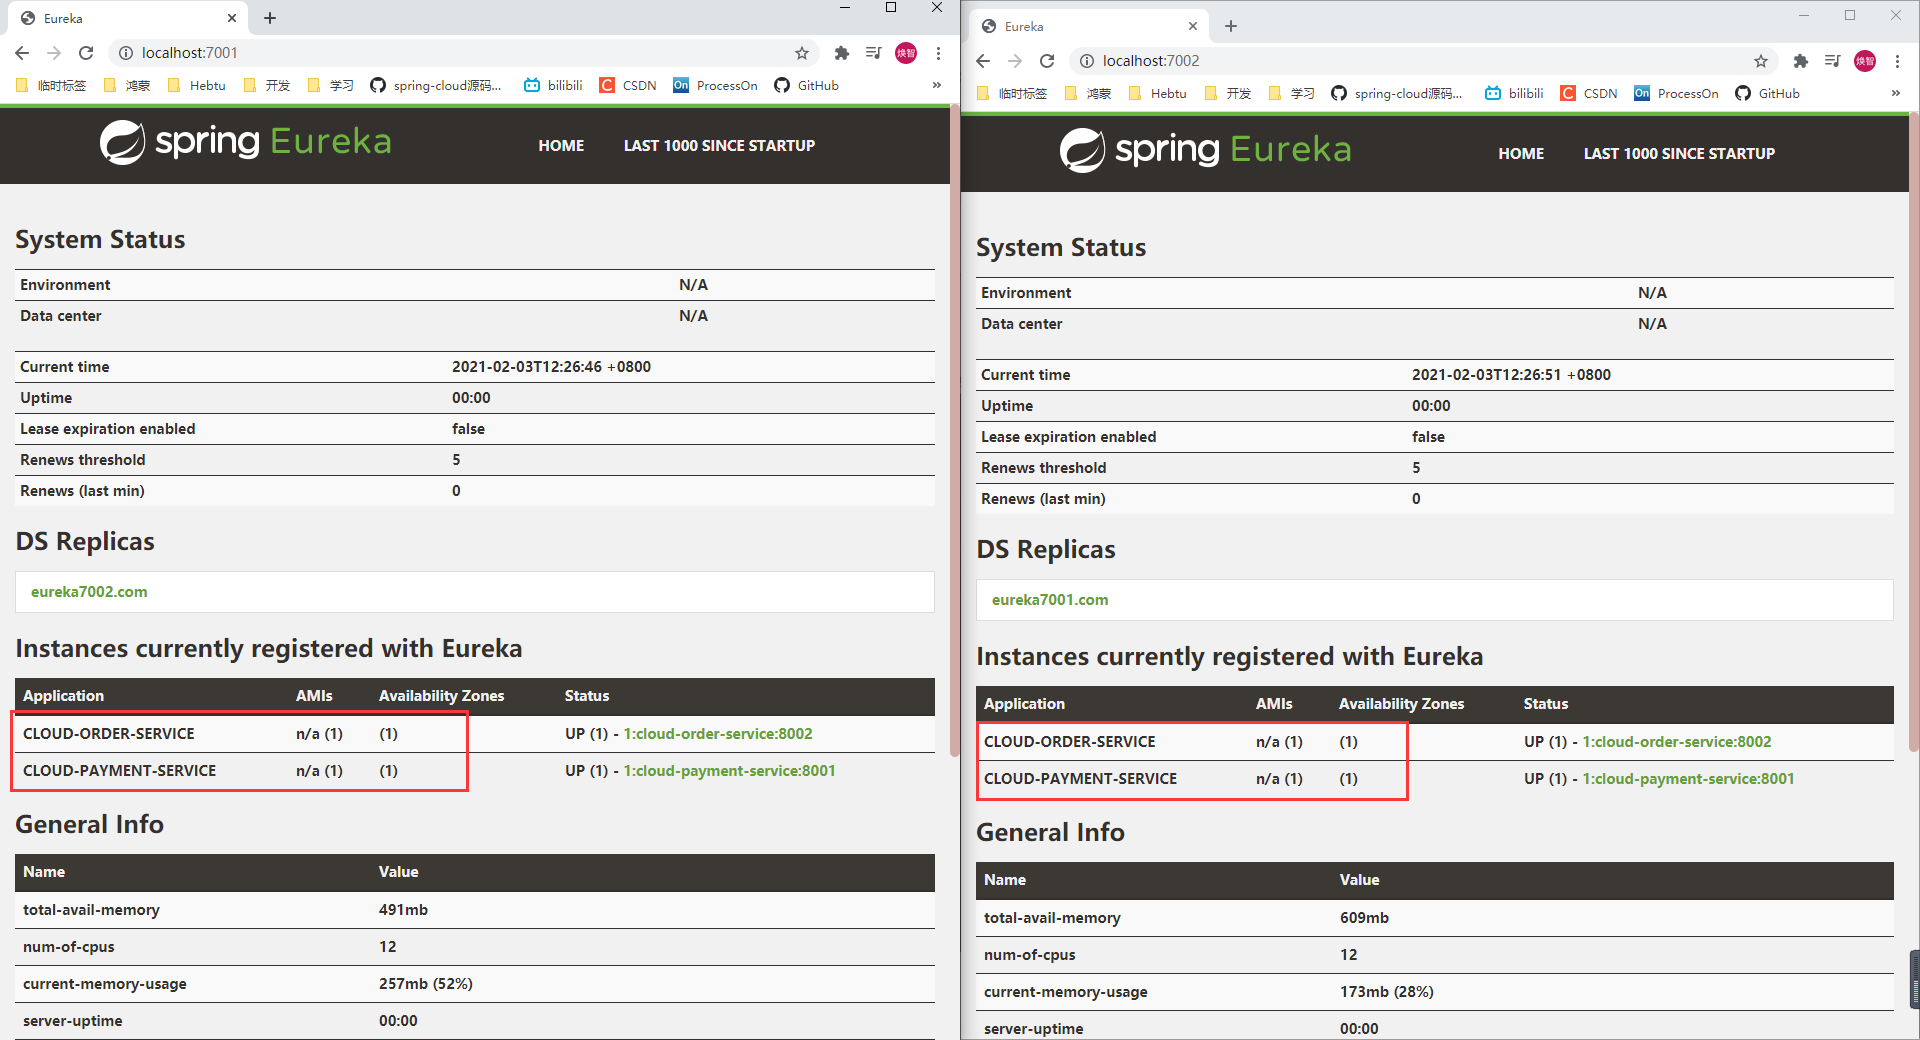
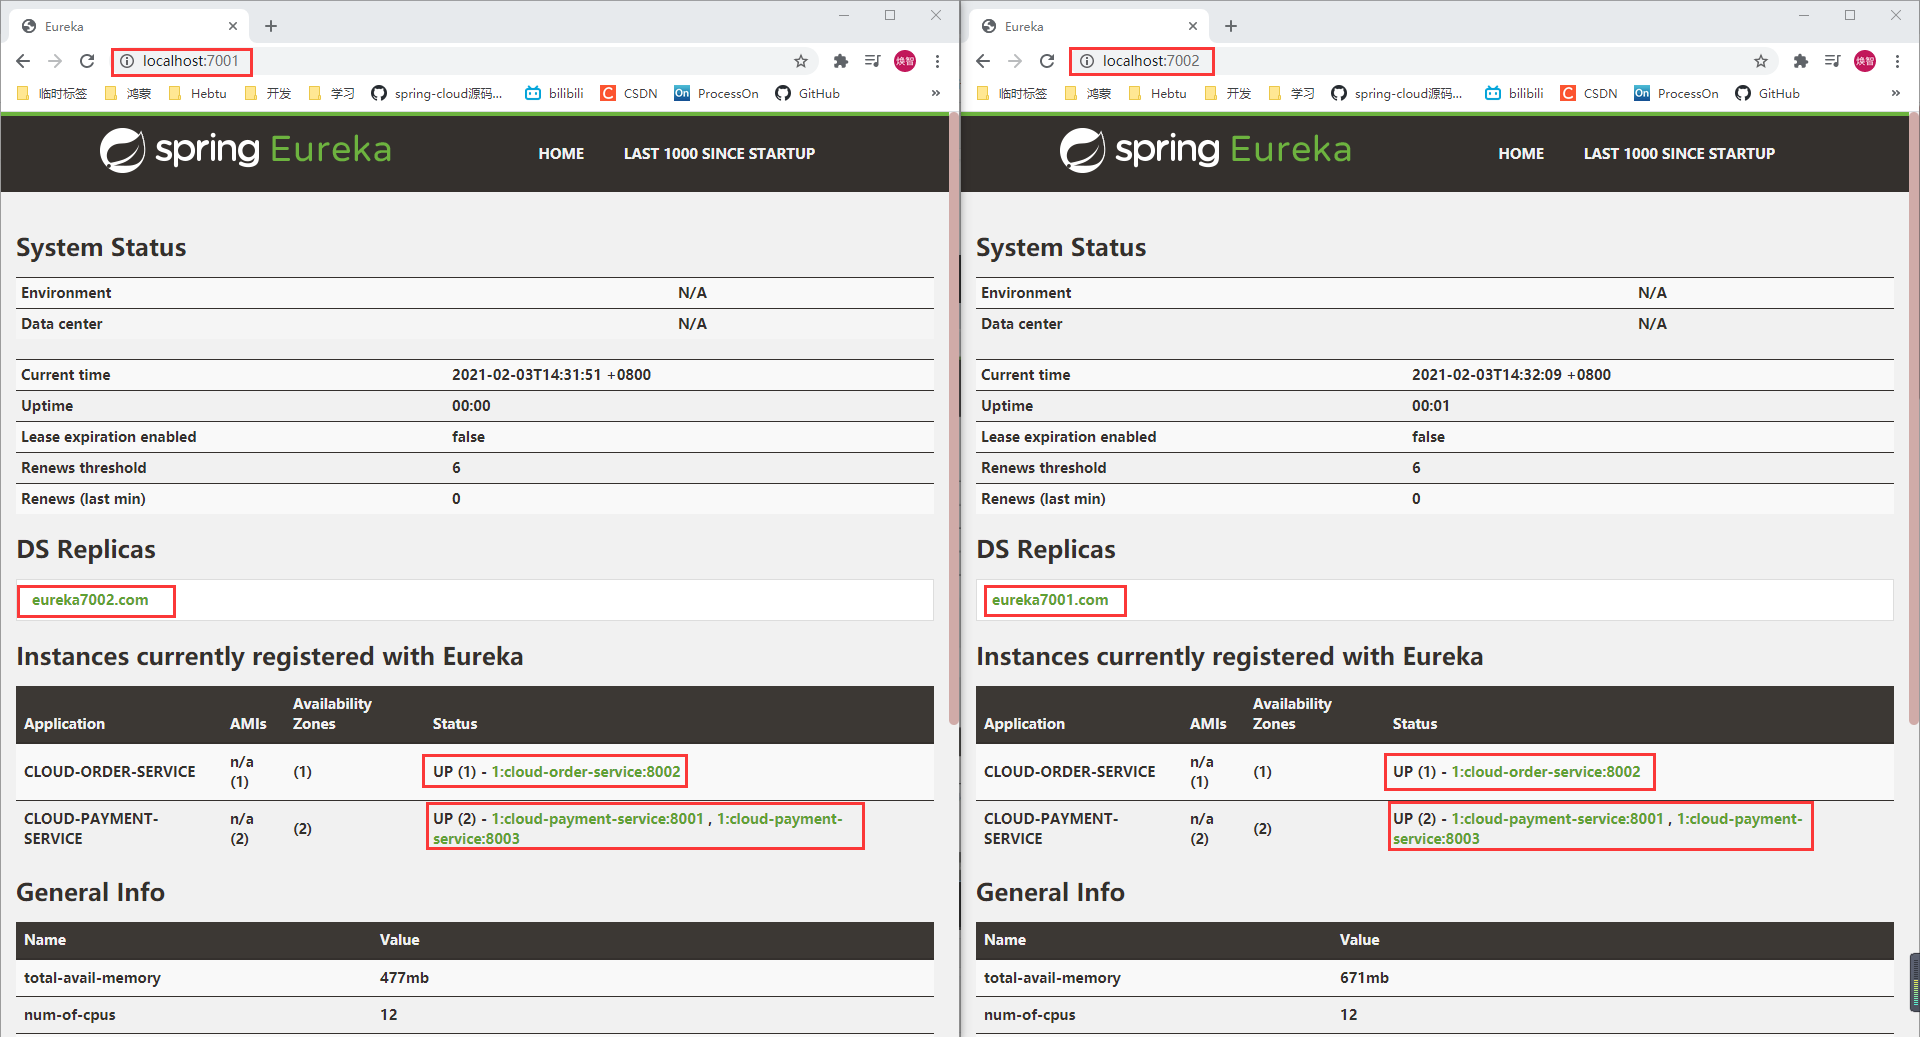
浏览器访问
localhost:7001和localhost:7002
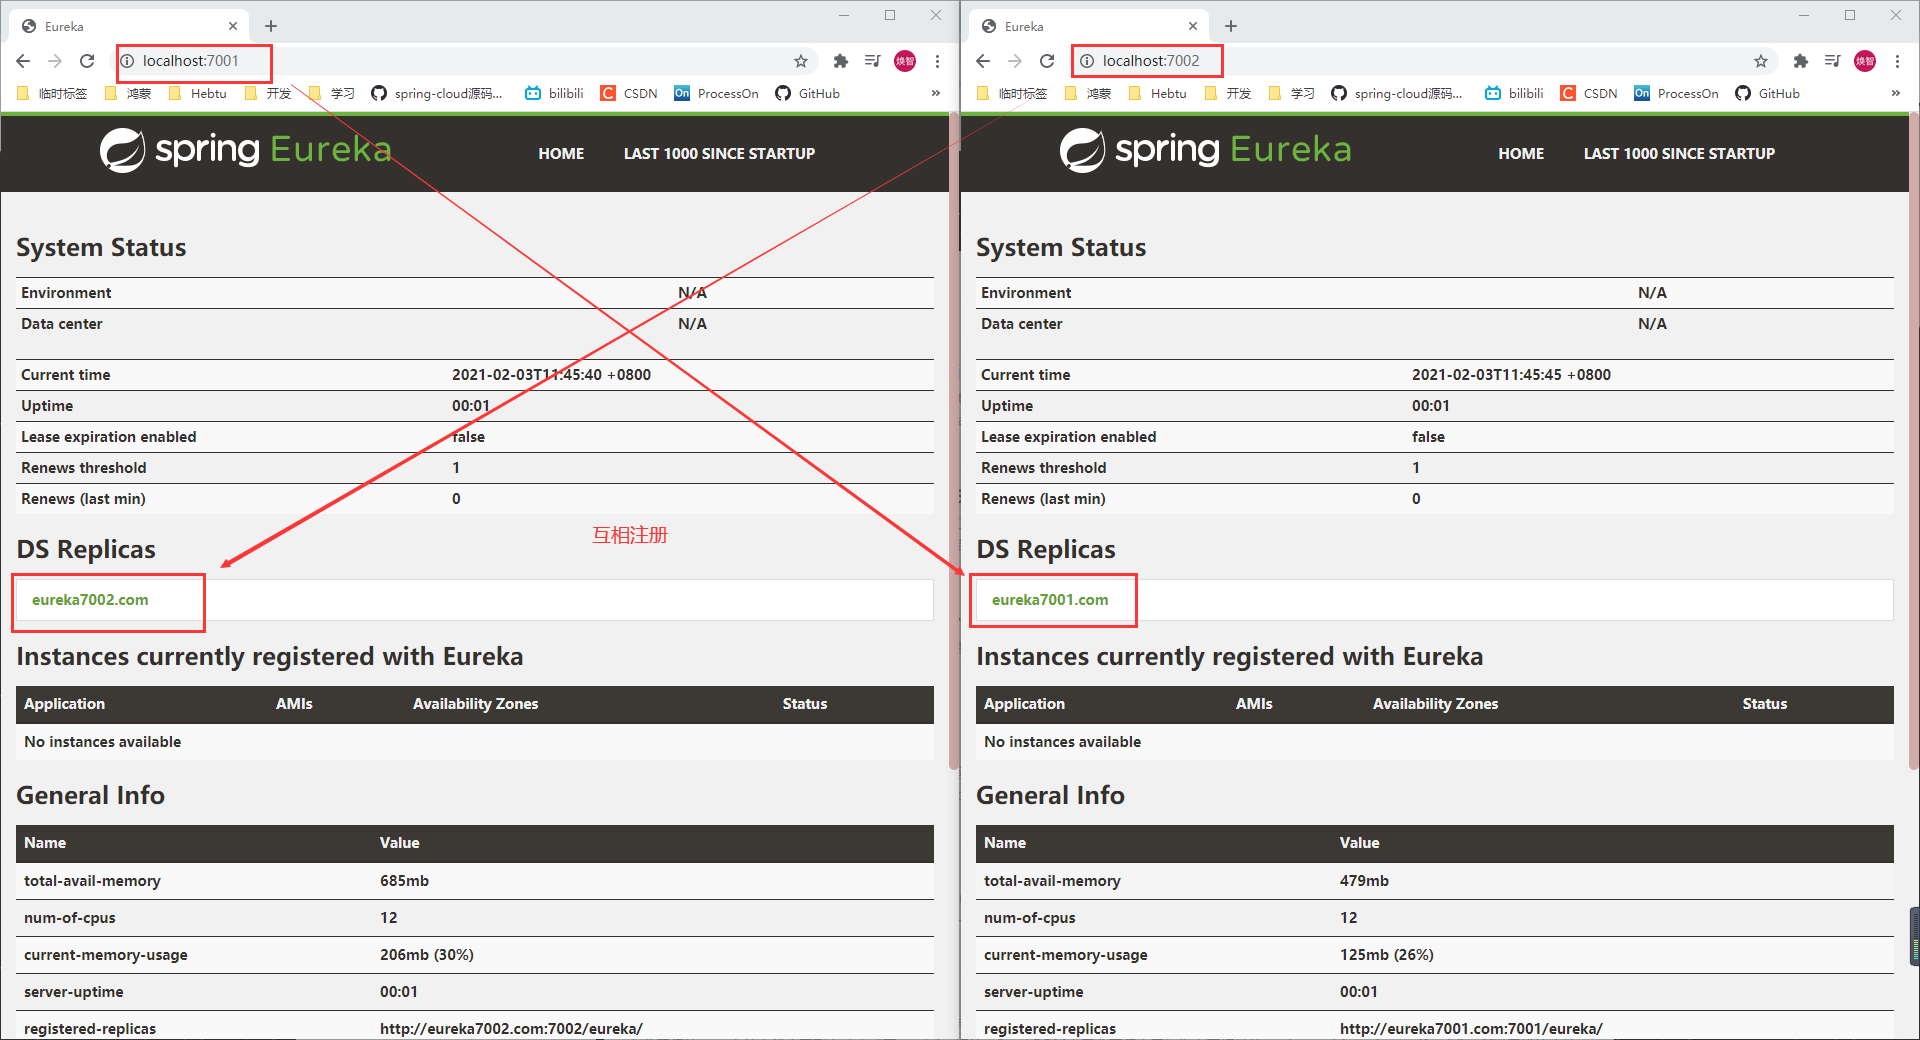
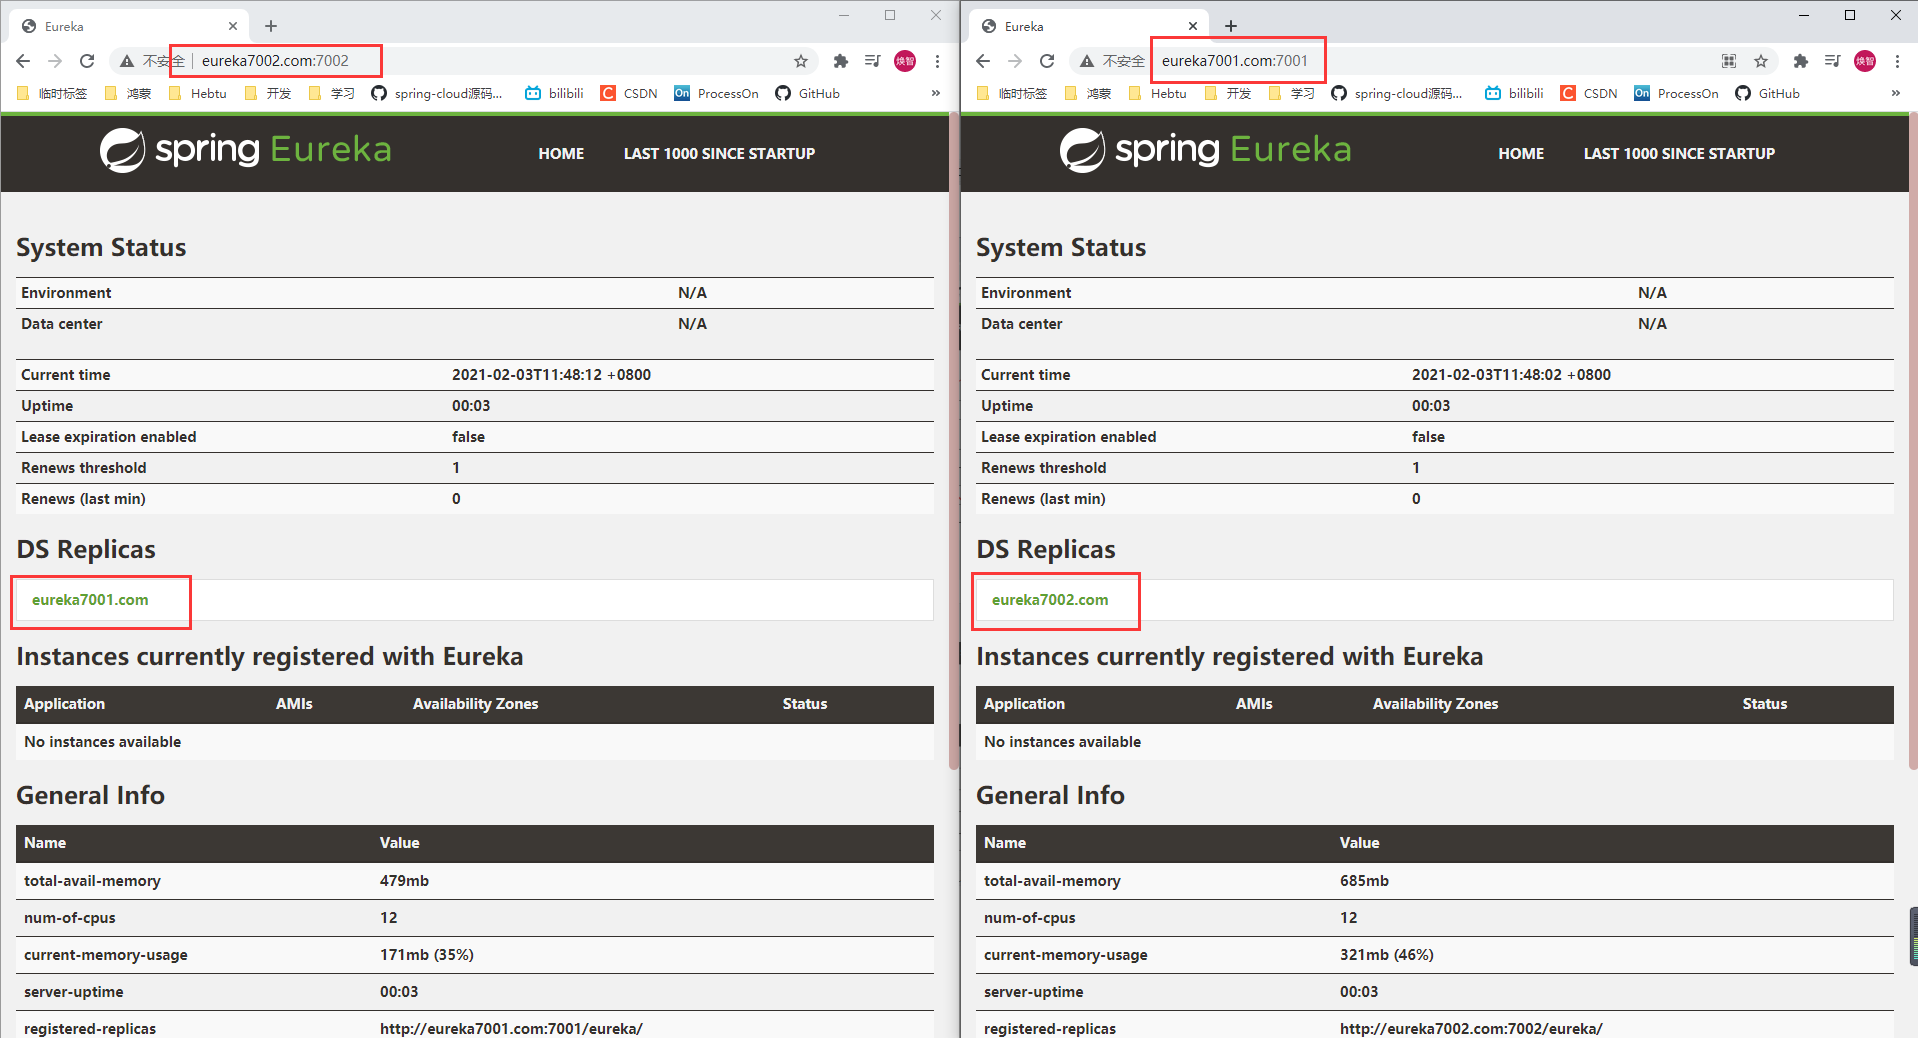
显而易见,访问
http://eureka7001.com:7001/和http://eureka7002.com:7002/等效
6、将所有微服务注册进Eureka集群
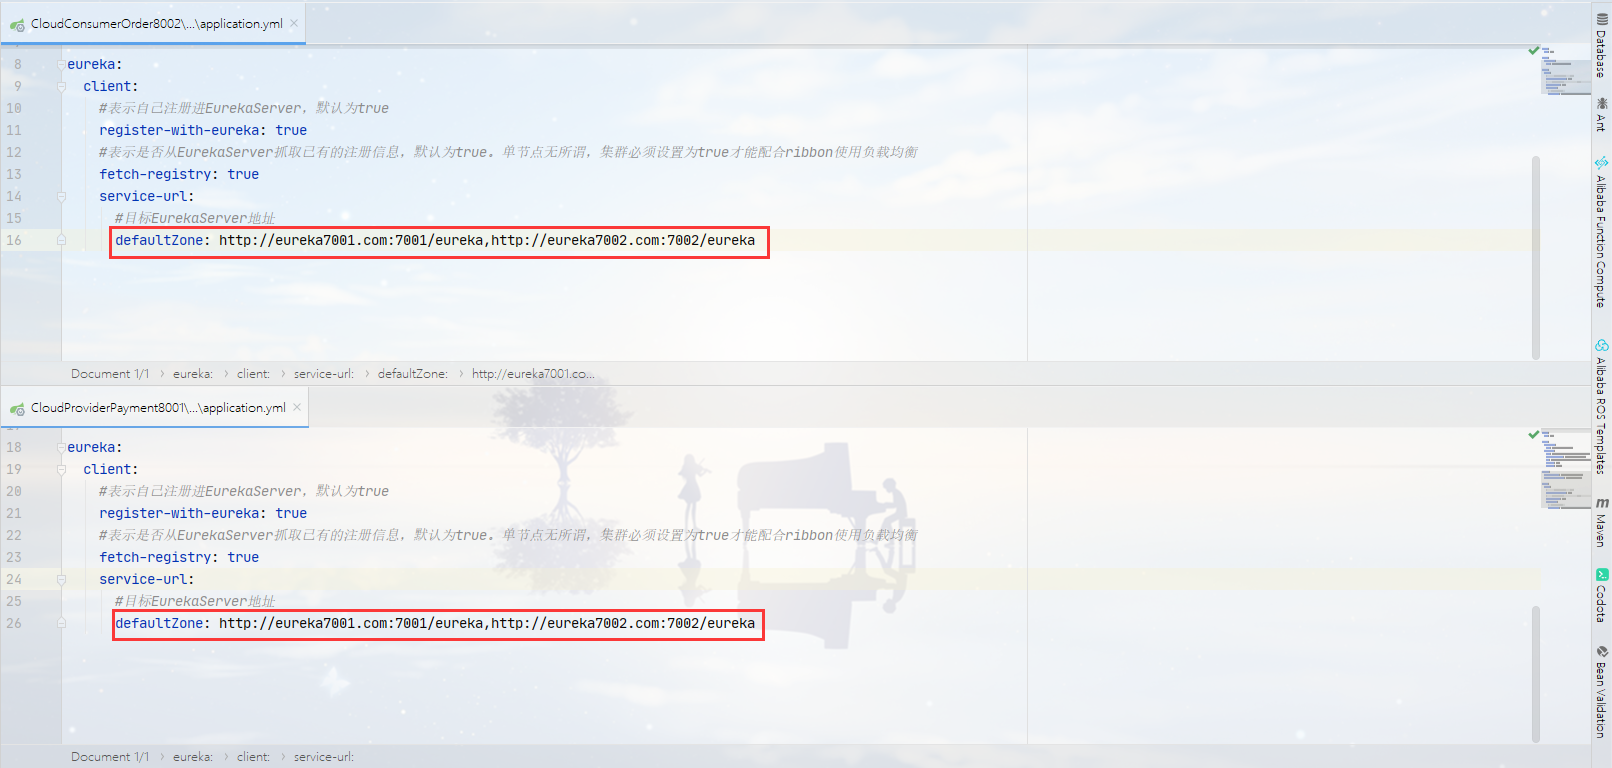
①、修改配置
修改所有微服务配置文件的
defaultZone节点即可
defaultZone: http://eureka7001.com:7001/eureka/,http://eureka7002.com:7002/eureka/
特别注意一点,
defaultZone的链接端口号后面需要跟上eureka,虽然访问的时候不需要加eureka,但是配置必须加上。
defaultZone: http://eureka7001.com:7001/eureka/,http://eureka7002.com:7002/eureka/
如果没有加,实测对于访问获取数据貌似没有影响,可以正常获取数据,但是短暂几秒过后控制台给我报了一个错
也就是说
defaultZone: http://eureka7001.com:7001,http://eureka7002.com:7002
#改为
defaultZone: http://eureka7001.com:7001/eureka/,http://eureka7002.com:7002/eureka/
错误详情
Request execution error. endpoint=DefaultEndpoint{

     serviceUrl='http://eureka7002.com:7002/} exception=Error while extracting response for type [class com.netflix.appinfo.InstanceInfo] and content type [application/json]; nested exception is org.springframework.http.converter.HttpMessageNotReadableException: JSON parse error: Root name 'timestamp' does not match expected ('instance') for type [simple type, class com.netflix.appinfo.InstanceInfo]; nested exception is com.fasterxml.jackson.databind.exc.MismatchedInputException: Root name 'timestamp' does not match expected ('instance') for type [simple type, class com.netflix.appinfo.InstanceInfo]
 at [Source: (PushbackInputStream); line: 1, column: 2] (through reference chain: com.netflix.appinfo.InstanceInfo["timestamp"]) stacktrace=org.springframework.web.client.RestClientException: Error while extracting response for type [class com.netflix.appinfo.InstanceInfo] and content type [application/json]; nested exception is org.springframework.http.converter.HttpMessageNotReadableException: JSON parse error: Root name 'timestamp' does not match expected ('instance') for type [simple type, class com.netflix.appinfo.InstanceInfo]; nested exception is com.fasterxml.jackson.databind.exc.MismatchedInputException: Root name 'timestamp' does not match expected ('instance') for type [simple type, class com.netflix.appinfo.InstanceInfo]
 at [Source: (PushbackInputStream); line: 1, column: 2] (through reference chain: com.netflix.appinfo.InstanceInfo["timestamp"])
	at org.springframework.web.client.HttpMessageConverterExtractor.extractData(HttpMessageConverterExtractor.java:120)
	at org.springframework.web.client.RestTemplate$ResponseEntityResponseExtractor.extractData(RestTemplate.java:1034)
	at org.springframework.web.client.RestTemplate$ResponseEntityResponseExtractor.extractData(RestTemplate.java:1017)
	at org.springframework.web.client.RestTemplate.doExecute(RestTemplate.java:777)
	at org.springframework.web.client.RestTemplate.execute(RestTemplate.java:710)
	at org.springframework.web.client.RestTemplate.exchange(RestTemplate.java:601)
	at org.springframework.cloud.netflix.eureka.http.RestTemplateEurekaHttpClient.sendHeartBeat(RestTemplateEurekaHttpClient.java:99)
	at com.netflix.discovery.shared.transport.decorator.EurekaHttpClientDecorator$3.execute(EurekaHttpClientDecorator.java:92)
	at com.netflix.discovery.shared.transport.decorator.RedirectingEurekaHttpClient.execute(RedirectingEurekaHttpClient.java:91)
	at com.netflix.discovery.shared.transport.decorator.EurekaHttpClientDecorator.sendHeartBeat(EurekaHttpClientDecorator.java:89)
	at com.netflix.discovery.shared.transport.decorator.EurekaHttpClientDecorator$3.execute(EurekaHttpClientDecorator.java:92)
	at com.netflix.discovery.shared.transport.decorator.RetryableEurekaHttpClient.execute(RetryableEurekaHttpClient.java:120)
	at com.netflix.discovery.shared.transport.decorator.EurekaHttpClientDecorator.sendHeartBeat(EurekaHttpClientDecorator.java:89)
	at com.netflix.discovery.shared.transport.decorator.EurekaHttpClientDecorator$3.execute(EurekaHttpClientDecorator.java:92)
	at com.netflix.discovery.shared.transport.decorator.SessionedEurekaHttpClient.execute(SessionedEurekaHttpClient.java:77)
	at com.netflix.discovery.shared.transport.decorator.EurekaHttpClientDecorator.sendHeartBeat(EurekaHttpClientDecorator.java:89)
	at com.netflix.discovery.DiscoveryClient.renew(DiscoveryClient.java:893)
	at com.netflix.discovery.DiscoveryClient$HeartbeatThread.run(DiscoveryClient.java:1457)
	at java.util.concurrent.Executors$RunnableAdapter.call(Executors.java:511)
	at java.util.concurrent.FutureTask.run(FutureTask.java:266)
	at java.util.concurrent.ThreadPoolExecutor.runWorker(ThreadPoolExecutor.java:1149)
	at java.util.concurrent.ThreadPoolExecutor$Worker.run(ThreadPoolExecutor.java:624)
	at java.lang.Thread.run(Thread.java:748)
Caused by: org.springframework.http.converter.HttpMessageNotReadableException: JSON parse error: Root name 'timestamp' does not match expected ('instance') for type [simple type, class com.netflix.appinfo.InstanceInfo]; nested exception is com.fasterxml.jackson.databind.exc.MismatchedInputException: Root name 'timestamp' does not match expected ('instance') for type [simple type, class com.netflix.appinfo.InstanceInfo]
 at [Source: (PushbackInputStream); line: 1, column: 2] (through reference chain: com.netflix.appinfo.InstanceInfo["timestamp"])
	at org.springframework.http.converter.json.AbstractJackson2HttpMessageConverter.readJavaType(AbstractJackson2HttpMessageConverter.java:285)
	at org.springframework.http.converter.json.AbstractJackson2HttpMessageConverter.read(AbstractJackson2HttpMessageConverter.java:243)
	at org.springframework.web.client.HttpMessageConverterExtractor.extractData(HttpMessageConverterExtractor.java:105)
	... 22 more
Caused by: com.fasterxml.jackson.databind.exc.MismatchedInputException: Root name 'timestamp' does not match expected ('instance') for type [simple type, class com.netflix.appinfo.InstanceInfo]
 at [Source: (PushbackInputStream); line: 1, column: 2] (through reference chain: com.netflix.appinfo.InstanceInfo["timestamp"])
	at com.fasterxml.jackson.databind.exc.MismatchedInputException.from(MismatchedInputException.java:63)
	at com.fasterxml.jackson.databind.DeserializationContext.reportPropertyInputMismatch(DeserializationContext.java:1503)
	at com.fasterxml.jackson.databind.DeserializationContext.reportPropertyInputMismatch(DeserializationContext.java:1519)
	at com.fasterxml.jackson.databind.ObjectMapper._unwrapAndDeserialize(ObjectMapper.java:4610)
	at com.fasterxml.jackson.databind.ObjectMapper._readMapAndClose(ObjectMapper.java:4524)
	at com.fasterxml.jackson.databind.ObjectMapper.readValue(ObjectMapper.java:3521)
	at org.springframework.http.converter.json.AbstractJackson2HttpMessageConverter.readJavaType(AbstractJackson2HttpMessageConverter.java:274)
	... 24 more
②、测试
启动
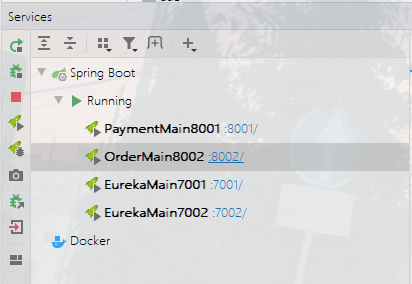
访问
好了,
Eureka Server集群搭建完毕,我们还剩下一个服务提供者集群,继续开整
7、搭建服务提供者集群
也就是创建第二个服务提供者
可采用多实例运行,并配置相应不同的
yml文件即可
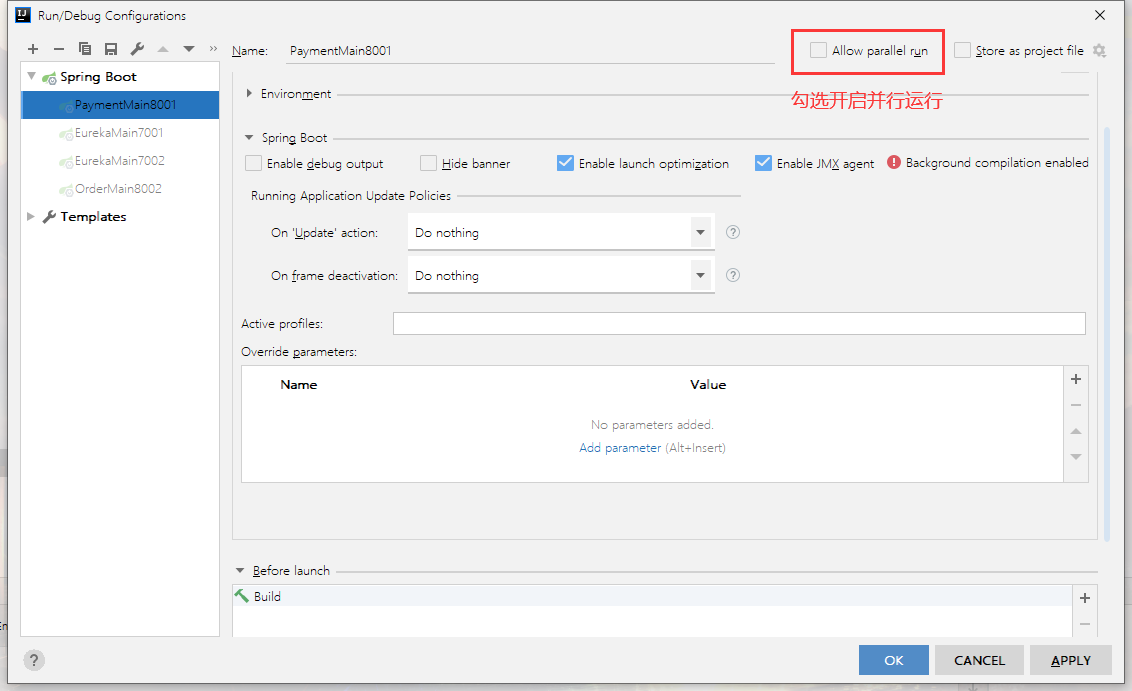
这里为了更加符合真实开发环境的多台
server,我直接创建一个新的module,但是绝大部分代码都是和第一个服务提供者一样。
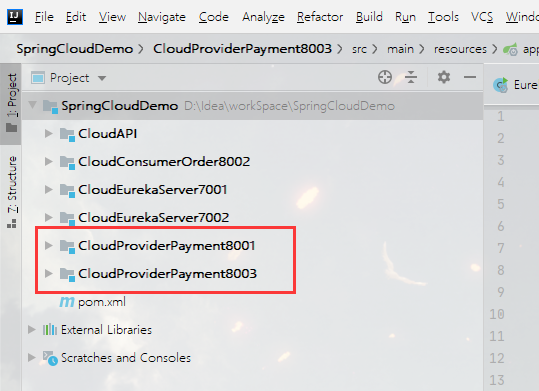
①、建module
仿照
CloudProviderPayment8001,创建新的module命名为CloudProviderPayment8003
②、POM
直接复制,不贴代码了
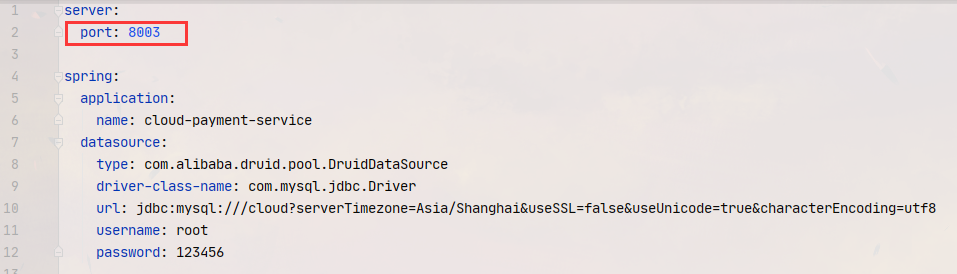
③、YML
直接不知,还是不贴代码了,唯一注意的是端口号改为
8003
④、主启动
还是复制
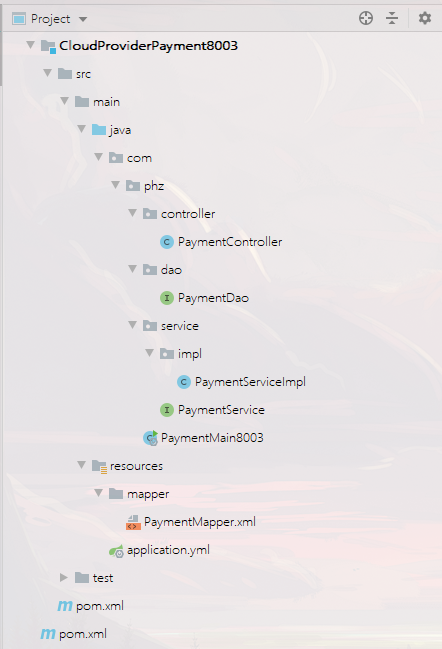
⑤、业务类
还是复制
完成后项目结构如图
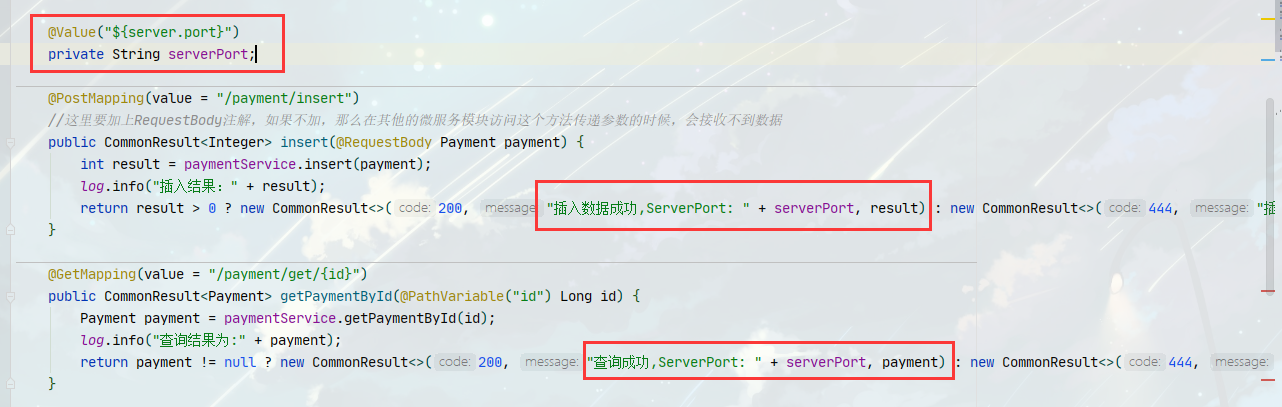
⑥、添加微服务唯一标识
说的高大上,其实就是要区分出是哪一个服务提供者提供的服务,每一个服务的端口号必然不一样,所以就拿端口号做唯一表示。
我就在每一个
Payment的controller里添加
@Value("${server.port}")
private String serverPort;
添加后的
Controller如图
⑦、测试
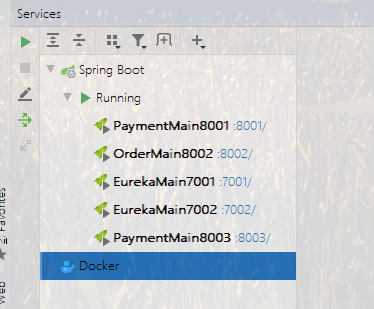
启动所有服务
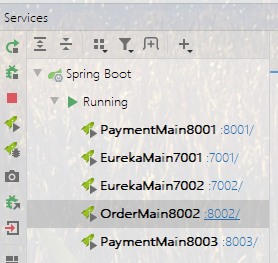
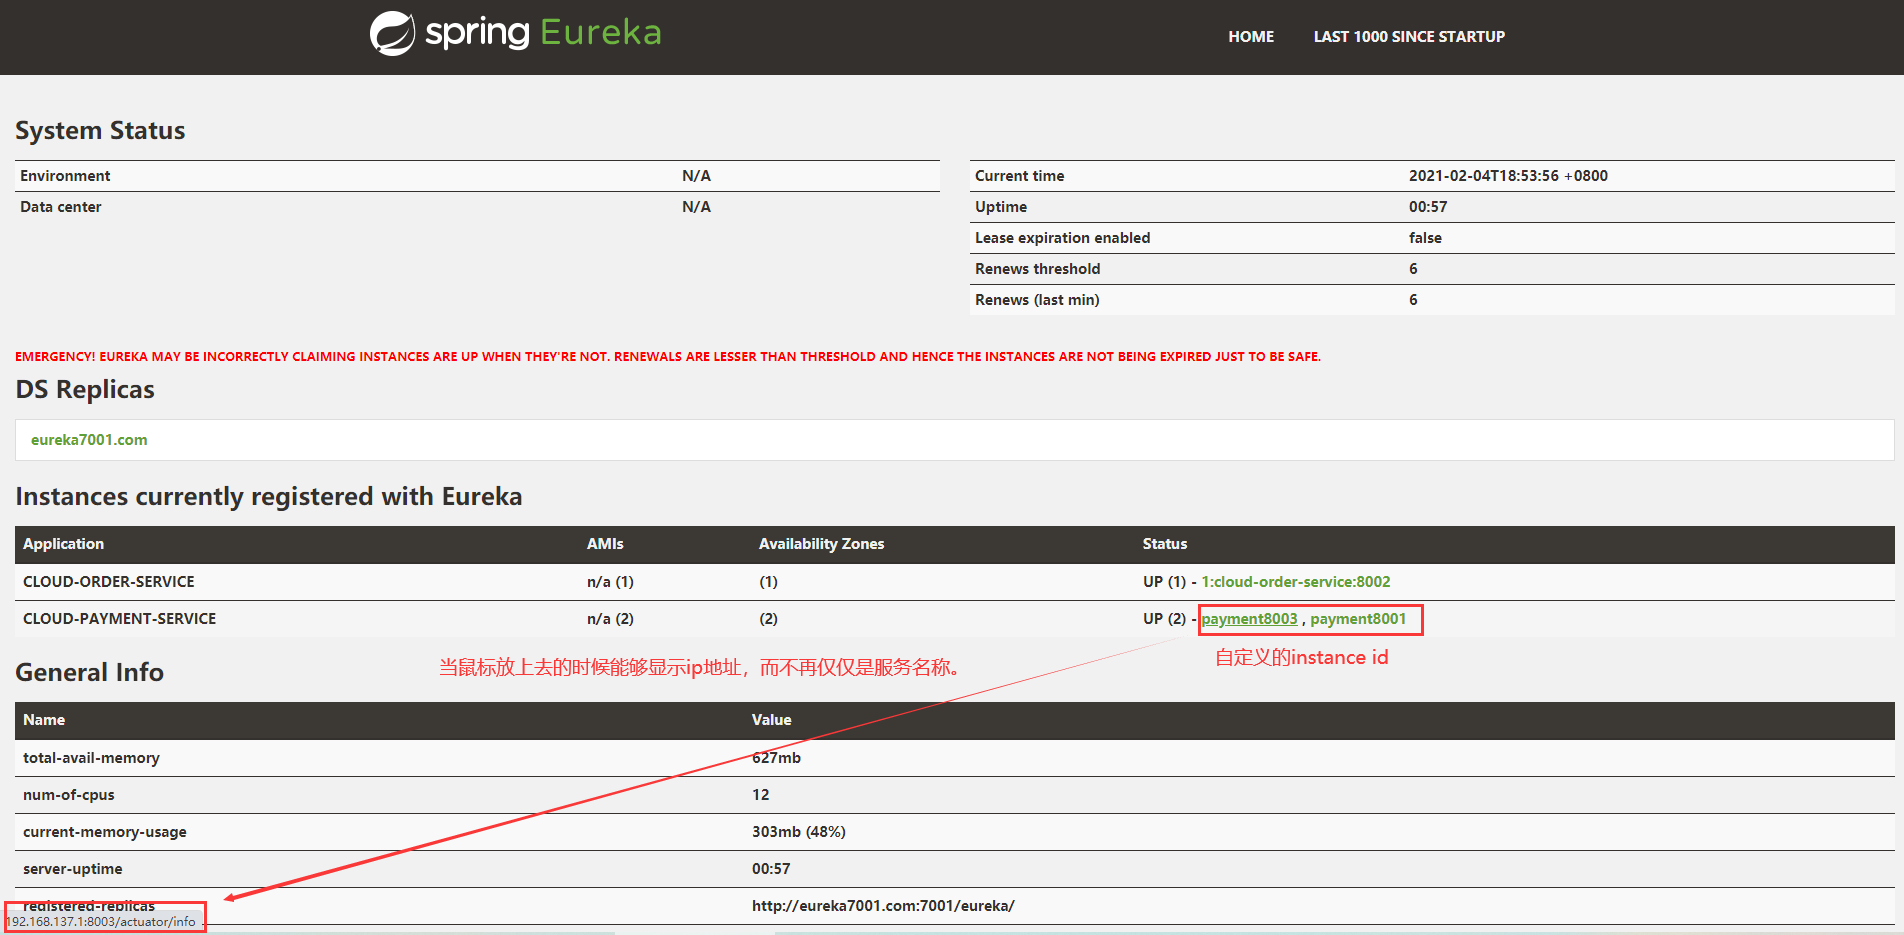
访问
Eureka查看所有起来的服务
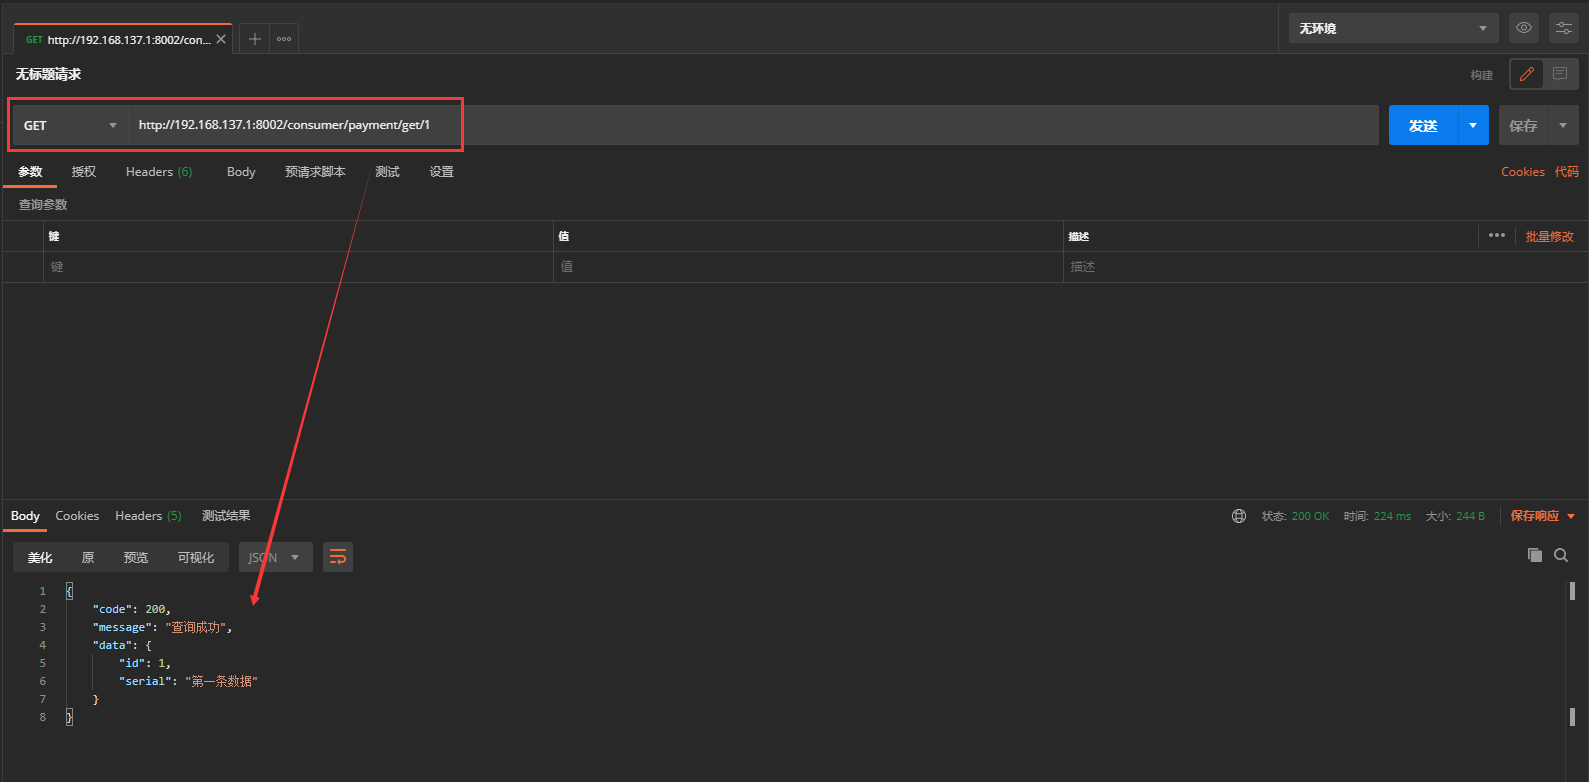
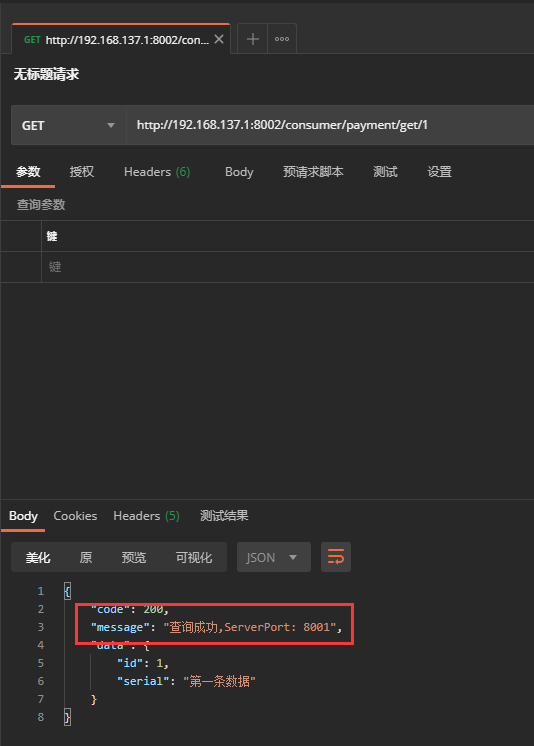
做查询测试
8、发现问题与解决
①、问题
当连续不停的测试,发现只有
8001提供服务,8003去哪儿了?回顾我们服务消费者的Controller,发现访问机器是写死的,难怪。
②、解决
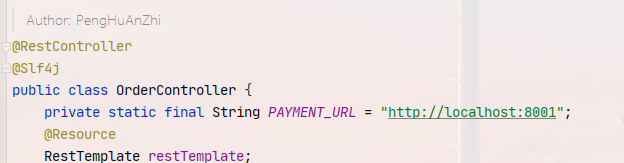
所以这个地方我们只查找微服务名称,至于给我提供该微服务下的哪台来服务,我们不关心,所以
PAYMENT_URL修改为:cloud-payment-service,也就是我们注册微服务的时候写的名称。
private static final String PAYMENT_URL = "http://cloud-payment-service";
但是这样还不够,我们仅仅是对外暴露了微服务名称,但是具体是谁来进行服务我们并没有合适的角色来进行分配啊。这个时候就需要开启
RestTemplate的负载均衡功能!
在
RestTemplate配置类中加上@LoadBalanced注解
@Configuration
public class ApplicationContextConfig {


    @Bean
    @LoadBalanced
    public RestTemplate getRestTemplate() {


        return new RestTemplate();
    }
}
到这里为止,我们应该是大功告成了,然后就是一点点细节优化
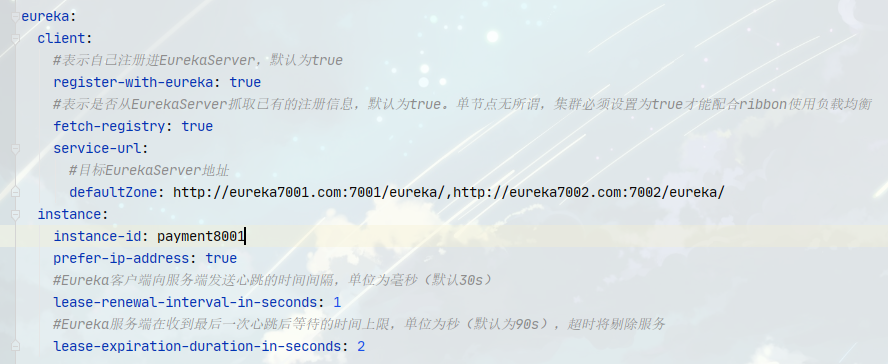
8001提供者配置文件添加:
instance:
  #这里是为了让Eureka管理界面直接显示服务名称,可以自定义
  instance-id: payment8001
  #开启优先使用`IP`地址作为主机名的标识
  prefer-ip-address: true
8003提供者配置文件添加:
instance:
  #这里是为了让Eureka管理界面直接显示服务名称,可以自定义
  instance-id: payment8003
  #开启优先使用`IP`地址作为主机名的标识
  prefer-ip-address: true
如图
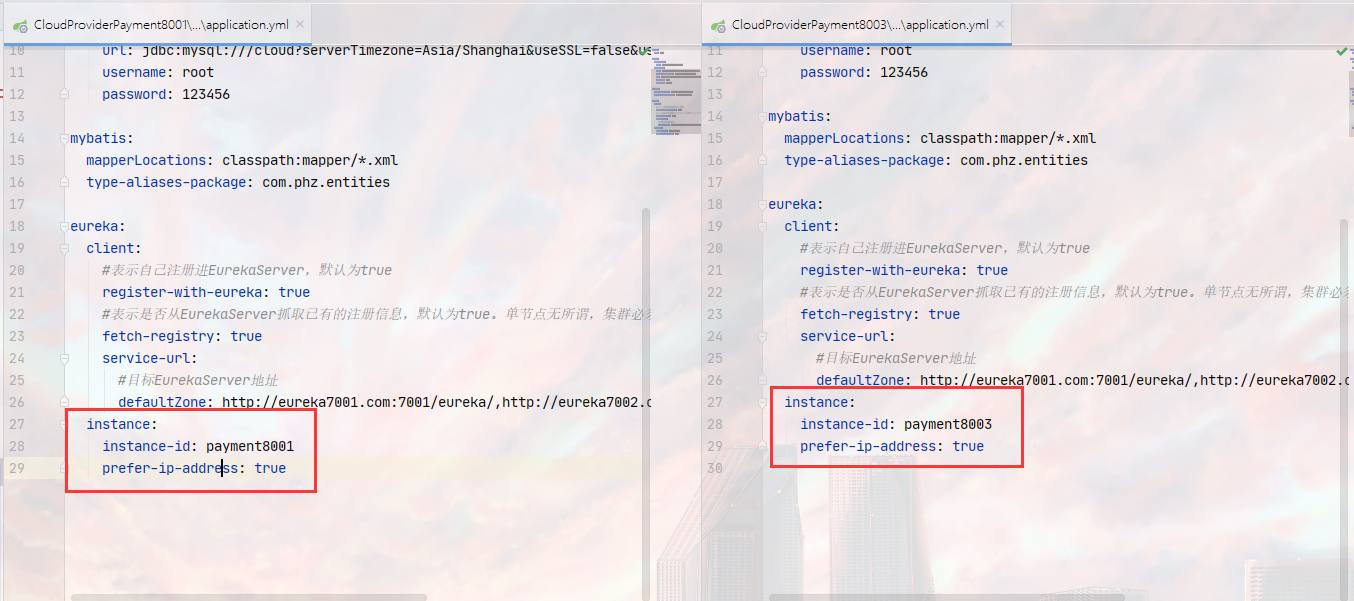
新增配置效果图
③、测试
开启服务
访问测试
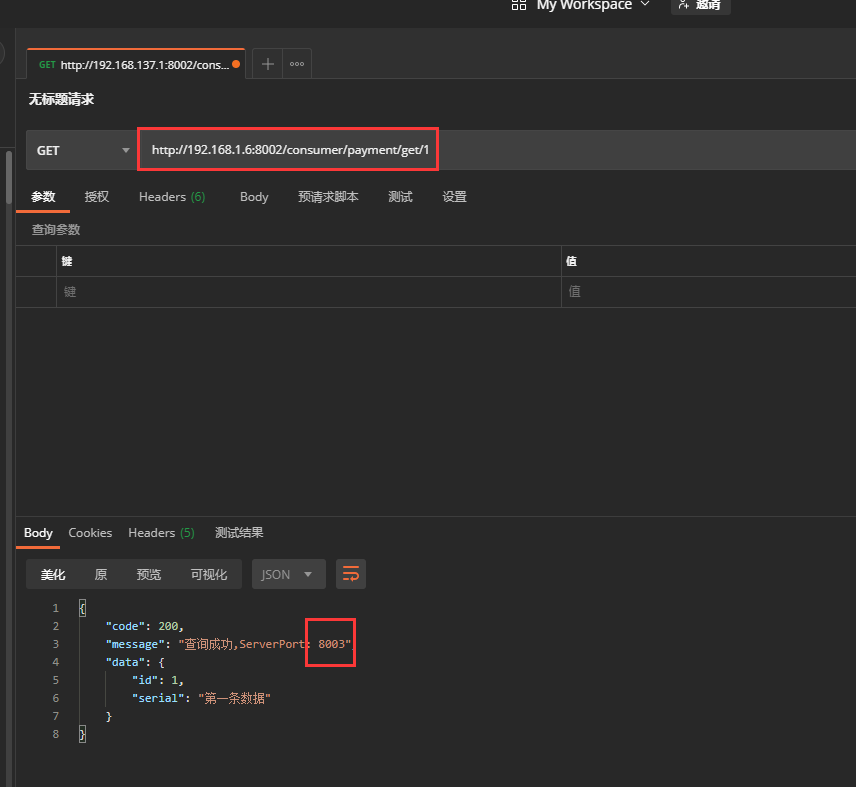
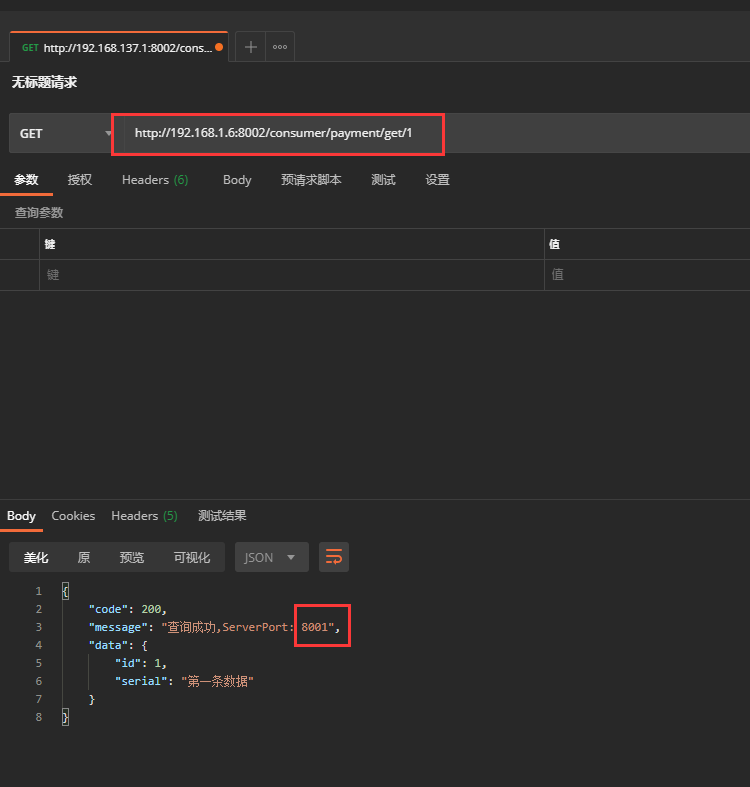
多次点击,发现
8001和8003是交替进行服务的
到此服务提供者集群搭建完毕!
9、服务的发现Discovery
①、主启动开启Discovery
@EnableDiscoveryClient

②、在Controller添加测试Discovery的方法
@Resource
private DiscoveryClient discoveryClient;
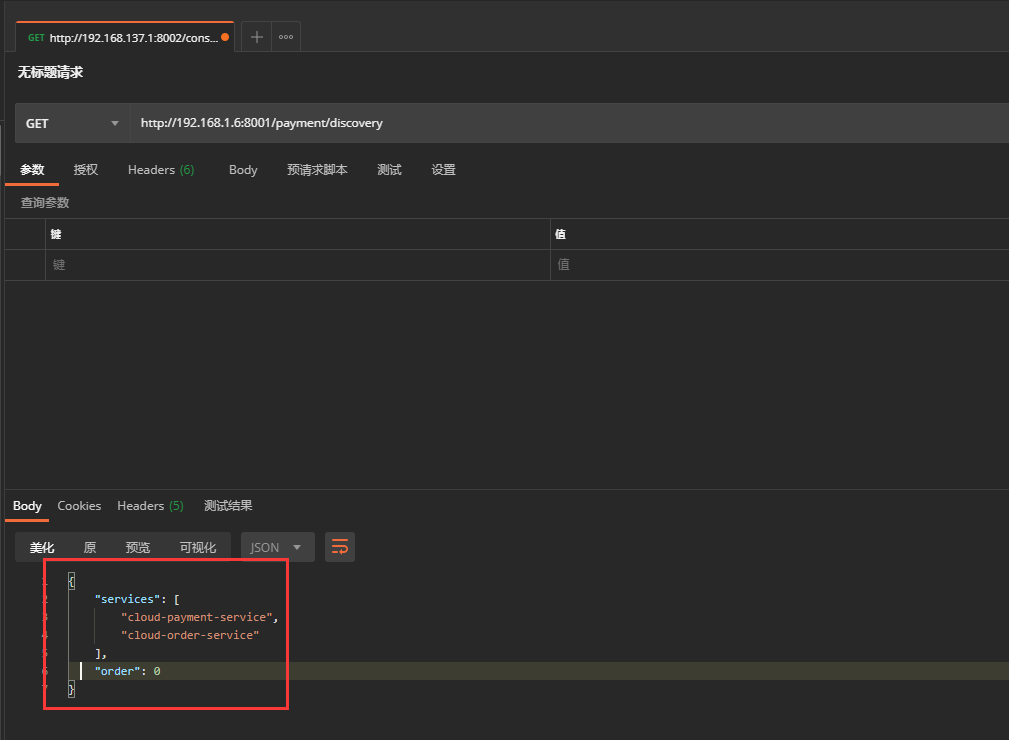
@GetMapping(value = "payment/discovery")
public Object discovery() {
List<String> services = discoveryClient.getServices();
//获得服务清单的第一种方法
log.info("第一种方式");
//哈哈发现个快捷点,打iter的时候自动生成增强for循环,奇技淫巧get
log.info("服务清单如下:");
for (String service : services) {
log.info(service);
}
log.info("----------------------------");
log.info("第二种方式");
//第二种方式,直接根据微服务名称获取其下面的所有实例
List<ServiceInstance> instances = discoveryClient.getInstances("cloud-payment-service");
for (ServiceInstance instance : instances) {
log.info("InstanceId : " + instance.getInstanceId() + "\tserviceId : " + instance.getServiceId() + "\tport : " + instance.getPort() + "\turi : " + instance.getUri() + "\tscheme : " + instance.getScheme() + "\tmetadata : " + instance.getMetadata());
}
return this.discoveryClient;
}
③、测试
实际上,这两种方式并不能相提并论,因为第一个是获得所有的微服务,第二个是指定微服务下面的若干实例。还是要区分一下

10、Eureka的自我保护机制
①、保护机制的理解
保护模式主要用于一组客户端和
Eureka Server之间存在网络分区场景下的保护。一旦进入保护模式,Eureka Server将会尝试保护其服务注册表中的信息,不再删除服务注册表中的数据,也就是不会注销任何微服务。如果没有禁止,你可能会遇到,服务已经关闭了,但是Eureka注册表中的信息并不会删除,但这也是为了保证服务的高可用。好比一个物业公司,他下面的某一个住户在连续的一段时间内,联系不上了,物业费也没交,但是我们不能够强行直接将他踢出去吧?于情于理都应该找到他商量着来。
一句话:某时刻某一个微服务不可用了,Eureka不会立刻清理,依旧会对该微服务的信息进行保存
②、什么是自我保护机制
默认情况下,如果
EurekaServer在一定时间内没有接收到某个微服务实例的心跳,EurekaServer将会注销该实例(默认90秒)。但是当网络分区故障发生(延时、卡顿、拥挤)时,微服务与EurekaServer之间无法正常通信,以上行为可能变得非常危险了——因为微服务本身其实是健康的,此时本不应该注销这个微服务。Eureka通过“自我保护模式”来解决这个问题——当EurekaServer节点在短时间内丢失过多客户端时(可能发生了网络分区故障),那么这个节点就会进入自我保护模式。
在自我保护模式中,
Eureka Server会保护服务注册表中的信息,不再注销任何服务实例。
它的设计哲学就是宁可保留错误的服务注册信息,也不盲目注销任何可能健康的服务实例。也就是"好死不如赖活着"
③、如何禁止自我保护
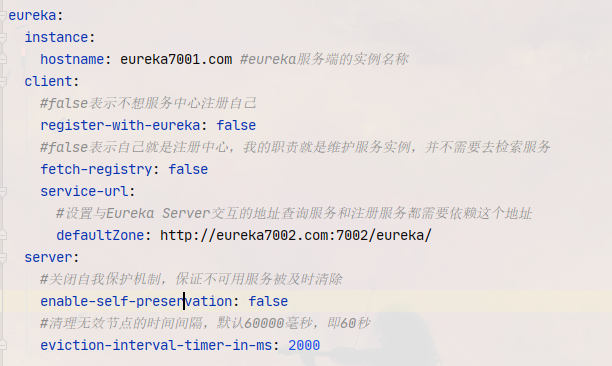
Ⅰ、Eureka Server
配置文件新增如下内容
server:
  #关闭自我保护机制,保证不可用服务被及时清除
  enable-self-preservation: false
  #清理无效节点的时间间隔,默认60000毫秒,即60秒
  eviction-interval-timer-in-ms: 2000
Ⅱ、Eureka Client
配置文件新增如下内容,时间都设置的特别短
#Eureka客户端向服务端发送心跳的时间间隔,单位为毫秒(默认30s)
lease-renewal-interval-in-seconds: 1
#Eureka服务端在收到最后一次心跳后等待的时间上限,单位为秒(默认为90s),超时将剔除服务
lease-expiration-duration-in-seconds: 2
④、测试
自己测吧,以前直接停止一个服务的时候,
Eureka管理界面的该服务依然还在,没有被删除,但是现在禁止后,把服务停止了,在很短的时间内,Eureka注册表直接就将它踢出去了
完结撒花!!!
11、停更说明
