Spring框架(第2天)-Spring JDBC 和 IoC 案例
回顾
-
说说创建Spring容器这几个类的功能
ClassPathXmlApplicationContext:在类路径下加载配置文件
FileSystemXmlApplicationContext:在文件系统下使用绝对路径加载配置文件
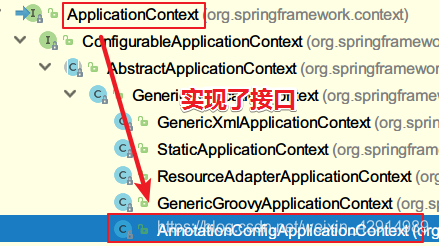
AnnotationConfigApplicationContext:加载注解的配置类
-
bean标签的属性有什么作用?
属性 说明 id 唯一标识 name 可以有多个名字,使用逗号,空格,分号分隔 class 类全名 scope singleton:单例对象
prototype:多例对象init-method 初始化方法 destroy-method 销毁方法,只对单例有效 lazy-init 延迟加载 -
使用构造器注入的属性
<constructor-arg>标签的属性 描述 index 索引位置,从0开始 name 参数名字 type 参数类型 value 简单类型=八种基本类型+String ref 注入引用类型 -
set注入的属性
<property>的属性 描述 name 参数名 value 简单类型=八种基本类型+String ref 注入引用类型 -
理解Spring相关注解的含义
设置扫描基包
<context:component-scan base-package="包名"/>
创建对象的注解 说明 @Component 用于普通类 @Controller 用于控制器 @Service 用于业务类 @Repository 用于持久层 依赖注入的注解 说明 @Autowired 1. 按类型匹配注入
2. 如果有多个类型,按名字
3. 如果有多个名字或找不到就抛出异常@Qualifier 按名字匹配 @Value 读取配置文件,把值注入到属性中 对象范围与生命周期 说明 @Scope 单例或多例对象 @Lazy 延迟加载 @PostConstruct 初始化方法 @PreDestroy 销毁方法
学习目标
- 能够使用Jdbc的模板
- 能够配置Spring的连接池
- 能够使用JdbcTemplate完成增删查改操作
- 使用注解改造CRUD工程
- 基于纯注解改造CRUD工程
- 能够实现Spring框架整合Junit
- 理解代理设计模式
- 掌握动态代理的两种实现方式
- 完成动态代理案例
1. JdbcTemplate入门案例
目标
- JdbcTemplate的介绍
- JdbcTemplate的入门案例
JdbcTeamplate概述
JdbcTemplate是Spring提供的一个模板类,它是对jdbc的封装。用于数据库持久层的操作,它的特点是:简单、方便。
它简化了JDBC的使用,并有助于避免常见错误。它执行核心的JDBC工作流程,我们只需要写SQL语句,并且从中获取结果就可以了。
JDBC中操作:
- 获取Connection
- 获取PreparedStatement
- 执行增删改查
- 查询还要获取ResultSet
- 处理异常:SQLException
- 关闭连接
使用JdbcTemplate就只要写增删改查的SQL语句就可以了
JdbcTemplate入门案例
步骤
- 创建表结构
DROP TABLE IF EXISTS `student`;

CREATE TABLE `student` (
  `id` int(11) NOT NULL AUTO_INCREMENT,
  `username` varchar(20) NOT NULL,
  `birthday` date DEFAULT NULL,
  `sex` char(1) DEFAULT '男',
  `address` varchar(50) DEFAULT NULL,
  PRIMARY KEY (`id`)
);

insert  into `student`(`username`,`birthday`,`sex`,`address`) values
('孙悟空','1980-10-24','男','花果山水帘洞'),
('白骨精','1992-11-12','女','白虎岭白骨洞'),
('猪八戒','1983-05-20','男','福临山云栈洞'),
('蜘蛛精','1995-03-22','女','盤丝洞');

select * from student;
-
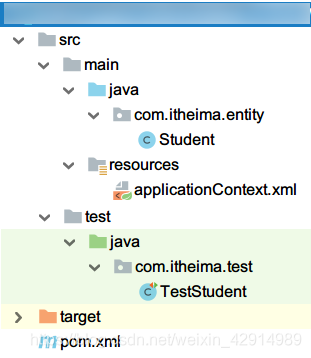
创建maven工程:
-
pom.xml添加依赖
<!-- 添加依赖 --> <dependencies> <!-- 1. Spring IOC 依赖--> <dependency> <groupId>org.springframework</groupId> <artifactId>spring-context</artifactId> <version>5.2.0.RELEASE</version> </dependency> <!-- 2. Spring Jdbc 依赖--> <dependency> <groupId>org.springframework</groupId> <artifactId>spring-jdbc</artifactId> <version>5.2.0.RELEASE</version> </dependency> <dependency> <groupId>mysql</groupId> <artifactId>mysql-connector-java</artifactId> <version>5.1.22</version> </dependency> <!-- 3. Junit 单元测试 依赖 --> <dependency> <groupId>junit</groupId> <artifactId>junit</artifactId> <version>4.12</version> <scope>test</scope> </dependency> </dependencies> -
创建实体:Student.java
package com.itheima.entity; import java.sql.Date; public class Student { private int id; private String username; //注:日期是java.sql.Date类型 private Date birthday; private String sex; private String address; public int getId() { return id; } public void setId(int id) { this.id = id; } public String getUsername() { return username; } public void setUsername(String username) { this.username = username; } public Date getBirthday() { return birthday; } public void setBirthday(Date birthday) { this.birthday = birthday; } public String getSex() { return sex; } public void setSex(String sex) { this.sex = sex; } public String getAddress() { return address; } public void setAddress(String address) { this.address = address; } @Override public String toString() { return "Student{" + "id=" + id + ", username='" + username + '\'' + ", birthday=" + birthday + ", sex='" + sex + '\'' + ", address='" + address + '\'' + '}'; } } -
创建测试类
- 包含方法createDataSource(),使用DriverManagerDataSource创建数据源,这是Spring自带的创建连接池的工具类。使用set方法设置数据库连接的四个参数。
- 创建测试方法
- 创建模板对象
- 定义SQL语句,查询1个学生
- 使用queryForObject()方法查询1个学生,重写RowMapper接口,并且自己封装结果集。
- 输出学生信息
package com.itheima.test;

import com.itheima.entity.Student;
import org.junit.Test;
import org.springframework.jdbc.core.BeanPropertyRowMapper;
import org.springframework.jdbc.core.JdbcTemplate;
import org.springframework.jdbc.datasource.DriverManagerDataSource;

public class TestStudent {


    @Test
    public void testFindOne() {


        //1.创建数据源:使用Spring提供的数据源
        DriverManagerDataSource ds = new DriverManagerDataSource();
        ds.setUsername("root");
        ds.setPassword("root");
        ds.setUrl("jdbc:mysql:///day46");
        ds.setDriverClassName("com.mysql.jdbc.Driver");

        //2.创建JdbcTemplate对象,传入数据源
        JdbcTemplate jdbcTemplate = new JdbcTemplate(ds);

        //3.调用JdbcTemplate的方法访问数据库,查询一条记录。参数1:SQL语句,参数2:映射对象,参数3:要替换的一个或多个占位符
        //RowMapper是一个接口,作用:将结果集封装成一个实体类对象。我们使用它提供的实现类
        //BeanPropertyRowMapper是RowMap接口的实现类,前提:表的列名与实体类的属性名相同,参数就是要封装的实体类类型
        Student student = jdbcTemplate.queryForObject("select * from student where id=?", new BeanPropertyRowMapper<>(Student.class), 1);
        System.out.println(student);

    }
}
RowMapper接口的实现类
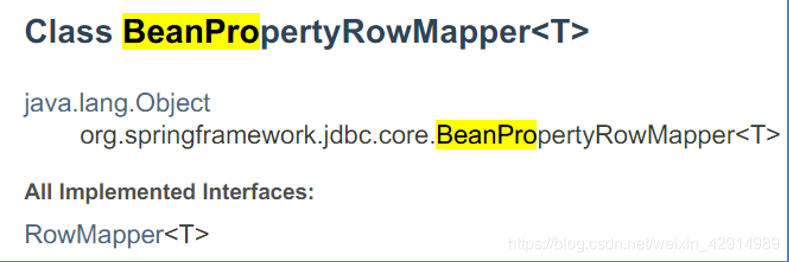
BeanPropertyRowMapper的映射规则
1.表的字段名与类中的属性名相同,表的字段名大小写不区分。
2.表的字段名如果有多个单词使用下划线隔开,与Java中驼峰命名的属性相对应。
| 表中字段名 | 类对应的属性名 |
|---|---|
| name或NAME | name |
| dept_name | deptName |
实现删除一条记录
注:增删改使用的是同一个方法
@Test
public void testDelete() {


    //1.创建数据源:使用Spring提供的数据源
    DriverManagerDataSource ds = new DriverManagerDataSource();
    ds.setUsername("root");
    ds.setPassword("root");
    ds.setUrl("jdbc:mysql:///day46");
    ds.setDriverClassName("com.mysql.jdbc.Driver");

    //2.创建JdbcTemplate对象,传入数据源
    JdbcTemplate jdbcTemplate = new JdbcTemplate(ds);

    //update方法:用于增删改的操作,参数1:SQL语句,参数2:替换占位符的值,返回影响的行数
    int row = jdbcTemplate.update("delete from student where id=?", 3);
    System.out.println("删除了" + row + "行记录");
}
小结
| JdbcTemplate类 | 说明 |
|---|---|
| public JdbcTemplate(DataSource dataSource) | 作用:创建模板对象 参数:数据源,从中获取连接对象 |
| public int update(String sql, Object…args) | 作用:实现增删改的操作 参数1:SQL语句 参数2:替换占位符的值 返回值:返回影响的行数 |
| <T> T queryForObject(String sql, RowMapper<T> rowMapper, Object… args) |
作用:查询1条记录 参数: 1) SQL语句 2) 指定映射关系的接口 3) 替换占位符的值 返回值:查询的那条记录的对象 |
接口的作用:
| RowMapper接口中的方法 | 说明 |
|---|---|
| T mapRow(ResultSet rs, int rowNum) throws SQLException | 作用:将结果集封装成一个对象 参数: 1) 查询出来的结果集 2) 这是第几行 返回值:封装好的对象 |
| BeanPropertyRowMapper类的构造方法 | 说明 |
|---|---|
| public BeanPropertyRowMapper(Class<T> mappedClass) | 作用:实现了上面的接口 参数:要封装的实体类类型 |
2. 使用IoC管理JdbcTemplate
目标
在Spring容器中管理JdbcTemplate
步骤
快捷键:Ctrl+F12:显示当前类中所有的方法
-
配置applicationContext.xml
- 定义数据源,指定数据库的四个必须的连接参数
- 创建操作模板,注入数据源
<?xml version="1.0" encoding="UTF-8"?> <beans xmlns="http://www.springframework.org/schema/beans" xmlns:xsi="http://www.w3.org/2001/XMLSchema-instance" xsi:schemaLocation="http://www.springframework.org/schema/beans http://www.springframework.org/schema/beans/spring-beans.xsd"> <!--1. 定义数据源,指定数据库的四个必须的连接参数--> <bean class="org.springframework.jdbc.datasource.DriverManagerDataSource" id="dataSource"> <property name="username" value="root"/> <property name="password" value="root"/> <property name="url" value="jdbc:mysql:///day46"/> <property name="driverClassName" value="com.mysql.jdbc.Driver"/> </bean> <!--2. 创建Jdbc模板,注入数据源--> <bean class="org.springframework.jdbc.core.JdbcTemplate" id="jdbcTemplate"> <property name="dataSource" ref="dataSource"/> </bean> </beans> -
编写测试代码
package com.itheima.test;

import com.itheima.entity.Student;
import org.junit.After;
import org.junit.Before;
import org.junit.Test;
import org.springframework.context.support.ClassPathXmlApplicationContext;
import org.springframework.jdbc.core.BeanPropertyRowMapper;
import org.springframework.jdbc.core.JdbcTemplate;

import java.util.List;

/**
 * 从容器中获取JdbcTemplate对象直接使用
 */
public class TestDemo2 {


    ClassPathXmlApplicationContext context;
    JdbcTemplate jdbcTemplate;

    //在每个测试方法前调用
    @Before
    public void init() {


        //创建Spring容器
        context = new ClassPathXmlApplicationContext("applicationContext.xml");
        //从容器中获取模板对象
        jdbcTemplate = (JdbcTemplate) context.getBean("jdbcTemplate");
    }

    //添加操作
    @Test
    public void testAdd() {


        int row = jdbcTemplate.update("insert into student values(null,?,?,?,?)", "唐三藏", "1990-11-23", "男", "女儿国");
        System.out.println("添加了" + row + "行记录");
    }

    //查询所有记录
    @Test
    public void testFindAll() {


        //query查询多条记录,查询所有的男生
        List<Student> students = jdbcTemplate.query("select * from student where sex=?", new BeanPropertyRowMapper<>(Student.class), "男");
        students.forEach(System.out::println);
    }

    //在每个测试方法之后关闭
    @After
    public void destory() {


        //关闭容器
        context.close();
    }
}
小结
在Spring的配置文件中需要配置哪2项?
配置数据源对象
配置JdbcTemplate对象,注入数据源
扩展:@Before 在每个测试方法前执行 @After 在每个测试方法后执行
3. 拓展:使用第三方连接池
目标
使用第三方厂商的数据源
需求
- 使用c3p0的数据源代替Spring的数据源工具类
- 使用druid的数据源代替Spring的数据源工具类
步骤
-
修改pom.xml文件,导入c3p0, druid的包,同时还需要导入日志记录包
<!-- C3P0数据源 --> <dependency> <groupId>com.mchange</groupId> <artifactId>c3p0</artifactId> <version>0.9.5.4</version> </dependency> <!-- Druid数据源 --> <dependency> <groupId>com.alibaba</groupId> <artifactId>druid</artifactId> <version>1.1.12</version> </dependency> <!-- Log4j 依赖 --> <dependency> <groupId>org.slf4j</groupId> <artifactId>slf4j-log4j12</artifactId> <version>1.7.7</version> </dependency> -
将log4j.properties文件复制到resources目录下
log4j.rootLogger=debug, stdout log4j.category.org.springframework=debug log4j.appender.stdout=org.apache.log4j.ConsoleAppender log4j.appender.stdout.layout=org.apache.log4j.PatternLayout log4j.appender.stdout.layout.ConversionPattern=%d %p [%c] - %m%n -
修改applicationContext.xml配置文件
- 使用druid的数据源类:com.alibaba.druid.pool.DruidDataSource
- 属性名与自带的连接池属性相同
<bean class="com.alibaba.druid.pool.DruidDataSource" id="dataSource"> <property name="username" value="root"/> <property name="password" value="root"/> <property name="url" value="jdbc:mysql:///day46"/> <property name="driverClassName" value="com.mysql.jdbc.Driver"/> </bean> -
修改applicationContext.xml配置文件
- 使用c3p0的数据源类:com.mchange.v2.c3p0.ComboPooledDataSource
- 属性名除了password相同,其它三个属性都不同
<!-- 使用c3p0的连接池 -->
<bean class="com.mchange.v2.c3p0.ComboPooledDataSource" id="dataSource">
    <!-- 有三个属性的名字不同 -->
    <property name="user" value="root"/>
    <property name="password" value="root"/>
    <property name="jdbcUrl" value="jdbc:mysql:///day46"/>
    <property name="driverClass" value="com.mysql.jdbc.Driver"/>
</bean>
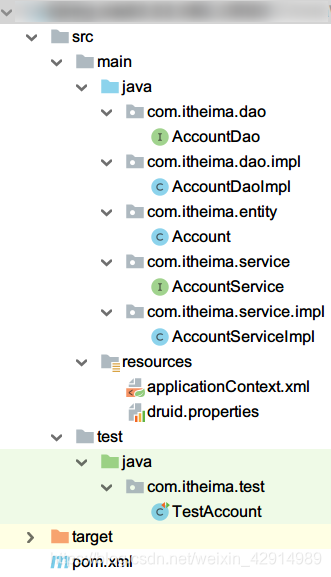
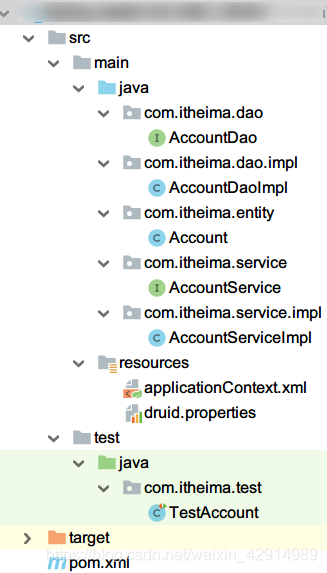
4. IoC实现账户CRUD:搭建环境
目标
- 搭建maven环境
- 创建表、实体类
- 创建DAO接口和DAO实现类,并且使用set注入JdbcTemplate对象
- 创建业务层接口和实现类,并且使用set注入DAO对象
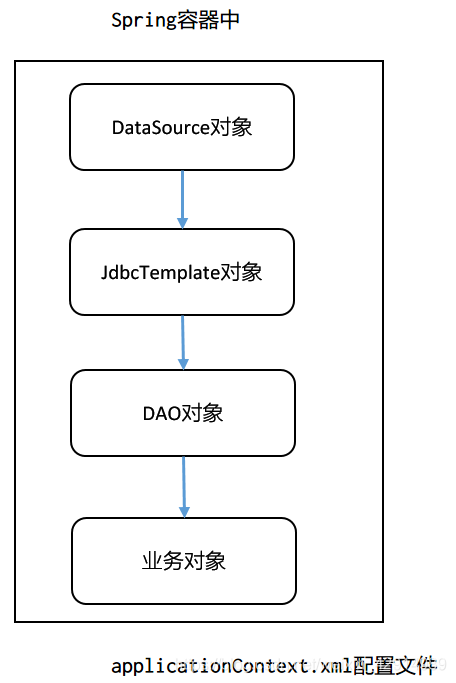
分析
类与类之间的依赖关系
创建maven项目
pom.xml文件
<dependencies>
	<!--Spring支持包-->
	<dependency>
		<groupId>org.springframework</groupId>
		<artifactId>spring-context</artifactId>
		<version>5.2.0.RELEASE</version>
	</dependency>
	<!--spring的jdbc支持包-->
	<dependency>
		<groupId>org.springframework</groupId>
		<artifactId>spring-jdbc</artifactId>
		<version>5.2.0.RELEASE</version>
	</dependency>
	<!--数据库驱动包-->
	<dependency>
		<groupId>mysql</groupId>
		<artifactId>mysql-connector-java</artifactId>
		<version>5.1.30</version>
	</dependency>
	<!--连接池-->
	<dependency>
		<groupId>com.alibaba</groupId>
		<artifactId>druid</artifactId>
		<version>1.1.10</version>
	</dependency>
	<!--junit-->
	<dependency>
		<groupId>junit</groupId>
		<artifactId>junit</artifactId>
		<version>4.12</version>
	</dependency>
</dependencies>
创建表结构

drop table if exists account;

-- 创建数据表,账户表
CREATE TABLE account (
	id INT PRIMARY KEY AUTO_INCREMENT,
	name VARCHAR(10),
	money DOUBLE  -- 金额
);

-- 添加数据
INSERT INTO account (name, money) VALUES ('周瑜', 1000), ('小乔', 1000);

select * from account;
创建实体类
- 使用包装类型
- 生成全参和无参的构造方法
- 生成toString()方法
package com.itheima.entity;

/**
 账户实体类
 */
public class Account {


    private Integer id;
    private String name;  //名字
    private Double money;  //余额

    @Override
    public String toString() {


        return "Account{" +
                "id=" + id +
                ", name='" + name + '\'' +
                ", money=" + money +
                '}';
    }

    public Account() {


    }

    public Account(Integer id, String name, Double money) {


        this.id = id;
        this.name = name;
        this.money = money;
    }

    public Integer getId() {


        return id;
    }

    public void setId(Integer id) {


        this.id = id;
    }

    public String getName() {


        return name;
    }

    public void setName(String name) {


        this.name = name;
    }

    public Double getMoney() {


        return money;
    }

    public void setMoney(Double money) {


        this.money = money;
    }
}
DAO接口和实现类
AccountDao接口
- 添加1个账户
- 通过id删除1个账户
- 通过id修改账户
- 查询所有的账户
package com.itheima.dao;

import com.itheima.entity.Account;

import java.util.List;

public interface AccountDao {


    /**
     * 添加1个账户
     */
    int save(Account account);

    /**
     * 查询所有的账户
     */
    List<Account> findAll();
}
AccountDaoImpl实现类
- 创建成员变量JdbcTemplate对象
- 提供setJdbcTemplate的注入方法
package com.itheima.dao.impl;

import com.itheima.dao.AccountDao;
import com.itheima.entity.Account;
import org.springframework.jdbc.core.BeanPropertyRowMapper;
import org.springframework.jdbc.core.JdbcTemplate;

import java.util.List;

/**
 * 实现类
 */
public class AccountDaoImpl implements AccountDao {


    private JdbcTemplate jdbcTemplate;

    //set方法注入对象
    public void setJdbcTemplate(JdbcTemplate jdbcTemplate) {


        this.jdbcTemplate = jdbcTemplate;
    }

    @Override
    public int save(Account account) {


        return jdbcTemplate.update("insert into account values(null,?,?)", account.getName(), account.getMoney());
    }

    @Override
    public List<Account> findAll() {


        return jdbcTemplate.query("select * from account", new BeanPropertyRowMapper<>(Account.class));
    }
}
业务层接口和实现类
AccountService接口
方法与DAO层中的方法相同
package com.itheima.service;

import com.itheima.entity.Account;

import java.util.List;

/**
 * 业务层接口
 */
public interface AccountService {


    /**
     * 添加1个账户
     */
    int save(Account account);

    /**
     * 查询所有的账户
     */
    List<Account> findAll();
}
AccountServiceImpl实现类
- 创建AccountDao的成员变量
- 提供AccountDao接口的set方法
- 调用DAO类中的方法实现相应的功能
package com.itheima.service.impl;

import com.itheima.dao.AccountDao;
import com.itheima.entity.Account;
import com.itheima.service.AccountService;

import java.util.List;

/**
 * 业务类
 */
public class AccountServiceImpl implements AccountService {


    private AccountDao accountDao;

    public void setAccountDao(AccountDao accountDao) {


        this.accountDao = accountDao;
    }

    @Override
    public int save(Account account) {


        return accountDao.save(account);
    }

    @Override
    public List<Account> findAll() {


        return accountDao.findAll();
    }
}
小结
-
在DAO层需要注入哪个对象?
JdbcTemplate对象 -
在业务层需要注入哪个对象?
DAO对象
5. IoC实现账户的CRUD:XML的配置【重点】
目标
- 创建druid.properties数据源配置文件,注意键名
- 创建Spring配置文件applicationContext.xml
- 在测试类中查询账户信息
技术点
<context:property-placeholder location="classpath:druid.properties"/>
XML配置步骤
- 使用context:property-placeholder,加载类路径下的配置文件,需要导入context命名空间。
- 创建dataSource,实现类是com.alibaba.druid.pool.DruidDataSource
- 创建jdbcTemplate对象, 注入dataSource。注:jdbcTemplate类中已经存在setDataSource()方法
- 创建dao对象,注入jdbcTemplate
- 创建service对象,注入dao
代码
druid.properties
注:键的命名
jdbc.username=root
jdbc.password=root
jdbc.url=jdbc:mysql://localhost:3306/day46?characterEncoding=utf8
jdbc.driverClassName=com.mysql.jdbc.Driver
applicationContext.xml
<?xml version="1.0" encoding="UTF-8"?>
<beans xmlns="http://www.springframework.org/schema/beans"
       xmlns:xsi="http://www.w3.org/2001/XMLSchema-instance" xmlns:context="http://www.springframework.org/schema/context"
       xsi:schemaLocation="http://www.springframework.org/schema/beans http://www.springframework.org/schema/beans/spring-beans.xsd http://www.springframework.org/schema/context https://www.springframework.org/schema/context/spring-context.xsd">

    <!-- 读取配置文件,放在容器中,后面我们可以读取其中的属性值 -->
    <context:property-placeholder location="classpath:druid.properties"/>

    <!-- 1.配置数据源 -->
    <bean class="com.alibaba.druid.pool.DruidDataSource" id="dataSource">
        <property name="username" value="${jdbc.username}"/>
        <property name="password" value="${jdbc.password}"/>
        <property name="url" value="${jdbc.url}"/>
        <property name="driverClassName" value="${jdbc.driverClassName}"/>
    </bean>

    <!-- 2.配置模板对象:注入数据源 -->
    <bean class="org.springframework.jdbc.core.JdbcTemplate" id="jdbcTemplate">
        <property name="dataSource" ref="dataSource"/>
    </bean>

    <!-- 3.配置DAO对象:注入模板 -->
    <bean class="com.itheima.dao.impl.AccountDaoImpl" id="accountDao">
        <property name="jdbcTemplate" ref="jdbcTemplate"/>
    </bean>

    <!-- 4.配置业务对象:注入DAO -->
    <bean class="com.itheima.service.impl.AccountServiceImpl" id="accountService">
        <property name="accountDao" ref="accountDao"/>
    </bean>
</beans>
测试类
package com.itheima.test;

import com.itheima.entity.Account;
import com.itheima.service.AccountService;
import org.junit.After;
import org.junit.Before;
import org.junit.Test;
import org.springframework.context.support.ClassPathXmlApplicationContext;
import org.springframework.jdbc.core.BeanPropertyRowMapper;
import org.springframework.jdbc.core.JdbcTemplate;

import java.util.List;

//相当于表示层
public class TestAccount {


    //获取业务层对象
    AccountService accountService;

    //在每个测试方法前调用
    @Before
    public void init() {


        //创建Spring容器
        ClassPathXmlApplicationContext context = new ClassPathXmlApplicationContext("applicationContext.xml");
        //获取业务层对象
        accountService = context.getBean("accountService", AccountService.class);
    }

    //添加操作
    @Test
    public void testAdd() {


        Account account = new Account(3, "刘备",10d);
        accountService.save(account);
    }

    //查询所有记录
    @Test
    public void testFindAll() {


        List<Account> accountList = accountService.findAll();
        accountList.forEach(System.out::println);
    }

}
小结
对象之间的注入顺序:
数据源 -> 模板对象 -> DAO -> Service
6. 扩展:XML配置import标签
目标
- 为什么要import标签
- 如何使用
作用
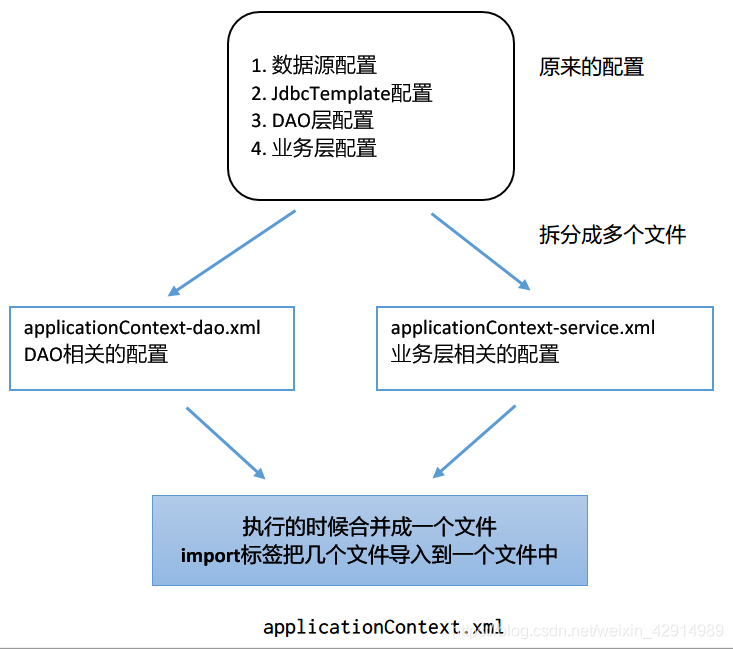
- 配置文件会先合并,后解析,也就是说,无论是命名空间还是配置的内容,都会合并处理。
- 多个 Spring 配置文件最终会合并到一起,形成一个配置文件,因此这些配置中的 bean 都是可以互相引用的。
步骤
- 复制模块,在新的模块中修改
- 将连接池,JdbcTemplate,DAO层的配置放在applicationContext-dao.xml配置文件中
- 将业务层的配置信息放在applicationContext-service.xml配置文件中,如果报错可以不理会。也可以在这个配置文件中导入applicationContext-dao.xml文件。
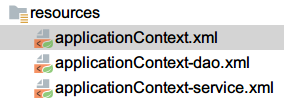
- 创建新的applicationContext.xml,导入上面的2个配置文件
- 在测试类中进行测试
扩展:优化导入
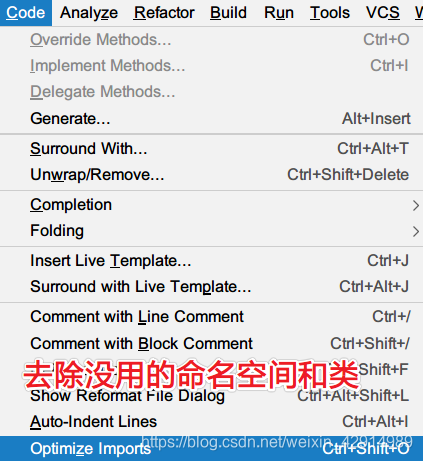
效果
代码
applicationContext.xml
<?xml version="1.0" encoding="UTF-8"?>
<beans xmlns="http://www.springframework.org/schema/beans"
       xmlns:xsi="http://www.w3.org/2001/XMLSchema-instance"
       xsi:schemaLocation="http://www.springframework.org/schema/beans http://www.springframework.org/schema/beans/spring-beans.xsd">

    <!--导入其它的配置文件 -->
    <import resource="applicationContext-service.xml"/>
    <import resource="applicationContext-dao.xml"/>

</beans>
applicationContext-service.xml
<?xml version="1.0" encoding="UTF-8"?>
<beans xmlns="http://www.springframework.org/schema/beans"
       xmlns:xsi="http://www.w3.org/2001/XMLSchema-instance"
       xsi:schemaLocation="http://www.springframework.org/schema/beans http://www.springframework.org/schema/beans/spring-beans.xsd">

    <!-- 报错忽略 -->
    <bean class="com.itheima.service.impl.AccountServiceImpl" id="accountService">
        <property name="accountDao" ref="accountDao"/>
    </bean>

</beans>
applicationContext-dao.xml
<?xml version="1.0" encoding="UTF-8"?>
<beans xmlns="http://www.springframework.org/schema/beans"
       xmlns:xsi="http://www.w3.org/2001/XMLSchema-instance" xmlns:context="http://www.springframework.org/schema/context"
       xsi:schemaLocation="http://www.springframework.org/schema/beans http://www.springframework.org/schema/beans/spring-beans.xsd http://www.springframework.org/schema/context https://www.springframework.org/schema/context/spring-context.xsd">

    <!-- 读取配置文件,放在容器中,后面我们可以读取其中的属性值 -->
    <context:property-placeholder location="classpath:druid.properties"/>

    <!-- 1.配置数据源 -->
    <bean class="com.alibaba.druid.pool.DruidDataSource" id="dataSource">
        <property name="username" value="${jdbc.username}"/>
        <property name="password" value="${jdbc.password}"/>
        <property name="url" value="${jdbc.url}"/>
        <property name="driverClassName" value="${jdbc.driverClassName}"/>
    </bean>

    <!-- 2.配置模板对象:注入数据源 -->
    <bean class="org.springframework.jdbc.core.JdbcTemplate" id="jdbcTemplate">
        <property name="dataSource" ref="dataSource"/>
    </bean>

    <!-- 3.配置DAO对象:注入模板 -->
    <bean class="com.itheima.dao.impl.AccountDaoImpl" id="accountDao">
        <property name="jdbcTemplate" ref="jdbcTemplate"/>
    </bean>
</beans>
小结
| import标签属性 | 说明 |
|---|---|
| resource | 指定导入的配置文件 |
7. 使用注解和XML配置改造上面案例【重点】
目标
使用XML+注解的方式改造上面的账户案例
关于 Spring 注解和 XML 的选择问题
- 注解的优势:代码量更少,耦合度增加
- XML的优势:耦合度降低,代码量多了
思路
- 框架和第三方组件的类使用XML的配置方式
- 自己写的所有的类使用注解的方式
回顾:配置的对比

复制项目
结构如下
持久层
使用@Repository与@Autowired注解,创建对象并给对象属性赋值
DAO实现类
- 使用注解:@Repository 这里无需指定名字,因为业务层通过类型匹配注入。
- 对JdbcTemplate使用@Autowired注解,按类型匹配自动注入
- 删除setJdbcTemplate()的方法
package com.itheima.dao.impl;

import com.itheima.dao.AccountDao;
import com.itheima.entity.Account;
import org.springframework.beans.factory.annotation.Autowired;
import org.springframework.jdbc.core.BeanPropertyRowMapper;
import org.springframework.jdbc.core.JdbcTemplate;
import org.springframework.stereotype.Repository;

import java.util.List;

/**
 * 实现类
 */
@Repository
public class AccountDaoImpl implements AccountDao {


    @Autowired
    private JdbcTemplate jdbcTemplate;

    @Override
    public int save(Account account) {


        return jdbcTemplate.update("insert into account values(null,?,?)", account.getName(), account.getMoney());
    }

    @Override
    public List<Account> findAll() {


        return jdbcTemplate.query("select * from account", new BeanPropertyRowMapper<>(Account.class));
    }
}
业务层
实现类
- 使用@Service注解,并且要指定名字,因为需要在测试类中通过id获取业务对象
- 使用@Autowired注解,按类型注入accountDao
- 删除setAccountDao()方法
package com.itheima.service.impl;

import com.itheima.dao.AccountDao;
import com.itheima.entity.Account;
import com.itheima.service.AccountService;
import org.springframework.beans.factory.annotation.Autowired;
import org.springframework.stereotype.Service;

import java.util.List;

/**
 * 业务类
 */
@Service("accountService")
public class AccountServiceImpl implements AccountService {


    @Autowired
    private AccountDao accountDao;

    @Override
    public int save(Account account) {


        return accountDao.save(account);
    }

    @Override
    public List<Account> findAll() {


        return accountDao.findAll();
    }
}
applicationContext.xml配置
- 配置context:component-scan 扫描com.itheima下的包,加载到容器中
- 加载类路径下的配置文件,指定location为druid.properties
- 配置数据源:dataSource
- 配置JdbcTemplate对象,注入数据源
<?xml version="1.0" encoding="UTF-8"?>
<beans xmlns="http://www.springframework.org/schema/beans"
       xmlns:xsi="http://www.w3.org/2001/XMLSchema-instance" xmlns:context="http://www.springframework.org/schema/context"
       xsi:schemaLocation="http://www.springframework.org/schema/beans http://www.springframework.org/schema/beans/spring-beans.xsd http://www.springframework.org/schema/context https://www.springframework.org/schema/context/spring-context.xsd">

    <!-- 使用注解:扫描基包 -->
    <context:component-scan base-package="com.itheima"/>

    <!-- 读取配置文件,放在容器中,后面我们可以读取其中的属性值 -->
    <context:property-placeholder location="classpath:druid.properties"/>

    <!-- 1.配置数据源 -->
    <bean class="com.alibaba.druid.pool.DruidDataSource" id="dataSource">
        <property name="username" value="${jdbc.username}"/>
        <property name="password" value="${jdbc.password}"/>
        <property name="url" value="${jdbc.url}"/>
        <property name="driverClassName" value="${jdbc.driverClassName}"/>
    </bean>

    <!-- 2.配置模板对象:注入数据源 -->
    <bean class="org.springframework.jdbc.core.JdbcTemplate" id="jdbcTemplate">
        <property name="dataSource" ref="dataSource"/>
    </bean>

</beans>
测试
package com.itheima.test;

import com.itheima.entity.Account;
import com.itheima.service.AccountService;
import org.junit.Before;
import org.junit.Test;
import org.springframework.context.support.ClassPathXmlApplicationContext;

import java.util.List;

//相当于表示层
public class TestAccount {


    //获取业务层对象
    AccountService accountService;

    //在每个测试方法前调用
    @Before
    public void init() {


        //创建Spring容器
        ClassPathXmlApplicationContext context = new ClassPathXmlApplicationContext("applicationContext.xml");
        //获取业务层对象
        accountService = context.getBean("accountService", AccountService.class);
    }

    //查询所有记录
    @Test
    public void testFindAll() {


        List<Account> accountList = accountService.findAll();
        accountList.forEach(System.out::println);
    }

}
小结
-
哪些类使用XML配置,哪些类使用注解配置?
第三方的jar包使用XML配置,自己写的类使用注解 -
配置业务层和DAO层分别用哪个注解?
@Service
@Repository
@Autowired
8. 纯注解配置
目标
纯注解配置的分析
应用场景:以后实现零配置来做项目,XML的配置都放在类中,这个类就是配置类,以后这个配置类不用我们写,而其它的框架去实现(SpringBoot)
原有项目的分析
基于注解的 IoC 配置已经完成,但是大家都发现了一个问题:我们依然离不开 spring 的 xml 配置文件,那么能不能省略这个 applicationContext.xml,所有配置都用注解来实现呢?
待改造的部分
-
我们发现,之所以我们现在离不开 xml 配置文件,是因为我们有一句很关键的配置:
<!--扫描指定的包和子包-->
<context:component-scan base-package="com.itheima"/>
如果也能用注解配置,那么我们就离脱离 xml 文件又进了一步。
-
另外,数据源和 JdbcTemplate的配置也需要靠注解来实现。
使用注解
我们已经配置好了要扫描的包,但是数据源和 JdbcTemplate对象如何从配置文件中移除呢?

为了模块化设计,将与数据库有关的配置写到另一个配置类中:JdbcConfig
注解@Configuration
- 作用:放在类上,表示这是一个配置类
- 注:如果要读取配置类,要使用AnnotationConfigApplicationContext加载容器
注解@ComponentScan
- 作用: 放在类上,指定要扫描的基包
| @ComponentScan的属性 | 作用 |
|---|---|
| basePackages | 参数是一个字符数组,指定一个或多个基包的名字 |
| value | 同上 |
@Bean
- 注解用在方法上
- 自动将方法的返回值加入到Spring容器中,方法名就是放在容器中的id。
- 如果想指定与方法名不同的id,则使用name属性指定名字,相当于指定id(name属性的别名是value)。
- 如果方法有参数,则参数传入的对象从容器中自动按类型匹配的方式去找。
@PropertySource
作用:读取Java的属性文件(.properties)
value[]属性:指定一个或多个属性文件的名字
注:@PropertySource可以不用写classpath,因为注解默认从类路径下加载
创建JdbcConfig配置类
-
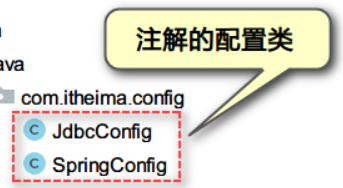
创建包com.itheima.config
-
在包中创建配置类
- 创建JdbcConfig配置类,这个文件通过SpringConfig类导入,可以省略@Configuration注解
- 使用@PropertySource加载druid.properties配置文件
- 添加与数据库连接相关的四个成员变量
-
使用@Value("${键}")注入数据库连接的属性值
-
编写数据源有关的方法
- 创建方法:public DataSource createDataSource()
- 创建方法:public JdbcTemplate createJdbcTemplate(DataSource dataSource)
注:在每个方法上添加@Bean注解,无需指定value,方法通过类型匹配的方式从容器中去查找对象
代码
package com.itheima.config;

import com.alibaba.druid.pool.DruidDataSource;
import org.springframework.beans.factory.annotation.Value;
import org.springframework.context.annotation.Bean;
import org.springframework.context.annotation.Configuration;
import org.springframework.context.annotation.PropertySource;
import org.springframework.jdbc.core.JdbcTemplate;

import javax.sql.DataSource;

@Configuration  //表示这是一个配置类,如果被其它配置类导入,这个可以省略
@PropertySource("druid.properties")   //默认从类路径下去加载文件
public class JdbcConfig {


    @Value("${jdbc.username}")
    private String username;

    @Value("${jdbc.password}")
    private String password;

    @Value("${jdbc.url}")
    private String url;

    @Value("${jdbc.driverClassName}")
    private String driverClassName;

    /**
     * 创建数据源对象
     * Bean注解的作用:放在方法上
     * 1. 会将这个方法的返回值放在Spring容器中
     * 2. 如果方法有参数,会按类型匹配的方式从容器中去查找,找到后注入进来
     * 3. 也可以指定放在容器中的名字,如果没有指定名字,默认是方法的名字
     */
    @Bean
    public DataSource createDataSource() {


        DruidDataSource ds = new DruidDataSource();
        ds.setUsername(username);
        ds.setPassword(password);
        ds.setUrl(url);
        ds.setDriverClassName(driverClassName);
        return ds;
    }

    @Bean
    public JdbcTemplate createJdbcTemplate(DataSource ds) {


        return new JdbcTemplate(ds);
    }

}
主配置类
步骤
- 创建SpringConfig配置类
- 使用@Configuration注解说明这是一个配置类
- 使用@ComponentScan扫描com.itheima包下所有的类
注:类中没有任何其它的代码
@Import
思考:此时我们已经有了两个配置类,但是他们还没有关系。如何建立他们的关系呢?
代码
SpringConfig.java
package com.itheima.config;

import org.springframework.context.annotation.ComponentScan;
import org.springframework.context.annotation.Configuration;
import org.springframework.context.annotation.Import;

/**
 * 主配置类
 */
@Configuration
@Import(JdbcConfig.class)   //指定一个或多个类对象,导入另一个配置类
@ComponentScan("com.itheima")  //指定一个或多个要扫描的基包名字
public class SpringConfig {


}
测试类
容器通过:AnnotationConfigApplicationContext类创建
package com.itheima.test;

import com.itheima.config.SpringConfig;
import com.itheima.entity.Account;
import com.itheima.service.AccountService;
import org.junit.Before;
import org.junit.Test;
import org.springframework.context.annotation.AnnotationConfigApplicationContext;
import org.springframework.context.support.ClassPathXmlApplicationContext;

import java.util.List;

//相当于表示层
public class TestAccount {


    //获取业务层对象
    AccountService accountService;

    //在每个测试方法前调用
    @Before
    public void init() {


        //创建Spring容器,指定配置类
        AnnotationConfigApplicationContext context = new AnnotationConfigApplicationContext(SpringConfig.class);
        //获取业务层对象
        accountService = context.getBean("accountService", AccountService.class);
    }

    //查询所有记录
    @Test
    public void testFindAll() {


        List<Account> accountList = accountService.findAll();
        accountList.forEach(System.out::println);
    }

}
小结
| 注解 | 作用 |
|---|---|
| @Configuration | 这是一个配置类 |
| @ComponentScan | 指定要扫描的基包 |
| @Import | 导入其它的配置类 |
| @PropertySource | 读取属性配置文件 |
| @Value | 将配置文件中属性值注入给成员变量 |
| @Bean | 1. 把方法的返回值放到容器中 2. 可以指定名字,如果没有指定名字,方法名就是id 3. 如果方法有参数,通过类型匹配的方式从容器中去找 |
9. Spring整合JUnit
目标
- Spring为什么要整合JUnit
- Spring使用哪些注解来整合JUnit
测试类中的问题
在测试类中,我们都需要自己创建容器对象和业务对象:
ApplicationContext context = new ClassPathXmlApplicationContext("applicationContext.xml");
AccountService accountService = (AccountService)context.getBean("accountService");
如何去掉这些代码,使用自动注入的方式获取业务对象呢?
理想的状态
-
Spring容器对象由JUnit帮我们创建好
-
容器中的业务对象也由JUnit创建好,我们只需要直接使用业务对象即可
解决思路分析
针对上述问题,我们需要的是程序能自动帮我们创建容器。一旦程序能自动为我们创建 Spring 容器,我们就无须手动创建了,问题也就解决了。
我们都知道, JUnit 单元测试它自己无法知晓我们是否使用了Spring 框架,更不用说帮我们创建 Spring 容器了。不过好在, JUnit4 给我们提供扩展的一个注解**@RunWith**,可以让我们替换掉它自己本身的运行器。这时,我们使用 Spring 框架提供的运行器,可以读取配置文件(或注解)来创建Spring容器。
开发步骤
- 添加spring-test的依赖包
- 在XML配置的项目中,加载配置文件的方式使用junit
- 在注解配置的项目中,使用纯注解的方式使用junit
添加spring-test依赖
<!-- spring测试包 -->
<dependency>
    <groupId>org.springframework</groupId>
    <artifactId>spring-test</artifactId>
    <version>5.2.0.RELEASE</version>
    <scope>test</scope>
</dependency>
测试步骤
在使用配置文件的项目中整合
- 使用JUnit的注解@RunWith,让JUnit使用Spring提供的运行器
- 使用Spring提供的注解@ContextConfiguration,使用locations="classpath:applicationContext.xml"指定XML的配置文件(locations的别名是value)。
- 给测试类中业务对象使用@Autowired注解
- 在测试类中直接使用业务对象即可
package com.itheima.test;

import com.itheima.entity.Account;
import com.itheima.service.AccountService;
import org.junit.Test;
import org.junit.runner.RunWith;
import org.springframework.beans.factory.annotation.Autowired;
import org.springframework.test.context.ContextConfiguration;
import org.springframework.test.context.junit4.SpringJUnit4ClassRunner;

import java.util.List;

//指定运行器
@RunWith(SpringJUnit4ClassRunner.class)
@ContextConfiguration("classpath:applicationContext.xml")  //指定配置文件
public class TestAccount2 {


    //获取业务层对象
    @Autowired
    AccountService accountService;

    //查询所有记录
    @Test
    public void testFindAll() {


        List<Account> accountList = accountService.findAll();
        accountList.forEach(System.out::println);
    }

}
在使用纯注解的项目中整合
- 使用JUnit的注解@RunWith,让JUnit使用Spring提供的运行器
- 使用Spring提供的注解@ContextConfiguration,使用classes=SpringConfig.class指定有注解配置的类对象
- 给业务类使用@Autowired注解
- 在测试类中直接使用业务对象即可
package com.itheima.test;

import com.itheima.config.SpringConfig;
import com.itheima.entity.Account;
import com.itheima.service.AccountService;
import org.junit.Test;
import org.junit.runner.RunWith;
import org.springframework.beans.factory.annotation.Autowired;
import org.springframework.test.context.ContextConfiguration;
import org.springframework.test.context.junit4.SpringJUnit4ClassRunner;

import java.util.List;

/**
 * Spring整合JUnit
 * 纯注解的方式
 * 1. RunWith 是JUnit的注解,可以指定其它第三方的运行器。指定为Spring编写的运行器:SpringJUnit4ClassRunner
 * 2. ContextConfiguration读取Spring的配置文件,纯注解:指定一个或多个配置类
 */
@RunWith(SpringJUnit4ClassRunner.class)
@ContextConfiguration(classes = SpringConfig.class)
public class TestAccount2 {


    //由Spring自动注入业务对象
    @Autowired
    AccountService accountService;

    //查询所有记录
    @Test
    public void testFindAll() {


        List<Account> accountList = accountService.findAll();
        accountList.forEach(System.out::println);
    }

}
小结
-
@RunWith注解作用?
指定第三方的运行器 -
@ContextConfiguration注解作用?
指定配置文件- locations: 默认的,指定xml的配置文件
- classes: 指定配置类
10. 代理模式:JDK动态代理
目标
- 什么是代理模式
- 有几种实现方式
代理模式介绍
代理模式的作用
对一个类的功能进行增强或对类中的方法进行拦截,应用场景:要增强一个类或方法,但不能修改原来的类代码。
如:对业务类中每个方法添加日志记录的功能,使用代理模式给每个方法添加了日志,又没有修改原来的业务代码。
代理模式的对象

动态代理模式实现的两种方式
- JDK代理,以前学习的就是这种
- CGLIB代理,今天要学习的新的内容
回顾JDK动态代理
因为这个代理类和方法由JDK自带的,类名:Proxy
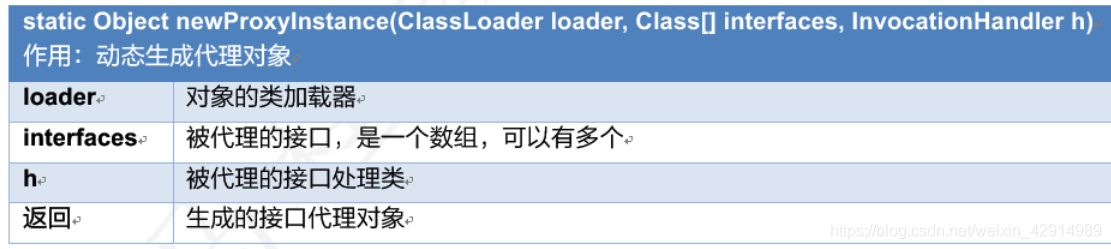
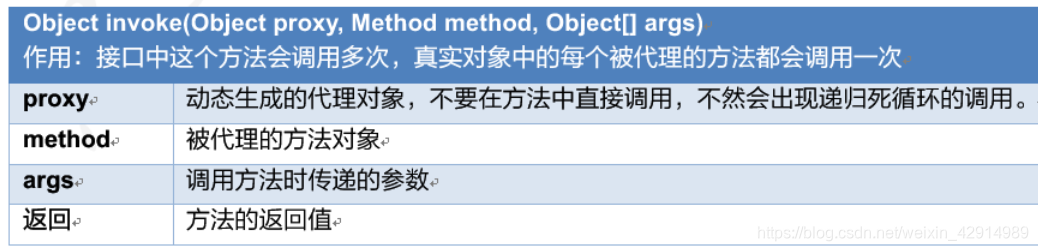
使用JDK代码有个不足:代理类必须要有实现的接口
11. 代理模式:CGLIB动态代理
目标
学习使用cglib来代理对象
为什么要使用CGLIB代理
特点:cglib是一个强大的高性能的代码生成包,它可以在运行期扩展java类或实现java接口,它广泛的被许多AOP的框架使用,为他们提供方法的拦截。
如果一个类并没有实现任何的接口,则无法使用上面所说的JDK动态代理,这时需要使用CGLIB代理,本质上是对原有类的继承,子类重新相应的方法。
使用cglib动态代理
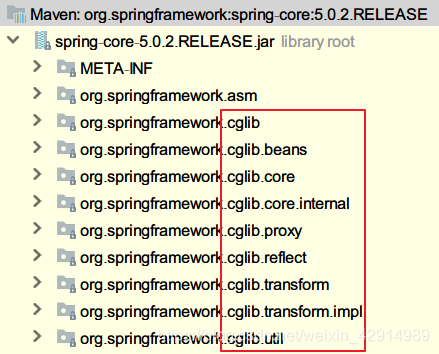
-
直接引入Spring-Core核心包就可以,已经包含cglib功能
-
在spring-core中依赖的jar包中就包含了cglib
演示案例
需求
-
代理SuperStar这个类,这个类没有实现任何的接口
-
有两个方法:唱歌,演戏
-
对演戏的方法进行代理
- 如果是演戏的方法,则判断出场费如果小于1000,则不演出。
- 其它方法则直接调用原来的方法。
步骤
- 编写Fans类,创建main函数,使用Enhancer.create创建代理对象
- 重写intercept()方法
- 得到方法的名字
- 判断是否是演出的方法
- 得到第1个参数即出场费,如果小于1000,则不演出了。(对方法功能增强)
- 否则调用原来的方法
代码
真实角色
package com.itheima.proxy;

/**
 * 真实对象:被代理的对象
 */
public class SuperStar {


    /**
     * 唱歌
     * @param song
     */
    public void sing(String song) {


        System.out.println("宝强唱:" + song);
    }

    /**
     * 演戏
     */
    public void act(double money) {


        System.out.println("拍戏出场费:" + money);
    }
}
Fans类
package com.itheima.proxy;

import org.springframework.cglib.proxy.Enhancer;
import org.springframework.cglib.proxy.MethodInterceptor;
import org.springframework.cglib.proxy.MethodProxy;

import java.lang.reflect.Method;

/**
 * 使用代理模式
 */
public class Fans {


    public static void main(String[] args) {


        System.out.println("真实对象:");
        //真实对象
        SuperStar s1 = new SuperStar();
        //唱歌的方法不变
        s1.sing("常回家看看");
        //对演戏的方法进行增强
        s1.act(800);

        System.out.println("代理对象:");
        /**
         * 创建代理对象
         * 参数1:被代理的类类型
         * 参数2:回调函数
         */
        SuperStar s2 = (SuperStar) Enhancer.create(SuperStar.class, new MethodInterceptor() {


            /**
             * 每个被代理的方法都会执行一次
             * @param proxy 生成的代理对象
             * @param method 被代理的方法对象
             * @param args 方法的参数
             * @param methodProxy 生成代理方法
             * @return 方法运行的返回值
             */
            @Override
            public Object intercept(Object proxy, Method method, Object[] args, MethodProxy methodProxy) throws Throwable {


                //获取方法名字
                String methodName = method.getName();
                //判断是不是act方法,对原有的功能进行增强
                if ("act".equals(methodName)) {


                    //获取出场费价格
                    double money = (double) args[0];
                    if (money < 1000) {


                        System.out.println("没有档期");
                        return null;
                    }
                }
                //调用原来的方法
                return method.invoke(s1, args);
            }
        });

        //调用代理对象方法
        s2.sing("绿光");
        s2.act(1700);
    }

}
运行
- 输出返回的代理对象的getClass()
- 使用instanceof判断代理对象是否是SuperStar的子类
效果
JDK代理对象:class com.sun.proxy.$Proxy11
CGLIB代理对象:class com.itheima.cglibproxy.SuperStar$$EnhancerByCGLIB$$2a0abf81
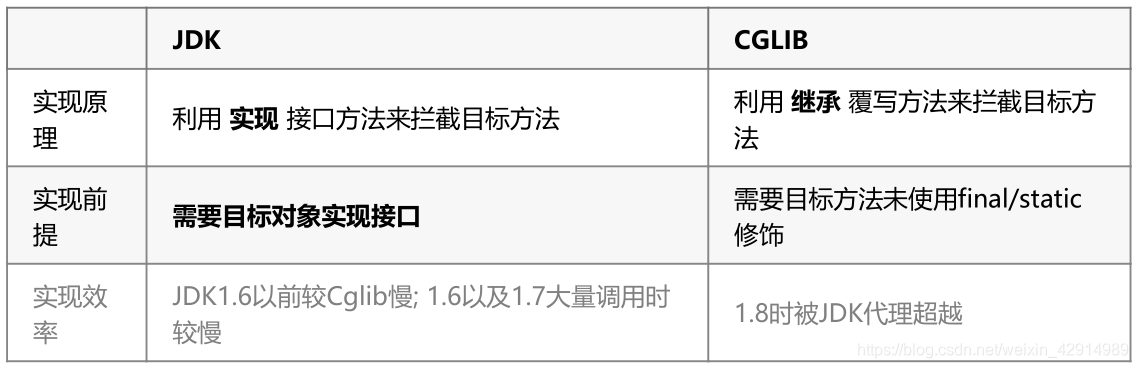
代理的比较
Cglib动态代理也称之为子类代理 : 代理类继承了真实对象
小结
| Enhancer类名 | 描述 |
|---|---|
| static Object create(Class type, Callback callback) | 创建代理对象 参数1:被代理的类型 参数2:回调函数 |
| MethodInterceptor接口继承了Callback接口 | 描述 |
|---|---|
| public Object intercept(Object proxy, Method method, Object[] args, MethodProxy methodProxy) throws Throwable |
每个被代理的方法都会执行1次 1. 代理对象 2. 真实方法 3. 方法参数 4. 生成的代理方法 |
学习总结
-
能够使用JdbcTemplate的模板
1. 创建数据源 2. 创建JdbcTemplate对象,注入数据源 3. 方法: 1) 增删改方法:update() 2) 查询1条记录:queryForObject() 3) 查询多条记录:query() RowMapper接口,用来将表的字段与实体类的属性进行映射 BeanPropertyRowMapper子类 -
能够配置Spring的连接池
-
DriverManagerDataSource
-
DruidDataSource
上面2种的属性相同
-
ComboPooledDataSource
-
-
能够使用JdbcTemplate完成增删查改操作
BeanPropertyRowMapper类的构造方法 说明 public BeanPropertyRowMapper(Class<T> mappedClass) 用来将表的字段与实体类的属性进行映射,已经实现的子类 -
使用注解改造CRUD工程
-
第三方的类使用:XML的配置
-
自己写的类使用:使用注解
@Repository 用在持久层
@Service 用在业务层
@Autowired 依赖注入
-
-
基于纯注解改造CRUD工程
注解 作用 @Configuration 这是一个配置类 @ComponentScan 扫描基包 @Import 导入其它配置类 @PropertySource 加载Java的属性文件 @Value 将属性值注入到成员变量中 @Bean 用在方法上
1. 方法的返回值放到容器中
2. 可以指定id,如果没有指定方法名就是id
3. 如果方法有参数,自动按类型匹配的方式注入 -
能够实现Spring框架整合Junit
注解名 属性作用 @RunWith 指定第三方的运行器 @ContextConfiguration 指定Spring的配置文件
locations: 默认,指定xml配置文件classes: 指定配置类 -
掌握动态代理的两种实现方式
CGLIB代理:用于被代理的类没有实现接口的时候,本质上是重写父类的方法进行增强
Enhancer类名 描述 static Object create(Class type, Callback callback) 创建代理对象 MethodInterceptor接口继承了Callback接口 描述 public Object intercept(Object proxy,
Method method,
Object[] args,
MethodProxy methodProxy) throws Throwable每个被代理的方法都会调用一次的回调函数
Memorial Day is 513 days |