环境准备
- 启动的ActiveMQ服务
- JDK1.8+
- IDEA或Eclipse
- Maven环境
- SpringBoot和ActiveMQ整合的依赖
<!--activemq启动器-->
<dependency>
   <groupId>org.springframework.boot</groupId>
   <artifactId>spring-boot-starter-activemq</artifactId>
</dependency>
<!--boot启动器-->
<dependency>
   <groupId>org.springframework.boot</groupId>
   <artifactId>spring-boot-starter</artifactId>
   <version>2.2.1.RELEASE</version>
</dependency>
<dependency>
   <groupId>org.springframework.boot</groupId>
   <artifactId>spring-boot-starter-web</artifactId>
</dependency>
<!--测试启动器-->
<dependency>
   <groupId>org.springframework.boot</groupId>
   <artifactId>spring-boot-starter-test</artifactId>
   <scope>test</scope>
</dependency>
<dependency>
   <groupId>junit</groupId>
   <artifactId>junit</artifactId>
   <scope>test</scope>
</dependency>
环境启动配置和代码
application.yml配置:
server:
  port: 7777
spring:
  activemq:
    #你的activemq连接地址
    broker-url: tcp://47.98.163.118:8161:61616
    #账号
    user: admin
    #密码
    password: admin
  jms:
    #指定连接的是队列(Queue)还是主题(Topic),false代表队列,true代表主题
    pub-sub-domain: false

queue:
  name: boot-queue-test

topic:
  name: boot-topic-test
ActiveMQ配置类:
package com.huazai.activemq.springboot.config;

import org.apache.activemq.command.ActiveMQQueue;
import org.springframework.beans.factory.annotation.Value;
import org.springframework.context.annotation.Bean;
import org.springframework.context.annotation.Configuration;

import javax.jms.Queue;

/**
 * @author pyh
 * @date 2021/1/16 19:13
 */
@Configuration
public class ActiveConfig {


    @Value("${queue.name}")
    private String queueName;

	@Value("${topic.name}")
    private String topicName;

    @Bean
    public Queue activeQueue() {


        return new ActiveMQQueue(queueName);
    }

	@Bean
    public Topic activeTopic() {


        return new ActiveMQTopic(topicName);
    }
}
启动类:
package com.huazai.activemq.springboot;

import org.springframework.boot.SpringApplication;
import org.springframework.boot.autoconfigure.SpringBootApplication;
import org.springframework.jms.annotation.EnableJms;

/**
 * @author pyh
 * @date 2021/1/16 18:51
 */
@SpringBootApplication
// 开启JMS服务
@EnableJms
public class BootQueueProviderMain {


    public static void main(String[] args) {


        SpringApplication.run(BootQueueProviderMain.class, args);
    }
}
队列生产者代码
package com.huazai.activemq.springboot.queue;

import org.springframework.beans.factory.annotation.Autowired;
import org.springframework.jms.annotation.JmsListener;
import org.springframework.jms.core.JmsMessagingTemplate;
import org.springframework.jms.core.JmsTemplate;
import org.springframework.stereotype.Service;

import javax.jms.JMSException;
import javax.jms.Queue;
import java.util.UUID;

@Service
public class QueueProviderService {


    /**
     * 相当于 {@link JmsTemplate}
     */
    @Autowired
    private JmsMessagingTemplate jmsMessagingTemplate;

    @Autowired
    private Queue queue;

    /**
     * 生产消息
     *
     * @throws JMSException
     */
    @JmsListener(destination = "${queue.name}")
    public void productMessage() throws JMSException {


        // 生产者生产并发送消息,此方法是send方法的加强版
        jmsMessagingTemplate.convertAndSend(queue, "消费者发送消息:" + UUID.randomUUID());
    }
}
队列消息发送测试类:
import com.huazai.activemq.springboot.BootQueueProviderMain;
import com.huazai.activemq.springboot.queue.QueueProviderService;
import org.junit.Test;
import org.junit.runner.RunWith;
import org.springframework.beans.factory.annotation.Autowired;
import org.springframework.boot.test.context.SpringBootTest;
import org.springframework.test.context.junit4.SpringJUnit4ClassRunner;

import javax.jms.JMSException;

/**
 * @author pyh
 * @date 2021/1/16 19:25
 */
@SpringBootTest(classes = BootQueueProviderMain.class)
@RunWith(SpringJUnit4ClassRunner.class)
public class QueueProviderTest {


    @Autowired
    private QueueProviderService queueProviderService;

    @Test
    public void testSend() throws JMSException {


        queueProviderService.productMessage();
    }
}
启动测试类,将消息发送到名称为boot-queue-test队列,结果如下:

队列消费者代码
消息监听消费服务:
package com.huazai.activemq.springboot.queue;


import org.springframework.jms.annotation.JmsListener;
import org.springframework.stereotype.Service;

import javax.jms.JMSException;
import javax.jms.TextMessage;

@Service
public class QueueConsumerService {


    /**
     * 监听接收的方法,监听的目的地名称为${queue.name}配置
     */
    @JmsListener(destination = "${queue.name}")
    public void receive(TextMessage textMessage) throws JMSException {


        String text = textMessage.getText();
        System.out.println("***消费者收到的消息:    " + text);
    }
}
启动消费者服务,接受到了之前生产者生产的消息,测试结果如下:

定时任务发送消息
- 开启主启动类
@SpringBootApplication
@EnableScheduling      // 是否开启
public class MainApp_Produce {


    public static void main(String[] args) {


        SpringApplication.run(MainApp_Produce.class,args);
    }
}

2. 使用注解@Scheduled
// 带定时投递的业务方法
    @Scheduled(fixedDelay = 3000)    // 每3秒自动调用
    public void produceMessageScheduled(){


        jmsMessagingTemplate.convertAndSend(queue,"** scheduled **"+ UUID.randomUUID().toString().substring(0,6));
        System.out.println("  produceMessage  send   ok   ");
    }
主题代码
主题订阅者服务
package com.huazai.activemq.springboot.topic;
import org.springframework.beans.factory.annotation.Autowired;
import org.springframework.jms.core.JmsMessagingTemplate;
import org.springframework.scheduling.annotation.Scheduled;
import org.springframework.stereotype.Service;
import javax.jms.Topic;
import java.util.UUID;
/**
* @author pyh
* @date 2021/1/17 15:14
*/
@Service
public class TopicProviderService {
@Autowired
private JmsMessagingTemplate jmsMessagingTemplate;
@Autowired
private Topic topic;
/**
* 每隔3秒定时发布主题消息
*/
@Scheduled(fixedDelay = 3000)
public void productTopic() {
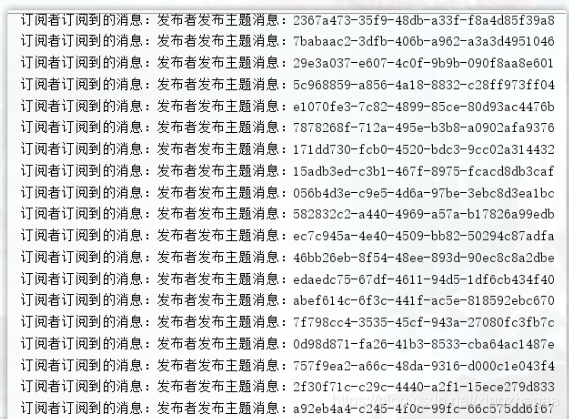
jmsMessagingTemplate.convertAndSend(topic, "发布者发布主题消息:" + UUID.randomUUID());
}
}
主题发布者服务
package com.huazai.activemq.springboot.topic;

import org.springframework.jms.annotation.JmsListener;
import org.springframework.stereotype.Service;

import javax.jms.JMSException;
import javax.jms.TextMessage;

/**
 * @author pyh
 * @date 2021/1/17 15:15
 */
@Service
public class TopicConsumerService {


    /**
     * 开启监听器监听主题消息
     *
     * @param textMessage
     * @throws JMSException
     */
    @JmsListener(destination = "${topic.name}")
    public void receive(TextMessage textMessage) throws JMSException {


        String text = textMessage.getText();
        System.out.println("订阅者订阅到的消息:" + text);
    }
}
先启动主题订阅者,再启动主题发布者,主题订阅者会间隔3秒接收到主题发布者的消息,结果如下:

连更文章
ActiveMQ专题0 —— 前言说明
ActiveMQ专题1 —— 入门概述
ActiveMQ专题2 —— ActiveMQ下载和安装(Linux版)
ActiveMQ专题3 ——Java编码实现ActiveMQ通讯(Queue)
ActiveMQ专题4 ——ActiveMQ专题4 ——Java编码实现ActiveMQ通讯(Topic)
ActiveMQ专题5 ——JMS规范和落地产品
ActiveMQ专题6 ——ActiveMQ的Broker
ActiveMQ专题7 —— Spring整合ActiveMQ
ActiveMQ专题8 —— SpringBoot整合ActiveMQ
ActiveMQ专题9 —— ActiveMQ的传输协议
ActiveMQ专题10 —— ActiveMQ的存储和持久化
ActiveMQ专题11 —— ActiveMQ的存储和持久化2 (续篇)
小总结
知 道 的 越 多 , 不 知 道 的 越 多 , 希 望 对 你 有 帮 助 ! \color{red}知道的越多,不知道的越多,希望对你有帮助! 知道的越多,不知道的越多,希望对你有帮助!
2021.03.04 ~ 2021.03.06 努力连更中