上一篇博客的地址:https://blog.csdn.net/qq_41115379/article/details/114336585
开始注册审批
在controller这边创建 approveaccountController
package org.javaboy.meeting.controller;

import org.javaboy.meeting.model.Employee;
import org.javaboy.meeting.service.EmployeeService;
import org.springframework.beans.factory.annotation.Autowired;
import org.springframework.stereotype.Controller;
import org.springframework.ui.Model;
import org.springframework.web.bind.annotation.GetMapping;
import org.springframework.web.bind.annotation.RequestMapping;

@Controller
@RequestMapping("/admin")
public class approveaccountController {


    //按照规范设置一个常数
    public static final Integer STATUS=0;
    @Autowired
    EmployeeService employeeService;
    @RequestMapping("/approveaccount")
    public String approveaccount(Model model){


        //通过mapping映射到对应的.ftl文件
        //因为需要上传用户未审批的信息 所以要传到前端对应的数据
        model.addAttribute("emps",employeeService.getAllEmp(STATUS));
        return "approveaccount";
    }
}
然后开始套娃
EmployeeService
public List<Employee> getAllEmp(Integer status) {


    return employeeMapper.getAllEmp(status);
}
EmployeeMapper
List<Employee> getAllEmp(Integer status);
EmployeeMapper.xml
<select id="getAllEmp" parameterType="org.javaboy.meeting.model.Employee">
    select * from employee where status=#{

    status};
</select>
再修改approveaccount.ftl
<!DOCTYPE html>
<html>
    <head>
        <title>CoolMeeting会议管理系统</title>
        <link rel="stylesheet" href="/styles/common.css"/>
        <style type="text/css">

        </style>
    </head>
    <body>
    <#include 'top.ftl'>
        <div class="page-body">
            <#include 'leftMenu.ftl'>
            <div class="page-content">
                <div class="content-nav">
                    人员管理 > 注册审批
                </div>
                <table class="listtable">
                    <caption>所有待审批注册信息:</caption>
                    <tr class="listheader">
                        <th>姓名</th>
                        <th>账号名</th>
                        <th>联系电话</th>
                        <th>电子邮件</th>
                        <th>操作</th>
                    </tr>
                    <#if emps ??>
                        <#list emps as emp>
                            <tr>
                                <td>${emp.employeename}</td>
                                <td>${emp.username}</td>
                                <td>${emp.phone}</td>
                                <td>${emp.email}</td>
                                <td>
                                    <input type="button" class="clickbutton" value="通过"/>
                                    <input type="button" class="clickbutton" value="删除"/>
                                </td>
                            </tr>
                        </#list>
                    </#if>
                </table>
            </div>
        </div>
        <div class="page-footer">
            <hr/>
            更多问题,欢迎联系<a href="mailto:[email protected]">管理员</a>
            <img src="/images/footer.png" alt="CoolMeeting"/>
        </div>
    </body>
</html>
运行以 linyk登录(删除多余的linyk) 点击注册审批就行了

优化通过和删除两个按钮
首先修改approveaccount.ftl
<a type="button" class="clickbutton" href="/admin/updatestatus?employeeid=${emp.employeeid}&status=1"/>通过</a>
<a type="button" class="clickbutton" href="/admin/updatestatus?employeeid=${emp.employeeid}&status=2"/>不通过</a>
这里提到了@param注解:@Param这个注解是用来解决接口方法有多个参数时、xxMapper.xml文件绑定参数混淆问题。
approveaccountController
@RequestMapping("/updatestatus")
public String updatestatus(Integer employeeid,Integer status){


   Integer result=employeeService.updatestatus(employeeid,status);
   //并且操作完成之后,就会返回到当前的页面
   return "redirect:/admin/approveaccount";
}
employeeService
public Integer updatestatus(Integer employeeid, Integer status) {


    return employeeMapper.updatestatus(employeeid,status);
}
employeeMapper
Integer updatestatus(@Param("employeeid") Integer employeeid,@Param("status") Integer status);
employeeMapper.xml
<update id="updatestatus">
    update employee set status =#{status} where employeeid=#{employeeid};
</update>
再运行一下,以 linyk登录(删除多余的linyk) 点击注册审批

通过的会在数据库中显示出来

部门管理
修改DepartmentController
@Autowired
DepartmentService departmentService;
@GetMapping("/departments")
public  String departments(Model model){


    model.addAttribute("department",departmentService.getAllDeps());
    return "departments";
}
再对department.ftl进行简单修改
<!DOCTYPE html>
<html>
    <head>
        <title>CoolMeeting会议管理系统</title>
        <link rel="stylesheet" href="/styles/common.css"/>
    </head>
    <body>
    <#include 'top.ftl'>
        <div class="page-body">
            <#include 'leftMenu.ftl'>
            <div class="page-content">
                <div class="content-nav">
                    人员管理 > 部门管理
                </div>
                <form>
                    <fieldset>
                        <legend>添加部门</legend>
                        部门名称:
                        <input type="text" id="departmentname" maxlength="20"/>
                        <input type="submit" class="clickbutton" value="添加"/>
                    </fieldset>
                </form>
                <table class="listtable">
                    <caption>所有部门:</caption>
                    <tr class="listheader">
                        <th>部门编号</th>
                        <th>部门名称</th>
                        <th>操作</th>
                    </tr>
                    <#if deps??>
                            <#list deps as dep>
                          <tr>
                            <td>${dep.departmentid}</td>
                            <td>${dep.departmentname}</td>
                            <td>
                                <a class="clickbutton" href="#">编辑</a>
                                <a class="clickbutton" href="#">删除</a>
                            </td>
                        </tr>
                        </#list>
                    </#if>

                </table>
            </div>
        </div>
        <div class="page-footer">
            <hr/>
            更多问题,欢迎联系<a href="mailto:[email protected]">管理员</a>
            <img src="/images/footer.png" alt="CoolMeeting"/>
        </div>
    </body>
</html>
运行一下

再做一下添加的功能
<form action="/admin/adddepartment">
    <fieldset>
        <legend>添加部门</legend>
        部门名称:
        <input type="text" name="departmentname" id="departmentname" maxlength="20"/>
        <input type="submit" class="clickbutton" value="添加"/>
    </fieldset>
</form>
修改DepartmentController
@GetMapping("/adddepartment")
//通过departmentname来添加的
public String adddepartment(String departmentname){


    //感觉是需要刷新吧 但我这里还没用Integer 不行,不然不能返回
   departmentService.adddepartment(departmentname);
    return "redirect:/admin/departments";
}
departmentService
public  Integer adddepartment(String departmentname) {


    return departmentMapper.adddepartment(departmentname);
}
departmentMapper
Integer adddepartment(String departmentname);
departmentMapper.xml
<insert id="adddepartment" parameterType="java.lang.String">
    insert into department (departmentname) value (#{

    departmentname});
</insert>
运行一下
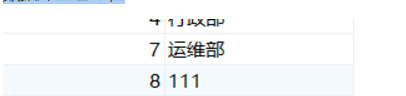
添加成功

数据库里也存在
再开始修改编辑
<a class="clickbutton" href="/admin/deletedep?departmentid=${dep.departmentid}">删除</a>
DepartmentController
@GetMapping("/deletedep")
public String deletedep(Integer departmentid){


    //是通过id来删除的
    departmentService.deletedep(departmentid);
    //并且无论成功或失败都回到当前页面
    return "redirect:/admin/departments";

}
DepartmentService
public Integer deletedep(Integer departmentid) {


    return departmentMapper.deletedep(departmentid);
}
departmentMapper
Integer deletedep(Integer departmentid);
departmentMapper.xml
<delete id="deletedep">
    delete from department where departmentid=#{

    departmentid};
</delete>
运行之后就可以进行删除了,数据库里也不存在对应数据

