本节教程我们将使用Retrofit网络请求库实现网易云音乐的推荐歌单的数据请求。请求的过程中我们将使用Coroutines实现异步操作,并且利用Moshi进行网络数据的解析。
我们的接口来自于开源库NeteaseCloudMusicApi,这个NodeJS API 库的文档非常完善,并且支持的接口非常多。这个库的安装请详阅该项目的参考文档。
kotlin - Coroutine 协程
协程是kotlin的一个异步处理框架,是轻量级的线程。
协程的几大优势:
- 可以用写同步的代码结构样式实现异步的功能
- 非常容易将代码逻辑分发到不同的线程中
- 和作用域绑定,避免内存泄露。可以无缝衔接LifeCycle和ViewModel等JetPack库
- 减少模板代码和避免了地狱回调
接下来我将详细介绍下协程的概念和使用方法。
启动协程
启动协程使用最多的方式(主要)有launch和async
public fun CoroutineScope.launch(
    context: CoroutineContext = EmptyCoroutineContext,
    start: CoroutineStart = CoroutineStart.DEFAULT,
    block: suspend CoroutineScope.() -> Unit
): Job
public fun <T> CoroutineScope.async(
    context: CoroutineContext = EmptyCoroutineContext,
    start: CoroutineStart = CoroutineStart.DEFAULT,
    block: suspend CoroutineScope.() -> T
): Deferred<T>
返回值 Job
Deferred其实是Job的子类,所以这两个启动方法的返回值都是Job,那Job有什么特性呢?
- Job 代表一个异步的任务
- Job 具有生命周期并且可以取消。
- Job 还可以有层级关系,一个Job可以包含多个子Job,当父Job被取消后,所有的子Job也会被自动取消;当子Job出现异常后父Job也会被取消。
Deferred有一个await方法就能取到协程的返回值,这是和Job的重要区别:
launch启动的协程的结果没有返回值,async启动的协程会返回值.这就是Kotlin为什么设计有两个启动方法的原因了。
public interface Deferred<out T> : Job {
    public suspend fun await(): T
}
总结:launch 更多是用来发起一个无需结果的耗时任务(如批量文件删除、混合图片等),async用于异步执行耗时任务,并且需要返回值(如网络请求、数据库读写、文件读写)。
调用对象 CoroutineScope
启动协程需要在一定的协程作用域CoroutineScope下启动。
public fun CoroutineScope(context: CoroutineContext): CoroutineScope =
    ContextScope(if (context[Job] != null) context else context + Job())
通过CoroutineScope的构造方法我们得知:
- 构造的时候需要Job,如果没有传入就会在内部新建一个Job做为这个协程的父Job来管理该协程的所有任务Job。
- 这儿的CoroutineContext我们可以简单的等于CoroutineDispatcher。这个稍后介绍。
协程作用域可以通过以下方式获得:
- Global Scope — 和APP的生命周期一致
- LiveDataScope, ViewModelScope, lifecycleScope 等 — 和这些类的生命周期一致 (涉及到的内容后面的教程会有解释)
- 自定义 Scope — 自己定义Scope,生命周期和定义相关。
协程作用域CoroutineScope的主要作用是规定了协程的执行范围,超过这个作用域范围协程将会被自动取消。
这就是前面提到的协程会和作用域绑定,避免内存泄露。
协程向下文环境 CoroutineContext
上下文环境主要是传如下Dispatchers的值,Dispatchers根据名字可以猜测它是分发器,把异步任务分发到对应的线程去执行。主要的值有以下:
- Dispatchers.Main — 分发任务到主线程,主要执行UI绘制等。
- DefaultScheduler.IO — 分发任务IO线程,它用于输入/输出的场景。主要用来执行网络请求、数据库操作、文件读写等。
- DefaultScheduler.Default — 主要执行CPU密集的运算操作
- DefaultScheduler.Unconfined — 这个分发的线程不可控的,一般不建议使用。
阶段总结
刚才我们介绍了协程launch函数的context参数,接下来看看其他两个参数:
- start参数的意思是什么时候开始分发任务,CoroutineStart.DEFAULT代表的是协程启动的时候立即分发任务。
- block参数的意思启动的协程需要执行的任务代码。以不写内容,直接传空{} 执行。明显这样启动的协程没有意义,暂时仅为学习。
学习到到目前为止,我们应该可以启动一个协程了
// 1
private val myJob = Job()
// 2
private val myScope = CoroutineScope(myJob + Dispatchers.Main)
// 3
myScope.launch() {
    // 4 TODO
}
总结如下:
- 创建一个父Job,作为协程的父Job
- 使用 myJob 和 Dispatchers.Main 这个协程向下文环境创建一个myScope协程作用域
- 在myScope这个协程作用域下启动协程
- 执行异步任务
协程中的异步操作 — suspend函数
suspend函数的流程
实现异步操作的核心关键就是挂起函数suspend函数,那究竟什么是挂起函数。
挂起函数的申明是在普通的函数前面加上suspend关键字,挂起函数执行的时候会中断协程,当挂起函数执行完成后,会把结果返回到当前协程的中,然后执行接下来的代码。
上面这段话说起来很枯燥,我们接下来利用代码来解释:
suspend fun login(username: String, password: String): User = withContext(Dispatchers.IO) {
    println("threadname = ${Thread.currentThread().name}")
    return@withContext User("Johnny")
}

myScope.launch() {
    println("threadname = ${Thread.currentThread().name}")
    val user = login("1111", "111111")
    println("threadname = ${Thread.currentThread().name}")
    println("$user")
}
- 挂起函数执行的时候会中断协程: suspend函数
login("1111", "111111")执行的时候到会切换新的线程即IO线程去执行,当前的协程所在的主线程的流程被挂起中止了,主线程可以接着处理其他的事情。 - 当挂起函数执行完成后,会把结果返回到当前协程中:
login("1111", "111111")在IO线程执行完成后返回user,并且返回到主线程。即协程所在的线程。 - 然后执行接下来的代码: 接下来打印
println("$user")是在协程所在的主线程执行。
结果如下所示:

withContext 函数
我们在上面的login函数中使用了withContext函数,这个函数是非常实用和常见的suspend函数。 使用它能非常容易的实现线程的切换,从而实现异步操作。
public suspend fun <T> withContext(
    context: CoroutineContext,
    block: suspend CoroutineScope.() -> T
): T
我们看到withContext函数也是个挂起函数,那我们就没有必要在挂起函数中调用挂起函数,可以直接调用withContext的简写:
myScope.launch() {
    println("threadname = ${Thread.currentThread().name}")
    val user = withContext(Dispatchers.IO) {
        println("threadname = ${Thread.currentThread().name}")
        return@withContext User("Johnny")
    }
    println("threadname = ${Thread.currentThread().name}")
    println("$user")
}
协程中的异常处理机制
协程提供了一个异常处理的回调函数CoroutineExceptionHandler。可以构造一个函数对象,赋值给协程作用域,这样协程中的异常就能被捕获了。
private val exceptionHandler = CoroutineExceptionHandler { coroutineContext, throwable ->
    Log.i("错误信息", "${throwable.message}")
}

private val myScope = CoroutineScope(myJob + Dispatchers.Main + exceptionHandler)
提示:这里的 + 号不是数学意义的加号,是把这些对象一起组合成一个协程向下文环境(键值对)。
协程总结
- 协程作用域可以界定生命周期,避免内存泄露
- suspend函数可以让我们写同步代码的结构去实现异步功能
- withContext等函数能非常容易将代码模块分发的不同的线程中去。
- 协程还有良好的异常处理机制,
用协程和Retrofit实现网络请求
Retrofit是负责网络请求接口的封装,通过大量的注解实现超级解耦。真正的网络请求是OKHttp库去实现。Retrofit常规使用方法不是本教程的讲解范围,本教程主要讲Retrofit怎样和协程无缝衔接实现网络请求。
Moshi是一个JSON解析库,天生对Kotlin友好,特别是Kotlin的data数据类非常适合它。所以建议选择它来解析JSON。
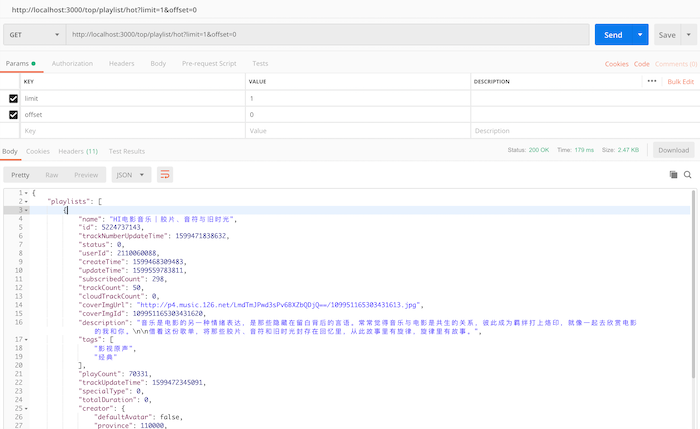
本地服务器环境搭建后好,访问http://localhost:3000/top/playlist/hot?limit=1&offset=0就能得到一系列的播单playlists
让我们接下来写代码吧。
- 在AndroidManifest.xml中加入网络请求权限
<uses-permission android:name="android.permission.INTERNET"/>
- 新建network_security_config.xml文件配置,内容如下
<?xml version="1.0" encoding="utf-8"?>
<network-security-config>
    <base-config cleartextTrafficPermitted="true" />
</network-security-config>
- 然后在AndroidManifest.xml中配置,这样APP就能通过HTTP协议访问服务器了
<application ...
android:networkSecurityConfig="@xml/network_security_config"
...>
</application>
- 添加依赖
def coroutines_version = '1.3.9'
implementation "org.jetbrains.kotlinx:kotlinx-coroutines-core:$coroutines_version"
implementation "org.jetbrains.kotlinx:kotlinx-coroutines-android:$coroutines_version"

// Api - Retrofit (with Moshi) and OkHttp
def retrofit_version = '2.7.1'
implementation "com.squareup.retrofit2:retrofit:$retrofit_version"
implementation "com.squareup.retrofit2:converter-moshi:$retrofit_version"
def  okhttp_version = '4.2.1'
implementation "com.squareup.okhttp3:okhttp:$okhttp_version"
implementation "com.squareup.okhttp3:logging-interceptor:$okhttp_version"
- 新建请求常量类MusicApiConstant
object MusicApiConstant {
    const val BASE_URL = "http://10.0.2.2:3000" // BASEURL
    const val PLAYLIST_HOT = "/top/playlist"    // 推荐歌单
}
注意:我现在用的模拟器开发测试,10.0.2.2代表的是模拟器所在机器的localhost地址,如果请求localhost访问的是模拟器的地址。
MusicApiConstant主要存放BASE_URL,各个请求的路径等常量
- 新建网络请求类 MusicApiService
interface MusicApiService {

    companion object {
        private const val TAG = "MusicApiService"

        // 1
        fun create(): MusicApiService {
            val retrofit = Retrofit.Builder()
                .baseUrl(MusicApiConstant.BASE_URL)
                .client(okHttpClient)
                .addConverterFactory(MoshiConverterFactory.create())
                .build()
            return retrofit.create(MusicApiService::class.java)
        }

        // 2
        private val okHttpClient: OkHttpClient
            get() = OkHttpClient.Builder()
                .addInterceptor(loggingInterceptor)
                .build()
        // 3
        private val loggingInterceptor: HttpLoggingInterceptor
            get() {
                val interceptor = HttpLoggingInterceptor(object : HttpLoggingInterceptor.Logger{
                    override fun log(message: String) {
                        Log.i(TAG, message)
                    }
                })
                interceptor.level = HttpLoggingInterceptor.Level.BASIC
                return interceptor
            }

    }

}
MusicApiService有一个伴生对象,里面有个create方法,是Retrofit的生成方法。其中配置了baseUrl,配置OKHttp为真正的请求类,配置了MoshiConverterFactory为JSON的转换工厂。这个方法返回的对象是请求的发起者。
- 定义播单的数据类
data class PlayListResponse(
    val code: Int,
    val playlists: List<PlayItem>
)

data class PlayItem(val name: String,
                    val id: String,
                    val coverImgUrl: String,
                    val coverImgId: String,
                    val description: String,
                    val playCount: Int,
                    val highQuality: Boolean,
                    val shareCount: Int,
                    val subscribers: List<User>,
                    val creator: User
)

data class User(val nickname: String,
                val userId: String,
                val avatarUrl: String,
                val gender: Int,
                val followed: Boolean
)
- 配置请求接口
interface MusicApiService {

    @GET(MusicApiConstant.PLAYLIST_HOT)
    suspend fun getHotPlaylist(@Query("limit") limit: Int, @Query("offset") offset: Int) : PlayListResponse

    ....
}
在MusicApiService中加入所示代码。
和普通写法的两点重要区别:
- 需要定义接口为suspend函数
- 返回的直接是数据,不是CallBack。
- Fragment中请求
在Fragment中定义Job,CoroutineExceptionHandler 和 CoroutineContext,构建一个CoroutineScope。代码如下:
private val myJob = Job()
private val exceptionHandler = CoroutineExceptionHandler { coroutineContext, throwable ->
    Log.i("请求错误信息", "${throwable.message}")
}
private val myScope = CoroutineScope(myJob + Dispatchers.Main + exceptionHandler)
- 在Fragment的onViewCreated方法中创建协程请求
override fun onViewCreated(view: View, savedInstanceState: Bundle?) {
    super.onViewCreated(view, savedInstanceState)

    myScope.launch {
        val response = MusicApiService.create().getHotPlaylist(1, 0)
        println("$response")
    }
}
目前位置,请求结果就得到了。

- 及时取消协程
override fun onDestroy() {
    super.onDestroy()
    myScope.cancel()
}
在Fragment的onDestroy方法中要取消协程,否则有可能造成程序崩溃。
结语 - 协程值得一学
协程是非常优秀的异步处理框架,已经和很多JetPack的库无缝连接。使用起来非常方便。
譬如可以直接利用ViewModel的ViewModelScope感知Fragment的lifecycle,不需要手动取消协程。此外Room和协程的Flow也能无缝连接,实现轻量级的RxJava类似的功能。这些后续都会有介绍。