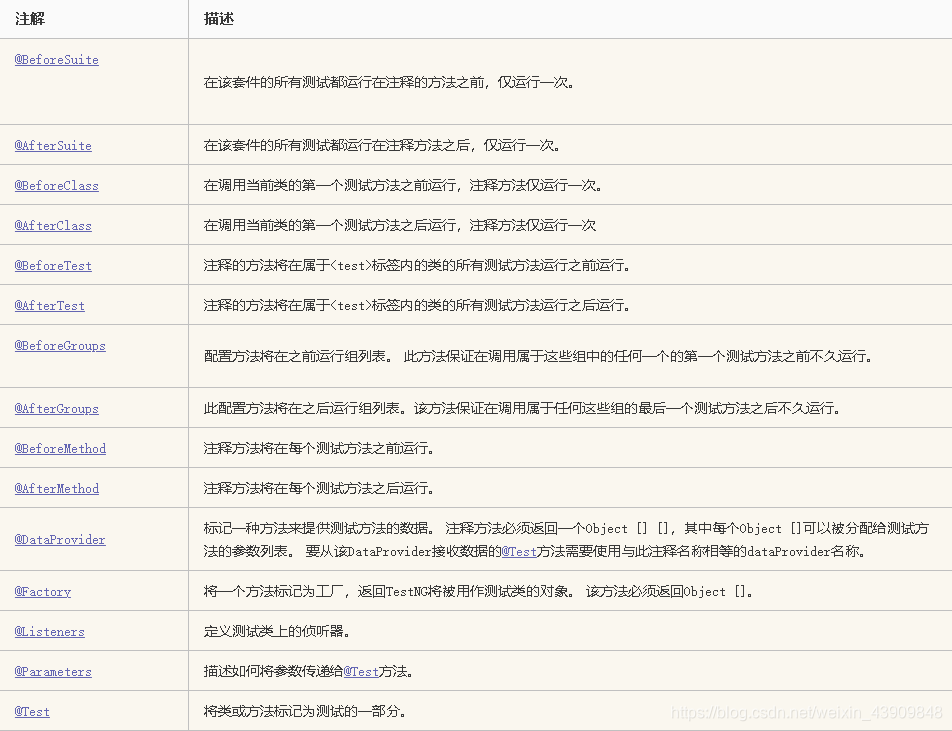
TestNG是一个比Junit功能更强大的测试框架。常用方法如下:
本次使用百度的登录作为案例,搭建一个完整的测试框架并进行登录测试。
1.新建一个MAVEN项目
目录结构如图

cases:测试用例
common:公用方法
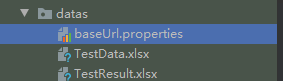
datas:存放数据,配置文件以及测试表格文档
utils:工具类
2.添加依赖
主要是selenium+testNG+ReporterNG的依赖
    <dependencies>
    <dependency>
        <groupId>org.apache.poi</groupId>
        <artifactId>poi</artifactId>
        <version>3.9</version>
    </dependency>
    <dependency>
        <groupId>org.apache.poi</groupId>
        <artifactId>poi-ooxml</artifactId>
        <version>3.9</version>
    </dependency>
        <dependency>
            <groupId>junit</groupId>
            <artifactId>junit</artifactId>
            <version>4.11</version>
            <scope>test</scope>
        </dependency>
        <dependency>
            <groupId>org.seleniumhq.selenium</groupId>
            <artifactId>selenium-java</artifactId>
            <version>3.4.0</version>
        </dependency>
        <dependency>
            <groupId>org.uncommons</groupId>
            <artifactId>reportng</artifactId>
            <version>1.1.4</version>
            <exclusions>
                <exclusion>
                    <groupId>org.testng</groupId>
                    <artifactId>testng</artifactId>
                </exclusion>
            </exclusions>
        </dependency>
        <dependency>
            <groupId>org.testng</groupId>
            <artifactId>testng</artifactId>
            <version>6.10</version>
            <scope>test</scope>
        </dependency>
        <dependency>
            <groupId>com.google.inject</groupId>
            <artifactId>guice</artifactId>
            <version>4.1.0</version>
        </dependency>
    </dependencies>
    <build>
        <pluginManagement><!-- lock down plugins versions to avoid using Maven defaults (may be moved to parent pom) -->
            <plugins>
                <!-- clean lifecycle, see https://maven.apache.org/ref/current/maven-core/lifecycles.html#clean_Lifecycle -->
                <plugin>
                    <artifactId>maven-clean-plugin</artifactId>
                    <version>3.1.0</version>
                </plugin>
                <!-- default lifecycle, jar packaging: see https://maven.apache.org/ref/current/maven-core/default-bindings.html#Plugin_bindings_for_jar_packaging -->
                <plugin>
                    <artifactId>maven-resources-plugin</artifactId>
                    <version>3.0.2</version>
                </plugin>
                <plugin>
                    <groupId>org.apache.maven.plugins</groupId>
                    <artifactId>maven-compiler-plugin</artifactId>
                    <version>3.8.0</version>
                    <configuration>
                        <source>8</source>
                        <target>8</target>
                    </configuration>
                </plugin>
                <plugin>
                    <groupId>org.apache.maven.plugins</groupId>
                    <artifactId>maven-surefire-plugin</artifactId>
                    <version>2.22.1</version>
                    <configuration>
                        <skipTests>false</skipTests>
                        <suiteXmlFiles>
                            <suiteXmlFile>testng.xml</suiteXmlFile>
                        </suiteXmlFiles>
                        <!-- ReportNG配置 -->
                        <properties>
                            <property>
                                <name>usedefaultlisteners</name>
                                <value>false</value>
                            </property>
                            <property>
                                <name>listener</name>
                                <value>org.uncommons.reportng.HTMLReporter,org.uncommons.reportng.JUnitXMLReporter</value>
                            </property>
                        </properties>
                        <workingDirectory>target/</workingDirectory>

                    </configuration>
                </plugin>
                <plugin>
                    <artifactId>maven-jar-plugin</artifactId>
                    <version>3.0.2</version>
                </plugin>
                <plugin>
                    <artifactId>maven-install-plugin</artifactId>
                    <version>2.5.2</version>
                </plugin>
                <plugin>
                    <artifactId>maven-deploy-plugin</artifactId>
                    <version>2.8.2</version>
                </plugin>
                <!-- site lifecycle, see https://maven.apache.org/ref/current/maven-core/lifecycles.html#site_Lifecycle -->
                <plugin>
                    <artifactId>maven-site-plugin</artifactId>
                    <version>3.7.1</version>
                </plugin>
                <plugin>
                    <artifactId>maven-project-info-reports-plugin</artifactId>
                    <version>3.0.0</version>
                </plugin>
            </plugins>
        </pluginManagement>
    </build>
3.配置文件准备
(1)首先下载对应版本的浏览器的驱动,我这里用的是chorme
chorme驱动下载
放在resources下面

(2)在datas下面新建一个baseUrl.properties来配置存放我们要测试的网站的url

baseUrl=https://192.168.1.20:7090 //url根据自己的需要来
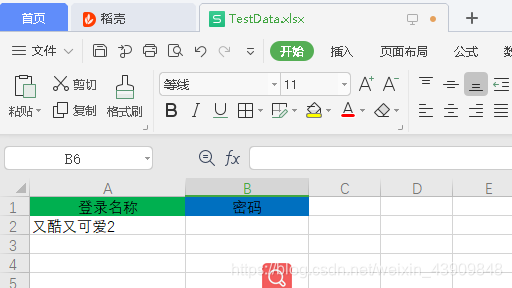
(3)在datas下面新建一个xlsx文件存放我们的测试数据(本文采用读取配置生成测试报告的方式测试)

TestData.xlsx内容如下:(这里只是用登录作为例子,很多时候我们可以将需要的数据例如xpath等等存入excel读取,根据需求填写表头)账号密码请填写自己的
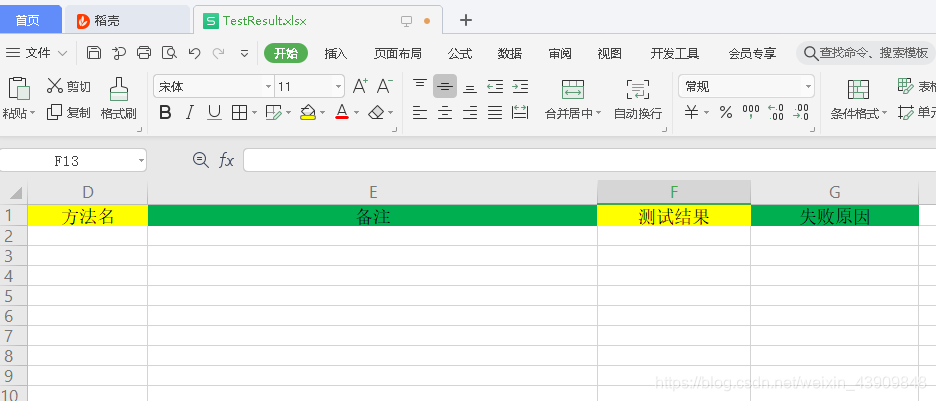
(4)在datas下面新建一个xlsx文件存放我们的测试报告文件
TestResult.xlsx
TestResult.xlsx内容如下:(可根据自己需求填写表头)
4.正式编码进入测试
1.在utils中添加工具类
由于我们要用到ExcelReport进行读写excel文件,读取测试用例并生成测试报告,所以添加读取和写入excel的工具类
ExcelReport.java
public class ExcelReport {


    public static int rowNumber = 1;

    public static void main(String[] args) {


        writeExcel("test","Login","testLoginFail01","注释","pass","");
    }

    /**
     *
     * @param packageName : 包名
     * @param className : 类名
     * @param methodName :方法名
     * @param remark : 注释
     * @param result : 结果 pass fail
     * @param reason :原因 pass 则为空 ,fail则有失败原因
     */
    public static void writeExcel(String packageName , String className, String methodName , String remark , String result , String reason){


        try{


            /**
             * 可以尝试,每次都生成不同的excel文档,往里面添加内容,但是需要office excel
             */
            //report生成测试报告文件的路径
            String path = "src/test/java/com/test/datas/TestResult.xlsx" ;
            XSSFWorkbook wb = new XSSFWorkbook(new FileInputStream(path));
            XSSFSheet sheet=wb.getSheetAt(0);
            //获得EXCEL行数
            int rowNums=sheet.getLastRowNum();
            // System.out.println("多少行:" +rowNums);
            //往sheet中追加一行数据
            int rowCurrentNumber = rowNums+1;
            sheet.createRow(rowCurrentNumber);
            XSSFRow row = sheet.getRow(rowCurrentNumber);
            //格式
            CellStyle cellStyle2=wb.createCellStyle();
            cellStyle2.setFillForegroundColor(IndexedColors.RED.getIndex()); // 前景色
            cellStyle2.setFillPattern(CellStyle.SOLID_FOREGROUND);
            cellStyle2.setBorderBottom(CellStyle.BORDER_THIN); // 底部边框
            if(row != null){


                //System.out.println("行不为空!" );
                Date now = new Date();
                SimpleDateFormat dateFormat = new SimpleDateFormat("yyyy/MM/dd HH:mm:ss");//可以任意地修改日期格式
                String currentTime = dateFormat.format( now );
                //创建单元格并赋值

                row.createCell(0).setCellValue(currentTime);
                row.createCell(1).setCellValue(packageName);
                row.createCell(2).setCellValue(className);
                row.createCell(3).setCellValue(methodName);
                row.createCell(4).setCellValue(remark);
                row.createCell(5).setCellValue(result);
                if(result.equals("fail")){


                    row.getCell(5).setCellStyle(cellStyle2);
                }
                row.createCell(6).setCellValue(reason);
            }else{


                //System.out.println("行为空!" );
            }
            FileOutputStream os = new FileOutputStream(path);
            wb.write(os);//一定要写这句代码,否则无法将数据写入excel文档中
            os.close();
        }catch(Exception e){


            e.printStackTrace();
        }

    }
}
ReadExcel.java
public class ReadExcel {


    public static Object[][] getData(String filePath, String fileName, String sheetName) throws IOException {


        File file = new File(filePath + "\\" + fileName);
        //创建FileInputStream对象用于读取Excel文件
        FileInputStream inputStream = new FileInputStream(file);
        //声明Workbook对象
        Workbook workbook = null;
        //获取文件名参数的扩展名,判断是.xlsx文件还是.xls文件
        String fileExtensionName = fileName.substring(fileName.indexOf("."));
        //如果是.xlsx,则用XSSFWorkbook对象进行实例化,如果是.xls则使用HSSFWorkbook对象进行实例化
        if (fileExtensionName.equals(".xlsx")){


            workbook = new XSSFWorkbook(inputStream);
        }
        else if (fileExtensionName.equals(".xls")) {


            workbook = new HSSFWorkbook(inputStream);
        }
        //通过sheetName参数生成Sheet对象
        Sheet sheet = workbook.getSheet(sheetName);
        //获取Excel数据文件Sheet1中数据的行数,getLastRowNum方法获取数据的最后一行行号
        //getFirstRowNum方法获取数据的第一行行号,相减之后算出数据的行数
        //Excel行和列都是从0开始
        int rowCount = sheet.getLastRowNum()-sheet.getFirstRowNum();
        //创建名为records的list对象来存储从Excel数据文件读取的数据
        List<Object[]> records = new ArrayList<Object[]>();
        //使用两个for循环遍历Excel数据文件除去第一行外所有数据
        //所以i从1开始,而不是从0开始
        for (int i = 1; i<rowCount+1; i++){


            Row row = sheet.getRow(i);
            //声明一个数组,用来存储Excel数据文件每行中的数据,数组的大小用getLastCellNum办法来进行动态声明,实现测试数据个数和数组大小相一致
            String fields[] = new String[row.getLastCellNum()];
            for (int j = 0; j<row.getLastCellNum();j++){


                //调用getCell和getStringCellValue方法获取Excel文件中的单元格数据
                fields[j] = row.getCell(j).getStringCellValue();
            }
            //将fields的数据兑现存储到records的list中
            records.add(fields);
        }
        //定义函数返回值,即Object[][]
        //将存储测试数据的list转换为一个Object的二维数组
        Object[][] results = new Object[records.size()][];
        //设置二维数组每行的值,每行是一个Object对象
        for (int i = 0; i<records.size(); i++){


            results[i] = records.get(i);
        }
        return results;
    }
}
2.读取测试配置文件类,主要用于读取访问的网站url地址和加载驱动、设置浏览器属性
SetUp.java
public class SetUP {


    //chromedriver路径
    public void setProperty() {


        System.setProperty("webdriver.chrome.driver", "src/main/resources/chromedriver.exe");
    }

    //访问的ip
        public static String getBaseUrl(){


            Properties prop = new Properties();
            String baseUrl = null;
            try {


            //读取url地址文件
                InputStream InputStream = new BufferedInputStream(new FileInputStream(new File("src\\test\\java\\com\\test\\datas\\baseUrl.properties")));
                prop.load(InputStream);
                baseUrl = prop.getProperty("baseUrl");
            } catch (Exception e) {


                e.printStackTrace();
            }
            return baseUrl;
    }

    //设置浏览器属性
    public static ChromeOptions setChromeOption() {


        ChromeOptions options = new ChromeOptions();
        options.addArguments("--headless");
        options.addArguments("--no-sandbox");
        options.addArguments("--disable-gpu");
        return options;
    }
}
3.编写登录测试用例
在common中创建LoginCommon.java用来封装具体的xpath操作,测试用例类中只需要调用即可
在这里,我们流程是进入百度页面–点击登录按钮–点击用户名登录–输入账号密码(百度网页的元素大部分都可以通过id或者name来取,还是比较方便的)
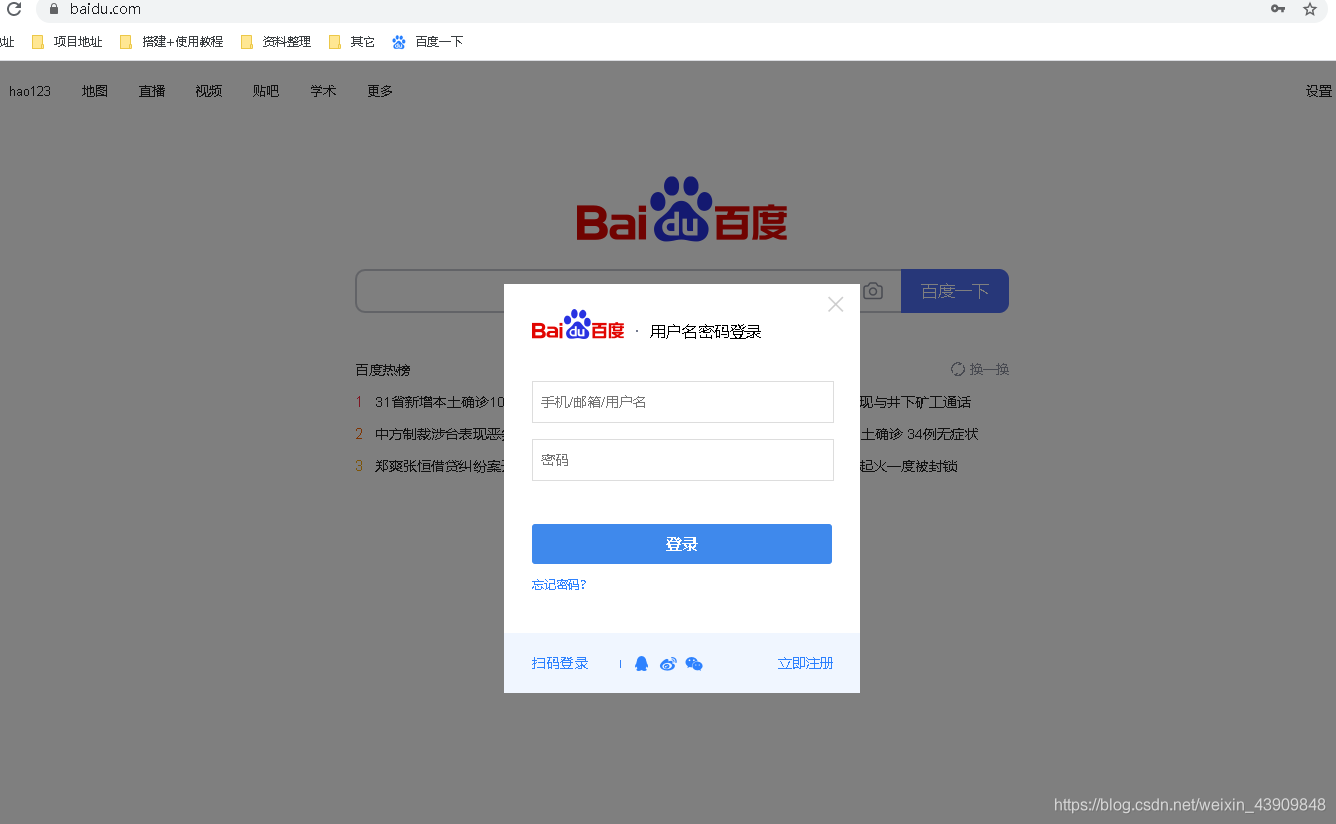
本处我们采用PO设计模式,使用页面对象模型,将元素定位和页面操作封装到LoginCommon页面,在测试用例中只需要调用即可。
代码如下:
LoginCommon.java
public class LoginCommon {


    public static void login(WebDriver driver, String username, String password){


        driver.findElements(By.name("tj_login")).get(1).click();
        driver.findElement(By.id("TANGRAM__PSP_11__footerULoginBtn")).click();
        driver.findElement(By.name("userName")).sendKeys(username);
        driver.findElement(By.name("password")).sendKeys(password);
        driver.findElement(By.id("TANGRAM__PSP_11__submit")).click();
    }
}
在cases下新建登录用例,来进行测试登录功能,由于百度登录成功后,百度右上角的登录会变成用户名,所以目前通过xpath找到这个地方,验证这个登录是否还存在来判断是否登录成功。
LoginCase.java
public class LoginCase {
private WebDriver driver;
private StringBuffer verificationErrors = new StringBuffer();
private String URL= getBaseUrl();
//获取包名
private String packageName=this.getClass().getPackage().getName();
//获取类名
private String className=this.getClass().getName();
//测试前初始化
@BeforeClass(alwaysRun = true)
public void setUp() throws Exception {
SetUP login = new SetUP();
login.setProperty();
//设置浏览器属性
ChromeOptions options = SetUP.setChromeOption();
//初始化driver
driver = new ChromeDriver(options);
}
//用数组接收从TestData中读取的数据,这里要注意,一个xlsx文件可能有很多sheet表,所以sheetName要对应
@DataProvider(name = "Login")
public Object[][] Login() throws IOException {
return ReadExcel.getData("src\\test\\java\\com\\test\\datas","TestData.xlsx","login");
}
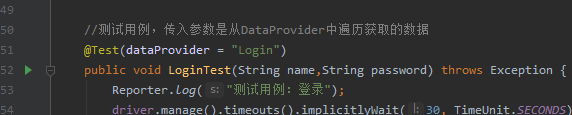
//测试用例,传入参数是从DataProvider中遍历获取的数据
@Test(dataProvider = "Login")
public void LoginTest(String name,String password) throws Exception {
Reporter.log("测试用例:登录");
driver.manage().timeouts().implicitlyWait(30, TimeUnit.SECONDS);
//登录
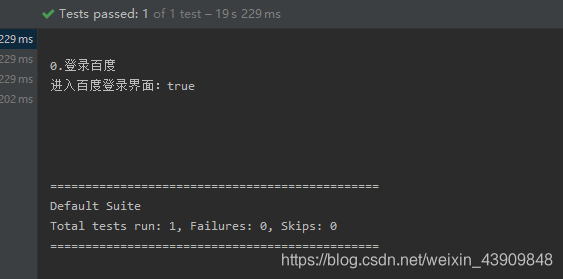
System.out.println("0.登录百度");
//第1步:获取路径,进入登录页面,判断是否进入
driver.get(getBaseUrl());
System.out.println("进入百度登录界面:" + getBaseUrl().equals(driver.getCurrentUrl()));
//获取当前方法名
String methodName=Thread.currentThread().getStackTrace()[1].getMethodName();
//第2步:输入正确的用户名和密码,点击登录(调用封装的登录方法)
LoginCommon.login(driver, name,password);
//点击登录有个转图片的验证码,这里没有更好的办法,只能暂时延迟手动转
Thread.sleep(10000);
//第3步:获取标签,看是否登录成功并写入excel结果
String message=driver.findElement(By.xpath("//*[@id=\"u1\"]/a")).getText();
//如果该位置依旧为登录,则表示登录失败
if(!message.equals("登录")){
ExcelReport.writeExcel(packageName+"登录测试",className,methodName,"登录","pass","");
}else{
ExcelReport.writeExcel(packageName+"登录测试",className,methodName,"登录","fail","登录失败");
}
}
//测试结束关闭driver,收尾
@AfterClass(alwaysRun = true)
public void tearDown() throws Exception{
driver.quit();
String verificationErrorString = verificationErrors.toString();
if (!"".equals(verificationErrorString)) {
fail(verificationErrorString);
}
}
}
4.执行测试查看结果
运行用例
查看excel测试用例

到这一步,整个流程基本就结束了,此处只是用登录作为例子,其它测试都可参照整个框架结构和格式。
5.reportNG测试报告
testNG生成的测试报告默认在idea的目录下,此处我们用reportNG来替换testNG的测试报告
在项目根目录下添加testng.xml

<?xml version="1.0" encoding="UTF-8"?>
<!DOCTYPE suite SYSTEM "http://testng.org/testng-1.0.dtd">
<suite name="All Test Suite">
    <test verbose="2" preserve-order="true" name="E:/demo/auto-autotest">
        <classes>
         <!--类名-->
            <class name="com.test.cases.LoginCase">
            </class>
        </classes>
    </test>
    <listeners>
        <!--testng的XML配置文件中添加这些内容-->
        <listener class-name="org.uncommons.reportng.HTMLReporter"/>
        <listener class-name="org.uncommons.reportng.JUnitXMLReporter"/>
    </listeners>
</suite>
运行testng.xml,会执行配置中的测试用例,然后可以看到生成了test-output目录
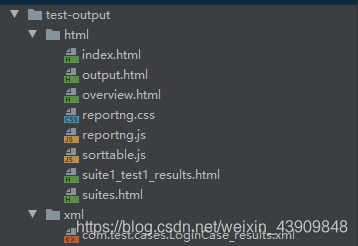
打开index.html,可以看到界面比较清晰友好的测试报告