1.安装环境node
首先:先从nodejs.org中下载nodejs,选择对应的下载即可。

双击安装,在安装界面一直Next


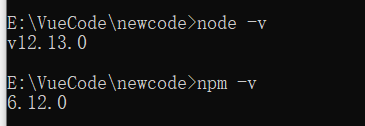
查看安装的版本号
使用淘宝NPM 镜像
大家都知道国内直接使用npm 的官方镜像是非常慢的,这里推荐使用淘宝 NPM 镜像。
$ npm install -g npm --registry=https://registry.npm.taobao.org

这样就可以使用npm 命令来安装模块了:
2.安装vue的脚手架
npm install vue-cli -g //全局安装 vue-cli
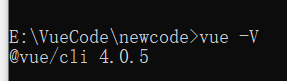
安装完成查看vue的版本
3.创建vue项目
vue create vue-ant demo(项目名称,任意)

4.使用vscode打开项目,先npm install 安装依赖,然后npm run serve启动项目

最后访问:http://localhost:8081/ 项目创建成功。

5.引入element-ui,npm i element-ui -S

6.在main.js中引入element-ui
// 引入element-ui

import ElementUI from 'element-ui'

import 'element-ui/lib/theme-chalk/index.css'

Vue.use(ElementUI)
7.https://element.eleme.cn/#/zh-CN/component/table 在组件库找到对应的组件即可,这里使用table组件。
<template>
  <div>
    <h1>使用element-ui的表格</h1>
    <el-table
      :data="tableData"
      style="width: 100%">
      <el-table-column
        prop="date"
        label="日期"
        width="180">
      </el-table-column>
      <el-table-column
        prop="name"
        label="姓名"
        width="180">
      </el-table-column>
      <el-table-column
        prop="address"
        label="地址">
      </el-table-column>
    </el-table>
  </div>
</template>

<script>
export default {
  name: 'HelloWorld',
  props: {
    msg: String
  },
  data() {
      return {
        tableData: [{
          date: '2016-05-03',
          name: '王小虎',
          address: '上海市普陀区金沙江路 1518 弄'
        }, {
          date: '2016-05-02',
          name: '王小虎',
          address: '上海市普陀区金沙江路 1518 弄'
        }, {
          date: '2016-05-04',
          name: '王小虎',
          address: '上海市普陀区金沙江路 1518 弄'
        }, {
          date: '2016-05-01',
          name: '王小虎',
          address: '上海市普陀区金沙江路 1518 弄'
        }, {
          date: '2016-05-08',
          name: '王小虎',
          address: '上海市普陀区金沙江路 1518 弄'
        }, {
          date: '2016-05-06',
          name: '王小虎',
          address: '上海市普陀区金沙江路 1518 弄'
        }, {
          date: '2016-05-07',
          name: '王小虎',
          address: '上海市普陀区金沙江路 1518 弄'
        }],
        multipleSelection: []
      }
    },

    methods: {

    }
}
</script>

<!-- Add "scoped" attribute to limit CSS to this component only -->
<style scoped>
h3 {
  margin: 40px 0 0;
}
ul {
  list-style-type: none;
  padding: 0;
}
li {
  display: inline-block;
  margin: 0 10px;
}
a {
  color: #42b983;
}
</style>
8.启动查看页面效果

9.这里表格的数据是固定的数据,接下来对接后端,获取动态的真实数据,首先先集成axios。npm i axios

9.1 http.js(和main.js同目录)
  import axios from 'axios'

  const http = axios.create({
    baseURL: "http://localhost:8080"
  })

  export  default http
9.2 在main.js引入http.js
import http from './http.js'

Vue.prototype.$http = http
10.将表格的数据置空,连接后端返回数据
getUserInfo() {
        this.$http.get('/vue').then((result) => {
          console.log("获取的后端数据:", result);
          // 将获取的后端数据复制给表格的数据
          this.tableData = result.data;
        }).catch((err) => {
          console.log("获取的后端数据出错:", err);
        });


// 进入页面就加载数据

mounted() {
      this.getUserInfo();
    },
11.springboot使用jpa返回简单的数据
实体类
package com.frank.jpaBatchSave.entity;

import lombok.Data;

import javax.persistence.Entity;
import javax.persistence.GeneratedValue;
import javax.persistence.Id;
import java.time.LocalDate;

/**
 * @author 小石潭记
 * @date 2020/12/5 17:52
 * @Description: ${todo}
 */
@Entity
@Data
public class VueUser {

    @Id
    @GeneratedValue
    private Long id;

    private String name;

    private String address;

    private LocalDate date;
}
repository
package com.frank.jpaBatchSave.repository;

import com.frank.jpaBatchSave.entity.User;
import com.frank.jpaBatchSave.entity.VueUser;
import org.springframework.data.jpa.repository.Modifying;
import org.springframework.data.jpa.repository.Query;
import org.springframework.data.repository.PagingAndSortingRepository;
import org.springframework.data.repository.query.Param;
import org.springframework.stereotype.Repository;
import org.springframework.transaction.annotation.Transactional;

import java.util.List;

/**
 * @author 小石潭记
 */
@Repository
public interface VueUserRepository extends PagingAndSortingRepository<VueUser, Long> {

}
controller
package com.frank.jpaBatchSave.web;

import com.frank.jpaBatchSave.entity.VueUser;
import com.frank.jpaBatchSave.repository.VueUserRepository;
import com.google.common.collect.Lists;
import org.apache.commons.collections4.IteratorUtils;
import org.springframework.beans.factory.annotation.Autowired;
import org.springframework.web.bind.annotation.CrossOrigin;
import org.springframework.web.bind.annotation.GetMapping;
import org.springframework.web.bind.annotation.RequestMapping;
import org.springframework.web.bind.annotation.RestController;

import java.util.List;

/**
 * @author 小石潭记
 * @date 2020/12/5 17:54
 * @Description: ${todo}
 */
@RestController
@RequestMapping("/vue")
@CrossOrigin
public class VueUserController {

    @Autowired
    private VueUserRepository repository;

    @GetMapping
    public List<VueUser> index() {
        Iterable<VueUser> all = repository.findAll();
        return Lists.newArrayList(all);
    }

}
数据库数据

12.启动前端项目查看效果

至此vue使用element-ui连接后端springboot获取数据已完成。
13.axios使用post提交数据,坑有点小多0.0
定义一个保存用户的方法,这里定义的是固定的数据,就没有使用页面提交表单了0.0
这里需要指定
headers: {
'Content-Type': 'application/json; charset=UTF-8'
},
默认是Content type 'application/x-www-form-urlencoded;charset=UTF-8' not supported.
saveUser() {
        let user = {
          name: '趵突泉',
          date: '2020-10-10',
          address: '山东省济南市趵突泉街101号'
        };

        this.$http({
            url: '/vue/save',
            method: 'POST',
            headers: {
                'Content-Type': 'application/json; charset=UTF-8'
            },
            data: user
        }).then(res => {
            console.log("插入数据成功:", res);
            this.getUserInfo();
        }).catch(err => {
            console.log("插入数据失败:", err);
        })
      }
后端接口,注意使用@RequestBody接收前端传递的对象
@PostMapping("/save")
    public String saveUser(@RequestBody VueUser user) {
        if (user.getName() != null) {
            repository.save(user);
            return "save success";
        }
        throw new MyException(USER_INFO_ERROR);
    }
同样的在mounted里面调用该方法,查看效果
 mounted() {
      this.getUserInfo();
      this.saveUser();
    },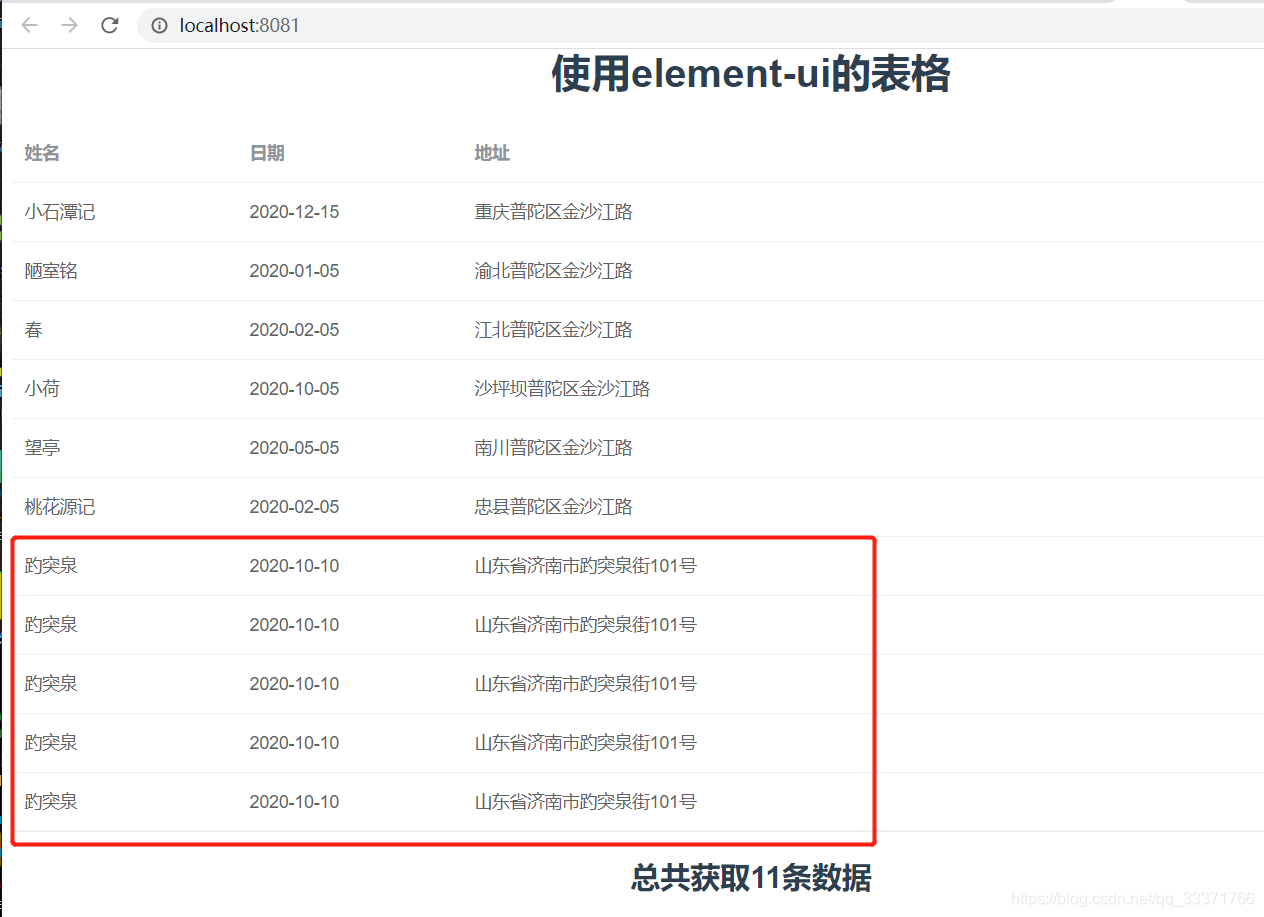
每刷新一次页面,就会添加一次数据,插入成功!
14.router路由添加
npm install vue-router 添加依赖
src下面创建router文件夹->router.js
// 配置路由相关的信息
import VueRouter from 'vue-router'
import Vue from 'vue'

import Index from '../components/Index.vue'
import UserInfo from '../components/UserInfo.vue'

// 1.通过Vue.use(插件), 安装插件
Vue.use(VueRouter)

// 2.创建VueRouter对象
const routes = [
  {
    path: '',
    // redirect重定向
    redirect: '/index'
  },
  {
    path: '/index',
    component: Index
  },
  {
    path: '/user-info',
    component: UserInfo
  }
]
const router = new VueRouter({
  // 配置路由和组件之间的应用关系
  routes,
  mode: 'history',
  linkActiveClass: 'active'
})

// 3.将router对象传入到Vue实例
export default router
main.js里面引入router
import Vue from 'vue'
import App from './App.vue'
// 引入element-ui
import ElementUI from 'element-ui'
import 'element-ui/lib/theme-chalk/index.css'
// 引入路由
import router from './router/router'

import http from './http.js'

Vue.prototype.$http = http

Vue.use(ElementUI)

Vue.config.productionTip = false

new Vue({
  // 引入路由
  router,
  render: h => h(App),
}).$mount('#app')
app.vue里面修改成 <router-view></router-view>
<div id="app">
    <router-view></router-view>
  </div>
15.新建新的页面Index
<template>
  <div>
    <h1>首页</h1>
    <el-button type="primary" @click="jumpUserInfo" style="margin-bottom: 25px">查看用户列表</el-button>
    <el-carousel indicator-position="outside">
      <el-carousel-item v-for="item in recordList" :key="item">
        <h3>{

   { item }}</h3>
      </el-carousel-item>
    </el-carousel>

    <el-carousel :interval="3000" type="card" height="200px">
      <el-carousel-item v-for="item in imagebox" :key="item.id">
        <img :src="item.idView" class="image">
        <span>{

   {item.text}}</span>
      </el-carousel-item>
    </el-carousel>
  </div>
</template>

<script>

export default {
  name: 'Index',
  props: {
    msg: String
  },
  data() {
      return {
        recordList: [
          '春', '夏', '秋', '冬'
        ],
        imagebox:[
          {
            id:1,
            text: '春天',
            idView:require('../assets/imagebox/1.jpg')
          },
          {
            id:2,
            text: '夏天',
            idView:require('../assets/imagebox/2.jpg')
          },
          {
            id:3,
            text: '秋天',
            idView:require('../assets/imagebox/3.jpg')
          },
          {
            id:4,
            text: '冬天',
            idView:require('../assets/imagebox/4.jpg')
          }
          //imagebox是assets下一个放图片的文件夹
        ]
      }
    },

    methods: {
     jumpUserInfo() {
       this.$router.push("/user-info");
     }
    },

    mounted() {

    },
}
</script>

<!-- Add "scoped" attribute to limit CSS to this component only -->
<style scoped>
.el-carousel__item h3 {
    color: #475669;
    font-size: 18px;
    opacity: 0.75;
    line-height: 300px;
    margin: 0;
  }

  .el-carousel__item:nth-child(2n) {
    background-color: #99a9bf;
  }

  .el-carousel__item:nth-child(2n+1) {
    background-color: #d3dce6;
  }
</style>
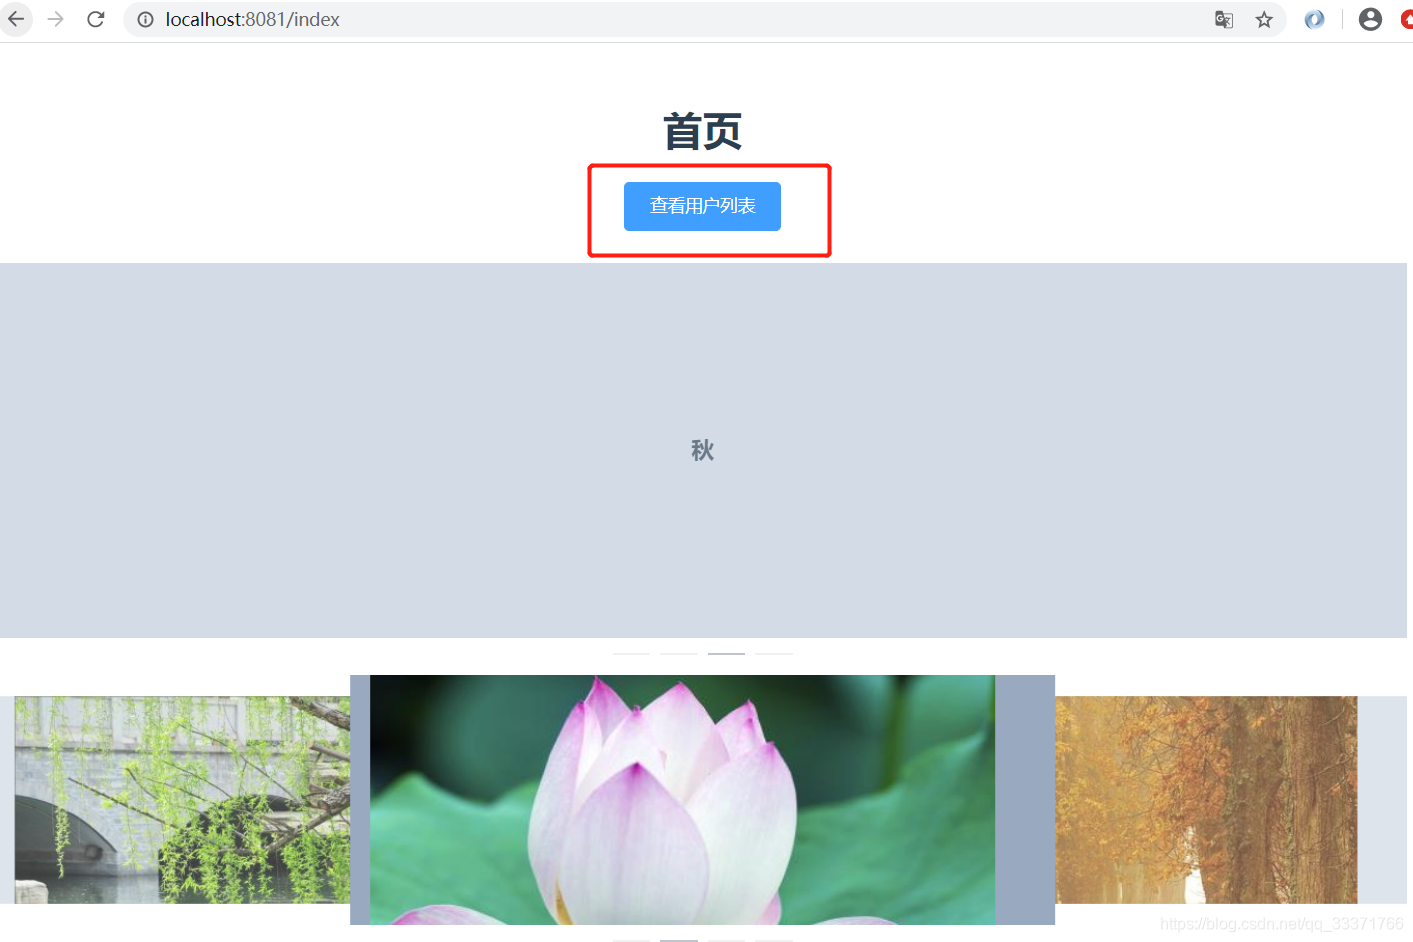
点击按钮,跳转页面userInfo页面

16.使用store模块
npm install vuex
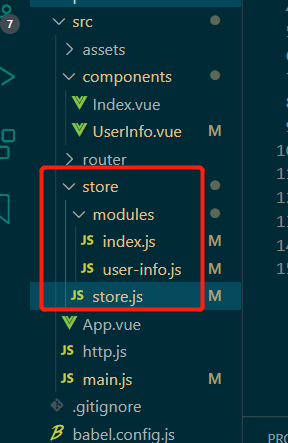
创建store文件夹,store.js和在modules对面页面的js
index.js
const state = {
    stateA: '首页的state'
  }

  const mutations = {
    showA (state) {
      return state.stateA
    }
  }

  const actions = {
    showAAction (context) {
      context.commit('showA')
    }
  }

  const getters = {
    getA (state) {
      return state.stateA
    }
  }
  export default {state, mutations, actions, getters}
user-info.js
const state = {
    stateB: '用户列表的state'
  }

  const mutations = {
    showB (state) {
      return state.stateB
    }
  }

  const actions = {
    showBAction (context) {
      context.commit('showB')
    }
  }

  const getters = {
    getB (state) {
      return state.stateB
    }
  }

  export default {state, mutations, actions, getters}
store.js 注入上面的两个模块的js
import Vue from 'vue'
import Vuex from 'vuex'
import Index from './modules/index'
import UserInfo from './modules/user-info'

Vue.use(Vuex)

const store = new Vuex.Store({
    modules: {
        Index,
        UserInfo
    }
})

export default store
main.js 引入store.js
import Vue from 'vue'
import App from './App.vue'
// 引入element-ui
import ElementUI from 'element-ui'
import 'element-ui/lib/theme-chalk/index.css'
import router from './router/router'
import store from './store/store'

import http from './http.js'

Vue.prototype.$http = http

Vue.use(ElementUI)

Vue.config.productionTip = false

new Vue({
  router,
  store,
  render: h => h(App),
}).$mount('#app')
页面index使用state
import { mapState } from 'vuex'computed: {
...mapState({
index: state => state.Index.stateA
})
} <h2>{
{index}}</h2>查看页面的效果,成功使用了index.js里面的state的属性stateA,action同理使用,用户列表的js同理使用。
