富文本编辑器(UEditor)
在平时开发Java Web项目的时候,往往会使用第三方插件来帮助我们更快的实现功能。
这里教大家使用百度开源的富文本编辑器(UEditor)来帮助我们更好的编写文本。
官网下载地址
这里下载最新版的就可以了

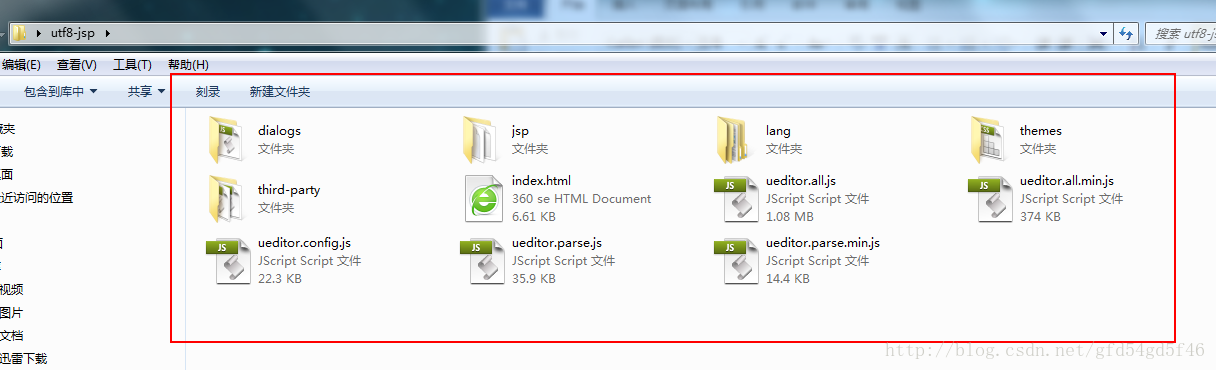
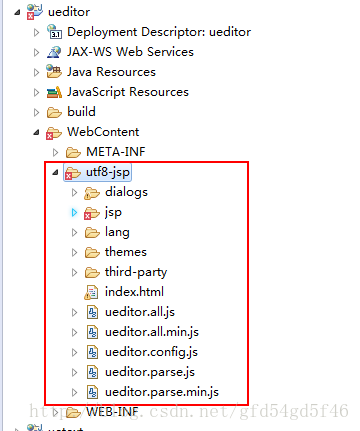
解压出来是这样的
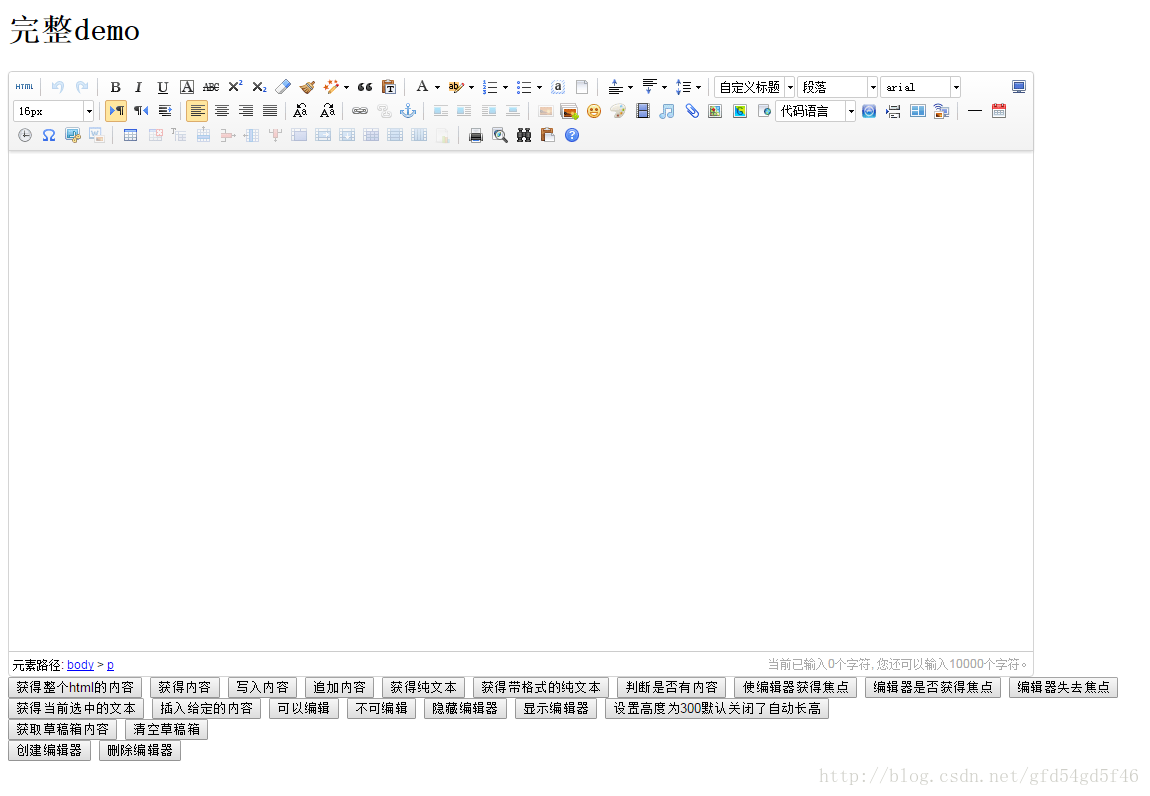
打开index.html的效果
好了 ,废话不多说,开始我们的正题。

1、配置编辑器环境
创建一个动态web工程
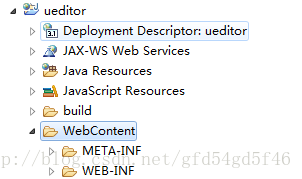
将解压出来的编辑器文件夹整个拷贝到WebContent目录下
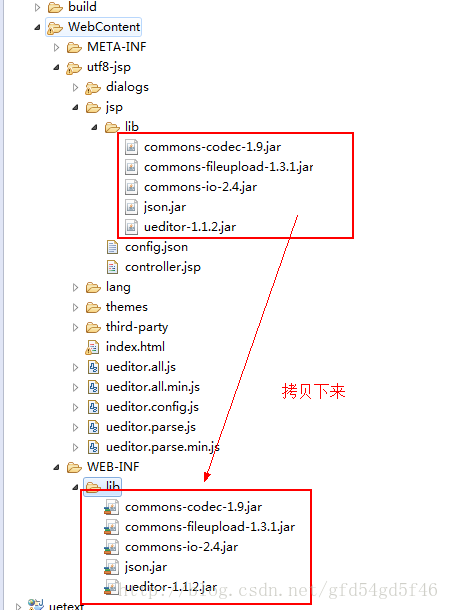
此时工程会报错,因为我们没有引用所需的jar包。
将utf8-jsp -> jsp->lib目录下中的所有jar包拷贝到WEB-INF目录下的lib文件夹中
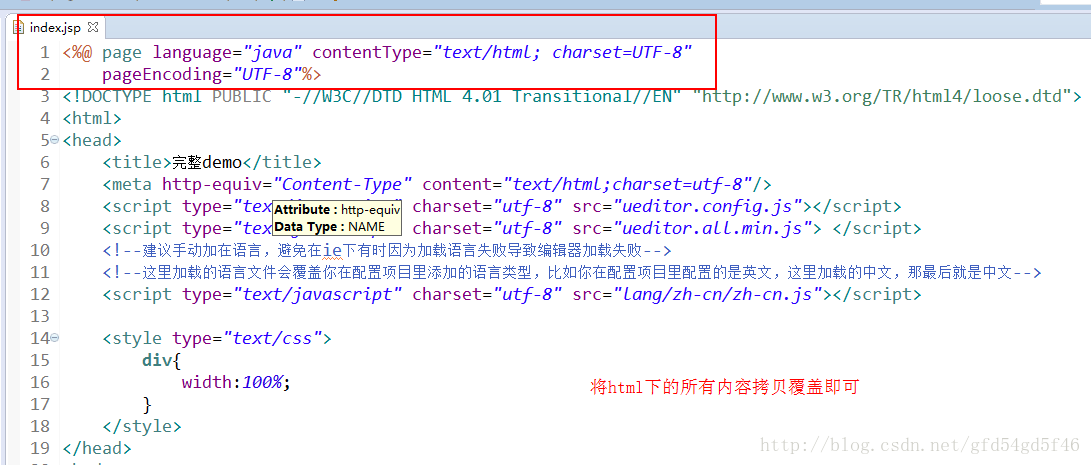
在WebContent下创建一个index.jsp的文件。
将utf8-jsp中的index.html文件内容拷贝到index.jsp
注:使用插件时必须引入以下3个文件
<script type="text/javascript" charset="utf-8" src=" ueditor.config.js"></script>
    <script type="text/javascript" charset="utf-8" src=" ueditor.all.min.js"> </script>
<script type="text/javascript" charset="utf-8" src=" lang/zh-cn/zh-cn.js"></script>- 1
- 2
- 3
调用编辑器:
<script id="editor" type="text/plain" style="width:1024px;height:500px;"></script>- 1
初始化编辑器:
<script type="text/javascript">

    //实例化编辑器
    //建议使用工厂方法getEditor创建和引用编辑器实例,如果在某个闭包下引用该编辑器,
    //直接调用UE.getEditor('editor')就能拿到相关的实例
    var ue = UE.getEditor('editor');

</script>- 1
- 2
- 3
- 4
- 5
- 6
- 7
- 8
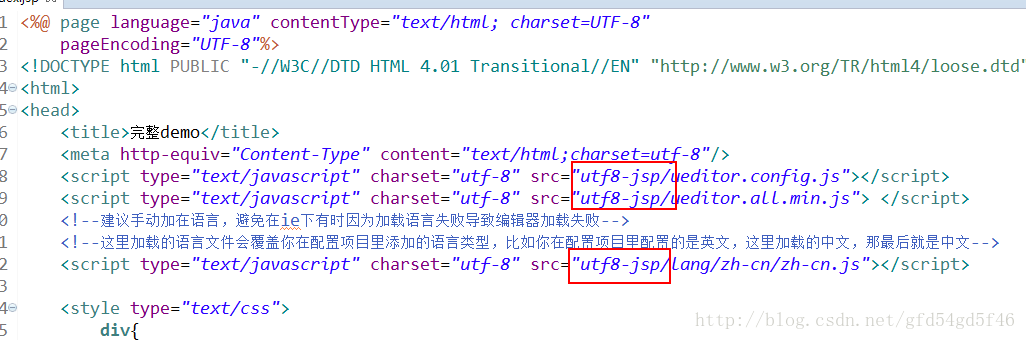
将引用js文件的相对路径补全
完成之后运行index.jsp或者右键工程运行

这样基本的配置就搭建好了。
2、获取编辑框的内容
我们来使用富文本编辑器随便写一些内容,然后点击获取内容
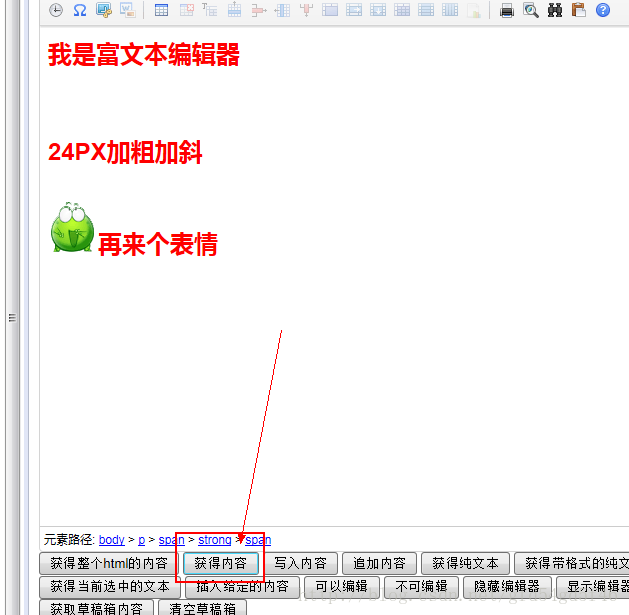
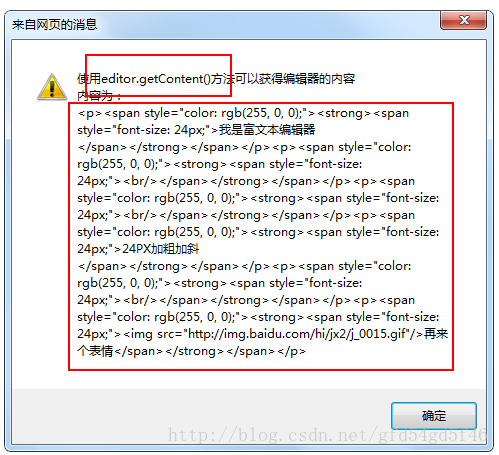
我们发现,在javaScript中可以使用 editor.getContent()获得整个p标签的内容,那我们怎么在java web中拿到内容呢?
回到index.jsp中
使用form表单将整个 编辑器包涵,并且加上用于提交表单的按钮
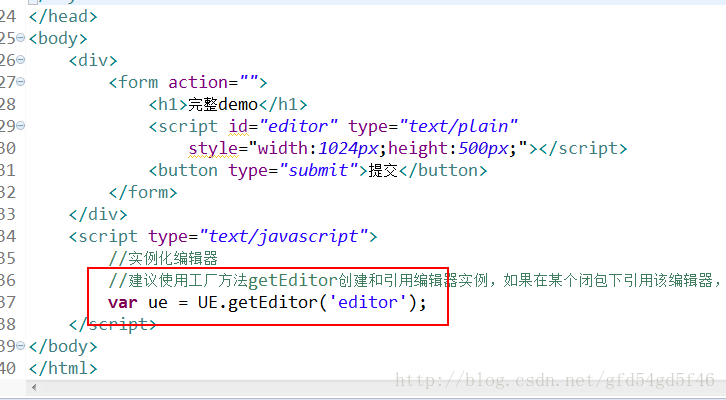
<body>
    <div>
        <form action="">
            <h1>完整demo</h1>
            <script id="editor" type="text/plain"
                style="width:1024px;height:500px;"></script>
            <button type="submit">提交</button>
        </form>
    </div>
    <script type="text/javascript">
        //实例化编辑器
        //建议使用工厂方法getEditor创建和引用编辑器实例,如果在某个闭包下引用该编辑器,直接调用UE.getEditor('editor')就能拿到相关的实例
        var ue = UE.getEditor('editor');
    </script>
</body>- 1
- 2
- 3
- 4
- 5
- 6
- 7
- 8
- 9
- 10
- 11
- 12
- 13
- 14
- 15
将多余的按钮以及js脚本都删除,保留一个实例化编辑器的方法
var ue = UE.getEditor('editor');- 1
运行之后 编辑一段内容然后点击提交
http://localhost:8080/ueditor/index.jspeditorValue=%3Cp%3E%E6%88%91%E6%98%AF%E5%86%85%E5%AE%B9%3C%2Fp%3E- 1

我们可以发现,在提交表单的时候数据是保存在editorValue下的,知道原理之后我们就可以创建一个servlet来接收这个字段了
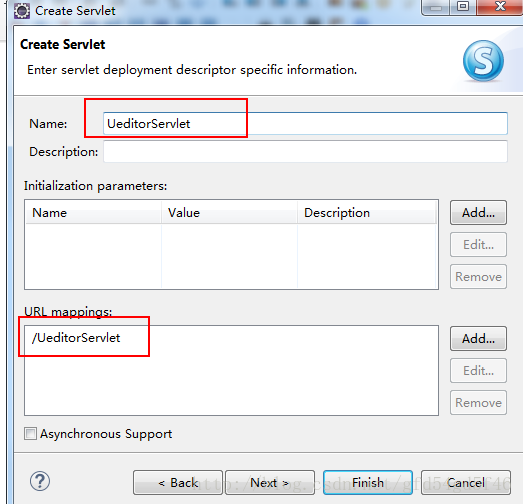
创建Servlet之后还需修改form表单中的action值
<form action="UeditorServlet" method="post">- 1
UeditorServlet .java中的doGet()方法
/**
     * 用于接收form表单中的editorValue值
     * @see HttpServlet#doGet(HttpServletRequest request, HttpServletResponse response)
     */
    protected void doGet(HttpServletRequest request, HttpServletResponse response) throws ServletException, IOException {
        //设置请求和响应的编码统一为UTF-8
        request.setCharacterEncoding("UTF-8");
        response.setCharacterEncoding("UTF-8");
        //拿到编辑器的内容
        String content = request.getParameter("editorValue");
        //如果不为空
        if(content != null){
            //将内容设置进属性
            request.setAttribute("content",content);
            //转发到content.jsp
            request.getRequestDispatcher("content.jsp").forward(request, response);
        }else{
            response.getWriter().append("内容为空!");
        }
}- 1
- 2
- 3
- 4
- 5
- 6
- 7
- 8
- 9
- 10
- 11
- 12
- 13
- 14
- 15
- 16
- 17
- 18
- 19
- 20
Content.jsp页面就简单使用EL表达式接收数据即可
<%@ page language="java" contentType="text/html; charset=UTF-8"
    pageEncoding="UTF-8"%>
<!DOCTYPE html PUBLIC "-//W3C//DTD HTML 4.01 Transitional//EN" "http://www.w3.org/TR/html4/loose.dtd">
<html>
<head>
<meta http-equiv="Content-Type" content="text/html; charset=UTF-8">
<title>Insert title here</title>
</head>
<body>
    <div>
        ${content }
    </div>
</body>
</html>- 1
- 2
- 3
- 4
- 5
- 6
- 7
- 8
- 9
- 10
- 11
- 12
- 13
- 14
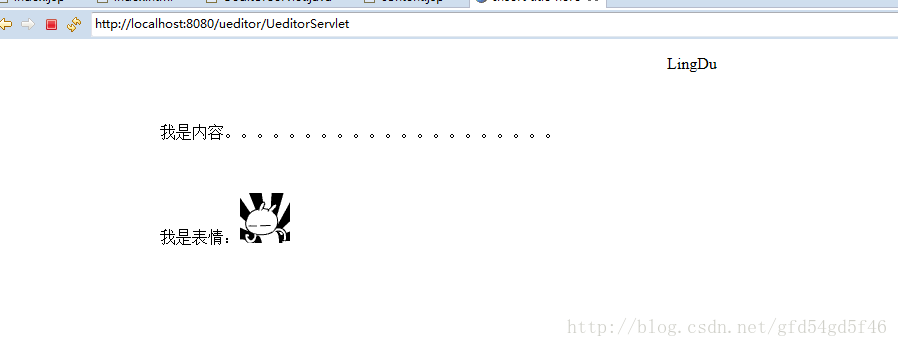
运行index.jsp ,随便编辑一段文字提交
这时内容就已经传过来了。
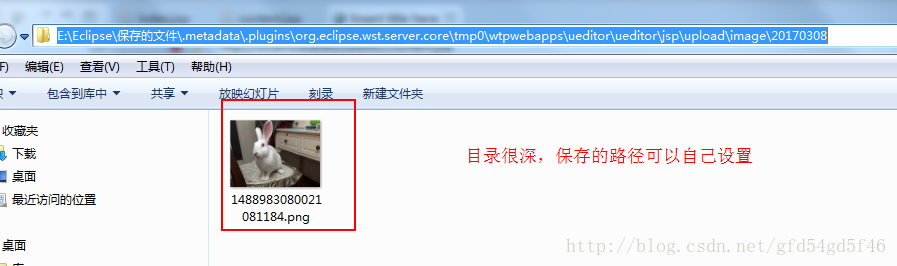
3、配置图片路径
在没有配置图片上传路径的时候,添加一张图片时是显示不出来的

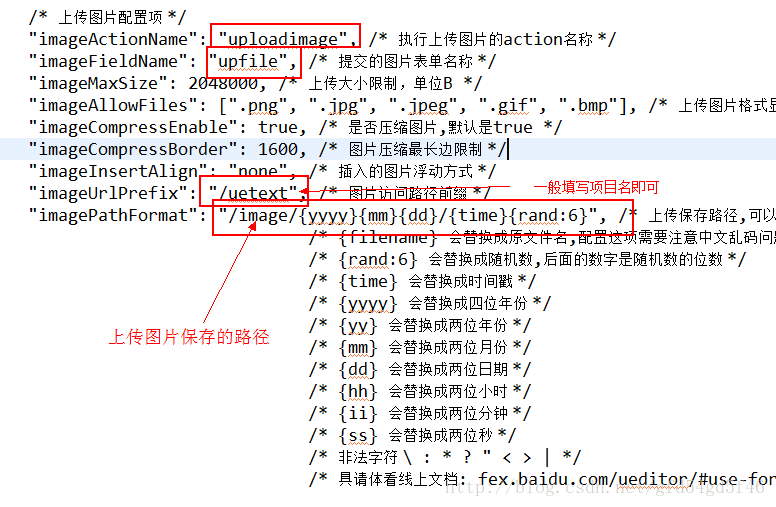
编辑utf8-jsp -> jsp -> lib -> 下的config.json文件

修改图片上传的路径
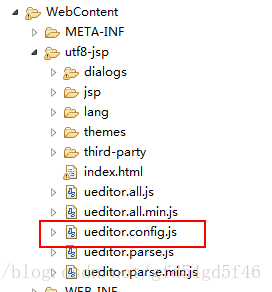
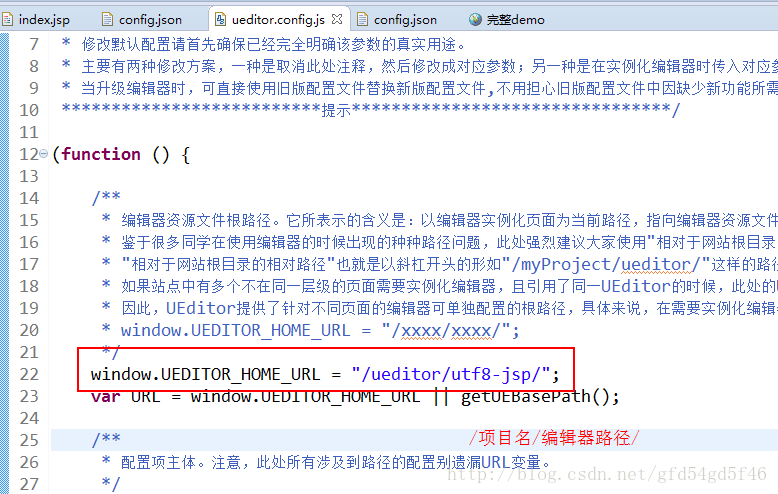
编辑utf8-jsp目录下的ueditor.config.js
在配置中加入编辑器的路径地址
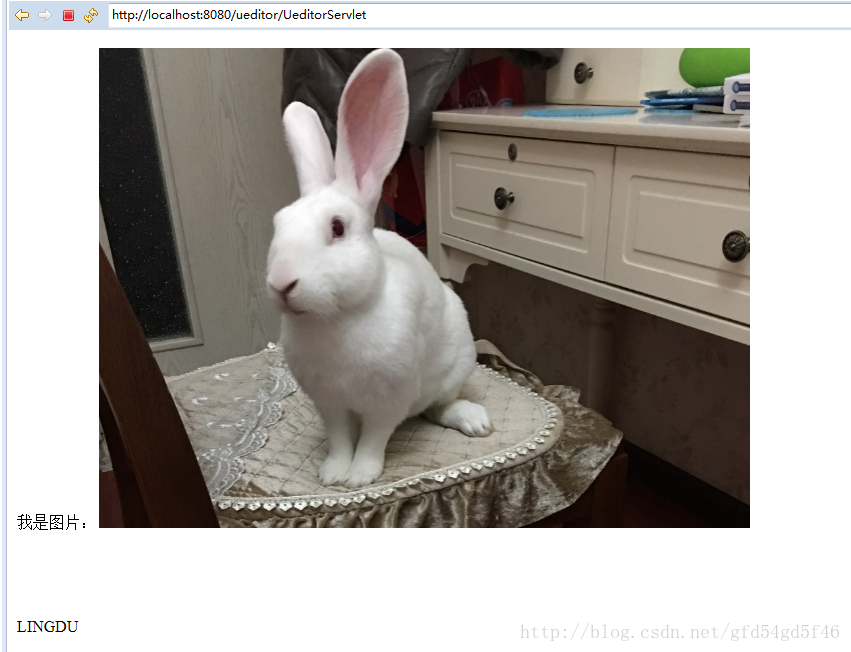
配置完成之后重启toncat服务器并且运行index.jsp,编写一条图文信息提交
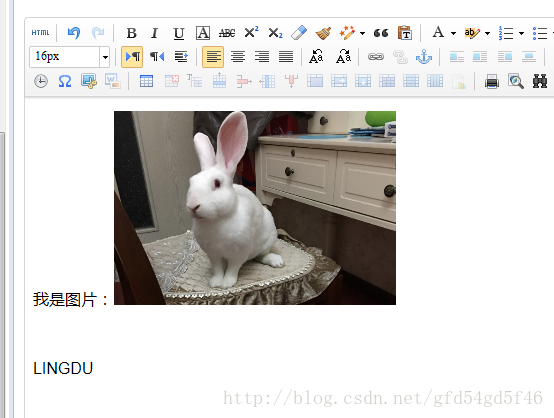
提交之后的结果:
查看图片保存路径可以在jsp中使用以下代码,即可得到工程编译后的路径
<%
    //图片保存的路径,可以到这个路径下查看
    out.println(request.getRealPath(""));
%>- 1
- 2
- 3
- 4
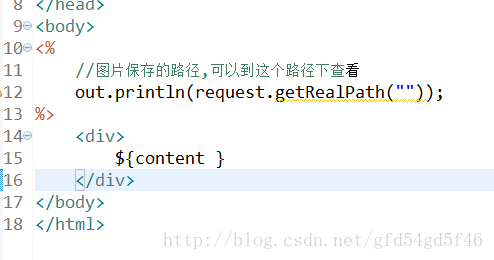
获取到了根目录位置