1.常用网络协议ipv4
#ip:
32位 二进制
11111110.11111110.11111110.11111110 == 254.254.254.254
#netmask:
用来标实ip的网络为与主机位
网络位表示网络区域
主机位表示网络区域中的某台主机
netmask非0位所对应的ip地址数值为这个ip的网络位
netmask 0位所对应的ip地址数值位这个ip的主机位
网络位一致主机位不一致的两个ip时可以直接通信的,这样的两台主机叫做直连网络
2.设定ip
##方法一:(临时设定的ip,重启后id会改变)
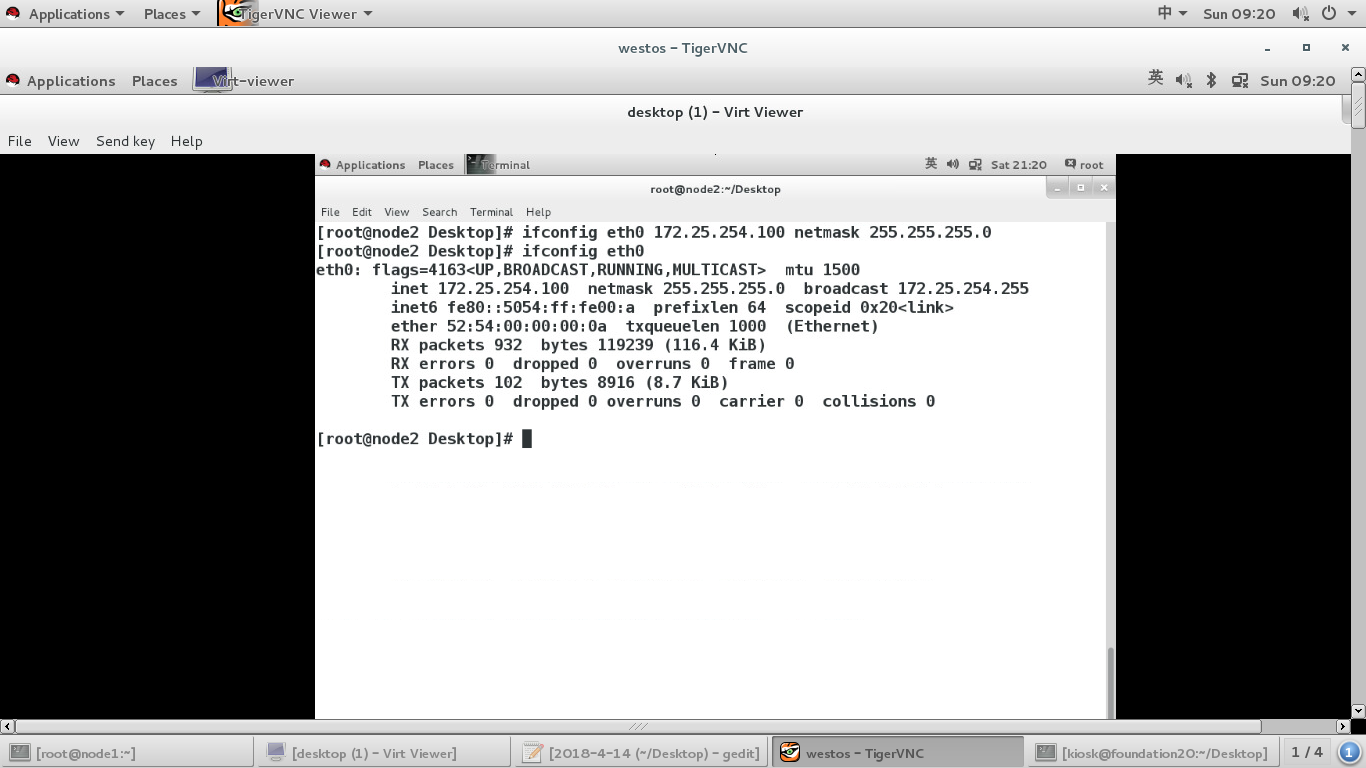
ifconfig device ip netmask 255.255.255.0
ifconfig etho 172.25.254.100 netmask 255.255.255.0
##方法二:
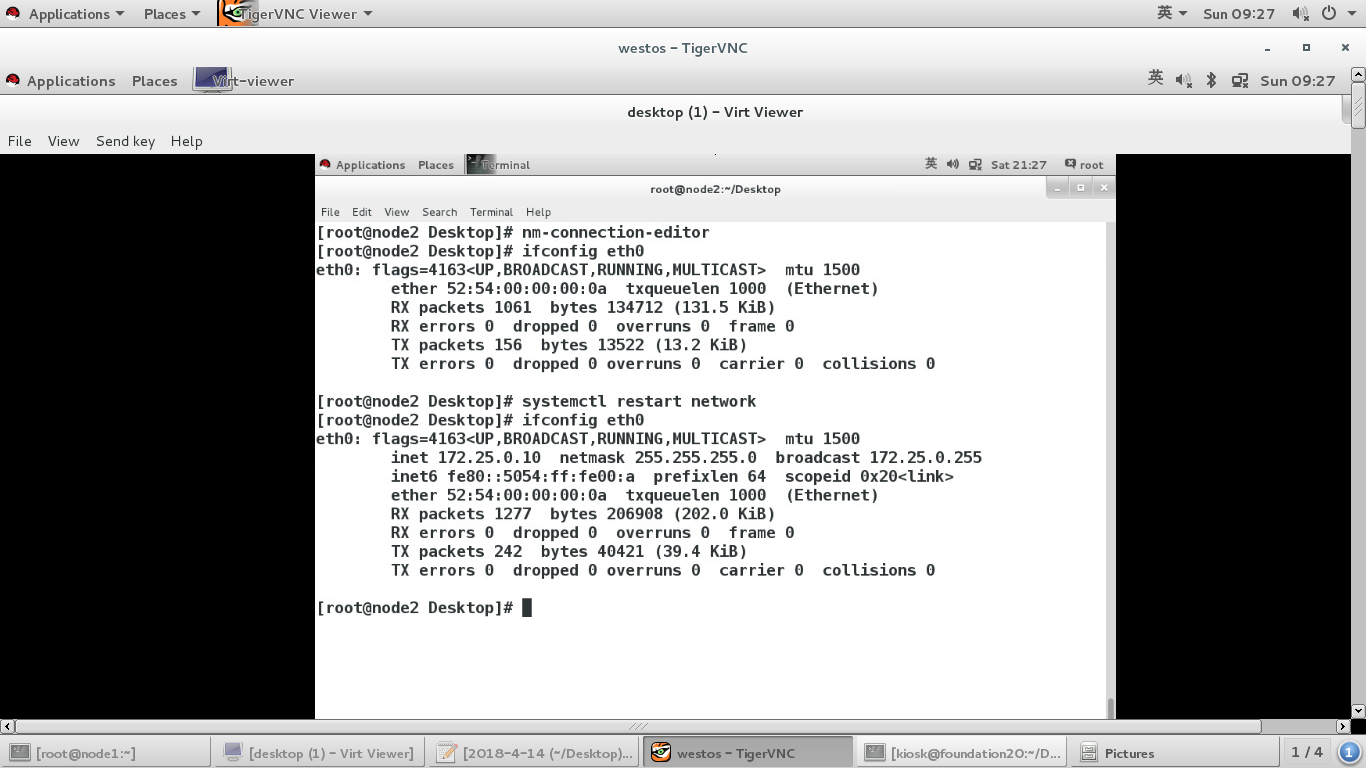
nm-connection-editor 图形设定ip的方式
nmtui 当系统没有图形时可以用此命令开启网络设定的ui界面
NEXT:DHCP #动态获取,ip不固定
static #静态ip为操作着字形设定,ip固定
# 在此图形工具中选择DHCP为动态网络
# 在此图形工具中选择manual为静态网络,ip需要手动输入
###ip设到网络设备上###
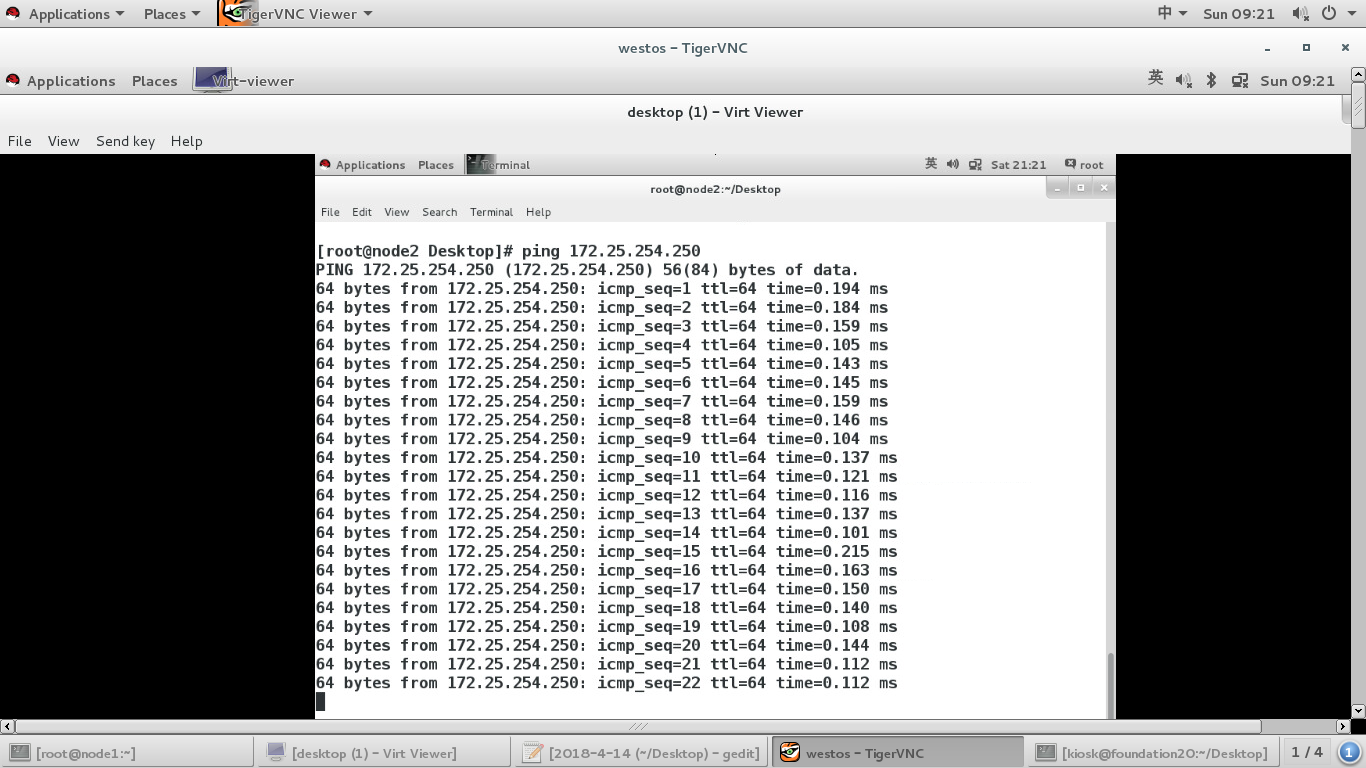
注意:ping 172.25.254.250 看网络是否相通
##方法三:
nmcli device status eth0 #查看eth0状态
nmcli device show eth0 #查看eth0详细信息
nmcli device disconnect eth0 #关闭eth0网络
nmcli device connect eth0 #打开eth0网络
**nmcli connection.....
down xxxx 关闭xxxx网络
up xxxx 打开xxxx网络
delete xxxxx 删除xxxx网络
show xxxx 显示网络信息
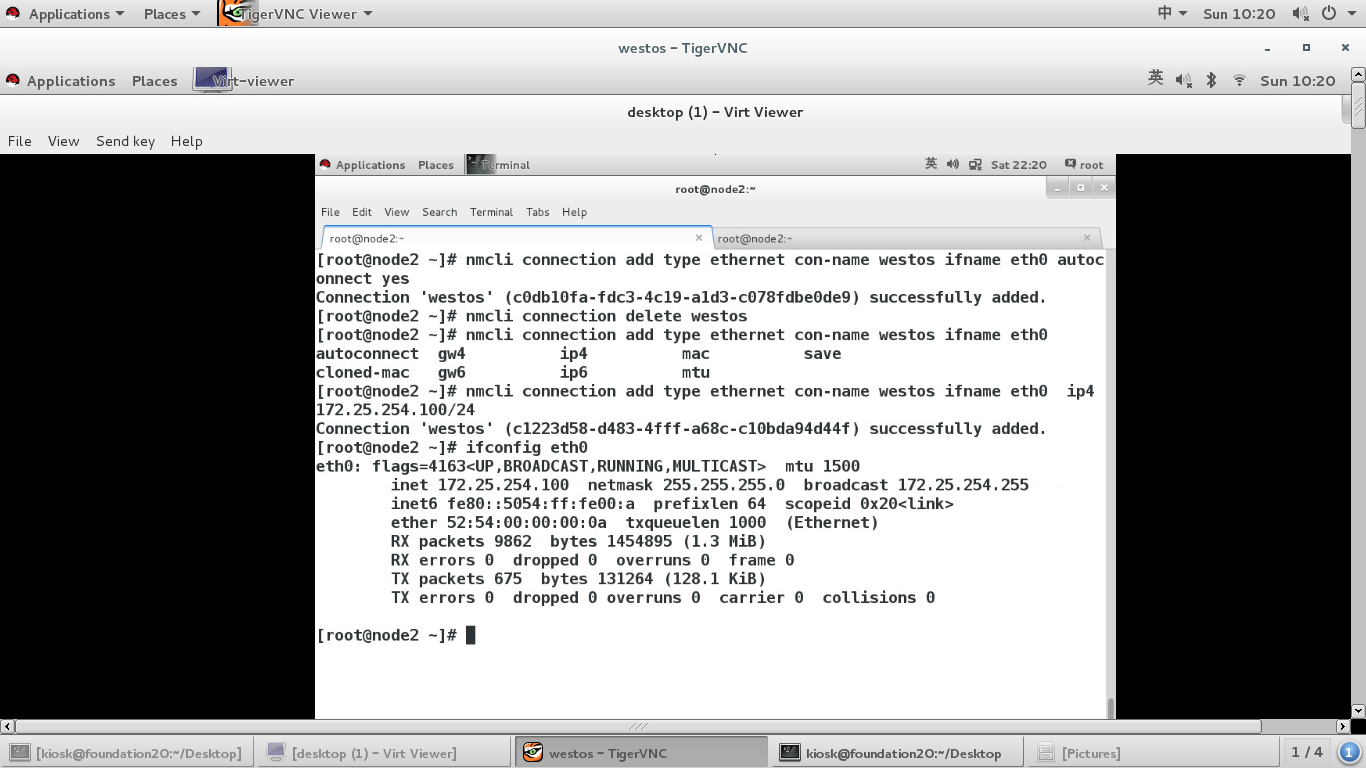
nmcli connection add type ethernet con-name westos(随便设定) ifname eth0(网卡) autoconnect yes ##设置动态ip##
nmcli connection add type ethernet con-name westos ifname eth0 ip4 172.25.254.120/24##设置静态ip##
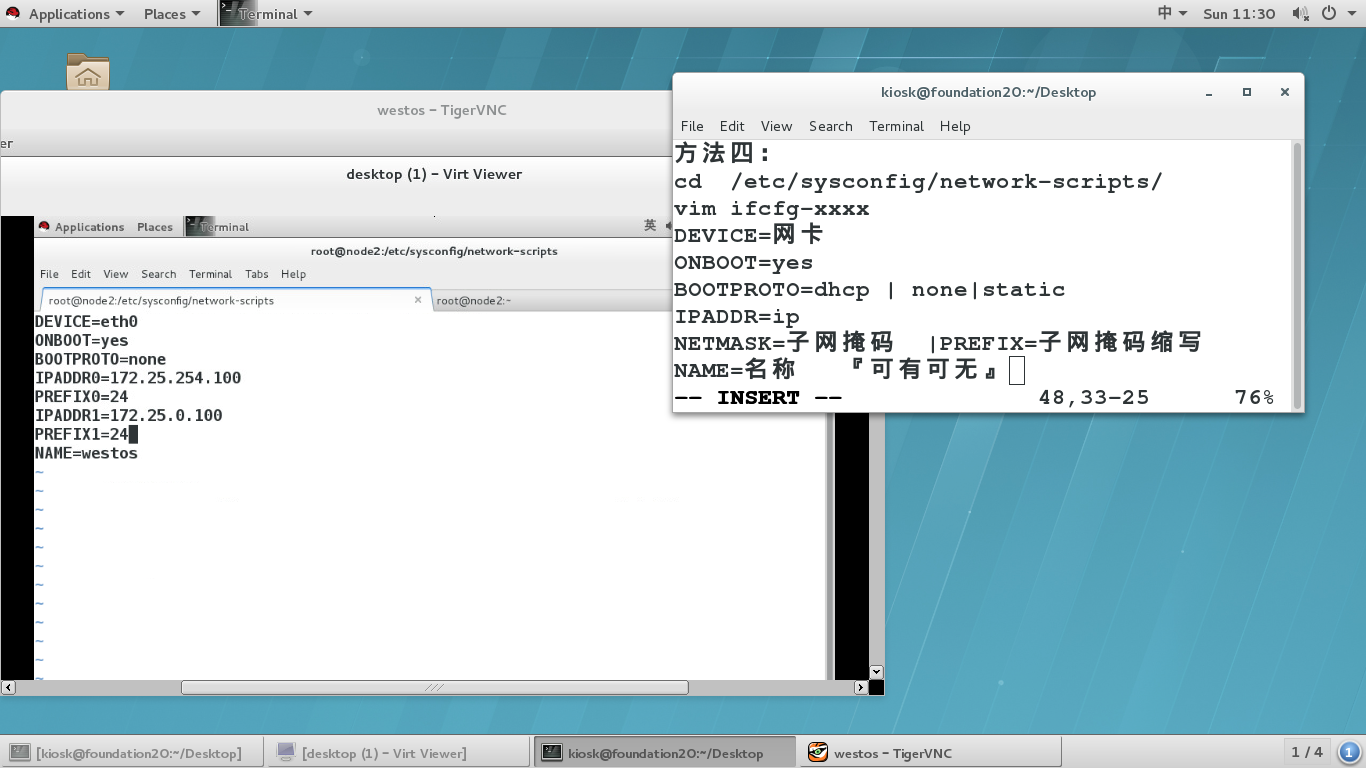
方法四:
cd /etc/sysconfig/network-scripts/
vim ifcfg-xxxx
DEVICE=网卡
ONBOOT=yes
BOOTPROTO=dhcp | none|static
IPADDR=ip
NETMASK=子网掩码 |PREFIX=子网掩码缩写
NAME=名称 『可有可无』
重启服务
##一个静态网卡设定多个ip
DEVICE=eth0
ONBOOT=yes
BOOTPROTO=none
IPADDR0=172.25.254.120
PREFIX0=24
IPADDR1=172.25.0.120
PREFIX1=24
NAME=WESTOS
systemctl restart network
ip addr show eth0 ##查看
##文件参数文档:/usr/share/doc/initscripts-*/sysconfig.txt
3.如何更改网络?(需要有一个网络ip)
(1)dhcp---->static动态到静态
nmcli connection modify westos ipv4.addresses 172.25.254.100/24
nmcli connection modify westos ipv4.method manual
systemctl restart network
(2)static---->dhcp静态到动态
nmcli connection modify westos ipv4.method auto
重启服务
(3)更改ip
nmcli connection modify westos ipv4.addresses 172.25.254.220.24
重启服务
##systemctl stop NetworkManager.service 关闭网络管理服务
##systemctl start NetworkManager.service 打开网络管理服务
4.设置网关
####在真机上操作####
[kiosk@foundation20 Desktop]$ su - root ##切换到超级用户
Password: westos
Last login: Sun Apr 15 15:39:02 CST 2018 on pts/2
[root@foundation20 ~]# route -n ##查看网关
Kernel IP routing table
Destination Gateway Genmask Flags Metric Ref Use Iface
0.0.0.0 172.25.254.254 0.0.0.0 UG 425 0 0 br0
172.25.20.0 0.0.0.0 255.255.255.0 U 425 0 0 br0
172.25.254.0 0.0.0.0 255.255.255.0 U 425 0 0 br0
192.168.122.0 0.0.0.0 255.255.255.0 U 0 0 0 virbr0
[root@foundation20 ~]# vim /etc/sysconfig/network-scripts/ifcfg-br0 ###编辑配置文件删除GATEWAY=XXXXXXX
[root@foundation20 ~]# systemctl restart network ###重启服务
[root@foundation20 ~]# ifconfig ###查看本机的ip也就是这个机子是网关是的ip
br0: flags=4099<UP,BROADCAST,MULTICAST> mtu 1500
inet 172.25.254.20 netmask 255.255.255.0 broadcast 172.25.254.255
inet6 fe80::221:ccff:fec7:d381 prefixlen 64 scopeid 0x20<link>
ether 00:21:cc:c7:d3:81 txqueuelen 0 (Ethernet)
RX packets 0 bytes 0 (0.0 B)
RX errors 0 dropped 0 overruns 0 frame 0
TX packets 0 bytes 0 (0.0 B)
TX errors 0 dropped 0 overruns 0 carrier 0 collisions 0
enp0s25: flags=4099<UP,BROADCAST,MULTICAST> mtu 1500
ether 00:21:cc:c7:d3:81 txqueuelen 1000 (Ethernet)
RX packets 403645 bytes 313990285 (299.4 MiB)
RX errors 0 dropped 0 overruns 0 frame 0
TX packets 104388 bytes 7998305 (7.6 MiB)
TX errors 0 dropped 0 overruns 0 carrier 0 collisions 0
device interrupt 20 memory 0xf2500000-f2520000
lo: flags=73<UP,LOOPBACK,RUNNING> mtu 65536
inet 127.0.0.1 netmask 255.0.0.0
inet6 ::1 prefixlen 128 scopeid 0x10<host>
loop txqueuelen 0 (Local Loopback)
RX packets 569149 bytes 226049238 (215.5 MiB)
RX errors 0 dropped 0 overruns 0 frame 0
TX packets 569149 bytes 226049238 (215.5 MiB)
TX errors 0 dropped 0 overruns 0 carrier 0 collisions 0
virbr0: flags=4099<UP,BROADCAST,MULTICAST> mtu 1500
inet 192.168.122.1 netmask 255.255.255.0 broadcast 192.168.122.255
ether 00:00:00:00:00:00 txqueuelen 0 (Ethernet)
RX packets 0 bytes 0 (0.0 B)
RX errors 0 dropped 0 overruns 0 frame 0
TX packets 0 bytes 0 (0.0 B)
TX errors 0 dropped 0 overruns 0 carrier 0 collisions 0
virbr1: flags=4099<UP,BROADCAST,MULTICAST> mtu 1500
ether 52:54:00:22:2f:b3 txqueuelen 0 (Ethernet)
RX packets 0 bytes 0 (0.0 B)
RX errors 0 dropped 0 overruns 0 frame 0
TX packets 0 bytes 0 (0.0 B)
TX errors 0 dropped 0 overruns 0 carrier 0 collisions 0
virbr0-nic: flags=4099<UP,BROADCAST,MULTICAST> mtu 1500
ether 52:54:00:9c:a9:ff txqueuelen 500 (Ethernet)
RX packets 0 bytes 0 (0.0 B)
RX errors 0 dropped 0 overruns 0 frame 0
TX packets 0 bytes 0 (0.0 B)
TX errors 0 dropped 0 overruns 0 carrier 0 collisions 0
wlp3s0: flags=4099<UP,BROADCAST,MULTICAST> mtu 1500
ether 8c:70:5a:bc:07:90 txqueuelen 1000 (Ethernet)
RX packets 876 bytes 70889 (69.2 KiB)
RX errors 0 dropped 0 overruns 0 frame 0
TX packets 26 bytes 5297 (5.1 KiB)
TX errors 0 dropped 0 overruns 0 carrier 0 collisions 0
[root@foundation20 ~]# route -n ###查看一下网关没有了
Kernel IP routing table
Destination Gateway Genmask Flags Metric Ref Use Iface
172.25.20.0 0.0.0.0 255.255.255.0 U 425 0 0 br0
172.25.254.0 0.0.0.0 255.255.255.0 U 425 0 0 br0
192.168.122.0 0.0.0.0 255.255.255.0 U 0 0 0 virbr0
[root@foundation20 ~]# route -n
Kernel IP routing table
Destination Gateway Genmask Flags Metric Ref Use Iface
0.0.0.0 192.168.43.1 0.0.0.0 UG 600 0 0 wlp3s0
172.25.20.0 0.0.0.0 255.255.255.0 U 425 0 0 br0
172.25.254.0 0.0.0.0 255.255.255.0 U 425 0 0 br0
192.168.43.0 0.0.0.0 255.255.255.0 U 600 0 0 wlp3s0
192.168.122.0 0.0.0.0 255.255.255.0 U 0 0 0 virbr0
[root@foundation20 ~]# ping www.baidu.com ###ping一下百度看通不通
PING www.a.shifen.com (220.181.111.188) 56(84) bytes of data.
64 bytes from 220.181.111.188: icmp_seq=1 ttl=53 time=70.4 ms
64 bytes from 220.181.111.188: icmp_seq=2 ttl=53 time=76.0 ms
64 bytes from 220.181.111.188: icmp_seq=3 ttl=53 time=38.0 ms
64 bytes from 220.181.111.188: icmp_seq=4 ttl=53 time=44.0 ms
64 bytes from 220.181.111.188: icmp_seq=5 ttl=53 time=43.9 ms
64 bytes from 220.181.111.188: icmp_seq=6 ttl=53 time=48.6 ms
64 bytes from 220.181.111.188: icmp_seq=7 ttl=53 time=45.5 ms
64 bytes from 220.181.111.188: icmp_seq=8 ttl=53 time=38.1 ms
64 bytes from 220.181.111.188: icmp_seq=9 ttl=53 time=40.6 ms
64 bytes from 220.181.111.188: icmp_seq=10 ttl=53 time=47.7 ms
^C
--- www.a.shifen.com ping statistics ---
10 packets transmitted, 10 received, 0% packet loss, time 9013ms
rtt min/avg/max/mdev = 38.095/49.342/76.086/12.503 ms
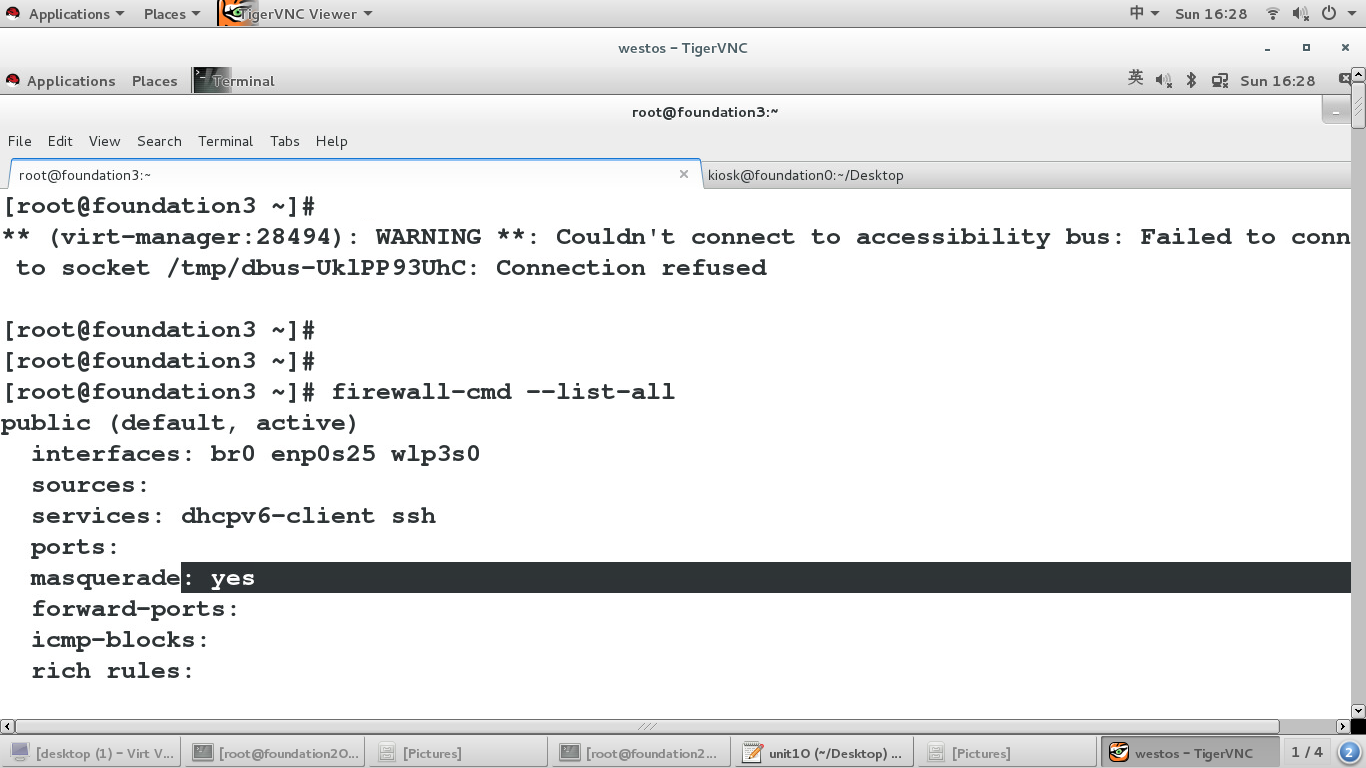
[root@foundation20 ~]# systemctl start firewalld ##打开防火墙
[root@foundation20 ~]# firewall-cmd --add-masquerade ##打开SND的功能
success
###在虚拟机里###
vim /etc/sysconfig/network ##输入真机的设置的ip
GATEWAY=172.25.254.120
systemctl restart network ##重启服务
vim /etc/resolv.conf ##写nameserver=172.25.254.120
ping www.baidu.com ##上网
##排错##
1.真机能不能上网 ping www.baidu.com
2.firewalld-cmd --list-all -->yes
3.在虚拟机中看ip 网关 dns
ping 网关
4.vim /etc/sysctl.conf ##内核路由开启
ip_forward = 1
sysctl -p
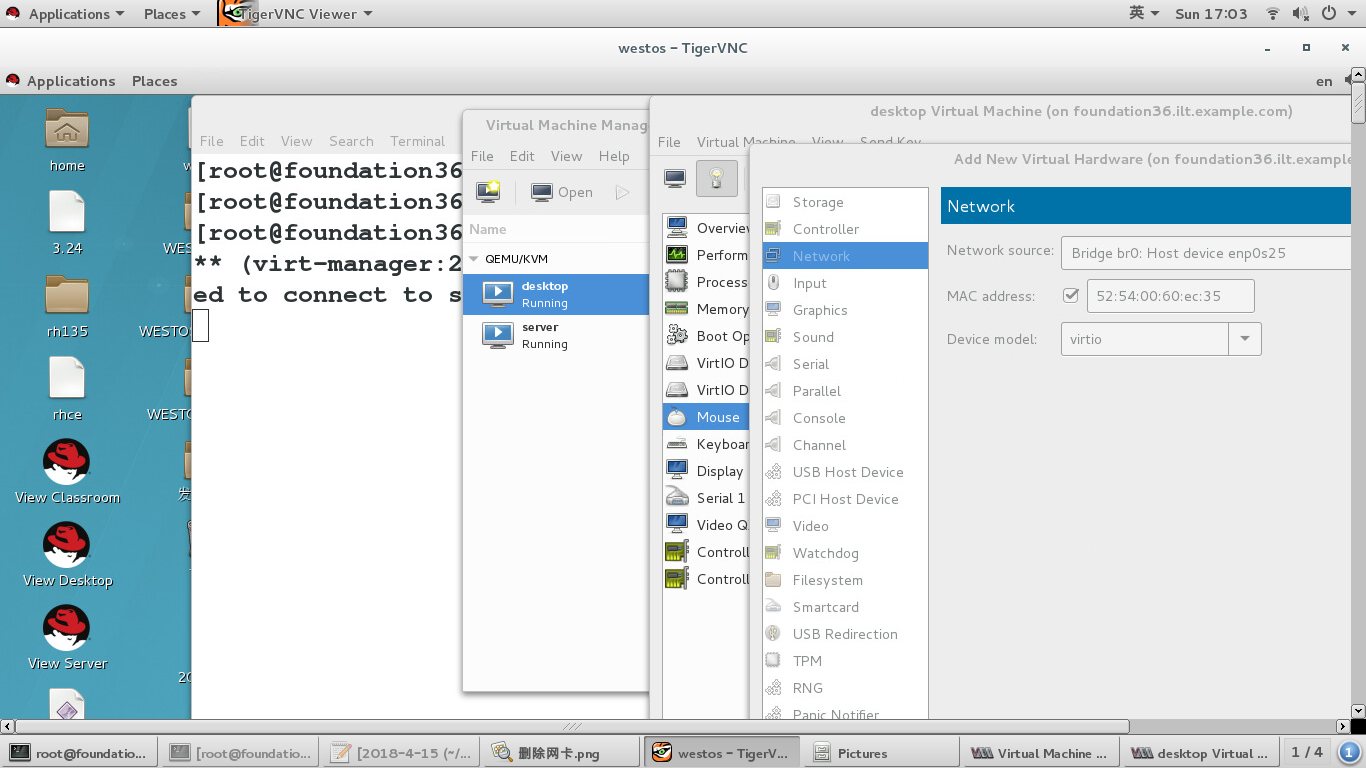
5. virt-manager ##删除网卡->先删除坏的网卡->用add建立新的网卡