test-network在Fabric 2.0版本中引入,替代了之前的“first-network”。本文是在Ubuntu18.04下进行测试。
下载Hyperledger Fabric Docker映像和示例之后,可以使用Fabric -samples存储库中提供的脚本部署测试网络。通过运行本地机器上的节点,可以提供测试网络来学习Fabric。开发人员可以使用这个网络来测试他们的智能合约和应用程序。该网络的目的只是作为教育和测试的工具,而不是如何建立一个网络的模型。通常,不鼓励对脚本进行修改,这可能会破坏网络。它基于一个有限的配置,不应该用作部署生产网络的模板:
- 它包括两个peer organizations和一个ordering organization。
- 为简单起见,配置了单节点Raft ordering service。
- 为了减少复杂性,不部署TLS证书颁发机构(CA)。所有证书都由根ca颁发。
- 示例网络部署了一个带有Docker Compose的Fabric网络。由于节点在Docker Compose网络中是隔离的,所以测试网络没有被配置为连接其他正在运行的Fabric节点。
一、准备工作
在运行test-network之前,需要克隆Fabric -samples存储库并下载Fabric映像。确保已经安装了相关工具,配置好go环境,并安装了示例、二进制文件和Docker映像。
注:test-network已通过Docker版本2.5.0.1验证成功,目前为推荐版本。更高版本的Docker可能无法工作。
确定机器上要放置fabric-samples存储库的位置,并在终端窗口中输入该目录。下面的命令将执行以下步骤:
- 如果需要,克隆hyperledger/fabric-samples存储库
- 选择适当的版本标记
- 将特定于Hyperledger Fabric平台的/bin和/config安装到Fabric -samples的/bin和/config目录中
- 下载指定版本的Hyperledger Fabric docker镜像
准备好之后,在将要安装Fabric示例和二进制文件的目录中,继续并执行命令拉下二进制文件和镜像。
如果要使用最新的生产版本,就省略所有版本标识符。
$ curl -sSL https://bit.ly/2ysbOFE | bash -s
如果要特定版本,则传递Fabric和Fabric-CA docker镜像的版本标识符。下面的命令演示了如何下载最新的生产版本-Fabric v2.3.1和Fabric CA v1.4.9
$ curl -sSL https://bit.ly/2ysbOFE | bash -s -- <fabric_version> <fabric-ca_version>
$ curl -sSL https://bit.ly/2ysbOFE | bash -s -- 2.3.1 1.4.9
上面的命令下载并执行一个bash脚本,该脚本将下载并提取所有特定于平台的二进制文件,将需要这些二进制文件来设置我们的网络,并将它们放入上面创建的克隆repo中。
在指定的目录下会生成一个Fabric-samples的文件。

文件中的/bin检索以下特定于平台的二进制文件:
- configtxgen,
- configtxlator,
- cryptogen,
- discover,
- idemixgen
- orderer,
- osnadmin,
- peer,
- fabric-ca-client,
- fabric-ca-server
由于是从外网下载的,所以要设置/etc/hosts文件。增加一行199.232.28.133 raw.githubusercontent.com。
再将Fabric-samples下的bin配置为环境变量即可。
gedit ~/.bashrc将export PATH=$PATH:$GOPATH/src/github.com/hyperledger/fabric-samples/bin添加进去之后,再运行命令source ~/.bashrc。
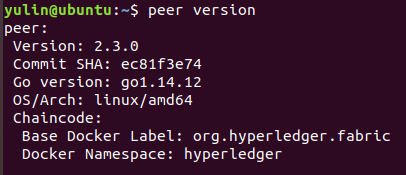
测试一下环境变量是否设置成功:
二、建立test-network
进入到test-network目录:
cd fabric-samples/test-network
在此目录中,可以找到一个带注释的脚本network.sh,该脚本使用本地计算机上的Docker映像来建立Fabric网络。可以运行./network.sh -h来打印脚本帮助文本:
$ ./network.sh -h
Usage:
  network.sh <Mode> [Flags]
    Modes:
      up - Bring up Fabric orderer and peer nodes. No channel is created
      up createChannel - Bring up fabric network with one channel
      createChannel - Create and join a channel after the network is created
      deployCC - Deploy a chaincode to a channel (defaults to asset-transfer-basic)
      down - Bring down the network

    Flags:
    Used with network.sh up, network.sh createChannel:
    -ca <use CAs> -  Use Certificate Authorities to generate network crypto material
    -c <channel name> - Name of channel to create (defaults to "mychannel")
    -s <dbtype> - Peer state database to deploy: goleveldb (default) or couchdb
    -r <max retry> - CLI times out after certain number of attempts (defaults to 5)
    -d <delay> - CLI delays for a certain number of seconds (defaults to 3)
    -i <imagetag> - Docker image tag of Fabric to deploy (defaults to "latest")
    -cai <ca_imagetag> - Docker image tag of Fabric CA to deploy (defaults to "latest")
    -verbose - Verbose mode

    Used with network.sh deployCC
    -c <channel name> - Name of channel to deploy chaincode to
    -ccn <name> - Chaincode name.
    -ccl <language> - Programming language of the chaincode to deploy: go, java, javascript, typescript
    -ccv <version>  - Chaincode version. 1.0 (default), v2, version3.x, etc
    -ccs <sequence>  - Chaincode definition sequence. Must be an integer, 1 (default), 2, 3, etc
    -ccp <path>  - File path to the chaincode.
    -ccep <policy>  - (Optional) Chaincode endorsement policy using signature policy syntax. The default policy requires an endorsement from Org1 and Org2
    -cccg <collection-config>  - (Optional) File path to private data collections configuration file
    -cci <fcn name>  - (Optional) Name of chaincode initialization function. When a function is provided, the execution of init will be requested and the function will be invoked.

    -h - Print this message

 Possible Mode and flag combinations
   up -ca -r -d -s -i -cai -verbose
   up createChannel -ca -c -r -d -s -i -cai -verbose
   createChannel -c -r -d -verbose
   deployCC -ccn -ccl -ccv -ccs -ccp -cci -r -d -verbose

 Examples:
   network.sh up createChannel -ca -c mychannel -s couchdb -i 2.0.0
   network.sh createChannel -c channelName
   network.sh deployCC -ccn basic -ccp ../asset-transfer-basic/chaincode-javascript/ -ccl javascript
   network.sh deployCC -ccn mychaincode -ccp ./user/mychaincode -ccv 1 -ccl javascript
在test-network目录中,运行以下命令以从以前的运行中删除任何容器或工件:
$ ./network.sh down
Stopping network
Removing network net_test
WARNING: Network net_test not found.
Removing volume net_peer0.org1.example.com
WARNING: Volume net_peer0.org1.example.com not found.
Removing volume net_peer0.org2.example.com
WARNING: Volume net_peer0.org2.example.com not found.
Removing volume net_orderer.example.com
WARNING: Volume net_orderer.example.com not found.
Removing network net_test
WARNING: Network net_test not found.
Removing volume net_peer0.org3.example.com
WARNING: Volume net_peer0.org3.example.com not found.
No containers available for deletion
No images available for deletion
Unable to find image 'busybox:latest' locally
然后,可以通过发出以下命令来启动网络。./network.sh up命令创建一个Fabric网络,该网络由两个peer node和一个ordering node组成。
$ ./network.sh up
Starting nodes with CLI timeout of '5' tries and CLI delay of '3' seconds and using database 'leveldb' with crypto from 'cryptogen'
LOCAL_VERSION=2.3.0
DOCKER_IMAGE_VERSION=2.3.0
/home/yulin/go/src/github.com/hyperledger/fabric-samples/test-network/../bin/cryptogen
Generating certificates using cryptogen tool
Creating Org1 Identities
+ cryptogen generate --config=./organizations/cryptogen/crypto-config-org1.yaml --output=organizations
org1.example.com
+ res=0
Creating Org2 Identities
+ cryptogen generate --config=./organizations/cryptogen/crypto-config-org2.yaml --output=organizations
org2.example.com
+ res=0
Creating Orderer Org Identities
+ cryptogen generate --config=./organizations/cryptogen/crypto-config-orderer.yaml --output=organizations
+ res=0
Generating CCP files for Org1 and Org2
Creating network "net_test" with the default driver
Creating volume "net_peer0.org1.example.com" with default driver
Creating volume "net_peer0.org2.example.com" with default driver
Creating volume "net_orderer.example.com" with default driver
Creating peer0.org1.example.com ...
Creating orderer.example.com ...
Creating peer0.org2.example.com ...
Creating peer0.org1.example.com
Creating orderer.example.com
Creating peer0.org1.example.com ... done
Creating cli ...
Creating cli ... done
CONTAINER ID        IMAGE                               COMMAND                  CREATED             STATUS                   PORTS                                            NAMES
58d5bff933c7        hyperledger/fabric-tools:latest     "/bin/bash"              3 seconds ago       Up Less than a second                                                     cli
7976cc172cb1        hyperledger/fabric-peer:latest      "peer node start"        24 seconds ago      Up 4 seconds             0.0.0.0:7051->7051/tcp                           peer0.org1.example.com
06c49a921c2b        hyperledger/fabric-peer:latest      "peer node start"        24 seconds ago      Up 5 seconds             7051/tcp, 0.0.0.0:9051->9051/tcp                 peer0.org2.example.com
68aa33d421d1        hyperledger/fabric-orderer:latest   "orderer"                25 seconds ago      Up 4 seconds             0.0.0.0:7050->7050/tcp, 0.0.0.0:7053->7053/tcp   orderer.example.com
5fa064d886d7        ethereum/solc:0.7.5                 "/usr/bin/solc --ver…"   3 weeks ago         Exited (0) 3 weeks ago                                                    jolly_clarke
3f41804a3354        ethereum/solc:0.7.5                 "/usr/bin/solc --ver…"   3 weeks ago         Exited (0) 3 weeks ago                                                    nervous_swirles
默认情况下,网络使用cryptogen工具启动网络。但是,也可以通过证书颁发机构来建立网络。
三、test-network的组成部分
在部署了测试网络之后,运行以下命令列出机器上运行的所有Docker容器。可以看到network.sh脚本创建的三个节点:
$ docker ps -a
CONTAINER ID        IMAGE                               COMMAND                  CREATED              STATUS                   PORTS                                            NAMES
58d5bff933c7        hyperledger/fabric-tools:latest     "/bin/bash"              About a minute ago   Up About a minute                                                         cli
7976cc172cb1        hyperledger/fabric-peer:latest      "peer node start"        About a minute ago   Up About a minute        0.0.0.0:7051->7051/tcp                           peer0.org1.example.com
06c49a921c2b        hyperledger/fabric-peer:latest      "peer node start"        About a minute ago   Up About a minute        7051/tcp, 0.0.0.0:9051->9051/tcp                 peer0.org2.example.com
68aa33d421d1        hyperledger/fabric-orderer:latest   "orderer"                About a minute ago   Up About a minute        0.0.0.0:7050->7050/tcp, 0.0.0.0:7053->7053/tcp   orderer.example.com
5fa064d886d7        ethereum/solc:0.7.5                 "/usr/bin/solc --ver…"   3 weeks ago          Exited (0) 3 weeks ago                                                    jolly_clarke
3f41804a3354        ethereum/solc:0.7.5                 "/usr/bin/solc --ver…"   3 weeks ago          Exited (0) 3 weeks ago                                                    nervous_swirles
每个与Fabric网络交互的节点和用户都需要属于一个组织才能参与网络。测试网络包括两个对等组织:Org1和Org2。它还包括一个维护网络提供排序服务的排序组织。
Peers是任何Fabric网络的基本组成部分。Peers存储区块链分类帐,并在事务提交到分类帐之前验证它们。Peers运行智能合约,其中包含用于管理区块链分类帐上资产的业务逻辑。
网络中的每个peer都必须属于一个组织。在测试网络中,每个组织各自运营一个peer,peer0.org1.example.com和peer0.org2.example.com。
每个Fabric网络还包括ordering服务。当peers验证交易并将交易块添加到区块链分类账中时,他们并不确定交易的顺序或将其包括在新的块中。在分布式网络上,peers可能彼此相距很远,并且对何时创建事务没有共同的看法。在交易顺序上达成共识是一个代价高昂的过程,这会给同伴带来开销。
ordering服务允许peers专注于验证交易并将其提交到分类账。在ordering节点收到客户认可的交易后,他们就交易顺序达成共识,然后将其添加到块中。接着将这些块分发到peer节点,peer节点将这些块添加到区块链帐本中。
test-network使用由orderer组织操作的单节点Raft ordering服务。可以在ordering.example.com上看到正在计算机上运行的ordering节点。尽管test-network仅使用单节点ordering服务,但生产网络将具有多个ordering节点,由一个或多个ordering组织进行操作。不同的ordering节点将使用Raft共识算法来就网络上的事务顺序达成协议。
四、建立Channel
现在,机器上正在运行peer节点和orderer节点,可以使用脚本为Org1和Org2之间的事务创建Fabric Channel。Channel是特定网络成员之间的专用通信层。Channel只能由受邀加入该Channel的组织使用,并且对网络的其他成员不可见。每个Channel都有一个单独的区块链分类帐。被邀请的组织将其同行“加入”Channel以存储Channel分类帐并验证Channel上的交易。
可以使用network.sh脚本在Org1和Org2之间创建一个Channel,并将其对等方加入该通道。运行以下命令以使用默认名为mychannel创建一个Channel:
$ ./network.sh createChannel
Creating channel 'mychannel'.
If network is not up, starting nodes with CLI timeout of '5' tries and CLI delay of '3' seconds and using database 'leveldb
Generating channel genesis block 'mychannel.block'
/home/yulin/go/src/github.com/hyperledger/fabric-samples/test-network/../bin/configtxgen
+ configtxgen -profile TwoOrgsApplicationGenesis -outputBlock ./channel-artifacts/mychannel.block -channelID mychannel
2021-02-04 12:25:40.972 CST [common.tools.configtxgen] main -> INFO 001 Loading configuration
2021-02-04 12:25:41.001 CST [common.tools.configtxgen.localconfig] completeInitialization -> INFO 002 orderer type: etcdraft
2021-02-04 12:25:41.003 CST [common.tools.configtxgen.localconfig] completeInitialization -> INFO 003 Orderer.EtcdRaft.Options unset, setting to tick_interval:"500ms" election_tick:10 heartbeat_tick:1 max_inflight_blocks:5 snapshot_interval_size:16777216
2021-02-04 12:25:41.003 CST [common.tools.configtxgen.localconfig] Load -> INFO 004 Loaded configuration: /home/yulin/go/src/github.com/hyperledger/fabric-samples/test-network/configtx/configtx.yaml
2021-02-04 12:25:41.040 CST [common.tools.configtxgen] doOutputBlock -> INFO 005 Generating genesis block
2021-02-04 12:25:41.040 CST [common.tools.configtxgen] doOutputBlock -> INFO 006 Creating application channel genesis block
2021-02-04 12:25:41.041 CST [common.tools.configtxgen] doOutputBlock -> INFO 007 Writing genesis block
+ res=0
Creating channel mychannel
Using organization 1
+ osnadmin channel join --channel-id mychannel --config-block ./channel-artifacts/mychannel.block -o localhost:7053 --ca-file /home/yulin/go/src/github.com/hyperledger/fabric-samples/test-network/organizations/ordererOrganizations/example.com/orderers/orderer.example.com/msp/tlscacerts/tlsca.example.com-cert.pem --client-cert /home/yulin/go/src/github.com/hyperledger/fabric-samples/test-network/organizations/ordererOrganizations/example.com/orderers/orderer.example.com/tls/server.crt --client-key /home/yulin/go/src/github.com/hyperledger/fabric-samples/test-network/organizations/ordererOrganizations/example.com/orderers/orderer.example.com/tls/server.key
+ res=0
Status: 201
{


	"name": "mychannel",
	"url": "/participation/v1/channels/mychannel",
	"consensusRelation": "consenter",
	"status": "active",
	"height": 1
}

Channel 'mychannel' created
Joining org1 peer to the channel...
Using organization 1
+ peer channel join -b ./channel-artifacts/mychannel.block
+ res=0
2021-02-04 12:25:49.063 CST [channelCmd] InitCmdFactory -> INFO 001 Endorser and orderer connections initialized
2021-02-04 12:25:49.436 CST [channelCmd] executeJoin -> INFO 002 Successfully submitted proposal to join channel
Joining org2 peer to the channel...
Using organization 2
+ peer channel join -b ./channel-artifacts/mychannel.block
+ res=0
2021-02-04 12:25:52.820 CST [channelCmd] InitCmdFactory -> INFO 001 Endorser and orderer connections initialized
2021-02-04 12:25:52.910 CST [channelCmd] executeJoin -> INFO 002 Successfully submitted proposal to join channel
Setting anchor peer for org1...
Using organization 1
+ peer channel fetch config config_block.pb -o orderer.example.com:7050 --ordererTLSHostnameOverride orderer.example.com -c mychannel --tls --cafile /opt/gopath/src/github.com/hyperledger/fabric/peer/organizations/ordererOrganizations/example.com/orderers/orderer.example.com/msp/tlscacerts/tlsca.example.com-cert.pem
Fetching channel config for channel mychannel
Using organization 1
Fetching the most recent configuration block for the channel
2021-02-04 04:25:57.408 UTC [channelCmd] InitCmdFactory -> INFO 001 Endorser and orderer connections initialized
2021-02-04 04:25:57.514 UTC [cli.common] readBlock -> INFO 002 Received block: 0
2021-02-04 04:25:57.515 UTC [channelCmd] fetch -> INFO 003 Retrieving last config block: 0
2021-02-04 04:25:57.602 UTC [cli.common] readBlock -> INFO 004 Received block: 0
Decoding config block to JSON and isolating config to Org1MSPconfig.json
+ + configtxlator proto_decode --input config_block.pb --type common.Block
jq '.data.data[0].payload.data.config'
Generating anchor peer update transaction for Org1 on channel mychannel
+ jq '.channel_group.groups.Application.groups.Org1MSP.values += {"AnchorPeers":{"mod_policy": "Admins","value":{"anchor_peers": [{"host": "peer0.org1.example.com","port": 7051}]},"version": "0"}}' Org1MSPconfig.json
+ configtxlator proto_encode --input Org1MSPconfig.json --type common.Config
+ configtxlator proto_encode --input Org1MSPmodified_config.json --type common.Config
+ configtxlator compute_update --channel_id mychannel --original original_config.pb --updated modified_config.pb
+ configtxlator proto_decode --input config_update.pb --type common.ConfigUpdate
+ jq .
++ cat config_update.json
+ echo '{"payload":{"header":{"channel_header":{"channel_id":"mychannel", "type":2}},"data":{"config_update":{' '"channel_id":' '"mychannel",' '"isolated_data":' '{},' '"read_set":' '{' '"groups":' '{' '"Application":' '{' '"groups":' '{' '"Org1MSP":' '{' '"groups":' '{},' '"mod_policy":' '"",' '"policies":' '{' '"Admins":' '{' '"mod_policy":' '"",' '"policy":' null, '"version":' '"0"' '},' '"Endorsement":' '{' '"mod_policy":' '"",' '"policy":' null, '"version":' '"0"' '},' '"Readers":' '{' '"mod_policy":' '"",' '"policy":' null, '"version":' '"0"' '},' '"Writers":' '{' '"mod_policy":' '"",' '"policy":' null, '"version":' '"0"' '}' '},' '"values":' '{' '"MSP":' '{' '"mod_policy":' '"",' '"value":' null, '"version":' '"0"' '}' '},' '"version":' '"0"' '}' '},' '"mod_policy":' '"",' '"policies":' '{},' '"values":' '{},' '"version":' '"0"' '}' '},' '"mod_policy":' '"",' '"policies":' '{},' '"values":' '{},' '"version":' '"0"' '},' '"write_set":' '{' '"groups":' '{' '"Application":' '{' '"groups":' '{' '"Org1MSP":' '{' '"groups":' '{},' '"mod_policy":' '"Admins",' '"policies":' '{' '"Admins":' '{' '"mod_policy":' '"",' '"policy":' null, '"version":' '"0"' '},' '"Endorsement":' '{' '"mod_policy":' '"",' '"policy":' null, '"version":' '"0"' '},' '"Readers":' '{' '"mod_policy":' '"",' '"policy":' null, '"version":' '"0"' '},' '"Writers":' '{' '"mod_policy":' '"",' '"policy":' null, '"version":' '"0"' '}' '},' '"values":' '{' '"AnchorPeers":' '{' '"mod_policy":' '"Admins",' '"value":' '{' '"anchor_peers":' '[' '{' '"host":' '"peer0.org1.example.com",' '"port":' 7051 '}' ']' '},' '"version":' '"0"' '},' '"MSP":' '{' '"mod_policy":' '"",' '"value":' null, '"version":' '"0"' '}' '},' '"version":' '"1"' '}' '},' '"mod_policy":' '"",' '"policies":' '{},' '"values":' '{},' '"version":' '"0"' '}' '},' '"mod_policy":' '"",' '"policies":' '{},' '"values":' '{},' '"version":' '"0"' '}' '}}}}'
+ configtxlator proto_encode --input config_update_in_envelope.json --type common.Envelope
2021-02-04 04:25:59.521 UTC [channelCmd] InitCmdFactory -> INFO 001 Endorser and orderer connections initialized
2021-02-04 04:25:59.588 UTC [channelCmd] update -> INFO 002 Successfully submitted channel update
Anchor peer set for org 'Org1MSP' on channel 'mychannel'
Setting anchor peer for org2...
+ peer channel fetch config config_block.pb -o orderer.example.com:7050 --ordererTLSHostnameOverride orderer.example.com -c mychannel --tls --cafile /opt/gopath/src/github.com/hyperledger/fabric/peer/organizations/ordererOrganizations/example.com/orderers/orderer.example.com/msp/tlscacerts/tlsca.example.com-cert.pem
Using organization 2
Fetching channel config for channel mychannel
Using organization 2
Fetching the most recent configuration block for the channel
2021-02-04 04:26:01.773 UTC [channelCmd] InitCmdFactory -> INFO 001 Endorser and orderer connections initialized
2021-02-04 04:26:01.829 UTC [cli.common] readBlock -> INFO 002 Received block: 1
2021-02-04 04:26:01.835 UTC [channelCmd] fetch -> INFO 003 Retrieving last config block: 1
2021-02-04 04:26:01.862 UTC [cli.common] readBlock -> INFO 004 Received block: 1
Decoding config block to JSON and isolating config to Org2MSPconfig.json
+ + jq '.data.data[0].payload.data.config'
configtxlator proto_decode --input config_block.pb --type common.Block
Generating anchor peer update transaction for Org2 on channel mychannel
+ jq '.channel_group.groups.Application.groups.Org2MSP.values += {"AnchorPeers":{"mod_policy": "Admins","value":{"anchor_peers": [{"host": "peer0.org2.example.com","port": 9051}]},"version": "0"}}' Org2MSPconfig.json
+ configtxlator proto_encode --input Org2MSPconfig.json --type common.Config
+ configtxlator proto_encode --input Org2MSPmodified_config.json --type common.Config
+ configtxlator compute_update --channel_id mychannel --original original_config.pb --updated modified_config.pb
+ configtxlator proto_decode --input config_update.pb --type common.ConfigUpdate
+ jq .
++ cat config_update.json
+ echo '{"payload":{"header":{"channel_header":{"channel_id":"mychannel", "type":2}},"data":{"config_update":{' '"channel_id":' '"mychannel",' '"isolated_data":' '{},' '"read_set":' '{' '"groups":' '{' '"Application":' '{' '"groups":' '{' '"Org2MSP":' '{' '"groups":' '{},' '"mod_policy":' '"",' '"policies":' '{' '"Admins":' '{' '"mod_policy":' '"",' '"policy":' null, '"version":' '"0"' '},' '"Endorsement":' '{' '"mod_policy":' '"",' '"policy":' null, '"version":' '"0"' '},' '"Readers":' '{' '"mod_policy":' '"",' '"policy":' null, '"version":' '"0"' '},' '"Writers":' '{' '"mod_policy":' '"",' '"policy":' null, '"version":' '"0"' '}' '},' '"values":' '{' '"MSP":' '{' '"mod_policy":' '"",' '"value":' null, '"version":' '"0"' '}' '},' '"version":' '"0"' '}' '},' '"mod_policy":' '"",' '"policies":' '{},' '"values":' '{},' '"version":' '"0"' '}' '},' '"mod_policy":' '"",' '"policies":' '{},' '"values":' '{},' '"version":' '"0"' '},' '"write_set":' '{' '"groups":' '{' '"Application":' '{' '"groups":' '{' '"Org2MSP":' '{' '"groups":' '{},' '"mod_policy":' '"Admins",' '"policies":' '{' '"Admins":' '{' '"mod_policy":' '"",' '"policy":' null, '"version":' '"0"' '},' '"Endorsement":' '{' '"mod_policy":' '"",' '"policy":' null, '"version":' '"0"' '},' '"Readers":' '{' '"mod_policy":' '"",' '"policy":' null, '"version":' '"0"' '},' '"Writers":' '{' '"mod_policy":' '"",' '"policy":' null, '"version":' '"0"' '}' '},' '"values":' '{' '"AnchorPeers":' '{' '"mod_policy":' '"Admins",' '"value":' '{' '"anchor_peers":' '[' '{' '"host":' '"peer0.org2.example.com",' '"port":' 9051 '}' ']' '},' '"version":' '"0"' '},' '"MSP":' '{' '"mod_policy":' '"",' '"value":' null, '"version":' '"0"' '}' '},' '"version":' '"1"' '}' '},' '"mod_policy":' '"",' '"policies":' '{},' '"values":' '{},' '"version":' '"0"' '}' '},' '"mod_policy":' '"",' '"policies":' '{},' '"values":' '{},' '"version":' '"0"' '}' '}}}}'
+ configtxlator proto_encode --input config_update_in_envelope.json --type common.Envelope
2021-02-04 04:26:02.756 UTC [channelCmd] InitCmdFactory -> INFO 001 Endorser and orderer connections initialized
2021-02-04 04:26:03.196 UTC [channelCmd] update -> INFO 002 Successfully submitted channel update
Anchor peer set for org 'Org2MSP' on channel 'mychannel'
Channel 'mychannel' joined
也可以使用channel标志创建具有自定义名称的Channel。例如,以下命令将创建一个名为channel1的Channel:
./network.sh createChannel -c channel1
如果要一步步启动网络并创建Channel,则可以同时使用up和createChannel模式:
./network.sh up createChannel
五、在Channel上启动链码
创建Channel后,可以开始使用智能合约与通道分类帐进行交互。智能合约包含管理区块链分类账上资产的业务逻辑。网络成员运行的应用程序可以调用智能合约以在分类账上创建资产,以及更改和转移这些资产。应用程序还查询智能合约以读取分类账上的数据。
为了确保交易有效,使用智能合约创建的交易通常需要由多个组织签名才能提交到Channel分类账。多重签名(Multiple signatures)是Fabric信任模型不可或缺的一部分。为一个事务要求多个背书可以防止Channel上的一个组织篡改其peer组织的分类帐或使用未被同意的业务逻辑。要签署事务,每个组织都需要在peer端调用和执行智能合约,然后peer端签署事务的输出。如果输出是一致的,并且已经有足够多的组织签署,事务就可以提交到分类帐。在Channel上指定需要执行智能合约的已设置组织的策略称为背书策略,该策略是为每个链码设置的,作为链码定义的一部分。
在Fabric中,智能合约以称为chaincode的包的形式部署在网络上。Chaincode安装在一个组织的对等节点上,然后部署到一个Channel上,在那里它可以被用来背书交易,并与区块链账本交互。在将chaincode部署到Channel之前,Channel的成员需要就建立chaincode治理的chaincode定义达成一致。当所需数量的组织同意时,chaincode定义就可以提交给Channel,chaincode就可以使用了。
使用network.sh创建Channel后,可以使用以下命令在Channel上启动链码,使用go版本:
./network.sh deployCC -ccn basic -ccp ../asset-transfer-basic/chaincode-go -ccl go
遇到问题Error: failed to normalize chaincode path: ‘go list‘ failed with: go: github.com/golang/protobuf
原因是下载依赖的连接被拒绝。命令行输入:
go env -w GOPROXY=https://goproxy.io,direct
go env -w GO111MODULE=on

重新执行命令之后,又遇到了Error: failed to normalize chaincode path: ‘go list’ failed with: go tool compile: signal: segmentation fault (core dumped): exit status 1
以上的问题一直没有解决,所以我试着使用Java版本的。又又出现了问题Error: chaincode install failed with status: 500 - error in simulation: failed to execute transaction 6efff62fd950a6c9aa4115b33dbcddc3075dd385ab10efc108548833e5645da1: error sending: timeout expired while executing transaction
关闭网络,重新启动网络并创建Channel,再一次执行命令,迷之解决了。


$ ./network.sh deployCC -ccn basic -ccp ../asset-transfer-basic/chaincode-java -ccl java
deploying chaincode on channel 'mychannel'
executing with the following
- CHANNEL_NAME: mychannel
- CC_NAME: basic
- CC_SRC_PATH: ../asset-transfer-basic/chaincode-java
- CC_SRC_LANGUAGE: java
- CC_VERSION: 1.0
- CC_SEQUENCE: 1
- CC_END_POLICY: NA
- CC_COLL_CONFIG: NA
- CC_INIT_FCN: NA
- DELAY: 3
- MAX_RETRY: 5
- VERBOSE: false
Compiling Java code...
~/go/src/github.com/hyperledger/fabric-samples/asset-transfer-basic/chaincode-java ~/go/src/github.com/hyperledger/fabric-samples/test-network

BUILD SUCCESSFUL in 4s
10 actionable tasks: 1 executed, 9 up-to-date
~/go/src/github.com/hyperledger/fabric-samples/test-network

Finished compiling Java code
//打包链码成basic.tar.gz放到test-network目录底下
+ peer lifecycle chaincode package basic.tar.gz --path ../asset-transfer-basic/chaincode-java/build/install/basic --lang java --label basic_1.0
+ res=0
Chaincode is packaged
Installing chaincode on peer0.org1...
Using organization 1
//将链码装到org1的peer上
+ peer lifecycle chaincode install basic.tar.gz
+ res=0
2021-02-06 13:55:20.259 CST [cli.lifecycle.chaincode] submitInstallProposal -> INFO 001 Installed remotely: response:<status:200 payload:"\nJbasic_1.0:47d38c46e28da5d4ff8644c24f3f7c72f711df9c56a69d72df0965295dd54923\022\tbasic_1.0" >
2021-02-06 13:55:20.259 CST [cli.lifecycle.chaincode] submitInstallProposal -> INFO 002 Chaincode code package identifier: basic_1.0:47d38c46e28da5d4ff8644c24f3f7c72f711df9c56a69d72df0965295dd54923
Chaincode is installed on peer0.org1
Install chaincode on peer0.org2...
Using organization 2
//将链码装到org2的peer上
+ peer lifecycle chaincode install basic.tar.gz
+ res=0
2021-02-06 13:55:23.352 CST [cli.lifecycle.chaincode] submitInstallProposal -> INFO 001 Installed remotely: response:<status:200 payload:"\nJbasic_1.0:47d38c46e28da5d4ff8644c24f3f7c72f711df9c56a69d72df0965295dd54923\022\tbasic_1.0" >
2021-02-06 13:55:23.352 CST [cli.lifecycle.chaincode] submitInstallProposal -> INFO 002 Chaincode code package identifier: basic_1.0:47d38c46e28da5d4ff8644c24f3f7c72f711df9c56a69d72df0965295dd54923
Chaincode is installed on peer0.org2
Using organization 1
//通过查询peer来找到一个链码的Package ID
+ peer lifecycle chaincode queryinstalled
+ res=0
Installed chaincodes on peer:
Package ID: basic_1.0:47d38c46e28da5d4ff8644c24f3f7c72f711df9c56a69d72df0965295dd54923, Label: basic_1.0
Query installed successful on peer0.org1 on channel
Using organization 1
//同意链码定义在mychannel的peer0.org1上
+ peer lifecycle chaincode approveformyorg -o localhost:7050 --ordererTLSHostnameOverride orderer.example.com --tls --cafile /home/yulin/go/src/github.com/hyperledger/fabric-samples/test-network/organizations/ordererOrganizations/example.com/orderers/orderer.example.com/msp/tlscacerts/tlsca.example.com-cert.pem --channelID mychannel --name basic --version 1.0 --package-id basic_1.0:47d38c46e28da5d4ff8644c24f3f7c72f711df9c56a69d72df0965295dd54923 --sequence 1
+ res=0
2021-02-06 13:55:25.736 CST [chaincodeCmd] ClientWait -> INFO 001 txid [96d6674bda82631cdfbd9cc5cc8d44c7b7ed465eeef74f8dfb9d852023a0f95d] committed with status (VALID) at localhost:7051
Chaincode definition approved on peer0.org1 on channel 'mychannel'
Using organization 1
Checking the commit readiness of the chaincode definition on peer0.org1 on channel 'mychannel'...
Attempting to check the commit readiness of the chaincode definition on peer0.org1, Retry after 3 seconds.
//确认是否通道成员同意了相同的链码定义
+ peer lifecycle chaincode checkcommitreadiness --channelID mychannel --name basic --version 1.0 --sequence 1 --output json
+ res=0
{


	"approvals": {


		"Org1MSP": true,
		"Org2MSP": false
	}
}
Checking the commit readiness of the chaincode definition successful on peer0.org1 on channel 'mychannel'
Using organization 2
Checking the commit readiness of the chaincode definition on peer0.org2 on channel 'mychannel'...
Attempting to check the commit readiness of the chaincode definition on peer0.org2, Retry after 3 seconds.
+ peer lifecycle chaincode checkcommitreadiness --channelID mychannel --name basic --version 1.0 --sequence 1 --output json
+ res=0
{


	"approvals": {


		"Org1MSP": true,
		"Org2MSP": false
	}
}
Checking the commit readiness of the chaincode definition successful on peer0.org2 on channel 'mychannel'
Using organization 2
同意链码定义在mychannel的peer0.org2上
+ peer lifecycle chaincode approveformyorg -o localhost:7050 --ordererTLSHostnameOverride orderer.example.com --tls --cafile /home/yulin/go/src/github.com/hyperledger/fabric-samples/test-network/organizations/ordererOrganizations/example.com/orderers/orderer.example.com/msp/tlscacerts/tlsca.example.com-cert.pem --channelID mychannel --name basic --version 1.0 --package-id basic_1.0:47d38c46e28da5d4ff8644c24f3f7c72f711df9c56a69d72df0965295dd54923 --sequence 1
+ res=0
2021-02-06 13:55:34.029 CST [chaincodeCmd] ClientWait -> INFO 001 txid [4b580d8eb6597899994730f60d8e177dcae990978ae268f6e5647fd427922d63] committed with status (VALID) at localhost:9051
Chaincode definition approved on peer0.org2 on channel 'mychannel'
Using organization 1
Checking the commit readiness of the chaincode definition on peer0.org1 on channel 'mychannel'...
Attempting to check the commit readiness of the chaincode definition on peer0.org1, Retry after 3 seconds.
//确认是否通道成员同意了相同的链码定义
+ peer lifecycle chaincode checkcommitreadiness --channelID mychannel --name basic --version 1.0 --sequence 1 --output json
+ res=0
{


	"approvals": {


		"Org1MSP": true,
		"Org2MSP": true
	}
}
Checking the commit readiness of the chaincode definition successful on peer0.org1 on channel 'mychannel'
Using organization 2
Checking the commit readiness of the chaincode definition on peer0.org2 on channel 'mychannel'...
Attempting to check the commit readiness of the chaincode definition on peer0.org2, Retry after 3 seconds.
+ peer lifecycle chaincode checkcommitreadiness --channelID mychannel --name basic --version 1.0 --sequence 1 --output json
+ res=0
{


	"approvals": {


		"Org1MSP": true,
		"Org2MSP": true
	}
}
Checking the commit readiness of the chaincode definition successful on peer0.org2 on channel 'mychannel'
Using organization 1
Using organization 2
//把链码定义提交到通道
+ peer lifecycle chaincode commit -o localhost:7050 --ordererTLSHostnameOverride orderer.example.com --tls --cafile /home/yulin/go/src/github.com/hyperledger/fabric-samples/test-network/organizations/ordererOrganizations/example.com/orderers/orderer.example.com/msp/tlscacerts/tlsca.example.com-cert.pem --channelID mychannel --name basic --peerAddresses localhost:7051 --tlsRootCertFiles /home/yulin/go/src/github.com/hyperledger/fabric-samples/test-network/organizations/peerOrganizations/org1.example.com/peers/peer0.org1.example.com/tls/ca.crt --peerAddresses localhost:9051 --tlsRootCertFiles /home/yulin/go/src/github.com/hyperledger/fabric-samples/test-network/organizations/peerOrganizations/org2.example.com/peers/peer0.org2.example.com/tls/ca.crt --version 1.0 --sequence 1
+ res=0
2021-02-06 13:55:42.531 CST [chaincodeCmd] ClientWait -> INFO 001 txid [448e9879b2254294cb8ccfd18d32d19d779e496d80912154fb5ec95971a1964c] committed with status (VALID) at localhost:9051
2021-02-06 13:55:42.531 CST [chaincodeCmd] ClientWait -> INFO 002 txid [448e9879b2254294cb8ccfd18d32d19d779e496d80912154fb5ec95971a1964c] committed with status (VALID) at localhost:7051
Chaincode definition committed on channel 'mychannel'
Using organization 1
Querying chaincode definition on peer0.org1 on channel 'mychannel'...
Attempting to Query committed status on peer0.org1, Retry after 3 seconds.
//确认链码定义被提交到通道
+ peer lifecycle chaincode querycommitted --channelID mychannel --name basic
+ res=0
Committed chaincode definition for chaincode 'basic' on channel 'mychannel':
Version: 1.0, Sequence: 1, Endorsement Plugin: escc, Validation Plugin: vscc, Approvals: [Org1MSP: true, Org2MSP: true]
Query chaincode definition successful on peer0.org1 on channel 'mychannel'
Using organization 2
Querying chaincode definition on peer0.org2 on channel 'mychannel'...
Attempting to Query committed status on peer0.org2, Retry after 3 seconds.
+ peer lifecycle chaincode querycommitted --channelID mychannel --name basic
+ res=0
//Success!
Committed chaincode definition for chaincode 'basic' on channel 'mychannel':
Version: 1.0, Sequence: 1, Endorsement Plugin: escc, Validation Plugin: vscc, Approvals: [Org1MSP: true, Org2MSP: true]
Query chaincode definition successful on peer0.org2 on channel 'mychannel'
Chaincode initialization is not required
deployCC子命令将在peer0.org1.example.com和peer0.org2.example.com上安装asset-transfer (basic)链码,然后将链码部署在使用Channel标志指定的Channel上(如果未指定通道,则在mychannel上部署 )。如果是第一次部署链码,该脚本将安装链码依赖项。可以使用语言标志-l来安装链码的Go,typescript或javascript版本。可以在fabric-samples目录的asset-transfer-basic文件夹中找到asset-transfer (basic)链码。
六、与网络交互
启用test-network后,可以使用peer CLI与网络进行交互。peer CLI允许从CLI调用已部署的智能合约,更新Channel或安装和部署新的智能合约。
首先确保位于test-network目录下,并且已经根据前面的内容配置好了peer的环境变量。使用以下命令将这些二进制文件添加到CLI路径:
export PATH=${

    PWD}/../bin:$PATH
还需要将FABRIC_CFG_PATH设置为指向fabric-samples存储库中的core.yaml文件:
export FABRIC_CFG_PATH=$PWD/../config/
现在,可以设置环境变量,使得使得你作为Org1来操作peer命令。
# Environment variables for Org1

export CORE_PEER_TLS_ENABLED=true
export CORE_PEER_LOCALMSPID="Org1MSP"
export CORE_PEER_TLS_ROOTCERT_FILE=${

    PWD}/organizations/peerOrganizations/org1.example.com/peers/peer0.org1.example.com/tls/ca.crt
export CORE_PEER_MSPCONFIGPATH=${

    PWD}/organizations/peerOrganizations/org1.example.com/users/Admin@org1.example.com/msp
export CORE_PEER_ADDRESS=localhost:7051
CORE_PEER_TLS_ROOTCERT_FILE和CORE_PEER_MSPCONFIGPATH环境变量指向组织文件夹中的Org1加密所用的信息。
运行以下命令初始化资产分类账:
$ peer chaincode invoke -o localhost:7050 --ordererTLSHostnameOverride orderer.example.com --tls --cafile "${PWD}/organizations/ordererOrganizations/example.com/orderers/orderer.example.com/msp/tlscacerts/tlsca.example.com-cert.pem" -C mychannel -n basic --peerAddresses localhost:7051 --tlsRootCertFiles "${PWD}/organizations/peerOrganizations/org1.example.com/peers/peer0.org1.example.com/tls/ca.crt" --peerAddresses localhost:9051 --tlsRootCertFiles "${PWD}/organizations/peerOrganizations/org2.example.com/peers/peer0.org2.example.com/tls/ca.crt" -c '{"function":"InitLedger","Args":[]}'
//成功并输出如下:
2021-02-06 14:38:30.299 CST [chaincodeCmd] chaincodeInvokeOrQuery -> INFO 001 Chaincode invoke successful. result: status:200
现在可以从CLI查询分类帐。运行以下命令获取已添加到通道分类账的资产列表:
$ peer chaincode query -C mychannel -n basic -c '{"Args":["GetAllAssets"]}'
//成功并输出如下:
[
	{

    "appraisedValue":300,"assetID":"asset1","color":"blue","owner":"Tomoko","size":5},
	{

    "appraisedValue":400,"assetID":"asset2","color":"red","owner":"Brad","size":5},
	{

    "appraisedValue":500,"assetID":"asset3","color":"green","owner":"Jin Soo","size":10},
	{

    "appraisedValue":600,"assetID":"asset4","color":"yellow","owner":"Max","size":10},
	{

    "appraisedValue":700,"assetID":"asset5","color":"black","owner":"Adrian","size":15},
	{

    "appraisedValue":700,"assetID":"asset6","color":"white","owner":"Michel","size":15}
]
当网络成员想要转移或更改总账上的资产时,就会调用链代码。使用以下命令通过调用asset-transfer (basic)链代码来更改账簿上资产的所有者:
$ peer chaincode invoke -o localhost:7050 --ordererTLSHostnameOverride orderer.example.com --tls --cafile "${PWD}/organizations/ordererOrganizations/example.com/orderers/orderer.example.com/msp/tlscacerts/tlsca.example.com-cert.pem" -C mychannel -n basic --peerAddresses localhost:7051 --tlsRootCertFiles "${PWD}/organizations/peerOrganizations/org1.example.com/peers/peer0.org1.example.com/tls/ca.crt" --peerAddresses localhost:9051 --tlsRootCertFiles "${PWD}/organizations/peerOrganizations/org2.example.com/peers/peer0.org2.example.com/tls/ca.crt" -c '{"function":"TransferAsset","Args":["asset6","Christopher"]}'
2021-02-06 14:46:37.974 CST [chaincodeCmd] chaincodeInvokeOrQuery -> INFO 001 Chaincode invoke successful. result: status:200 payload:"{\"owner\":\"Christopher\",\"color\":\"white\",\"size\":15,\"appraisedValue\":700,\"assetID\":\"asset6\"}"
查看结果,可以看到:asset6的owner从Michel名下转到了Christopher名下。
$ peer chaincode query -C mychannel -n basic -c '{"Args":["GetAllAssets"]}'
[
	{

    "appraisedValue":300,"assetID":"asset1","color":"blue","owner":"Tomoko","size":5},
	{

    "appraisedValue":400,"assetID":"asset2","color":"red","owner":"Brad","size":5},
	{

    "appraisedValue":500,"assetID":"asset3","color":"green","owner":"Jin Soo","size":10},
	{

    "appraisedValue":600,"assetID":"asset4","color":"yellow","owner":"Max","size":10},
	{

    "appraisedValue":700,"assetID":"asset5","color":"black","owner":"Adrian","size":15},
	{

    "appraisedValue":700,"assetID":"asset6","color":"white","owner":"Christopher","size":15}
]
因为asset-transfer (basic)链码的背书策略要求交易由Org1和Org2签名,所以链代码调用命令需要使用——peerAddresses标志以peer0.org1.example.com和peer0.org2.example.com为目标。由于在网络中启用了TLS,该命令还需要使用——tlsRootCertFiles标志为每个peer引用TLS证书。
在调用chaincode之后,可以使用另一个查询来查看调用如何更改区块链分类账上的资产。因为已经查询了Org1 peer,所以利用这个机会查询在Org2 peer上运行的chaincode。设置以下环境变量为Org2:
# Environment variables for Org2

export CORE_PEER_TLS_ENABLED=true
export CORE_PEER_LOCALMSPID="Org2MSP"
export CORE_PEER_TLS_ROOTCERT_FILE=${

    PWD}/organizations/peerOrganizations/org2.example.com/peers/peer0.org2.example.com/tls/ca.crt
export CORE_PEER_MSPCONFIGPATH=${

    PWD}/organizations/peerOrganizations/org2.example.com/users/Admin@org2.example.com/msp
export CORE_PEER_ADDRESS=localhost:9051
接着查询运行在peer0.org2.example.com上的asset-transfer (basic)链码:
$ peer chaincode query -C mychannel -n basic -c '{"Args":["ReadAsset","asset6"]}'
//返回
{

    "owner":"Christopher","color":"white","size":15,"appraisedValue":700,"assetID":"asset6"}
通过这个方法,也可以确认asset6已经转移到Christopher的名下。
七、关闭网络
当使用完测试网络的时候,可以用如下命令来关闭测试网络。
./network.sh down
该命令将停止并删除节点和chaincode容器,删除组织加密材料,并从Docker注册表中删除chaincode镜像。这个命令还会从之前的运行中删除Channel和docker卷,这样当遇到任何问题时,就可以再次运行./network.sh。
在发出./network.sh up命令时发生了什么?
./network.sh为两个peer节点和一个order节点创建证书和密钥。默认情况下,该脚本使用位于organizations/cryptogen文件夹中的配置文件使用cryptogen工具。如果使用-ca标志创建证书颁发机构,该脚本将使用Fabric CA服务器配置文件和位于organizations/ Fabric-ca文件夹中的registerregister.sh脚本。cryptogen和Fabric CAs都在organizations文件夹中为所有三个组织创建crypto material和MSP文件夹。- 一旦生成了组织的crypto material,
network.sh就可以启动该网络的节点。该脚本使用docker文件夹中的docker-composition-test-net.yaml文件来创建peer和orderer节点。docker文件夹还包含docker-composition-e2e.yaml文件,在三个Fabric CAs旁边显示网络节点。此文件用于运行Fabric SDK的端到端测试。 - 如果使用
createChannel子命令,./network.sh在scripts文件夹中运行createChannel.sh脚本,使用提供的通道名创建通道。该脚本使用configtxgen工具基于configtx/configtx.yaml文件中的TwoOrgsApplicationGenesis通道配置文件创建通道生成块。在创建通道之后,脚本使用peer cli将peer0.org1.example.com和peer0.org2.example.com加入通道,并使两个peer成为anchor peers。 - 如果使用了deployCC命令,
./network.sh运行deployCC.sh脚本在peer上安装asset-transfer (basic)链代码,然后在通道上定义链代码。一旦将chaincode定义提交给通道,peer cli使用Init初始化chaincode,并调用chaincode将初始数据放到分类账上。