这是一篇介绍基于 OpenCV 和 Python 实现车牌提取项目思路和源码的文章,本文涉及一些人工智能和图像识别技术,具体而言,涉及到关于车牌号码识别的研究(车牌提取和字符分割),网上查找到的方案有 tensorflow 和opencv,opencv 也是比较成熟的方案,先从简单的开始,以下是关于使用opencv实现车牌号码提取的部分。
1 车牌提取
1.1 实现思路
- 读取彩色的图片
- 转换为灰度图
- 高斯模糊
- Sobel算子进行边缘检测
- 图像二值化
- 闭操作(腐蚀和扩张)
- 循环找到所有的轮廓
- 判断车牌区域
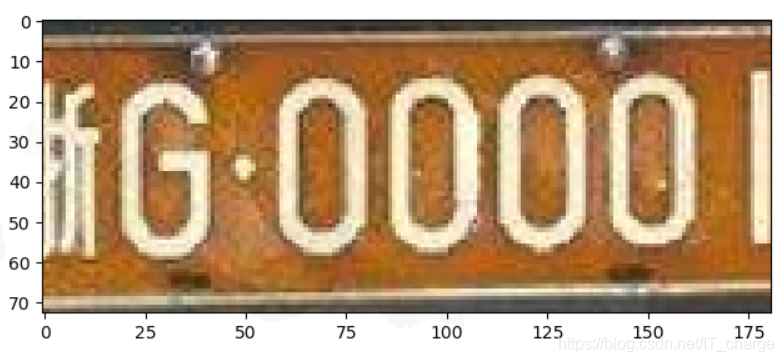
1.2 原图

1.3 代码详解
1.3.1 导入包库
import cv2 as cv
import matplotlib.pyplot as plt
1.3.2 读取彩色的图片
cv.imread("E:/car.png")

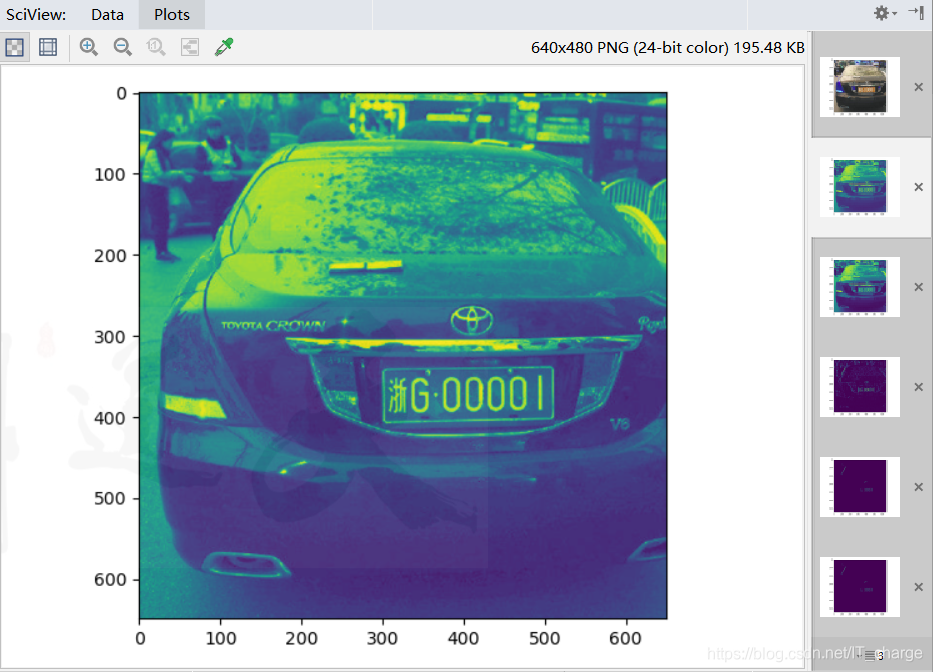
1.3.3 转换为灰度图
cv.cvtColor(img, cv.COLOR_BGR2GRAY)
1.3.4 高斯模糊
通过高斯模糊,可以去除部分的干扰,让识别更加准确。
cv.GaussianBlur(img1,(5,5),10)

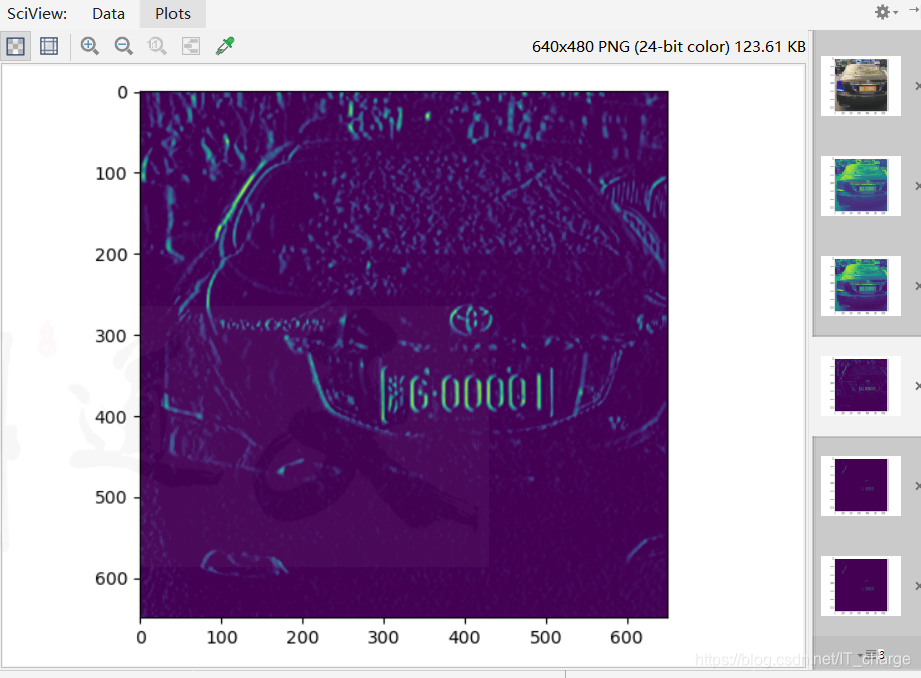
1.3.5 用Sobel算子进行边缘检测
便于接下来提取轮廓
cv.Sobel(img2,cv.CV_8U,1,0,ksize=1)
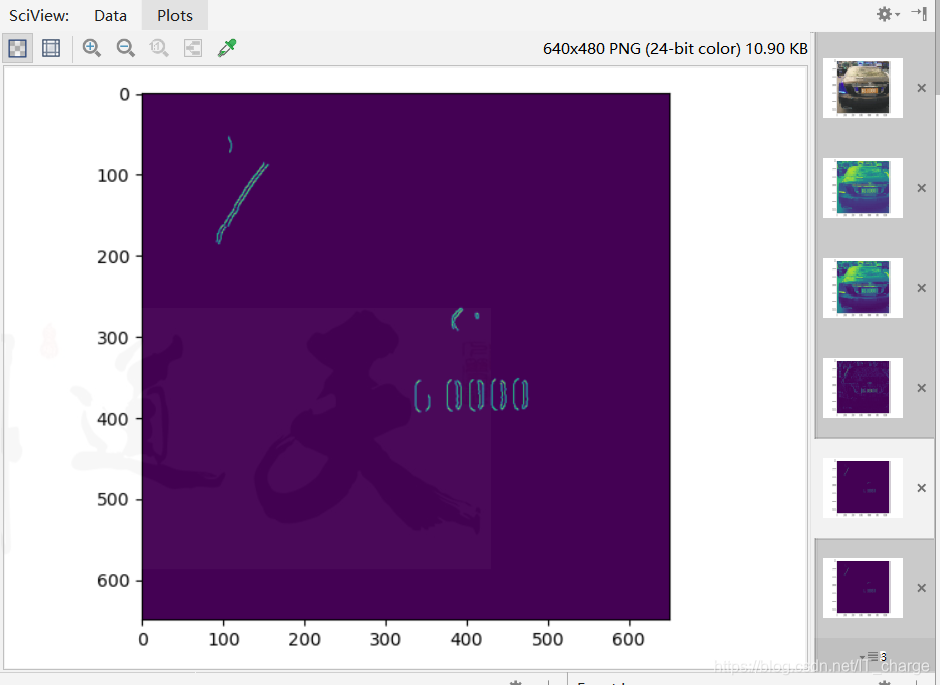
cv.Canny(img3,250,100)
1.3.6 进行二值化处理
将图像上的像素点的灰度值设置为0或255,图像呈现出明显的只有黑和白。
cv.threshold(img4,0,255,cv.THRESH_BINARY)
1.3.7 闭操作
依次进行腐蚀和扩张,这一步操作可以将目标区域连成一个整体,便于后续轮廓的提取。
cv.getStructuringElement(cv.MORPH_RECT,(43,33))
cv.dilate(img5,kernel)

1.3.8 查找轮廓
i,j = cv.findContours(img6,cv.RETR_TREE,cv.CHAIN_APPROX_SIMPLE)
1.3.9 判断车牌区域
result = None
for i1 in i:
    x,y,w,h = cv.boundingRect(i1)
    if w>2*h:
        print(1)
        plt.imshow(img[y:y+h,x:x+w])
        plt.show()
        result = img[y:y+h,x:x+w]

1.4 总观代码
import cv2 as cv
import matplotlib.pyplot as plt

# 读取彩色的图片
img = cv.imread("E:/car.png")
plt.imshow(img)
plt.show()
# 转换为灰度图
img1 = cv.cvtColor(img, cv.COLOR_BGR2GRAY)
plt.imshow(img1)
plt.show()
# 用Sobel进行边缘检测
# # 高斯模糊
img2 = cv.GaussianBlur(img1,(5,5),10)
plt.imshow(img2)
plt.show()
# Laplacian进行边缘检测
img3 = cv.Sobel(img2,cv.CV_8U,1,0,ksize=1)
plt.imshow(img3)
plt.show()
img4 = cv.Canny(img3,250,100)
plt.imshow(img4)
plt.show()
# 进行二值化处理
i,img5 = cv.threshold(img4,0,255,cv.THRESH_BINARY)
plt.imshow(img5)
plt.show()
# 可以侵蚀和扩张
kernel = cv.getStructuringElement(cv.MORPH_RECT,(43,33))
img6 = cv.dilate(img5,kernel)
plt.imshow(img6)
plt.show()
# # 循环找到所有的轮廓
i,j = cv.findContours(img6,cv.RETR_TREE,cv.CHAIN_APPROX_SIMPLE)
result = None
for i1 in i:
    x,y,w,h = cv.boundingRect(i1)
    if w>2*h:
        print(1)
        plt.imshow(img[y:y+h,x:x+w])
        plt.show()
        result = img[y:y+h,x:x+w]
1.5 最终实现效果
2 车牌识别之字符分割
前面对这牌提取做个详细描述,与此相类似,车牌的字符分割也是很重要的一部分,字符分割的思想在其他项目中同样有很重要的作用。因此有必要针对字符分割的思路和实现过程做一个记录。
2.1 实现思路
总的来说,是基于像素直方图的字符分割实现的:首先对图片进行二值化处理,统计水平方向和竖直方向上各行各列的黑色像素的个数,根据像素的特点确定分割位置,进而完成字符分割。
2.2 原图

2.3 代码详解
2.3.1 导入包库
import cv2
from matplotlib import pyplot as plt
2.3.2 读取图像,并把图像转换为灰度图像并显示
cv2.imread('E:/3.png')  # 读取图片
cv2.cvtColor(img_, cv2.COLOR_BGR2GRAY)  # 转换了灰度化

2.3.3 将灰度图像二值化,设定阈值是100
cv2.threshold(img_gray, 100, 255, cv2.THRESH_BINARY_INV)

2.3.4 分割字符
水平方向:统计每一行黑色像素数量n,并记录。可以根据每一行黑色像素的数目来确定分割的起始和终止;由图可知,当 n减小到一定阈值时,为字符的边缘;
竖直方向:同理,统计每一列的黑色像素数量v,并记录。可以可以根据每一列黑色像素的数目的变化来确定分割的起始和终止。
white = []  # 记录每一列的白色像素总和
black = []  # ..........黑色.......
height = img_thre.shape[0]
width = img_thre.shape[1]
white_max = 0
black_max = 0
# 计算每一列的黑白色像素总和
for i in range(width):
    s = 0  # 这一列白色总数
    t = 0  # 这一列黑色总数
    for j in range(height):
        if img_thre[j][i] == 255:
            s += 1
        if img_thre[j][i] == 0:
            t += 1
    white_max = max(white_max, s)
    black_max = max(black_max, t)
    white.append(s)
    black.append(t)
2.3.5 分割图像
def find_end(start_):
    end_ = start_ + 1
    for m in range(start_ + 1, width - 1):
        if (black[m] if arg else white[m]) > (0.95 * black_max if arg else 0.95 * white_max):  # 0.95这个参数请多调整,对应下面的0.05(针对像素分布调节)
            end_ = m
            break
    return end_
2.4 总观代码
import cv2
from matplotlib import pyplot as plt
## 根据每行和每列的黑色和白色像素数进行图片分割。
# 1、读取图像,并把图像转换为灰度图像并显示
img_ = cv2.imread('E:/3.png') # 读取图片
img_gray = cv2.cvtColor(img_, cv2.COLOR_BGR2GRAY) # 转换了灰度化
# cv2.imshow('gray', img_gray) # 显示图片
# cv2.waitKey(0)
# 2、将灰度图像二值化,设定阈值是100
ret, img_thre = cv2.threshold(img_gray, 100, 255, cv2.THRESH_BINARY_INV)
# cv2.imshow('white_black image', img_thre) # 显示图片
# cv2.waitKey(0)
# 4、分割字符
white = [] # 记录每一列的白色像素总和
black = [] # ..........黑色.......
height = img_thre.shape[0]
width = img_thre.shape[1]
white_max = 0
black_max = 0
# 计算每一列的黑白色像素总和
for i in range(width):
s = 0 # 这一列白色总数
t = 0 # 这一列黑色总数
for j in range(height):
if img_thre[j][i] == 255:
s += 1
if img_thre[j][i] == 0:
t += 1
white_max = max(white_max, s)
black_max = max(black_max, t)
white.append(s)
black.append(t)
# print(s)
# print(t)
arg = False # False表示白底黑字;True表示黑底白字
if black_max > white_max:
arg = True
# 分割图像
def find_end(start_):
end_ = start_ + 1
for m in range(start_ + 1, width - 1):
if (black[m] if arg else white[m]) > (0.95 * black_max if arg else 0.95 * white_max): # 0.95这个参数请多调整,对应下面的0.05(针对像素分布调节)
end_ = m
break
return end_
n = 1
start = 1
end = 2
word = []
while n < width - 2:
n += 1
if (white[n] if arg else black[n]) > (0.05 * white_max if arg else 0.05 * black_max):
# 上面这些判断用来辨别是白底黑字还是黑底白字
# 0.05这个参数请多调整,对应上面的0.95
start = n
end = find_end(start)
n = end
if end - start > 5:
cj = img_[1:height, start:end]
cj = cv2.resize(cj, (15, 30))
word.append(cj)
print(len(word))
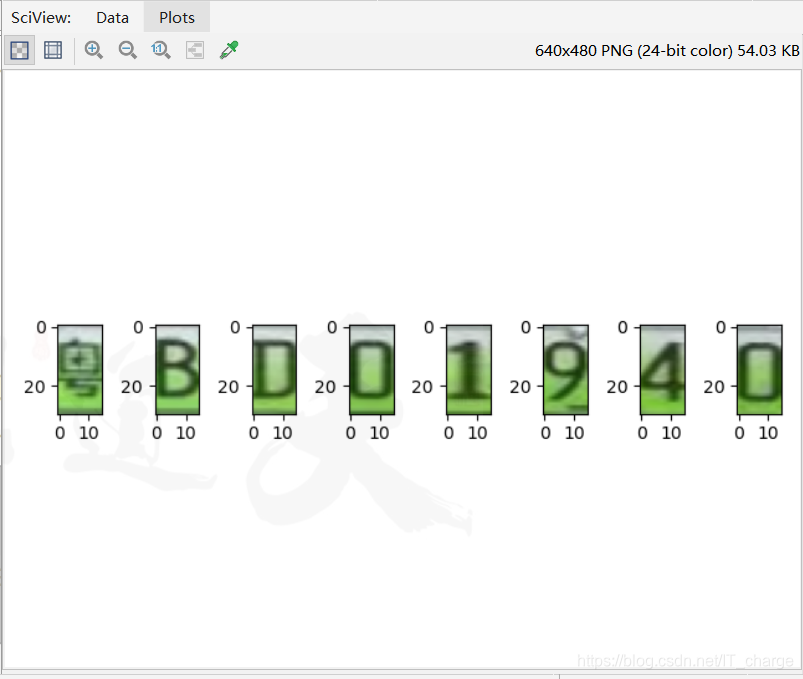
for i,j in enumerate(word):
plt.subplot(1,8,i+1)
plt.imshow(word[i],cmap='gray')
plt.show()
2.5 最终实现效果