实验目的:
-
使用适用于 Visual Studio Code 的 Azure IoT 工具来监视设备到云消息。
-
使用适用于 Visual Studio Code 的 Azure IoT 工具来发送云到设备消息。
复制此 URL 并将其粘贴到浏览器窗口中,打开VS Code:vscode:extension/vsciot-vscode.azure-iot-tools
实验过程:
登录以访问 IoT 中心
-
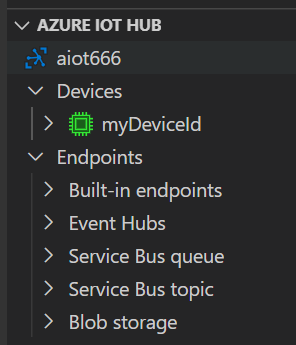
在 VS Code 的“资源管理器” 视图中,展开左下角的“Azure IoT HUB” 部分。
-
在上下文菜单中单击“选择 IoT hub” 。
-
弹出窗口将显示在右下角,以便让你首次登录 Azure。
-
登录后,将显示 Azure 订阅列表,然后选择“Azure 订阅和 IoT Hub”。
-
几秒钟后,设备列表将显示在“Azure IoT 中心设备” 选项卡中。
备注
也可以选择“设置 IoT 中心连接字符串”来完成设置。 在弹出窗口中输入 IoT 设备连接到的 IoT 中心的 iothubowner 策略连接字符串。
Setup Azure IoT Hub through Connection String
You can use IoT Hub connection string to setup your IoT Hub
-
In Explorer of VS Code, click "Azure IoT Hub Devices" in the bottom left corner.
-
Click "Set IoT Hub Connection String" in context menu.
-
An input box will pop up, then enter your IoT Hub Connection String (It is one-time configuration, and please make sure it is IoT Hub Connection String and not Device Connection String. The format is
HostName=<my-hub>.azure-devices.net;SharedAccessKeyName=<my-policy>;SharedAccessKey=<my-policy-key>). -
The device list will be shown.
-
Then you can manage your devices and interact with Azure IoT Hub through context menu.
NOTE: You can also go to File > Preferences > Settings (Code > Preferences > Settings), and update the configuration of
azure-iot-toolkit.iotHubConnectionStringto change your IoT Hub Connection String.
监视设备到云的消息
若要监视设备发送到 IoT 中心的消息,请执行以下步骤:
-
右键单击设备,然后选择“开始监视内置事件终结点” 。
-
受监视的消息将显示在“输出” > “Azure IoT Hub” 视图中。
-
若要停止监视,请右键单击“输出” 视图,然后选择“停止监视内置事件终结点” 。

发送“云到设备”消息
要将消息从 IoT 中心发送到设备,请执行以下步骤:
-
右键单击设备,然后选择“将 C2D 消息发送到设备” 。
-
在输入框中输入消息。
-
结果将显示在“输出” > “Azure IoT Hub” 视图中。

参照:https://docs.microsoft.com/zh-cn/azure/iot-hub/iot-hub-vscode-iot-toolkit-cloud-device-messaging 使用适用于 Visual Studio Code 的 Azure IoT 工具在设备和 IoT 中心之间发送和接收消息