1. 安装elasticsearch
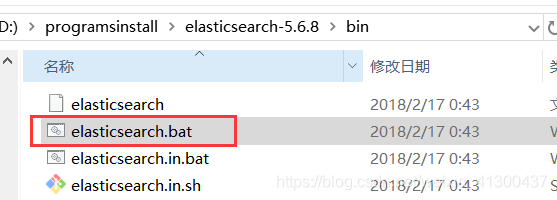
这里选择windows版本的elasticsearch,elasticsearch 依赖jdk,首先要装好jdk,tar包解压到本地路径,然后进入bin目录,双击elasticsearch.bat即启动
启动日志如下,可以看到绑定的端口号是9200,默认端口:

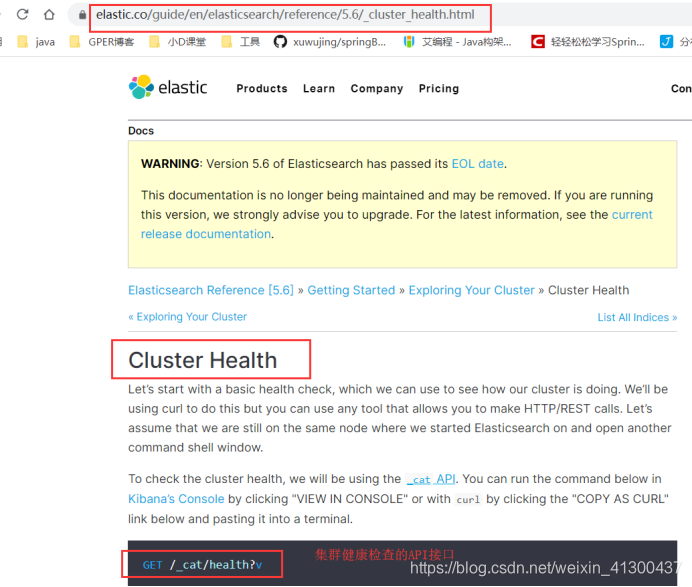
2.查看集群健康状态
官网文档地址 https://www.elastic.co/guide/en/elasticsearch/reference/5.6/index.html

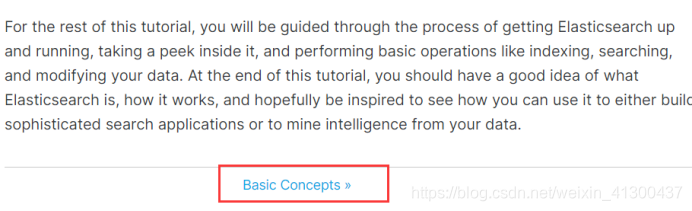
可以看到elasticsearch的一些基本概念,继续往后面翻,直到https://www.elastic.co/guide/en/elasticsearch/reference/5.6/_cluster_health.html
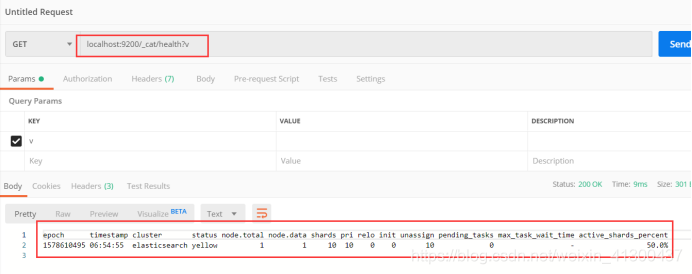
用 postman请求localhost:9200/_cat/health?v,结果如下
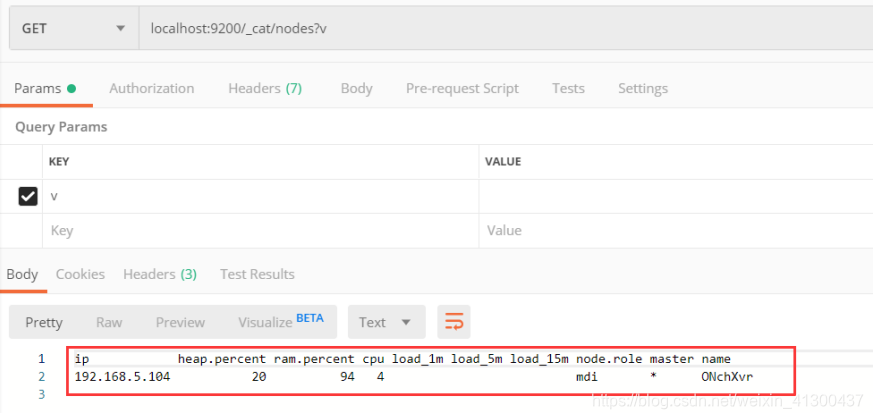
3. 查看集群follows节点
We can also get a list of nodes in our cluster as follows:localhost:9200/_cat/nodes?v
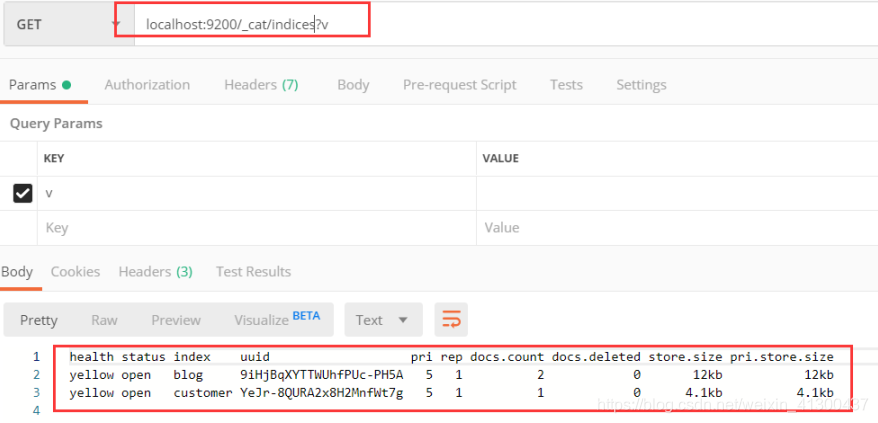
4. 查看索引:GET /_cat/indices?v
https://www.elastic.co/guide/en/elasticsearch/reference/5.6/_list_all_indices.html#_list_all_indices
这里已经有创建过索引,因此会显示两条索引信息:
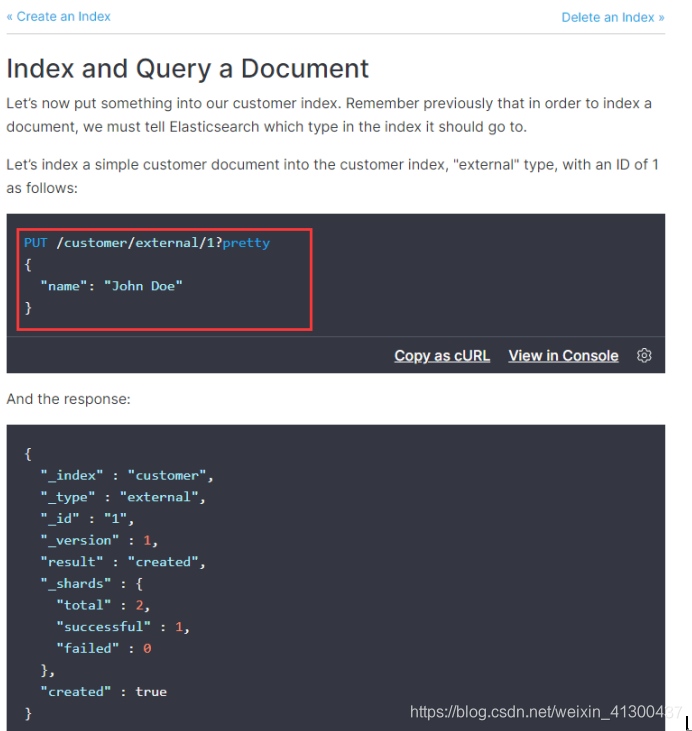
5.创建索引 PUT /customer?pretty
https://www.elastic.co/guide/en/elasticsearch/reference/5.6/_create_an_index.html

上图所示的官方文档示例中,通过PUT请求,创建了一个名字为 customer的索引
6.创建索引时添加一个数据
PUT /customer/external/1?pretty
{

     "name": "John Doe"}
通过postman创建一个索引
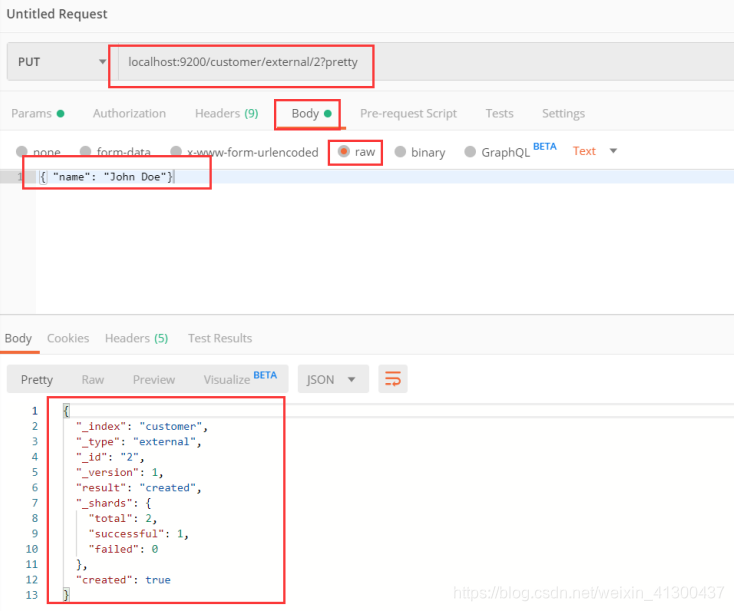
查看刚才创建的数据,请求方式改为GET即可:localhost:9200/customer/external/2?pretty
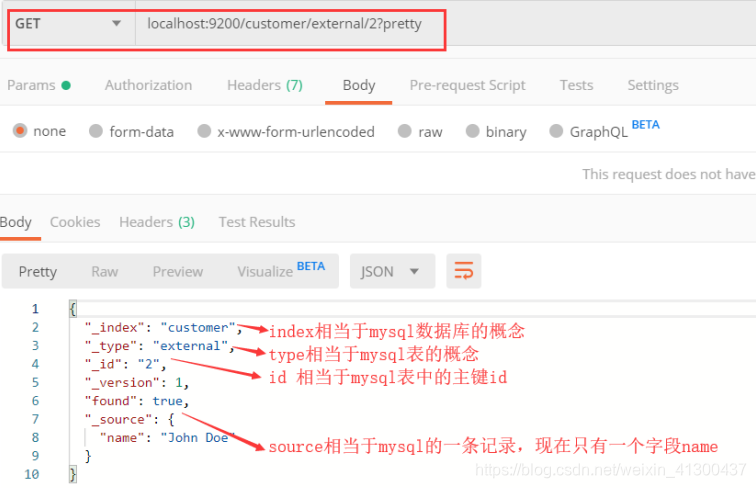
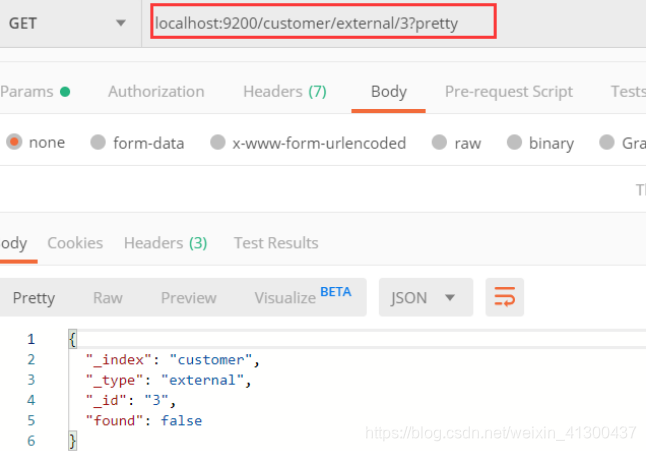
上面是查找一个已有的数据,当查找一个不存在的数据时,返回结果如下:
7.springboot整合elasticsearch
springboot整合elasticsearch可以通过springdata来快速整合,springdata官方文档地址:https://spring.io/projects/spring-data-elasticsearch ,
- 添加elasticsearch的starter依赖
  <dependency>
            <groupId>org.springframework.boot</groupId>
            <artifactId>spring-boot-starter-data-elasticsearch</artifactId>
        </dependency>
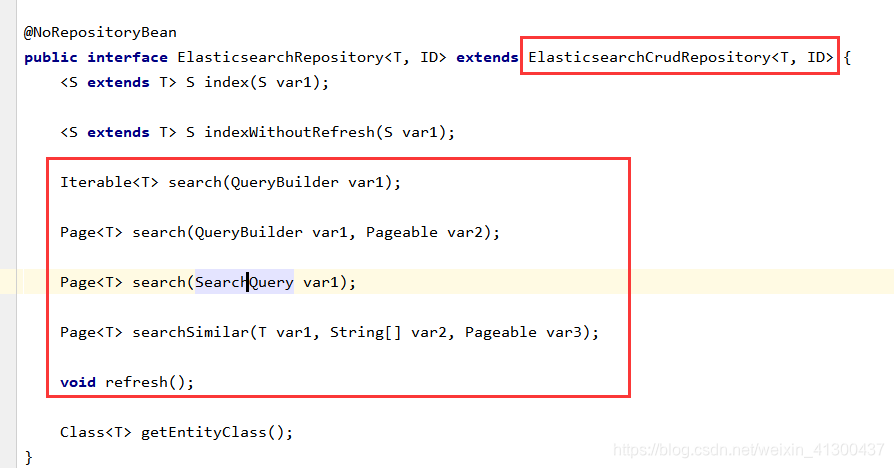
- 定义数据操作接口,继承ElasticSearchRepository
package com.example.springbootdemo4.repository;

import com.example.springbootdemo4.domain.Article;
import org.springframework.data.elasticsearch.annotations.Document;
import org.springframework.data.elasticsearch.repository.ElasticsearchRepository;
import org.springframework.stereotype.Component;

/**
 *
 */
@Component
@Document(indexName = "blog", type = "article", shards = 1, replicas = 0)
public interface ArticleRepository extends ElasticsearchRepository<Article, Long> {


}
ElasticsearchRepository 是一个接口,它定义了很多对于数据的默认操作:
package com.example.springbootdemo4.domain;

import org.springframework.data.elasticsearch.annotations.Document;

import java.io.Serializable;

/**
 * 文章对象
 * @Document注解表示每个Article对象就是一条es的记录,
 * 把该对象存放到blog库的article表中
 */
@Document(indexName = "blog", type = "article")
public class Article implements Serializable {


    private long id;
    private String title;
    private String summary;
    private String content;
    private int pv;
    // getter setter 省略
}
注意点:
索引名称记得小写,类属性名称也要小写
新建实体对象article
加上类注解 @Document(indexName = “blog”, type = “article”)
- 配置文件
# 可以不写,默认就是true
spring.data.elasticsearch.repositories.enabled=true
spring.data.elasticsearch.cluster-name=elasticsearch
# 多个节点用逗号分隔
spring.data.elasticsearch.cluster-nodes=127.0.0.1:9300
- 测试接口
package com.example.springbootdemo4.controller;

import com.example.springbootdemo4.domain.Article;
import com.example.springbootdemo4.repository.ArticleRepository;
import org.elasticsearch.index.query.MatchQueryBuilder;
import org.elasticsearch.index.query.MultiMatchQueryBuilder;
import org.elasticsearch.index.query.QueryBuilders;
import org.springframework.beans.factory.annotation.Autowired;
import org.springframework.stereotype.Controller;
import org.springframework.web.bind.annotation.GetMapping;
import org.springframework.web.bind.annotation.RequestMapping;
import org.springframework.web.bind.annotation.ResponseBody;

@Controller
@RequestMapping("api/v1/article")
public class ElasticTestController {


    @Autowired
    private ArticleRepository articleRepository;

    /**
     * 启动本机ES,postman请求 http://localhost:8080/api/v1/article/save
     * localhost:9200/blog/article/3 查看当前插入的内容
     * @return
     */
    @GetMapping("/save")
    @ResponseBody
    public Object save(){


        Article article = new Article();
        article.setContent("this is content");
        article.setId(3L);
        article.setPv(888);
        article.setTitle("this is title");
        articleRepository.save(article);
        return "success";
    }
    /** localhost:9200/blog/article/3 返回数据:
     * {
     *     "_index": "blog",
     *     "_type": "article",
     *     "_id": "3",
     *     "_version": 1,
     *     "found": true,
     *     "_source": {
     *         "id": 3,
     *         "title": "this is title",
     *         "summary": null,
     *         "content": "this is content",
     *         "pv": 888
     *     }
     * }
     */

    /**
     *
     * @param title
     * @return
     */
    @GetMapping("/search")
    @ResponseBody
    public Object search(String title){


        MatchQueryBuilder queryBuilder = QueryBuilders.matchQuery("title", title);
        Iterable<Article> list = articleRepository.search(queryBuilder);
        return list;
    }

    /**
     * http://localhost:8080/api/v1/article/multiMatchQuery?keywords=springboot
     * 多字段匹配查询:https://www.elastic.co/guide/en/elasticsearch/reference/5.6/query-dsl-multi-match-query.html
     * 本例在title,summary字段上面查找请求的关键字,如果title字段上面查不到,就去summary字段上面查
     * @param keywords 要查找的关键字
     * @return
     */
    @GetMapping("/multiMatchQuery")
    @ResponseBody
    public Object multiMatchQuery(String keywords){


        MultiMatchQueryBuilder queryBuilder = QueryBuilders.multiMatchQuery(keywords, "title", "summary");
        Iterable<Article> list = articleRepository.search(queryBuilder);
        return list;
    }
}