一、Linux下安装ElasticSearch
1、检测是否安装了Elasticsearch
1 ps aux |grep elasticsearch
2、安装JDK
3、下载Elasticsearch
1 wget https://artifacts.elastic.co/downloads/elasticsearch/elasticsearch-6.0.0.tar.gz
解压Elasticsearch
tar -zxvf elasticsearch-6.0.0.tar.gz
移动Elasticsearch到/usr/local/elasticsearch
1 mv elasticsearch-6.0.0 /usr/local/elasticsearch
4、修改配置文件
进入/usr/local/elasticsearch/config目录,使用vi编辑器
1 vi elasticsearch.yml
1 network.host: 192.168.181.201
2 discovery.zen.ping.unicast.hosts: ["192.168.181.201"]
修改/etc/sysctl.conf否则会出现
max virutal memory areas vm.max_map_count [65530] is too low, increase to at least [262144]
vm.max_map_count=262144
退出保存后执行如下命令:
1 sysctl -p
使用vi编辑器,修改/etc/security/limits.conf文件,在文件末尾添加如下代码,否则会出现
max number of threads [3750] for user [xxx] is too low, increase to at least [4096]
1 # sanglp为登录服务器的用户名
2
3 sanglp soft nofile 65536
4 sanglp hard nofile 65536
5 sanglp soft nproc  4096
6 sanglp hard nproc  4096
切记退出重新登录。
5、启动Elasticsearch
进入/usr/local/elasticsearch目录之中,输入以下命令,开始Elasticsearch服务:
1 ./bin/elasticsearch
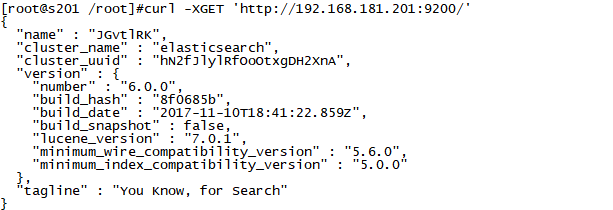
测试: