Custom Sublime Text Build Systems For Popular Tools And Languages【为常用的工具和语言自定义Sublime Text的编译系统】
惯例上链接:点我点我
这个是想看看算法又不想装IDE的时候准备配置一下Sublime。关键是看了一下前面的解说部分,后面具体的配置没有用这个文章中的,但是既然已经顺便翻译完了就放上来。。。。。
为了比之前的文章看着舒服开始换markdown编辑器了。
译文:
Sublime Text是目前开源社区的很多开发人员所选择。它很复杂,并且具有强大的文本选择和自定义支持,同时它还有很多其它文本编辑器所不具备的一项功能——它的编译系统。在这篇文章中,我将向你们介绍Sublime的编译系统,同时分享几个我们现在经常用的语言和工具的编译脚本。
它们包括用于Grunt,CoffeeScript,SASS等的脚本。
介绍
Sublime Text编译系统可以说很简单,但却是可高度自定义的,其基本思想就是每个类型的编译配置文件都是由一个“.sublime-buile” file -a JSON 的声明来使其生效,这个声明包括使用一个特定工具(或一系列工具)来编译一个工程需要的命令、路径以及配置项。
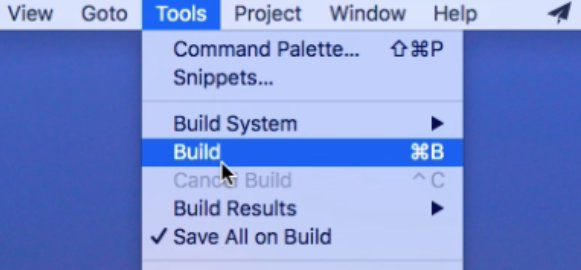
编译操作可以用键盘快捷键(Mac上默认是Command+B,Windows上是F7)来实现,或者在文件保存之后用工具菜单中的build实现。对于当前打开的工程,它会自动记得上次选择的(例如grunt)编译系统。
当通过一个“.sublime-build”文件向Sublime传递外部工具/二进制文件参数时,它可以使用任何需要的参数或标志。它还能用Sublime中内置的控制台将调用的这些应用的输出重新导回。这种能够不用离开编辑器而轻松编译工程的工作模式很有效率。
增加一个自定义编译系统[Adding a custom Build System]
Sublime通过存放在Sublime“Packages”目录下的“.sublime-build”文件构成其工具/编译系统目录。如果有人需要定位到这个文件夹的话,可以在”~/Library/Application Support/Sublime Text2/Packeges/User”(如果是用OS X)目录下找到,如果是其它平台也可以在相应的Packages/User目录下找到。

一个基本的“.sublime-build”文件可以是如下的关键字/值形式:
{
"cmd": ["command", "argument", "--flag"],
"selector": ["source.js"],
"path": "/usr/local/bin",
"working_dir": "/projects/"
}
支持的关键字包括:
- cmd——一个数组,包括要执行的命令,以及该命令要求提供的参数(argument)和标识(flags)。注意,Sublime会检查你列出的所有工具的路径,除非已经有一个绝对路径指向它们。
- selector——一个可选字符串,用来指定对于当前文件范围来说最优的编译器。这一项仅仅在工具/编译系统/自动(Tools/Build System/Automatic)为真时有用。
- path——一个可选字符串,用于在列出的命令被调用之前替换你的当前进程路径。
- working_dir——一个可选字符串,定义一个目录来将当前目录切换为调用任意命令时的优先目录。
- shell——一个可选布尔值,用于定义命令是否用shell(例如 bash)执行。
- file_regex——一个可选正则表达式,用于获取指令的错误输出。
如果需要Sublime编译脚本中支持的关键字完整列表,可以查看unofficial docs。
编译变量:
除此之外,Sublime支持在编译文件中使用变量替换,例如$file_path(当前文件的路径)等。它们包括:
- $file_path——当前查看的文件目录
- $file_name——仅指当前文件(包括扩展名)的名字部分
- $file_base_name——当前文件(不包括扩展名)的名字部分
- $project_path——当前工程路径
- $project_name——当前工程的名字
所有支持的替换(substitutions)列表。
编译任务归类[Grouping build tasks]
一些开发人员还喜欢用一个外部bash脚本(或类似的)将任务归类。举例来说,这里有一个简单的git-ftp配置脚本(deploy script),你可以通过它在Sublime中用Git来commit和push你的最新修改,然后将最新的文件上传到FTP。
例子:Commit, Push And Upload To FTP
deployment.sh:
- 1
- 2
- 1
- 2
deployment.sublime-build:
- 1
- 2
- 3
- 4
- 1
- 2
- 3
- 4
如果你以前没有用过git-ftp,Alex Fluger有篇关于如何使用它的比较全面的文章你可能会感兴趣。
确定目标平台[Targeting Platforms]
Sublime编译文件还支持针对特定平台(即:OS X,Windows,Linux)指明配置数据。通过用平台的名字确定配置文件(config)中的其它元素,可以很轻松地确定目标平台,例如:
{
    "cmd": ...
    ...

    "windows":
    {
    "cmd":  ...
    },

    "osx":
    {
        "cmd": ...
    },

    "linux":
    {
        "cmd": ...
    }
}
针对流行的前端(front-end)工具编译文件[Build files for popular front-end tools]
为了帮助你开始,针对我所注意到的当下web开发人员使用的一些前端工具,已经在下面列出了一系列“.sublime-build”文件。
以上大部分都可以在没有指定path的时候正常工作,但是如果你遇到了和path相关的问题,可以尝试将它include进你的config文件中(例如:”path”: “usr/local/bin”)
grunt:
- 1
- 2
- 3
- 4
- 1
- 2
- 3
- 4
Node Build Script:
- 1
- 2
- 3
- 4
- 1
- 2
- 3
- 4
CoffeeScript:
- 1
- 2
- 3
- 4
- 1
- 2
- 3
- 4
SASS:
- 1
- 2
- 3
- 4
- 5
- 1
- 2
- 3
- 4
- 5
与此同时有一个更加详细版本的config,包括自动缩小和查看,如下:
- 1
- 2
- 3
- 4
- 5
- 1
- 2
- 3
- 4
- 5
LESS:
- 1
- 2
- 3
- 4
- 5
- 1
- 2
- 3
- 4
- 5
Stylus:
- 1
- 2
- 3
- 4
- 5
- 1
- 2
- 3
- 4
- 5
(一个更加复杂的版本可以在LESS-build-sublime工程中找到)
Jade:
- 1
- 2
- 3
- 4
- 1
- 2
- 3
- 4
r.js (RequireJS Optimizer):
- 1
- 2
- 3
- 4
- 5
- 1
- 2
- 3
- 4
- 5
UglifyJS:
- 1
- 2
- 3
- 4
- 1
- 2
- 3
- 4
Node (just passing in directly):
- 1
- 2
- 3
- 4
- 5
- 6
- 7
- 8
- 9
- 1
- 2
- 3
- 4
- 5
- 6
- 7
- 8
- 9
Pandoc (Markdown to HTML):
- 1
- 2
- 3
- 4
- 1
- 2
- 3
- 4
(还有当它发布之后:)
- 1
- 2
- 3
- 4
- 1
- 2
- 3
- 4
JSHint:
我猜大多数web开发人员都会想在一个更宽泛的编译流程中使用JSHint,但是如果你喜欢通过一个Sublime编译文件单独运行它的话,sublime-jshint包中有一个build file可以同时在OS X和Windows上良好工作。
针对特定编程语言编译文件[Build files for specific programming languages]
Ruby (using RVM):
- 1
- 2
- 3
- 4
- 5
- 1
- 2
- 3
- 4
- 5
- 1
- 2
- 3
- 4
- 5
- 6
- 7
- 8
- 9
- 1
- 2
- 3
- 4
- 5
- 6
- 7
- 8
- 9
PHP:
- 1
- 2
- 3
- 4
- 5
- 1
- 2
- 3
- 4
- 5
Java:
- 1
- 2
- 3
- 4
- 5
- 6
- 1
- 2
- 3
- 4
- 5
- 6
.Net (Windows):
- 1
- 2
- 3
- 4
- 5
- 1
- 2
- 3
- 4
- 5
C:
- 1
- 2
- 3
- 4
- 5
- 1
- 2
- 3
- 4
- 5
C++ (via g++):
(注意我们还可以指定OS-specific[特定操作系统]配置项,如下:)
- 1
- 2
- 3
- 4
- 5
- 6
- 7
- 1
- 2
- 3
- 4
- 5
- 6
- 7
Haskell:
- 1
- 2
- 3
- 4
- 5
- 1
- 2
- 3
- 4
- 5
总结
Sublime的编译系统很赞,可以帮你避免在编辑器和外部编译工具之间频繁的手动切换。鉴于你现在很可能已经了解到,将你自己自定义的编译系统放到一起是一个很简单的过程,我建议如果Sublime在机缘巧合下成为了你的编辑器的话,你可以将这个过程实践一下。
转自:http://blog.csdn.net/u012566895/article/details/50617531