写在前面
本篇文章分享如何使用springboot集成mybatis-plus,并使用其代码生成器生成代码,继承其接口实现增删改查等。当然,也会分享我在其中踩到的坑,本文只是最基本最简单的使用,关于更高级的用法有空会再研究的。
在我看来,mybatis-plus最大的好处就是能让你的代码变得十分简洁,通过其提供的接口,我们在数据库层只需要实现比较复杂的select语句即可。以下是效果图(以变化比较明显的xml为例):
引入mybatis-plus前的EmployeeDao.xml:
<?xml version="1.0" encoding="utf-8" ?>
        <!DOCTYPE mapper PUBLIC "-//mybatis.org//DTD Mapper 3.4//EN" "http://mybatis.org/dtd/mybatis-3-mapper.dtd">
<mapper namespace="com.yuan.oa.dao.EmployeeDao">
<resultMap id="Employee" type="com.yuan.oa.entity.Employee">
    <id property="sn" column="sn" javaType="String"/>
    <result property="password" column="password" javaType="String"/>
    <result property="name" column="name" javaType="String"/>
    <result property="departmentSn" column="department_sn" javaType="String"/>
    <result property="post" column="post" javaType="String"/>
    <association property="department" column="department_sn" javaType="Department">
        <id property="sn" column="dsn" javaType="String"></id>
        <result property="name" column="dname" javaType="String"></result>
    </association>
</resultMap>
<insert id="insert" parameterType="Employee">
        insert into employee values(#{

    sn},#{

    password},#{

    name},#{

    departmentSn},#{

    post})
    </insert>
<update id="update" parameterType="Employee">
        update employee set password=#{

    password},name=#{

    name},department_sn=#{

    departmentSn},post=#{

    post} where sn=#{

    sn}
    </update>
<delete id="delete" parameterType="String">
        delete from employee where sn=#{

    sn}
    </delete>
<select id="selectOne" parameterType="String" resultMap="Employee">
        select e.*,d.sn dsn,d.name dname from employee e left join department d on d.sn=e.department_sn
        where e.sn=#{

    sn}
    </select>
<select id="selectAll" resultMap="Employee">
        select e.*,d.sn dsn,d.name dname from employee e left join department d on d.sn=e.department_sn
    </select>
<select id="selectByDepartmentAndPost" resultMap="Employee">
    select e.*,d.sn dsn,d.name dname from employee e left join department d on d.sn=e.department_sn
    where e.sn is not null
    <if test="dsn!=null">
        and e.department_sn=#{

    dsn}
    </if>
    <if test="post!=null">
        and e.post=#{

    post}
    </if>
</select>
</mapper>
引入mybatis-plus后的EmployeeDao.xml:
<?xml version="1.0" encoding="UTF-8"?>
<!DOCTYPE mapper PUBLIC "-//mybatis.org//DTD Mapper 3.0//EN" "http://mybatis.org/dtd/mybatis-3-mapper.dtd">
<mapper namespace="com.yuan.oa_dao.dao.EmployeeDao">

    <!-- 通用查询映射结果 -->
    <resultMap id="EmployeeWithDepartment" type="com.yuan.oa_dao.dto.EmployeeWithDepartment">
        <result column="sn" property="sn" />
        <result column="password" property="password"/>
        <result column="NAME" property="name" />
        <result column="department_sn" property="departmentSn" />
        <result column="post" property="post" />
        <association property="department" column="department_sn" javaType="Department">
            <id property="sn" column="dsn"></id>
            <result property="name" column="dname"></result>
        </association>
    </resultMap>


    <!-- 通用查询结果列 -->
    <sql id="Base_Column_List">
        sn, password, NAME, department_Sn, post
    </sql>
    <select id="getOne" parameterType="String" resultMap="EmployeeWithDepartment">
        select e.*,d.sn dsn,d.name dname
        from employee e
        left join department d
        on d.sn=e.department_sn
        where e.sn=#{

    sn}
    </select>
    <select id="selectAll" resultMap="EmployeeWithDepartment">
        select e.*,d.sn dsn,d.name dname
        from employee e
        left join department d
        on d.sn=e.department_sn
    </select>
    <select id="selectByDepartmentAndPost" resultMap="EmployeeWithDepartment">
        select e.*,d.sn dsn,d.name dname from employee e left join department d on d.sn=e.department_sn
        where e.sn is not null
        <if test="dsn!=null">
            and e.department_sn=#{

    dsn}
        </if>
        <if test="post!=null">
            and e.post=#{

    post}
        </if>
    </select>
</mapper>
是不是感觉简洁了许多,话不多说,开始干活!
依赖及配置
首先是在你的springboot项目中导入相关的依赖,这个其实在官方文档中已经给出,另外,我们也能在里面找到很多mybatis-plus的强大用法,平时使用可以当做工具书来用。我们需要加入的依赖有:
<dependency>
    <groupId>com.baomidou</groupId>
    <artifactId>mybatis-plus-boot-starter</artifactId>
    <version>3.3.2</version>
</dependency>
没错就这一个,然后你就可以把你的mybatis依赖愉快地删掉了。
接下来是在你的启动类上加上注解MapperScan,里面的内容是你的Mapper所在路径:
import org.mybatis.spring.annotation.MapperScan;
import org.springframework.boot.SpringApplication;
import org.springframework.boot.autoconfigure.SpringBootApplication;

@SpringBootApplication(scanBasePackages = "com.yuan")
@MapperScan(value = {

    "com.yuan.oa_dao.dao"})
public class OaWebApplication {


    public static void main(String[] args) {


        SpringApplication.run(OaWebApplication.class, args);
    }

}
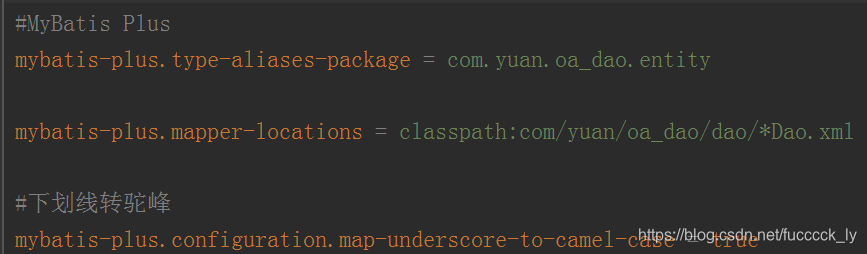
在你的配置文件下加入以下的配置就搞定啦!此时你的mybatis-plus集成完毕,可以正常使用了。
代码生成器
然而你还是会感觉没什么变化,当然,重头戏才刚刚开始,我们需要使用代码生成器来生成我们的代码,简化开发,同样在官方文档也有十分详细的相关配置与介绍。
MyBatis-Plus 从 3.0.3 之后移除了代码生成器与模板引擎的默认依赖,需要手动添加相关依赖:
<!--mybatis-plus代码生成器 相关依赖-->
        <dependency>
            <groupId>com.baomidou</groupId>
            <artifactId>mybatis-plus-generator</artifactId>
            <version>${

    mybatisplus.version}</version>
        </dependency>
<!--代码生成器模板引擎 相关依赖-->
        <dependency>
            <groupId>org.apache.velocity</groupId>
            <artifactId>velocity-engine-core</artifactId>
            <version>2.2</version>
        </dependency>
在这里我只贴出最简单的生成器的代码:
package com.yuan.oa_dao.global;


import java.util.HashMap;
import java.util.Map;

import com.baomidou.mybatisplus.annotation.DbType;
import com.baomidou.mybatisplus.generator.AutoGenerator;
import com.baomidou.mybatisplus.generator.InjectionConfig;
import com.baomidou.mybatisplus.generator.config.*;
import com.baomidou.mybatisplus.generator.config.rules.NamingStrategy;

/**
 * <p>
 * 代码生成器演示
 * </p>
 */
public class CodeGenerator {


	//这里选择输出到文件夹里,可以自由选择输出的位置,一般是输出到项目的src/main/java文件夹下
    final static String  dirPath = "D:/mybatisPlusFiles";

    /**
     * <p>
     * MySQL 生成演示
     * </p>
     */
    public static void main(String[] args) {


        AutoGenerator mpg = new AutoGenerator();

        // 全局配置
        GlobalConfig gc = new GlobalConfig();
        gc.setOutputDir(dirPath);//设置路径
        gc.setAuthor("ly");//设置作者名
        gc.setFileOverride(true); //是否覆盖
        gc.setActiveRecord(true);// 不需要ActiveRecord特性的请改为false
        gc.setEnableCache(false);// XML 二级缓存
        gc.setBaseResultMap(true);// XML ResultMap
        gc.setBaseColumnList(true);// XML columList

        mpg.setGlobalConfig(gc);

        // 数据源配置
        DataSourceConfig dsc = new DataSourceConfig();
        //注意这个DbType不要导错包
        dsc.setDbType(DbType.MYSQL);
        dsc.setDriverName("com.mysql.jdbc.Driver");
        dsc.setUsername("账号");
        dsc.setPassword("密码");
        dsc.setUrl("jdbc:mysql://127.0.0.1:3306/oa?characterEncoding=utf8");
        mpg.setDataSource(dsc);

        // 策略配置
        StrategyConfig strategy = new StrategyConfig();
        strategy.setNaming(NamingStrategy.underline_to_camel);// 表名生成策略
        strategy.setEntityBuilderModel(true);
        mpg.setStrategy(strategy);

        // 包配置
        PackageConfig pc = new PackageConfig();
        pc.setParent("com.yuan");//包前缀
        pc.setModuleName("oa_dao");//模块名
        pc.setController("controller");
        pc.setEntity("Entity");
        pc.setMapper("mapper");
        pc.setService("service");
        pc.setServiceImpl("serviceImpl");
        pc.setXml("mapperXml");//后缀

        mpg.setPackageInfo(pc);

        // 注入自定义配置,可以在 VM 中使用 cfg.abc 【可无】
        InjectionConfig cfg = new InjectionConfig() {


            @Override
            public void initMap() {


                Map<String, Object> map = new HashMap<String, Object>();
                map.put("abc", this.getConfig().getGlobalConfig().getAuthor() + "-mp");
                this.setMap(map);
            }
        };

        //模板引擎为velocity
        String templatePath = "/templates/mapper.xml.vm";

        mpg.setCfg(cfg);

        // 执行生成
        mpg.execute();

    }

}
然后点击运行,你就能看到你的文件夹生成成功,那么代码生成器的使用到此结束。

继承接口CRUD
可以看到,代码生成器为我们生成了我们平时必须自己完成的entity、mapper、mapperXml、service、serviceImpl和controller文件,那么让我们来看看他是如何做到简化我们的文件的。、
首先来看entity文件,它与正常的entity的不同在于他继承了Model类,这个类为我们提供了单体操作的CRUD,不过正常我们还是会使用继承了BaseMapper接口的mapper来进行CRUD。
接下来是在entity类属性上的注解@TableId和@TableField,前者是标识当前表的主键,用于对应其中的selectById和deleteById等方法;后者则是用于属性名与数据库列名不一致的情况,为防止属性注入失败而生的注解。
package com.yuan.oa_dao.entity;

import com.baomidou.mybatisplus.extension.activerecord.Model;
import com.baomidou.mybatisplus.annotation.TableField;
import java.io.Serializable;

/**
 * <p>
 *
 * </p>
 *
 * @author ly
 * @since 2020-06-16
 */
public class Employee extends Model<Employee> {


    private static final long serialVersionUID=1L;
	@TableId
    private String sn;

    private String password;

    @TableField("NAME")
    private String name;

    @TableField("department_Sn")
    private String departmentSn;

    private String post;


    public String getSn() {


        return sn;
    }

    public Employee setSn(String sn) {


        this.sn = sn;
        return this;
    }

    public String getPassword() {


        return password;
    }

    public Employee setPassword(String password) {


        this.password = password;
        return this;
    }

    public String getName() {


        return name;
    }

    public Employee setName(String name) {


        this.name = name;
        return this;
    }

    public String getDepartmentSn() {


        return departmentSn;
    }

    public Employee setDepartmentSn(String departmentSn) {


        this.departmentSn = departmentSn;
        return this;
    }

    public String getPost() {


        return post;
    }

    public Employee setPost(String post) {


        this.post = post;
        return this;
    }

    @Override
    protected Serializable pkVal() {


        return null;
    }

    @Override
    public String toString() {


        return "Employee{" +
        "sn=" + sn +
        ", password=" + password +
        ", name=" + name +
        ", departmentSn=" + departmentSn +
        ", post=" + post +
        "}";
    }
}
接下来是Mapper和Mapper.xml文件:Mapper类继承了BaseMapper类,这个类中为我们实现了简单的CRUD以及常用的方法,而我们只需要实现的接口就只是比较复杂的查询方法。
比较值得注意的是,mybatis-plus为我们生成的xml文件,与我们平时mybatis使用的xml文件比较大的区别是引入了不同的头文件,因此像我一样对自己已有项目进行改造的朋友要注意了,我们应该复制整个xml文件,否则因为头文件不同会出现错误。
package com.yuan.oa_dao.mapper;

import com.yuan.oa_dao.entity.Employee;
import com.baomidou.mybatisplus.core.mapper.BaseMapper;

/**
 * <p>
 *  Mapper 接口
 * </p>
 *
 * @author ly
 * @since 2020-06-16
 */
public interface EmployeeMapper extends BaseMapper<Employee> {


}
<?xml version="1.0" encoding="UTF-8"?>
<!DOCTYPE mapper PUBLIC "-//mybatis.org//DTD Mapper 3.0//EN" "http://mybatis.org/dtd/mybatis-3-mapper.dtd">
<mapper namespace="com.yuan.oa_dao.mapper.EmployeeMapper">

    <!-- 通用查询映射结果 -->
    <resultMap id="BaseResultMap" type="com.yuan.oa_dao.entity.Employee">
        <result column="sn" property="sn" />
        <result column="password" property="password" />
        <result column="NAME" property="name" />
        <result column="department_Sn" property="departmentSn" />
        <result column="post" property="post" />
    </resultMap>

    <!-- 通用查询结果列 -->
    <sql id="Base_Column_List">
        sn, password, NAME, department_Sn, post
    </sql>

</mapper>
另外,xml文件中为我们配的map是可以修改的,比如本项目中需要在现有的map映射上加入department的详细信息,那直接在map中追加需要的标签即可,具体如下代码:
<?xml version="1.0" encoding="UTF-8"?>
<!DOCTYPE mapper PUBLIC "-//mybatis.org//DTD Mapper 3.0//EN" "http://mybatis.org/dtd/mybatis-3-mapper.dtd">
<mapper namespace="com.yuan.oa_dao.dao.EmployeeDao">

    <!-- 通用查询映射结果 -->
    <resultMap id="EmployeeWithDepartment" type="com.yuan.oa_dao.dto.EmployeeWithDepartment">
        <result column="sn" property="sn" />
        <result column="password" property="password"/>
        <result column="NAME" property="name" />
        <result column="department_sn" property="departmentSn" />
        <result column="post" property="post" />
        <association property="department" column="department_sn" javaType="Department">
            <id property="sn" column="dsn"></id>
            <result property="name" column="dname"></result>
        </association>
    </resultMap>

    <!-- 通用查询结果列 -->
    <sql id="Base_Column_List">
        sn, password, NAME, department_Sn, post
    </sql>

    <select id="selectByDepartmentAndPost" resultMap="EmployeeWithDepartment">
        select e.*,d.sn dsn,d.name dname from employee e left join department d on d.sn=e.department_sn
        where e.sn is not null
        <if test="dsn!=null">
            and e.department_sn=#{

    dsn}
        </if>
        <if test="post!=null">
            and e.post=#{

    post}
        </if>
    </select>
</mapper>
然后是service接口和实现类serviceImpl,我们可以看到二者分别继承了IService类和ServiceImpl类,他们也为我们提供了简单的CRUD方法供我们使用,通过使用这些方法,能让我们的代码变得简洁,不必再花费精力去写简单的增删改查而专注于较为复杂的业务逻辑。
package com.yuan.oa_dao.service;

import com.yuan.oa_dao.entity.Employee;
import com.baomidou.mybatisplus.extension.service.IService;

/**
 * <p>
 *  服务类
 * </p>
 *
 * @author ly
 * @since 2020-06-16
 */
public interface IEmployeeService extends IService<Employee> {


}
package com.yuan.oa_dao.serviceImpl;

import com.yuan.oa_dao.entity.Employee;
import com.yuan.oa_dao.mapper.EmployeeMapper;
import com.yuan.oa_dao.service.IEmployeeService;
import com.baomidou.mybatisplus.extension.service.impl.ServiceImpl;
import org.springframework.stereotype.Service;

/**
 * <p>
 *  服务实现类
 * </p>
 *
 * @author ly
 * @since 2020-06-16
 */
@Service
public class EmployeeServiceImpl extends ServiceImpl<EmployeeMapper, Employee> implements IEmployeeService {


}
最后是controller层:这一部分跟我们平时的controller是一模一样的。
package com.yuan.oa_dao.controller;


import org.springframework.web.bind.annotation.RequestMapping;

import org.springframework.stereotype.Controller;

/**
 * <p>
 *  前端控制器
 * </p>
 *
 * @author ly
 * @since 2020-06-16
 */
@Controller
@RequestMapping("/oa_dao/employee")
public class EmployeeController {


}
但关键在于如何调用service层的方法,mybatis-plus给我们的一些方法需要提供一个名为Wrapper的参数,这是官方为我们提供的一个包装器,用于我们sql语句中的筛选。具体是这样使用的:
这是一个根据id查找部门的方法:

使用mybatis-plus为我们提供的按id查询的方法时:

其中的QueryWrapper就是官方为我们提供的包装器,其中包装了很多对应sql查询语句的方法,比如这个方法后的“eq”就对应着“=”,而其中的参数就对应sql语句中的where sn=#{sn}
类似于这样的用法在官方文档中都有提及,大家有兴趣可以一看,传送门:关于Wrapper
写在最后
最后,本篇文章是本人在学习过程中顺便记录的,希望能对大家有帮助,当然,其中很多东西有着本人对mybatis-plus官方文档的理解,如有错误,欢迎大家一起指正,共同进步!